Leaderboard


Popular Content
Showing content with the highest reputation on 09/19/2020 in Posts
-
And round 25.... Belt adjusted and repositioned Belt end trimmed. Holster attachment buttons not covered (Thank you Glen) Trooper butt fixed. Front ends of butt plate no longer flare out. Yet again, thanks Glen Please let me know if there is anything else Sha. Thanks for looking!!!! Dave4 points
-
Hey guys, been a while, I do apologize! Work and life have been crazy and I've been stuck in that last 10% or so of my build for a little while. I'm constantly trying to figure out not just how to make things work, but how to get them to work WELL! So let's break down my list of excuses as to what's been holding me back. It's pretty much 4 categories: the helmet, the belt, the shoulder bridges, and final strapping/adjustment. The Helmet: Not much to say here. It's still sitting in primer (well, sanded back clear), waiting for it's final coat of white and clear, then the grey/black details. I'm waiting to finish the belt so I can respray both at the same time, since cracking open a can of 2K clear is a commitment. I have the satin grey, flat black, and a black fine detail paint pen ready to go, it just makes me nervous with the masking to ensure I get the details sharp. The Belt: Had a pretty bad issue with the belt that has been extremely irritating and time consuming to fix and has led me to question my paint method as a whole. I didn't document much of this (sorry) admittedly because of how frustrated it made me. I was using a piece of 2" blue masking tape horizontally across the middle of the belt to help me mark the holes for my belt box attachments, and when I went to remove it, I ripped about 2"x10" of the clear coat off the center of the belt. It must not have fully bonded to the 2X paint underneath and peeled off like a film. It was thick enough that it left a jagged, noticeable edge where it was removed, and obviously a difference in sheen. I was pissed. The belt is a pretty noticeable part of the suit, so I knew it needed to be fixed correctly, which meant more sanding and a respray. I tried to spray a couple coats of white to bring the level in the exposed area back UP, while also spending several sessions sanding the clear on the rest of the belt DOWN to try to level it out. I thought I had it good to go and sprayed the whole thing again... only to have the clear continue to peel up. At this point, I used a piece of tape and intentionally ripped off any remaining clear that was loose, then sanded almost all the way down to the fiberglass, before spraying with white again, which is where the belt is at now. Ready for clear. Again. Unsure if this was an isolated incident with the 2K or what, but between this and the cost, I think I would just use Rustoleum's gloss clear if I did this again. Not sure the 2K is worth it. Which brings me to my next difficulty - attaching the belt. I had the realization the other day that this suit would potentially be very difficult to put on by myself, should I need to without a competent wrangler, which got me rethinking some of my assembly methods. Hence where the magnets come in! I started with the idea of making the trauma plate easier to install on my own and added 4 big neodymium magnets to it in the center and top corners. I may dial the gap in more in the future but I wanted to keep the flare at the bottom to account for the back belt. I cut some craft foam and covered the bottom side of the panel, hopefully keeping the scratching/rubbing to a minimum (which I'll address in a couple other places as well, and will be watching for as I wear the suit... some day haha). And installed! It goes on easily by itself and aligns nicely. Next I wanted to find a convenient and secure way to mount the belt to the barrel, and figured I would give the same big neodymium magnets a shot. I sprayed some with flat white so they blend in a little better and epoxied them to the back side of the belt, and corresponding ones to the inside of the barrel. I also put magnets on the ends of the belt, where they overlap, and I'll add a little of my ultra-thin velcro to the very edge to hold it all together. I did need to end up trimming about 2" off both sides of the rear belt assembly, as it was too long and the overlap was hitting somewhere up by the belt boxes. I'll need to repaint the ends, and I wish I had noticed and fixed this before final paint... But it's okay because I had ANOTHER paint issue on the belt! When I was testing out the magnets, I left one on the front overnight by accident and it bonded to the paint or something, because when I removed it, I got this: So that was fun to repair. Again. I have all the holes drilled, screws ready, and the elastic prepped for the drop boxes - just waiting to assemble until after final paint on the front belt. And finally, the last belt component is the thermal detonator. Started masking it so it will be ready for gray when I do the helmet details, then I will mount it to the rear belt. Planning to use screws for everything, along with a little E6000 to hedge my bets. Hopefully if I ever need to remove anything, it won't take the clear with it again... The Shoulder Bridges: Next on my list of sorrows were the should bridges and their attachment. I had originally ordered and intended to use rubber/latex shoulder straps from Jeff/11b30b4, but was having a heck of a time deciding how to mount them and was way overthinking everything. Between this, the fact that they had yellowed pretty significantly, and that I eventually ended up snapping one while trying to bend it to the proper curved shape (they are cast flat), I ended up giving up on them and went back to the hard ones from Jim. The ridges are larger and look more accurate, but I was (and still am) concerned about them cracking. I think I've decided that I'm going to glue them in the front with epoxy, then use neodymium magnets embedded in the bridges to keep them in the pockets at the rear, essentially "hard-mounting" everything, more like many clones do. I also ordered a set of Mr. Paul's (of TotalGrunt/Shoretrooper build fame) metal shoulder bell/bridge supports. These are apparently the most accurate way to ensure your shoulder bells are supported and sit correctly, and include the elastic/snaps to attach the bells, so I'll post up how that process goes when they arrive from the UK. Final Strapping/Adjustment: Obviously this is the very last step, but I'm curious what new and exciting problems I'll run into as I figure the last of this out. I haven't actually put on the full suit in MONTHS so I'm curious how it'll go. I don't think I've post since I started applying the ultra-thin Velcro, but I'm pretty stoked on it. The only concerns I have had are that it's actually a little stronger than I anticipated, so I don't need to use as much as I did on most of the pieces (I may trim it back later) - I don't want to put TOO much strain on the pieces when I WANT to take them back apart. I also ran into the issue of the adhesive pulling the clear coat off again, so I started scuffing up the spots where I applied Velcro to help mitigate this. Otherwise, it works and looks great and allows for a much more flush look. Magnets probably would work well for areas like the shins and forearms as well, but I'm over it and just want to finish at this point. I also need to create the belt drops to hang my thighs with... it's on my list. I'd like to improve over my current OT-style design and incorporate the correct-style clips, but need to do some more research. If anyone has any good solutions, I'd love to hear/see them! From the top down, a checklist (mostly for me, but might as well post it here): Helmet - final white and clear, helmet detail paint, install visor and vocoder, install interior padding, install fans/mic Chest/back - epoxy in shoulder bridges and shoulder bell supports, finalize chest-to-side panel connections, install craft foam lining Ab/belt - epoxy in magnets for belt attachment, final white/clear on belt, install belt boxes, paint thermal detonator, install thermal detonator Arms - install shoulder bell snaps Legs - glue sniper knee, create garter system for thighs, install garter system I'll keep grinding away and maybe add some pictures later this weekend, but there's a pretty big update down for ya!4 points
-
https://www.501st.com/members/displaymemberdetails.php?userID=32929 TK 661442 points
-
Got there in the end! TK 150262 points
-
I use a heat gun all the time BUT you do need to know what you are doing, it's a tricky beast to use with ABS and you can go from pliable plastic to molten mess in less than a blink of an eye. LOTS of practice or safer to use a hot water bath. See how you look once you have all the armor strapped and test fitted, you may find it's really not an issue at all.2 points
-
[mention]markgambino [/mention] fantastic job on that helmet! Wow! Keep this up and it’ll be a really easy approval for our GML [emoji1303][emoji1303]2 points
-
I made a bucket! I'm pretty chuffed with the result. I've embraced the idea that screen used armour was less than perfect and love the flaws I can see. I still need to tidy up a few rough tube stripes, but over all, STOKED. Of course, if there is anything glaringly obvious I have screwed up, all feedback welcome. Gonna move onto electronics now and see if I can fit those PLUS my head inside the thing. (The left ear appears to have swung a little backwards at the bottom. Don't know what that's about, but I may have to adjust it later down the line. The right one, though, *Italian kissy fingers*)2 points
-
I'm glad you're back at it, but wish you didn't have so much trouble... Getting my helmet details crisp was a big pain too! I had some trouble getting the fine point paint marker into some of the crevices around the rear traps. I ended up taping a little on either side of the line just to keep the black paint in line. So far, I haven't really had issues getting my suit on/off, which parts are you referring to? I used velcro in a few spots to hold each belt half up and they seem to work fine. Now that you mention it, I think some shoulder bridges might be good to raise the bells a little. I might try some fiberglass scraps shaped like Paul's bracket. Glen (gmrhodes13) posted some pics on my thread that point out the straps holding up the thighs from Star Wars Celebration. It looks like one strap hangs straight down and another is angled more forward. I'm hoping that holds them somewhat steady. Can't wait for some pics!2 points
-
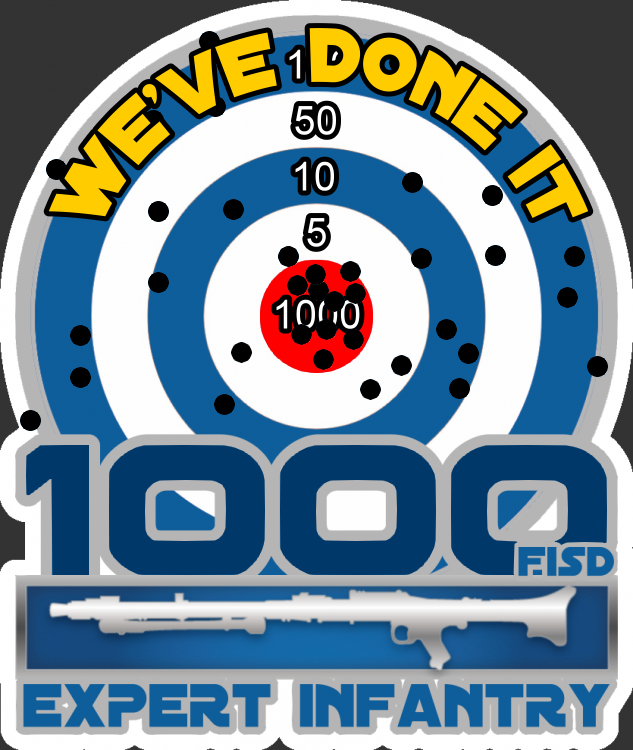
Congratulations to our 1000 Expert Infantry With our 1000th EIB and March to 1000 now complete we take a look back to where it all began, bare with me as a lot of information is buried deep down and some has been lost over the years, I'm sure @Daetrin can chime in but this is what I have uncovered. Initially conceived by our detachment founder Paul "Daetrin" TK8020 back in 2006, here is the first outline of the program https://www.whitearmor.net/forum/topic/5-expert-infantryman-badge-eib-program-overview/ In January 2007 a name had to be found https://www.whitearmor.net/forum/topic/560-we-need-a-name-for-deployment/ discussed and a poll went up https://www.whitearmor.net/forum/topic/633-poll-deployent-name/ the winning name being "Mark" (IV, V, VI). This name stuck for a little while but in August 2007 there was another poll https://www.whitearmor.net/forum/topic/1347-deployment-name-poll/ this time it was decided the program would be called "Elite". In March 2009 a new poll went up to come up with a new name https://www.whitearmor.net/forum/topic/6378-changing-elite-to-something-else/page/5/ with now outcome and in the end our detachment founder Paul decided on the name Expert Infantryman https://www.whitearmor.net/forum/topic/6378-changing-elite-to-something-else/?do=findComment&comment=82088 his post below: "In the end I decided to re-brand our program as "Expert Infantry", with Elite troopers becoming Expert Infantryman. This is based on the Expert Infantryman Badge in the U.S. Army - see http://en.wikipedia.org/wiki/Expert_Infantry_Badge for more info." Program name changes Mark 1-5 Elite 6-65 Expert Infantry 66-1000 EIB graphics Now on to some graphics and much of this had been discussed in staff areas, but here are just a few of the early designs It was suggested to keep it more to the military style, here is the military's Expert Infantryman Badge http://en.wikipedia.org/wiki/Expert_Infantry_Badge And from there came And finally Current day Some of the programs to help get the numbers of EIB's on the rise: The Road to 300 https://www.whitearmor.net/forum/topic/18434-the-road-to-300-fisd-eib-that-is-stormtroopers-achieved/ The March to 500 https://www.whitearmor.net/forum/topic/33547-october-2015-newsletter-road-to-500-expert-infantry-badge/ The March to 700 https://www.whitearmor.net/forum/topic/26126-the-march-to-700-expert-infantry-in-2014/ The March to 1000 https://www.whitearmor.net/forum/topic/49177-only-18-spots-left-time-to-step-up/ Previous Deployment Officers: (sorry if anyone was missed, please let me know and I will edit) Paul "Daetrin" TK8020 Scott "Scott M." TK4149 Terrell "SuperTrooper" TK1787 Mason "dashrazor" TK4603 Mathias "Locitus" TK2959 Phil "FunkyTrigger" TK3796 Steve "gazmosis" TK4034 Eric "Darth Aloha" TK9674 (454) Tony "ukswrath" TK10116 Andrew "Sly11" TK11469 Joseph "justjoseph63" TK10963 Dan "CableGuy" TK142911 Sha Sha "shashachu" TK19233 Dan "TheSwede" TK99665 Christine "Cricket" TK10401 Mike "msouza" TK11463 Mario "TKSpartan" TK48117 Chemi "Chemi" TK30173 Some milestones interesting to see how details evolved over the years (just a shame some images are no longer available): 1st 28th April 2007 - Scott "Scott M." TK4149 - FX - https://www.whitearmor.net/forum/topic/884-mark-iv-deployment-request01fx/ 100th 2nd March 2010 - Robert "TKittell" TK7143 - AM armor AP helmet - https://www.whitearmor.net/forum/topic/10128-tk-7143-requesting-eib-status100am/ 200th 28th January 2012 - Graeme "Trooper1972" TK3896 - AM armor TM helmet - https://www.whitearmor.net/forum/topic/18409-tk3896-requesting-eib-status-anh-stunt200am/ 300th 25th January 2013 - Steffen "Minuteman" TK18793 - AM armor TM helmet- https://www.whitearmor.net/forum/topic/22825-tk-18793-requesting-anh-stunt-eib-status-am300/ 500th 21st September 2015 - Brad "68Brick" TK21814 - AP armor AP helmet - https://www.whitearmor.net/forum/topic/32917-tk-21814-requesting-anh-stunt-eib-status-ap500/ 700th 9th March 2017 - Christine "Cricket" TK10401 - RS armor RS helmet - https://www.whitearmor.net/forum/topic/40906-tk-10401-requesting-anh-stunt-eib-status-rs-700/ And big congratulations to our 1000th EIB recipient 1000th 16th September 2020 - Sebastion "Shimo"" TK51337 - Anovos armor Anovos helmet - https://www.whitearmor.net/forum/topic/50022-tk-51337-requesting-first-order-stormtrooper-the-last-jedi-eib-status-anovos-1000/ 1st double digit EIB recipient 10th 13th October 2021 - Glen "gmrhodes13" TK85421 - RS armor ATA helmet - Death Trooper https://www.whitearmor.net/forum/topic/51526-tk-85421-requesting-death-trooper eib status-ata-approved-10/ Multiple EIB Recipients Let's also not forget those who have taken it up to the next level and who are multiple EIB recipients. Additional awards are issued as [APPROVED] 2nd, 3rd, 4th and so on and do not get counted into the total 1000, you can see who has multiple awards by looking at their EIB banner on their forum profile, there are extra stars on top for additional approvals which then change to gold after 5. There are a total of 75 recipients of multiple EIB awards, congratulations to you all 2nd EIB Award Recipients - 59 Dan "R2Dan" TK8527 Carsten "Sidius" TK11672 Derek "DZFireMedic" TK83125 Luis "Rietzer" TK31513 Daniel "Ensi" TK61514 Dennis "NINJAMOVE" TK16112 Christopher "Chewy" TK66402 Rowan "zebedee" TK12111 Jonathan "JLight" TK32627 Randy "magni" TK16127 Andreas "Coil" TK24269 Danny "Ripper_L" TK55550 Kai "TK Goatee" TK71715 Jim "Engineering trooper" TK12638 Robert "RLJ2515" TK10596 Sarah "Alay" TK20466 Mark "humperdingle" TK22700 Dave "PBTrooper" TK10737 Shawn "CrookKnight" TK10204 Ruben "Crusader_6" TK34281 Chris "PhoenixTrooper" TK80806 Andrew "fuumantroop" TK24218 Steve "starsaber25" TK19466 Mike "TK1636" TK1636 Michael "TK-Sharp" TK12169 Joey "vecspeed12" TK9512 Partick "Front-a-Little" TK7961 Carey "C HERM" TK941 Nick "ZeroCool" TK20882 Manny "Tehcaveman" TK10912 Anthony "Redforce" TK10666 Andy "HeloTrooper" TK5224 Hans "Sparrow J" TK5224 BJ "bjsavage7" TK5955 Charles "Clamps" TK25267 T.J. "Hunterhwt" TK7944 Mark "captsafe66" TK4584 Darren "SandFlea" Tk7435 Matt "out0fstep" TK9328 Laurent "Mini Trooper" TK3182 Lou "Darth Voorhees" TK6908 Daniel "DarthChridan" TK7987 Christian "v7sg" TK9539 Vern "TK bondservnt" TK2392 Paul "Daetrin" TK8020 Rich "Rich330" TK6042 Allan "Trooper Q2" TK3066 Brain "tkrestonva" TK2918 Stefan "Turrican" TK1355 Terry "Terry19D" TK2055 Chris "TK-5069" TK5069 Ken "TK88667" TK88667 Jacob "Pistolsheets" TK86267 Jonatan "Nairy" TK23592 Adam "revilimiter" TK89400 Aizenoso "Aizenoso" TK14292 Tim "TrickyT81" TK24881 Dan "Kaiserinthehood" TK80419 3rd EIB Award Recipients - 8 Joseph "justjoseph63" TK10963 Tony "ukswrath" TK10116 Charles 'Templar726" TK72627 Juan "BananoPower22" TK4326 Daniel "Debater2nd" TK2618 Jason "TK-J" TK4625 Thayne "ThayNerd" TK5401 Brett "Cleantrooper" TK9593 4th EIB Award Recipients - 3 Arthur "giskard8" TK39093 Daniel "TheSwede" TK99665 Frank "rhapsodyredd99" RK11038 5th EIB Award Recipient - 1 Justin "TheRascalKing" TK61490 6th EIB Award Recipient - 0 - - - - - - 7th EIB Award Recipient - 2 Todd "Toddo" TK6647 Ardeshir "equuspolo" TK42128 8th EIB Award Recipient - 0 - - - - - 9th EIB Award Recipient - 0 - - - - - 10th EIB Award Recipient - 1 Glen "gmrhodes13" TK85421 NOTE If you are approved with a "2nd Version" of a particular costume that you are already approved with you do not receive an additional award, there is only 1 award issued for each costume version ie: only 1 x Hero, 1 x Stunt, 1 x HWT, 1 x ESB, 1 x TFA and so on. If you have a second/additional version costume approved you will see "2nd Version" and [APPROVED] added to the thread title, no additional profile stars. A full list of all all FISD awards can be found here:
 1 point
 -
Just finished printing, assembling, and painting my E-11. Here are some photos. STL files can be found at the links below. https://www.thingiverse.com/thing:4003566 (Basic Sterling) https://www.thingiverse.com/thing:3989097 (E-11 Accessories)1 point
-
Great, thank you! Sent from my Imperial Communicator1 point
-
Thank you Glen. I was definitely trying to be "rough" with the cut lines. I'm trying to always remember to cut conservatively at first, fine tuning later. And thanks for the reminder regarding the ears, I was holding them up to the sides when marking my lines, kind of visualizing how they'll cover the seems, but I do still need to do a rough trimming of them to get a better idea. I was hoping to just give myself a good jumping off point.1 point
-
Nice work, should fit over your bells well1 point
-
Cheers guys1 point
-
Excellent, now, have you requested 501st access to these forums so you can see the merch thread? Welcome aboard1 point
-
Good advice. I'm working on strapping this weekend, so I'll do as you suggest and get it on before making a molten mess! Sent from my Imperial Communicator1 point
-
thanks1 point
-
NOW...something very important that I want to share with any furture builders reading this thread, a helpful tip that I have learnt before gluing any snaps in. There has been some debate about E6000 glue coming in contact with the metal snaps, and how it reacts by creating heat that can cause melt indents on parts of the armour. I've conducted these tests and experiments before making a start on my armour itself. Although I didn't take any photos of this process, I can still share my results and experience. These rumours are 100% true. When E6000 glue comes into contact with the metal snaps, it reacts in a way that creates heat and that heat does cause the armour surface to melt (even more so when heavy clamping force is applied). I used several pieces of nylon webbing with snaps installed and glued them onto scrap pieces of ABS; waited 48 hours and removed the nylon from the ABS to see the results. Here were my results:- Test 1. If you are careful and just glue around the edges of the nylon (without metal contact) then you should be good. Test 2. I glued along the edges of 1 nylon snap, applied glue onto the snap base itself and used a light clamp force. After ripping it off there left a small melt mark on the surface. Test 3. Same thing as step 2 only instead I used a heavy amount of clap force. That left a larger melt mark on the surface. Test 4. With this one I cut a piece of blue painters tape and covered it over the snap base (but not the entire nylon strip). Glued along the edges of the nylon and onto the painter tape, used light clamp force and remove the nylon. It worked perfectly, there was no trace of melted plastic and not even any blue colouration or tape residue. Option 4, was the best result and its the tecnique that I will be using for the rest of my build. Please Note - These test and experiments were performed on AP armour, which is slightly thicker than other ABS plastic from other armour makers. Which means that the results of plastic melt could be more severe to other armour parts which is thinner. I strongly advise that you first perform these tests to understand the limitations and strength of your armour. I hope this helps.1 point
-
NEVER USE A HEAT GUN!!!! As soon as you overheat the ABS it will instantly warp beyon repair, a customer screwed his whole helmet using a heat gun to reshape the ears while on helmet it was a costly mistake he had to buy a completely new helmet It will be pretty darn expensive to ship a new AB plate to AUS1 point
-
Nice job helmet looks great!!!! Please look at the original movie armor part sections, all armor parts are pretty wonky all the asymetries you see are actually movie accurate, same for the ears the left and right have completely different shape as you have noticed and will not sit the same. Mark (AP)1 point
-
Keep up the great work man! Your hard work and dedication will pay off, and I’m sure your suit will be AMAZING. Magnets FTW. Sent from my iPhone using Tapatalk1 point
-
Only initial ideas so far but here are some thoughts. Ideal numbers: 2 experts (one must be staff to chair the chat, can both be staff) Number of New members with questions in the live chat: (4 -6) min/max too many or to few and it gets to difficult or isn't worth the time and effort. Time Frame: based on platform used 45 minutes - 1 hour. Questions: must have your top need to know questions submitted 3 days before the event. limit of 2 questions submitted by each participant. Conversation would drive the rest of the Q and A Time zones: this is the toughest of all and would require the most planning based on country the new members were in and the staff/experts.1 point
-
So I was thinking about how my gloss white coats have been full of pinholes and thought that maybe I've been sanding too finely. So I wet sanded putty from my shins with 220. I found a few more spots so I filled them too. On a positive note, it's WAY easier to sand putty with 220 I figured I'd quick spray some primer on the trauma plate too. And then wet sanded more putty with 220 from the thighs and ammo belt. I then prepped some double snaps on small webbing strips, so I can E6000 them to the thighs tomorrow for hanging while I paint.1 point
-
Hi all Darren and I have been looking at this issue today. The GML is aware and looking into it. :-)1 point
-
Congratulations #999!1 point
-
Thanks Andrew! EI is in the bag, sir. I'll be posting my Centurion application VERY soon!1 point
-
A few people have asked how I mounted my TD and ammo boxes. Originally, I mounted the ammo boxes with pop rivets but they later came loose or pulled through the boxes. I mounted my Td with machine screws and T-nuts so I went back and did this with the ammo boxes as well. This method take a little longer but gives you the ability to remove the items if you need to. So here is my TD mounted to the hard back belt. Notice the 4 screws, this is how they are mounted. You will need the following: 4ea #8-32 x ¼” T-nuts 4ea #8-32 x ½” Combo Truss Head Zinc Machine Screws PC-7 Two-Part Epoxy Resin Dike pliers (Cutting) Drill with ¼” drill bit Dremel with cutting arbor 220 grit sandpaper First, I placed the TD on the hard belt properly centered and aligned and traced the outline of the mount on the belt with a pencil. Next, I drilled 4 corner holes on the mounting face of the TD to create a box large enough to get my fingers or tools inside the TD but also leaving enough material on the mounting surface for the T-nuts to bond with. Next, I used the Dremel to connect the 4 drilled holes thereby creating the square hole. Using 220 grit sandpaper I rounded the edges of the new hole and I rouged up the inside of the TD where the T-nuts will mount. Next, I marked on the back hard belt where the machine screw holes will be in relation to the traced outline of the mount and where the square hole was made. Be sure you leave enough space around the edges for the T-nut to fit inside the TD and not hit the walls of the TD mount. Next, using the ¼” drill bit, drill the 4 screw holes in the hard belt. Next, hold, tape in place, clamp, or brace the TD properly aligned to the hard belt and drill through the hard belt to drill the screw holes in the TD. Next, using a dike pliers (cutting), cut the 4 prongs off the T-nuts as close to the surface as you can. Next, mix up 2 tablespoons of PC-7 (1 tablespoon of each component A & B). Next, using a finger smooth some of the PC-7 inside the TD where each T-nut will mount. Insert each T-nut from the inside of the TD to protrude through each ¼” hole, then smooth the remainder of the PC-7 on top of the T-nuts blending the PC-with the inside of the TD to completely bond the T-nuts with the TD and let it cure overnight. Lastly mount the TD to the hard belt with the machine screws. This allows for you to remove the TD if you need to. I used this same method for the ammunition boxes on the front hard belt. I hope this helps for anyone looking to mount stuff with screws.1 point
-
I'd be up for that! Lots of free time on my hands right now1 point
-
You normally have to be actually working on EI or Centurion to be grandfathered in but really depends on what the DO's say when you actually apply. You love that blade putty
 1 point
 -
It's a little hard to organize with many of our members in different time zones, perhaps a one off may work, but as you have found out there are some regulars across different time zones that normally can answer specific questions quite quickly1 point
-
Many thanks. I received a B pull back plate from HSP. In terms of shape, this is wider than the 850. Overall, I find this visually more beautiful. The back plate would be completely reworked. It was difficult to insert the notch there. I have now applied the first layer of spray filler. Now it's time to grind again ... Left 850AM, right HSP1 point