Leaderboard


Popular Content
Showing content with the highest reputation on 07/28/2020 in Posts
-
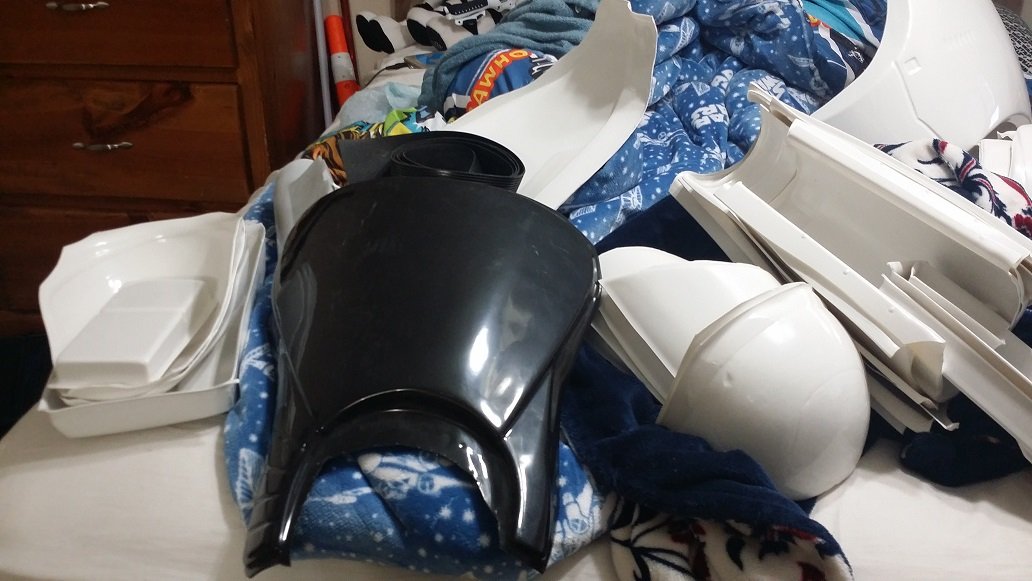
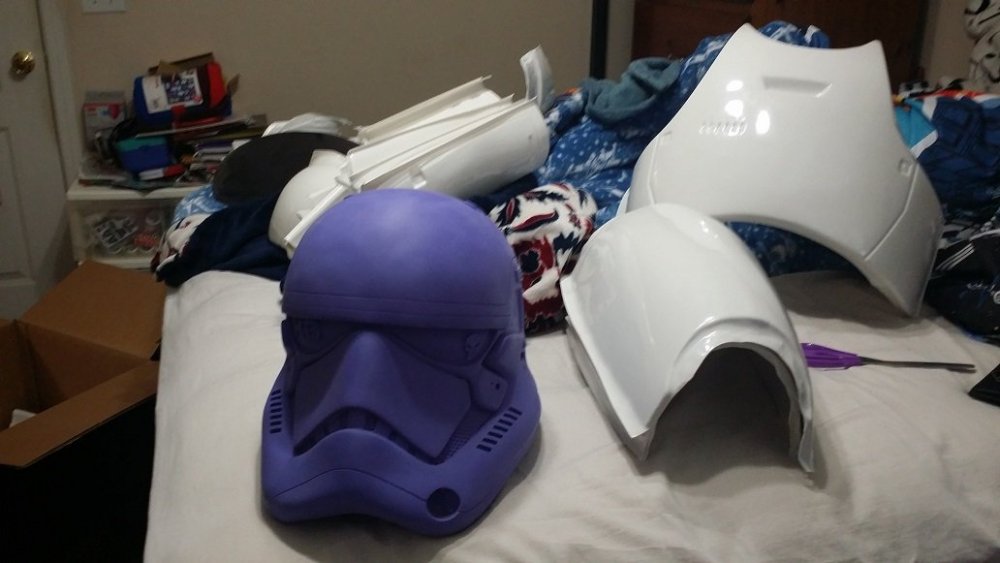
The whole COVID mess has induced some build depression. Like, all dressed up but nowhere to troop. I do need to get back to work on this, if for no other reason than to get the parts off the guest room bed.3 points
-
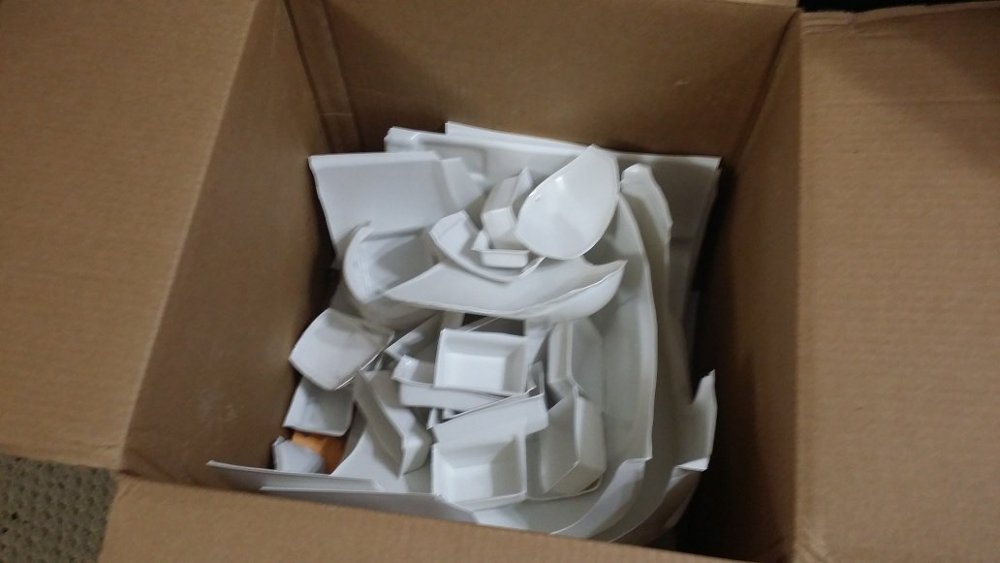
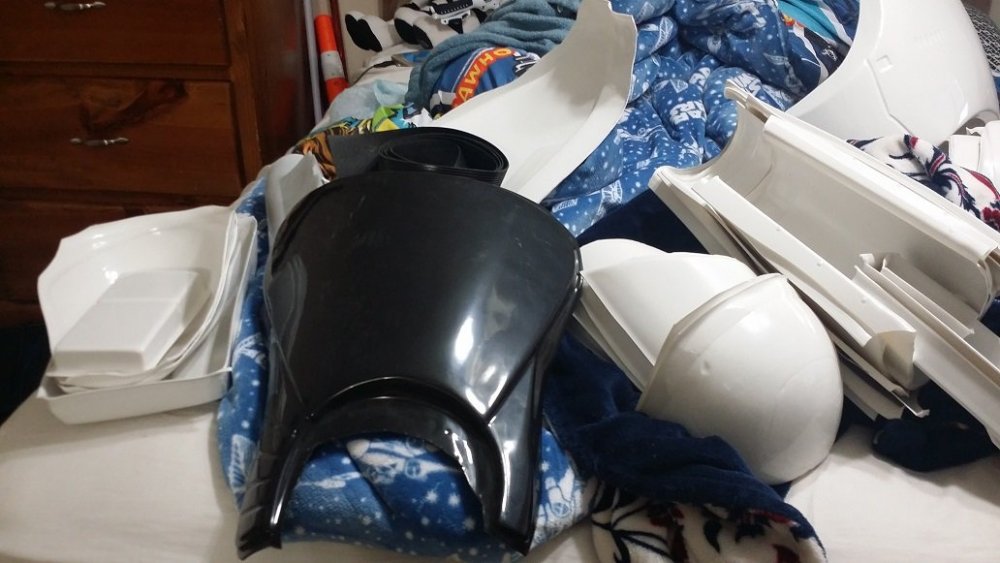
Hey everybody. Name is Monica, but friends call me Momo. I'm a fresh cadet of the Georgia Garrison and currently stationed in Alpharetta, GA. Ever since the new movies came out I took a great liking of the First Order stormtroopers. After finding a good vendor I decided to pull the trigger. Well the day has arrived, I was quite surprised what was waiting for me outside today. The day of Big Brown Box has arrived! Oh boy theres so many parts! I'm not new to costuming but with this I have no idea what im doing xD Gonna search for all kinds of guides and tools, maybe when the world gets better, an armor party would be nice too. Looks like all the parts are here though if anything is missing I have no idea yet LOL. I have a dremel in the garage, but I think ABS scissors are the way to go for most of these? Need to grab em off amazon. I know I need to hunt down some gaskets, I also need to trim myself down a little bit. Its all overwhelming right now, but with the armor actually in my possession I'm much less likely to procrastinate now. I think for now though im going to box the armor back up and keep it safe in my closet while I collect all the other things and soft parts I need for the build. Need to find some good gloves and boots and follow a lot of other peoples armor builds. The long journey starts today but one day...I'll join the ranks of the First Order!
 2 points
 -
All good! Thank you for your help and advice, I've now managed to post some pictures. ...2 points
-
Will do. Thank you.2 points
-
Hi Stephany, looking good . As Glenn has pointed too,. I would suggest to consider remove a bit of gray paint from the teeth as per the Crl states : - Frown is painted gray and does not leave the teeth area.. Reference Images And for looking really better in the vocoder, you could round it a bit as the reference images. Reference Images keep on doing a great work,2 points
-
I did some painting today! [emoji439] Stephanie | Cadet #20252 points
-
Hi Don, Yeah tough times for many out there brother, but we will be hear for you when you can get back to it. I hope things start looking up for you soon. Stay safe and well.2 points
-
I don't know about craziest but I've done a few surprise birthdays and weddings, the best was the bride of a fellow member (a stormtrooper) contacted us without him knowing and asked for us to make an appearance at their wedding, the member knew nothing until we came charging out when we heard "does anyone have any reason why these two should not be wed" to which we replied "stop, stop your wanted back on the death star" got a roar of laughs and the member was really chuffed, he couldn't stop thanking us after the event.2 points
-
Just wanted to check and see if these fit the bill before I re-glue them..2 points
-
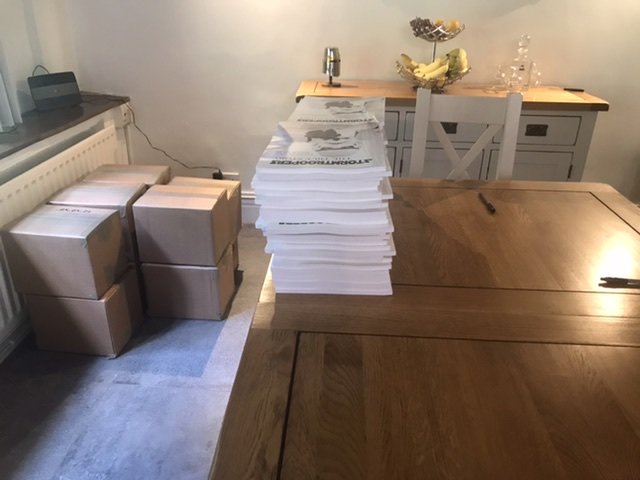
*Update * The books have arrived. We’re busy signing and posting them out. All orders up to 10 th July will have been shipped by Monday 27th July. The book has proven to be so popular that we have ordered another print
 2 points
 -
Hi everyone, I joined the 501st as a Tie Pilot Reserve in 2019. After my last troop, I realized that I want to be a stormtrooper. I pulled the trigger and I ordered a ANH Stunt from WTF in March. I recently joined the forum and was awe struck by all the shared knowledge. Wish I'd joined while I was waiting, but I am here now. My BBB came a couple weeks ago and I have started my build. I intend to take my time. I'll probably be asking lots of questions.1 point
-
I noticed with the flexible fiberglass that it can get cracks in some places, I had two on my sithtrooper prior to painting, appears they are usually on curves or any place that would bend, I ground out some of the cracks, then used bondo (auto filler) then added fiberglass resin and matting behind for extra support, seems to have done the trick. I also found when storing be carful how you pack, a bicep got squashed and had to use some tape to hold the shape back in the normal position and it came good. I'm not sure if the flexible fiberglass hardens over time but just be aware it can move. Whit is a funny it can show lots of imperfections as they appear dark in color, I doubt it will be noticed so really up to you if you want to fix the pin holes1 point
-
Today was productive! I finished preliminary sanding! Then I sprayed gloss white on the hand plates. It went pretty well, except for a few pinholes. I'm not sure if they'll require fixing, or if they won't be noticed... I might just dab some paint onto those spots later on. I went to putty the chest, back, and shoulder straps, but saw they needed washing first. I untaped the straps and noticed a big crack on one! I'm not sure if putty will be good enough for it... Has anyone else made Jim's fiberglass straps work, or do I need to buy plastic ones? Washing off the pieces almost made me realize I didn't fill the oval!! I'm glad I didn't throw away my resin tin...I was able to drip out just enough, add a few drops of hardener, and fill the oval! I have to prop it up while drying or the resin just swaps to one side... I'll sand that down tomorrow. I also see that I wasn't too attentive when sanding these pieces (they were the first I did and I didn't have my worklight on) so I'll sand them a bit more tomorrow too. Better to start with a smooth surface than fix later!1 point
-
Absolutely but sadly COVID closed the campground this year but I will next year.1 point
-
I installed the handle and trigger, it took a lot longer than I thought. The alignment took some time, but happy with the result. Two screws secure the handle to the frame.1 point
-
IB is definitely the way to go, and worth the wait. I’m sure you’ll find other components to work on in the meantime. =) Sent from my iPhone using Tapatalk1 point
-
Greetings Rob, and welcome to FISD! You've come to the right place for building a stormtrooper kit, and there will be many people here to help you along the way! I'm a little north east of you in northwest Georgia (outside Chattanooga, TN), so we're relative neighbors in a sense! As far as your questions about your ATA armor, you would be able to build either a ANH Hero (Luke or Han) or ANH Stunt (all other stormtroopers), and likely take either variant to both EI and Centurion level. However, for the Hero you would need to get bubble lenses for the helmet, rather than the flat piece that Terrell (ATA) supplies, and you would also need different ears with only three bumps, rather than the two sets of four-bump ears that typically ship with the armor. As for the mm measurements you're referring to, 7.5mm would be to each side of a butt-joint raised ridge which would later be covered by a 15mm cover strip on your arms pieces. Note that biceps, forearms, thighs, and shins will have different width measurements for you to use, and you'll also need to take your fitment into the armor into consideration. i.e. heavier troopers may need to increase the measurements to fit comfortably in their armor. More info on cover strips can be found in my post here (you'll need to scroll down as it's a long post). In general, and if possible, it's good to keep the front-facing cover strips to cannon / screen-used widths, and then widen the rear-facing (your back) strips if needed for fitment. I myself have also been working on my own ATA Stunt build (link to my thread here) and at least until recently, have been having a blast. Since you're building an ATA kit I also thought I'd share with you a resource thread which I created for all Troopers, but particularly with ATA builders in mind. The second half of the long thread has links to helpful builds, and many of them are ATAs. Post up lots of pictures and ask lots of questions, and answers will come! Welcome again!1 point
-
Thanks for helping ,I think it worked.1 point
-
I cleaned up the frown and finished painting the ears and added the screen behind the frown, held in place by a few drops of CA glue on the back of each tooth, which was also done after I took this photo. Here is a photo of inside the bucket. What I did here for mounting the lenses was cut down and angle some dowel rods and pre-drill for mounting posts, attached in four points around the eye with CA glue. Thinking that a good idea, it was difficult to see where to mark the lens and I probably missed the predrilled holes anyway, but it appears to have worked out. I will likely touch the bottom posts up with a little black paint. Ears painted... I began some fitting of the forearms late yesterday evening. I cut away all of the return on the bottom but forgot to cut out the return on the rectangular portion, which I will do this evening. I cut out nearly all of the return edge on the upper forearm and biceps as well. I hope to have these fitted and one inner strip glued on each tonight. Here is a photo of the right forearm. The bottom is barely large enough for me to squeeze my hand through and the top should have maybe finger thickness of play when I get it glued up and shaped. I tried to mark where my arm is in relation to the armor, since the under suit didn't help the photo much. What is the general consensus on the snugness of these pieces? My son's helmet is pretty much complete as well. He really wanted to handle the painting on his bucket, which involved some trial and error, but I believe he's in good shape now. I will try to post some pictures of that progress tonight.1 point
-
I´ve got my TK number today. It´s TK 108681 point
-
I´ve got my book today. Signed by Brian and Lindsay.1 point
-
Hi guys! Applying for approval!, TK-26590 https://www.501st.com/members/displaymemberdetails.php?userID=32795 Thanks in advance1 point
-
I've been reading through various AP builds and have found something confusing about the TD screws. AP have supplied (already painted) screws for the TD and the CRL states that they are accurate. However, all the builds I have read through mention that they need to be replaced with flat pan slotted screws for L3. Does that mean that the AP screws provided are not accurate for L3? If not, I found one of these screws in the bottom of my tool chest. I've done the measurements comparing it to the already supplied screws, luckily it is the same height and width as them. If these screws are acceptable for L3, then I'll have another look to see if I can find more.1 point
-
Placed my order today as well! Can’t wait!1 point
-
Full Suit Fitting and Initial Submission Photos Thighs cut and cover strips glued, thigh garter and strapping system finished. Full fitting -- photos by Andrew H (TK-14023). Mobility test -- videos also by Andrew H (TK-14023). Excellent test of pinch points and mobility issues, videos not included here. Key resources consulted: AJ's AM ANH Stunt build (https://www.whitearmor.net/forum/topic/40831-ajs-of-am-20-build/) LTM's AM TK ANH Stunt build (LTM's AM TK ANH build) TK-32568 EIB Submission (https://www.whitearmor.net/forum/topic/46507-tk-32568-requesting-anh-stunt-eib-status-am-892/) TK-32568 Centurion Submission (https://www.whitearmor.net/forum/topic/46815-tk-32568-requesting-anh-stunt-centurion-status-am-432/) Crowdsourced suggestions in the AM Armor's Costuming Facebook Group (https://www.facebook.com/groups/840018932822639) Andrew H, TK-14023, who has helped directly with advice and fittings and material components and has brought me all the way to this point. Submission photos: Front: Back: Left: Left, arm up: Left, rivets close up: Right: Right side, arm up: Right side, close up of Han snap: Further progress on thighs after submission: Right thigh, inner split rivet outside view: Right thigh, outer split rivet inside view: Right thigh, outer split rivet outside view: Right thigh, inner split rivet inside view: Left thigh, back, gap sealed: Left thigh, front, gap sealed: Right thigh, back, gap sealed:1 point
-
Real life comes first brother, stay safe1 point
-
Very nice, just don't get too close to the gums1 point
-
Looking good Stephanie.1 point
-
Ok, I updated what was suggested, let me know what you guys think. Personally, I think I need to trim the shoulder bells. Unless they are supposed to jut out like that, but I legitimately cannot get them any closer to the chest, and I may just have to trim the sides so they come in more. Sound like a good idea? Left side fits well Right side fits well until I lift my arms, then this happens. I think I'll just add support straps to help keep it together. I remembered the Thermal Detonator this time LOL I submitted my 501st application today, so wish me luck! Thanks all for the suggestions.1 point
-
You could try mineral spirits, usually available from hardware stores1 point
-
Thanks for the quick response! I'll add the pictures that you required and also do the little changes needed.1 point
-
Looks a bit like a mix between TM and ATA parts but reworked and distorted due to the bad pulls.1 point
-
It’s perfect bound and laminated - the same format as In the Shadow of Vader. They make a perfect pair1 point
-
Looking forward to seeing this together. Was going to look at doing the helmet myself but Nicos files have gone up to $70 US (with shield) :1 point
-
Fernando Baro TK29415 Centurión A4 Mario http://www.whitearmor.net/eib/certificates/29415-centurion.png1 point
-
Sorry for being late to the party. Great job done on the folding stock and the power cylinders. Following...1 point
-
May as well! It's quite the feeling to know that your hard work has passed the microscope test1 point
-
Here's my finished pimped out armour transport:1 point