Leaderboard


Popular Content
Showing content with the highest reputation on 05/15/2019 in Posts
-
cutting up some real sterling mags for my alum replica2 points
-
Thanks Mike. That's really helpful. I'm sort of a dummy when it comes to video games. It looks like you're right on track weathering wise. Please make sure your photos are as high resolution as possible for each view of the parts. -Eric2 points
-
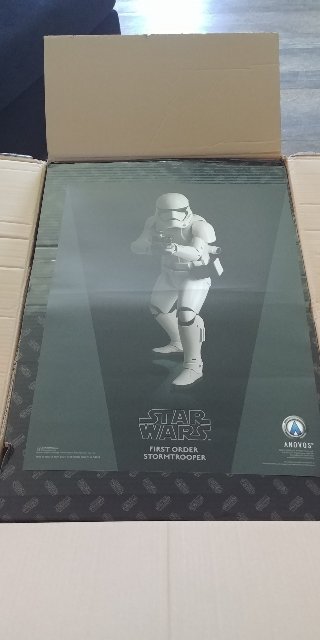
Well....Its here. 2 years and 7 months waiting. I'm going to attempt a build thread here to document my progress and maybe help some others along the way. I'm a noob so I'm sure I'll be learning just as much as well. I will be building this for TFA and NOT TLJ so there will likely be some mods along the way. Also, I will be putting this together using a mix of the Anovos instructions which can be downloaded from the website and Ukswraths build thread. (A staple in my opinion) Since this is an upgraded kit, there will be plenty of differences. Feel free to chime in with any advice. I promise to respect and treat it as just that. Advice. Thanks in advance!!! Ok.....so.....Here we go!!!!
 1 point
 -
Please grant me access. 501st Canadian Garrison member http://www.501st.com/members/displaymember.php?userID=30494&costumeID=124&fbclid=IwAR195ECSed7KW6GrFrpLXNYNxFS02T6jzCb1QXJV6jixWxKTGUOW3ZP8Ar41 point
-
You'll find a lot of references in the gallery section, here are some brows1 point
-
And professional automotive painters use 400 grit before final paint, so yea no higher than 600/8001 point
-
I have actually recorded some of the work I’ve done with repairs on my Jim Kit that I will post to YouTube and include some links on my Build thread as well.1 point
-
ABS paste works great, though I've also used tub and tile filler on a couple armors, So long as the color matched it works beautifully, not to mention there's no gluing, sanding or painting. Oh and the armor is ready to wear in 30 minutes lol1 point
-
Judge for yourself (reference photo below). That said with the sniper knee below the thigh increases mobility and helps eliminate armor bites.1 point
-
Garter belt. I had a rethink on the belt. I thought the buckle might rub on the inside of the ab, so I went with velcro as per this thread. I'm no seamstress, but I managed to get it done.1 point
-
They look good. Nice work. As for the shins - I did the same thing as Ukswrath. Little bit of velcro and the problem is solved. Easy fix.1 point
-
Found out it was the indent that was different cant say I ever noticed Sent from my SM-G973U using Tapatalk1 point
-
Goodluck on your application!1 point
-
As long as it is posted in this thread you are good to go, sir! NICE JOB!1 point
-
A couple of pics showing how filling the thigh seams with ABS paste turned out. Not perfect, bit you really have to look close to see where they've been filled1 point
-
Fitment check. Does this look right? How do you keep the greaves in place? As soon as I move they want to rotate to the outside.1 point
-
The helmet is finally done! I decided not to wet sand, so I was able to get right to adding the final details this week. After gluing everything in place and painting the frown, I added some grime in the cracks with watered down acrylic paint. I wanted to make it seem a little used and kind of give the traps and tears that black outline look. I might try some more weathering, like rubbing damp newspaper on it. But I haven't decided yet. I painted the inside of the helmet with black PlastiDip and started adding padding and greeblies. I'll post a pic of it when I'm finished.1 point
-
I think you have the same issue as me the thighs looks like your right thigh is lower... I think you have room on the inside off your thighs and if you pull your thighs up the backs will hit your bum. I have taken mine apart and redoing them again with a hot bath to make sure the insides dont rub to much against each other and sanded down the backs to the same contour so they dont hit my bum. rotating your right thigh a bit will also let the drop box fall naturally and close the black gap more. I think the grey ab buttons are a little big, blues ones look good. I have the same armour so really happy to check your pictures! thank you1 point
-
Yeah...what he said... The ab buttons are overpainted, as are the teeth. A bunch pf pretty minor stuff. Nice work!1 point
-
Nice work a couple of things you could adjust to really make you stand out. Bring your thighs up a little more to reduce the black showing. Bring your biceps down a little to reduce the gap at the elbow. Reduce the length of your drop box straps, they are a little long, perhaps also add a little glue to the straps so the drop boxes stay at the end of the belt. TD straps don't fit the pipe very well and are sitting up on the ends. Vocoder paint could be tightened up, a little on a slant and not round in areas, a tooth pick is great for getting into corners. The paint should not leave the teeth and some is seen on the gums. Ab button paint is a little large on some of the buttons. Tube stripes are ideally a pencil width from the cheek. Once again nice work and good luck with your application.1 point
-
I just noticed this Trooper in a group photo in @Pyrates Hall of Fame thread and it caught my eye... Not sure who it is, and I realize that they are jumping (not an easy feat, I'm sure) but it just struck me as odd, especially with the placement of the DLT-19s underneath. Strange, but cool at the same time.1 point
-
Personally I would go with glue rather than Velcro as there is a large gap in those sides, be interesting to see how others are tackling the use of velcro1 point
-
Just a brief update, I'm adding a small margin to some of the items on my Shapeways store. Nothing huge, I'm going to round up to the nearest 50c, and the few extra $ every so often would allow me a to treat my self to some free postage every so often! I had a quick look at the sales and there's over 65 of the cylinders out there now which is pretty cool!1 point
-
Perfect - I may take to be professionally painted. The video in your second link was made by a former member of this garrison - thanks for linking it!1 point
-
Definitely one day at a time. My first build was kind of a "learn as I go" process which was time consuming and not very cost effective. So now I am trying to avoid that frustration by getting ahead of the game and using that experience, doing my research and planning out what I'll need to do it right the first time. All of the inputs and support have been amazing and greatly appreciated. And when BBB does finally come, I will most definitely share that build with all y'all via a build thread so that we can all get the benefit of dealing with modifying this "production" version of the Anovos kit. Thanks again!1 point
-
Great to see another FO! For the cracks I used fibreglass matting and polyester resin from a boat repair kit. I applied on the backside of the armor where the crack was and made sure to cover way more area than just the crack itself. This will kill the flex in that area and prevent the crack from progressing. After this you can use body filler as normal on the front and sand flush I sanded all of the pieces on the inside with 120grit sandpaper to get rid of stray fibers and sharp spots, then gave the entire kit a good wash. This eliminates itching/snagging and just promotes good adhesion for snaps etc. Some use plastidip on the inside but I don't see the point in that personally. After this i'd recommend giving the outside of the kit a light sanding with fine grit sandpaper (320+), then hit it with a coat of primer. This will show every single little blemish, pinhole, and crack. My kit looked flawless until I had a layer of primer on it1 point