Leaderboard


Popular Content
Showing content with the highest reputation on 03/01/2019 in Posts
-
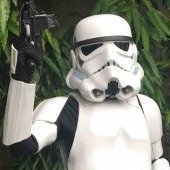
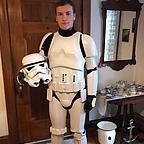
Name: Miguel Ángel Torres Jiménez FISD Forum Name: Forestrooper Legion ID: 17307 Garrison: Spanish Garrison Costume Information Armor Maker: SDS Helmet maker: SDS E-11 Blaster: 3D printed Legion Profile: http://www.501st.com/members/displaymemberdetails.php?userID=23643 EIB request: https://www.whitearmor.net/forum/topic/45686-tk-17307-requesting-anh-stunt-eib-status-sds-867/&share_tid=45686&share_fid=44557&share_type=t List of changes: - Vocoder painted. - Displaced Hovi mesh. - Reduced the size of the small ab plate. - Improved the calve fastenings. - Added knurling pattern on the blaster's rear sight. - Blaster has been prepping, sanding and repainting. - Performed a realignment of the sniper knee.2 points
-
Hey Trina and thank you for your EIB Application Like others said - great job in sizing the armor to fit A couple of things before we can get started: # Photos showing the inner fixings of knee ammo belt. # Photo of TD showing all 4 screws. # Hardest part - CRL L2 states: Sniper knee plate must be aligned with the ridges on the shin. The sniper plate holds some challenges for alot of Trooper and one way of dealing with it is to off-set the shin itself, others use brute force with clamps and magnets. If you would like a second opinion before you try and re-attach you can always post some new pics showing the sniper knee straight on from the sides as the pics you provided has an angle to them and I can take another look - and I might seem a bit picky about the left one (in this pic) but from the looks of things as the right (in this pic) need some re-alligning I figured I draw that up to, but anyway, if you like to post some more pics I´d be happy to take a look at them2 points
-
Hi fellow 501st Legion members, After nearly 3 years of development and refinement of the hardware and the code, I'm happy to announce that the currently most advanced blaster firmware FX-BlasterOS (previously known as Proto Blaster Platform) goes open-source, freely downloadable for anyone. To get an impression of the features you can implement now for free, look at the Intro Video on YouTube. For Easter Eggs, make sure you watch it till the end : FX-BlasterOS Intro Video With the software going open-source, you have multiple choices too to build your blaster electronics: Tier1: if you want a high-quality, proven solution which optimally supports all features of FX-BlasterOS, follow the below link: You advantage: - proven, tested - small enough to fit into any blaster - you can charge your Li-Ion battery over USB - comes with extensive power saving options for a sleep mode which can sustain your prop for several months on the shelf - comes already pre-installed with full version of FX-BlasterOS Tier2: you can stick together your own electronics from cheap parts, look how easy it is using Arduino boards and breakouts (see also the Shoping list below for details): To ease programming for those who are not (yet) familier with Arduino, there are detailed working instructions how to do it on the Wiki Page of the Git. In case of anz trouble of technical support request, use the Issue tab of the Git. There is also the possibility to source a carrier board for the cheap components, hugely simplifying the task of soldering and making the electronics more reliable. You can use skyone's excellent rider board which can be used with components compatible with FX-BlasterOS. https://www.whitearmor.net/forum/topic/19322-arduino-a-cheap-board-for-e11-blaster-effects/?do=findComment&comment=646230 Shopping List Here is also a shopping list for you of components you will need: Arduino Board: Arduino Nano (actually any Atmega328P based board, wiring examples will be shown for the Nano): ebay search term: Arduino Nano v3 https://www.ebay.de/itm/Nano-V3-0-ATmega-328-Board-CH340-USB-Chip-Arduino-Kompatibel/252742123829?hash=item3ad89ac135:g:xCEAAOSwPGtb33e0:rk:1:pf:0 DFPlayer Mini: ebay search term: "DFPlayer mini". Please ask the seller if the module comes with the original manufacturer's YX5200-24SS or YX6300-24SS chipset. You will also want to have a 470 Ohm thru hole resistor to connect the D8 of the Nano to the RX of the DFPlayer. https://www.ebay.de/itm/TF-Card-U-Disk-Mini-MP3-Player-Audio-Voice-Modul-Arduino-DFPlayer-Tafel-AIP/153290978607?hash=item23b0dab52f:g:uewAAOSwP6pbtdXJ:rk:1:pf:0 Speaker: recommended are OD: 20mm or 28mm Impedance: 8Ohm Power: 1W to 2W ebay search term: "20mm 2W 8Ohm speaker" Examples: https://www.ebay.de/itm/2pc-Audio-Speaker-20mm-8Ohm-8-2W-Stereo-Woofer-Trumpet-Horn-Loudspeaker-Power/162171125788?hash=item25c227001c:g:WRgAAOSwMtxXsvaV:rk:1:pf:0 https://www.ebay.de/itm/28mm-8-Ohm-2W-Round-Speaker-For-DCC-Sound-Like-Loksound-Hornby-Bachmann-Zimo/263578226658?hash=item3d5e7c8fe2:g:BToAAOSwm-Zavo6p:rk:2:pf:0 Neopixel Sticks (for PLI/Status bar): ebay search term: "WS2812 stick" https://www.ebay.de/itm/Adafruit-NeoPixel-Stick-8-x-WS2812-5050-RGB-LED-Strip-Driver-for-Arduino-r3/272010992457?hash=item3f551e5b49:g:7YMAAOSw7aBVBxRo:rk:7:pf:0 Important: type shall be WS2812/WS2812B 5050 RGB (not RGBW!!!) or sk6218 3535 RGB (not RGBW!!!) Single neopixel on round PCB (for nozzle light): ebay search term: "neopixel flora" https://www.ebay.de/itm/Adafruit-Flora-RGB-Smart-NeoPixel-version-2-Pack-of-4-ADA1260/231237003534?epid=1028248696&hash=item35d6cca90e:g:LGoAAOSwNC5ZezSY:rk:6:pf:0 The original design is from Adafruit, please support the development by purchasing Adafruit products. You can also find similar offers on eBay from cheaper sources as well. Neopixel stripes (for barrel ligting): ebay search term: "WS2812 stripe" https://www.ebay.de/itm/5m-30-60-144-RGB-LED-Streifen-Stripe-mit-WS2812B-5050-SMD-LEDs-WS2812-Versand-DE/222192610445?hash=item33bbb62c8d:m:mR_Pz7NGzDUQhwH1s-6BFvg:rk:1:pf:0 Important: type shall be WS2812/WS2812B 5050 RGB (not RGBW!!!) or sk6218 3535 RGB (not RGBW!!!). As most blaster props are black it is recommended to buy a non-waterproof, 60LED/m type of pixel stripe. The striper are soldered together every 0.5m, but you can shorten the stripes easily to any lenght using scrissors, cutting the stripe at the copper landings. Momentary Switch: ebay search term: "momentary switch" or "tactile switch" You will need a single momentary (not latching!!!) swicth for the MK1, MK2 and MK3 builds, two for MK4 and MK5. For the trigger it is recommended to use a switch with a long arm like this one: https://www.ebay.de/itm/Mikroschalter-Mikrotaster-mit-langem-Hebel-250V-3A-125V-5A-S67/330793297018?epid=1154680769&hash=item4d04d1247a:g:8EgAAMXQlrxRcPJ9:rk:1:pf:0 For the mode select, aux. switch you can take the momentary switch of your choice, they come in an infinite variety, take the one which suits your needs. I myself like these small ones: https://www.ebay.de/itm/6mm-x-6mm-Tactile-Push-Button-Switch-Micro-Momentary-Tact-Assortment-Kit-TE948/283285172378?hash=item41f51cb09a:g:SjoAAOSwo-VcAmNI:rk:9:pf:0 OLED Display with 128x32 resolution with I2C interface: ebay search term: "OLED 128*32" I2C" https://www.ebay.de/itm/0-91-128x32-IIC-I2C-Blue-OLED-Display-DIY-Module-DC3-3V-5V-128-32-Arduino/322536659354?hash=item4b18aed99a:g:ag8AAOSwK6RZLbR9:rk:5:pf:0 or for the scope a smaller one of type "OLED 64x48 I2C" https://www.ebay.de/itm/4pin-White-0-66-Screen-IIC-I2C-0-66in-OLED-Display-Module-64x48-for-AVR-STM32/272861748083?ssPageName=STRK%3AMEBIDX%3AIT&_trksid=p2057872.m2749.l2649 Connectors for switches, speaker etc.: ebay search term: "micro JST 2-pin" For 2-wire connections like for switches, speaker, I recommend micro JST connectors with 1.25mm pitch: https://www.ebay.de/itm/5-Paar-2Pin-1-25-1-25mm-1-25mm-GH-Micro-JST-Stecker-Buchse-10cm-28AWG-Kabel-RC/172626910637?hash=item28315d9dad:g:XHsAAOSwux5YTaEB:rk:3:pf:0 2.1mm recharge port: https://www.ebay.de/itm/DC-Einbaubuchse-Stift-2-1-mm-geschlossene-Bauart-Lotanschlus-fur-Hohlstecker/141127499530?hash=item20dbdabf0a:g:4mIAAOSww~xZ1KXj:rk:9:pf:0 Micro- and/or Mini-USB breakout boards: ebay search term: "micro USB breakout" or "mini USB breakout" https://www.ebay.de/itm/Micro-USB-Platine-Adapter-fur-Breadboard-DIP-DIL-Breakout-Board-Arduino/183233499430?hash=item2aa9915126:g:kywAAOSwm8NbAIfU:rk:6:pf:0 https://www.ebay.de/itm/Adafruit-USB-Mini-B-Breakout-Board/272373312981?epid=1663565126&hash=item3f6ab6edd5:g:8BYAAOSwIIFbML51:rk:3:pf:01 point
-
If they do indeed have a version of him at the parks I think that would be an acceptable basis for a CRL, IMO.1 point
-
Toys are generally a somewhat loose interpretation of a screen character. Historically the FISD doesn't reference toys as a basis for accuracy instead we use what's seen on screen and the artist's original concept. That said it would be nice to see this character brought to life.1 point
-
There are some differences in the helmets Front chin is a lot longer and angles backwards halfway down and it is a lot sharper that movie version, there is also the lower black inset line below the tube stripes which stops a lot shorter that movie version. Nose has a sharper corner at the edge of the mouth compared to movie which is rounded.1 point
-
Most definitely - my cod piece and tops of the thighs have pretty much destroyed the glossy part. It's all hidden beneath the plastic, but it doesn't look great on it's own! Great method with creating the shorts, I might have to copy you there!1 point
-
1 point
-
Hi Eric, @gmrhodes13 is correct that the cover strip will also need to be shortened before we can proceed. Assuming you did your build with E6000, it should be a pretty simple fix - pry it up from the bottom, then snip it so it lines up with the bottom ridge. Reference: Apologies for not noticing earlier.1 point
-
More waiting Sent from my iPhone using Tapatalk1 point
-
Congratulations and welcome to the rank1 point
-
Nice work on the updates, well done1 point
-
Noted on this! Thanks for the feedback! Will take photos and upload them soon.1 point
-
Congrats Jen!1 point
-
Tell me about it - got one from stormtrooperundersuit and after test fitting and 2 Troops it´s pretty much toast Good thing I got some armor and gaskets coming from Anovos at any moment now to cheer me up1 point
-
Congratulations Jennifer welcome to EI1 point
-
Congratulations Aaron. Welcome to EI trooper1 point
-
congratulations Trooper!1 point
-
congratulations to 894 from 8921 point
-
Nothing worse than waiting for glue to dry1 point
-
Congratulations trooper and welcome to the EI ranks1 point
-
Very nice Kris, I ended up finding some pants of similar glossy material and cut them down to shorts which I wear over my two piece undersuit, I do find that the glossy finish can rub off over time so I don't wear them all the time, mainly for higher profile troops1 point
-
Thank you. Makes sense about return edges at top. I’ll be losing more of the elbow end return edge to allow a bit more movement too. Glad others had those moments, stupid mistake but easily fixed. Did a basic test fit of body parts and think I’ll need to lose some of width from torso and kidney as currently overlap but rest feels like a good fit for my height/width. I’m 6’4” tall, slim to medium build which is why I went for AM armour but it also caters for the wider trooper so fair bit to trim. Blue tape trooper slowly taking shape Sent from my iPhone using Tapatalk1 point
-
Congratulations Aaron! Welcome to EIB.1 point
-
My pleasure Aaron And to be perfectly clear: although we would love to see you attend to all suggestions the only mandatory fixes are those on the Centurion section. In other words the helmet is good to go for Centurion as it stands But there´s no rush - enjoy the promotion - build the next costume - work on improvements little by little when you have the time - then submitt and rock a clean Centurion application1 point
-
And if you want to take the scope of your blaster a little further, the resin is really easy to bore out with a Dremel. I made a deep hole in the sight end (the end with the larger lens hole), put a circle piece of and old CD in there, put a layer of red acetate over that (upon which I had drawn a crude crosshair), and then put the big lens on top to close up the end. I can't tell you how many times other TKs have asked me if my scope is real. Building your own blaster is so much fun!!!1 point
-
Congratulations Aaron! Hope to see your Centurion application soon.1 point
-
Hi Aaron and thank you for your EIB application - we just love it when Troopers go that extra mile to look their best and for that I salute you In this review I will ensure that your armor follows the requriments set out in the CRL L2 Expert Infantry and also point out what I can to prepare you for Centurion, should you choose to apply. I hope you do! Before we start I want to apologize for some of the pics that somehow have poor resolution, they were fine when I edited them but upon posting they changed. Instead of keeping you waiting I still feel they are good enough to work with. Let´s get started shall we! CRL and EIB Application Requirements: All required submission photos have been posted and after the clean up work on the frown I am very pleased to announce your armor displays all the necessary elements to qualify for ANH Stunt Expert Infantry. On behalf of myself and the entire D.O. Staff, congratulations! Other-Armor Fit/Assembly: In this section we review observations made by your fellow troopers and ourselves. Some observations may lead to suggestions to improve the overall look of your armor. You have a great looking set of armor Aaron and you should be proud! Albeit at first glance, it may seem like alot but most of my suggestions that follow below are minor. Starting from the helmet and working our way down. You have a nice high brow worthy of a Sandtrooper, however the Stunts typically have a sligtly lower one as seen in the pic below. Disclamer* when wearing the helmet the brow hight is not that obvious so perhaps you`ve already tweeked it. Moving on to the ears, they should idealy have a slight angle to them so if you can do this without damaging the helmet I suggest you do so, it looks pretty close but would still look a bit better moving the ear so the bottom screw lines up to the blue line. On the screen used helmets the right side ear (if wearing it) usually had less of an angle but I included it in case you decide to go all out and do both sides and get the look of our "set for stun-Trooper" Anovos usually puts the tube stripes a tad to far down on the cheek, a rule of thumb is a #2 pencil so if you are up to it I suggest moving them up. Next up we have the vocoder and although it´s pretty good I have pointed out some areas that could benefit from some TLC. You did a fine job in painting those buttons and when I admired them I noticed that the panels themselves got a slight return left and as the ref pic shows, they should be flat. If you used E-6000 they should come of fairly easy and after some sanding they are golden. Turning the attention to the TD your clips are nicely butted up against the end caps, actually better than the referenced TD There are a few things I want to address though. Starting with said clips they should be cut straight rather than rounded and the control panel should butt up to them as seen in the ref pic. The screws are usually closer to the edge but short from buying a new set of clips there´s not much to be done, cutting them that much shorter might play havoc with how it sits on the belt so it´s more of an FYI. In this pic the lower right screw looks wrong but the close-up pic you provided confirms it to be the correct pan head style. The knee ammo belt, although correctly secured to the the lower edge per the CRL it should not protrude over it at the fixing point. Idealy it wraps around to each corner as per ref pic and is spaced evenly around the leg. We would really like to see this fixed for your Centurion application. The sniper knee look to be leaning back quite a bit but at the same time appears to follow the ridges of the shin as per CRL so for the moment I will leave it as a suggestion to try and level it out, as a bonus that would help prevent the common issue with it catching under the thigh and possibly digging into your knee cap. If you decide to go for it, removing the return at the bottom will help in getting it more level/straight. I also suggest triming it as shown with the blue line to come even closer to screen accuracy. Next we have some general spacing and my suggestion is to raise the left forearm and at the same time lower the right bicep to even out the gaps. Your thighs are really nice and high and truly in kepping with the ANH Troopers so I almost feel bad asking you to lower them but, with you beeing a taller Trooper it will look better if the spaces are more even I highlighted the bottom of the shins to ask if you have room to make them even more snug around the ankels/boots for that ANH-look. As you are taller we understand that it can be hard to close up that gap between the back and kidney more but we ask you to look into what can be done, it beeing lowering the backplate and/or raising the kidney/ab section but it won´t hold you back come Centurion. I also marked a cover strip on your right bicep that could stand a shave. Dropping those thighs as mentioned earlier will also give you some clearence in the back. Lastly we have the back of the shins and simply put just be sure to check how they line up with the help of a handler on your next Troop for a cleaner look. I will round of these suggestions by mentioning your return edges. I noticed you have a fair amount left pretty much all around and that is all good (except for one particular armor piece but we´ll get to that) but if you experience any pinching, resticted mobility or such, know that you have alot to work with before the armor looses that illusion of thickness - again, your overall look is great Let´s move on! Centurion Suggestions:In this section we prepare you for Centurion. More photos may be requested in the future that allow us to make better decisions on possible adjustment etc. If there are any areas of concern they will be discussed here. Because Centurion photos show much more detail than EIB, items pertaining to Centurion might be seen there and not here. We try to point out all we can from what is seen but the final accuracy is the responsibility of the trooper. Below you will find areas that will need to be adressed for a future succesfull Centurion Application unless otherwise specified. Let´s have at it! With the frown now beeing up to snuff we leave the helmet and go straight for the shoulders. As per CRL there should be a minimal gap between the shoulder armor and the chest/back plates. Tightening up the strapping should go a long way and also maybe double upp on the elastic between the chest and back as one can see it pulling out under the shoulder straps. I mentioned the return edges and though not manatory here, removing most of the lower edge will also help in bringing those bells closer. Moving down to the belt, as mentioned by your fellow Trooper, raising the belt to roughly were that blue line is would be a required fix. It could be as simple as adding some velcro in the center. Turning to the right side, ideally there´s no gap between the ab and kidney and yours is very close so thightening the belt is probably all that is needed. Switching to the left we see that the rivets don´t quite line up, could be a dressing issue as I can´t see were the ab and kidney meet top and bottom as it´s hidden by the belt and chest plate. If not a dressing issue then moving the rivet is a required fix and it could be either one as long as all three are equally spaced as seen in the ref pic below. I see in your internal strapping pic that you used split rivets so it´s an easy one. You did a good job in patching up Anovos "mistake" with having the Hero-configuration as default for the holster but for Centurion you will need a new belt and as such you will re-attach the holster and I suggest you move it a bit closer to the ammo belt, though not a mandatory fix but most of the Troopers had their holster closer to the ammo belt so why not go for it. Turning to the back we have the shoulders and by trimming down the lower return of the shoulder bells and tightening the straps up top as mentioned previosly will help to close that gap more. As per CRL There should be a minimal gap between the shoulder armor and the chest and back plates. You also have a shoulder bridge gone Rogue on you so strap that bad boy down with some Centurion grade 5mm white elastic. Here we have those return edges I spoke about, for Centurion there can´t be any on the wrist ends of the forearms so that would need to be trimmed. See ref pic. Again Congratulations on a successfull EIB application - great job I hope to see you back for your Centurion application and although it might seem like there´s alot to do it really isn´t and we all just want you to look your best! Now...prepare for your next Troop as the Empires newest Expert Infantry Man1 point
-
1 point
-
As Tony mentioned, GREAT job so far.. keep it up, and and this rate you will be trooping before you know it! If you haven't been there yet, I would highly recommend checking out the FISD blaster reference thread. TONS of detailed info there.. https://www.whitearmor.net/forum/topic/32111-fisd-e-11-blaster-reference/ Also, it looks as if you have been bitten by the "accuracy bug". Before starting on your Doopydoos E-11, I would suggest getting one of Tino's @T-Jayfinishing kits. Lots of items to bring you to the next levels of realism. https://www.whitearmor.net/forum/topic/28444-fs-completion-sets-for-e-11-resin-kits-with-worldwide-tracked-shipping-and-paypal/1 point
-
Lightspeed! Thanks for the quick turnaround and for bearing with us as we navigate the Command Staff transition. I'll be with you soon.1 point
-
Approval email received! Just need to wait for the election dust to settle and I'll have my TKID!1 point
-
Why not paramedics use it, ok maybe it's a little different Super Glue for Wound Closure article1 point
-
How am I just coming across this now? This is Legendary.1 point
-
Excellent! Well, thanks to several confirmations the consensus seems to be that that missing measurement on the holster cut out is indeed 1.5" So, I've uploaded a revised version of the template to my imgur so if anyone happens to be Googling for it, they'll be able to find it easier... So, this weekend, I set to and started making the holster. Really easy, just cut out the leather, burnished the edges, saddle-stitched the side and put in the snaps... Just waiting for some veg tan leather for the top strips (the only stuff I have is way too thick) and I intend to pop-rivet the holding strap only once I've got my E11 (Doopydoos kit is ordered and on its way) Boots-wise... I went over them with an entire bottle of Angelus Shoe Prep, left that 24 hours, then went over with acetone, left that 24 hours and then began painting... Decided to go slow-and-steady, one thin coat every twenty four hours... This is 3 coats in... Am now up to 4 coats and things are looking good, have left them > 48 hours and will wear them a bit around the house to see if there are any problems I need to touch up. I intend to go over with a coat of Fibings Resolene to put the final shine on things, but don't want to do that until I'm confident that the paint isn't going to peel/crack.1 point
-
Hi Aaron I have started on your application and we hit a snag on the helmet and more particularly on the frown. As per CRL: Frown is painted gray and does not leave the teeth area. Anovos has had some history with over spray and it´s clear yours do to. So in order to be able to continue and get you that EI badge I need you to remove the overspray and post a new pic when you are ready. But fear not, some mineral spirits, a tootpick, cotton swab or any other weapon of choice should have this cleand up in no time. As a bonus you have to option to give the frown some extra TLC for that gnarly ANH-look, the painting and trimming of the teeth on the screen helmets was far from prestine and in my opinion that added to the look we all love, I´m providing some reference to help you decide on how you want it to look - if you wonder anything, please don´t hesitate to ask1 point
-
Hey Aaron I will be doing your EIB review and yes please, I would like to see the inside fixings - thanks1 point
-
Looking smart, Aaron. Could we kindly request the following photos, please; Sniper knee - left, front, right Thigh ammo pack - fixings, inside and out Thanks in advance. Dan1 point
-
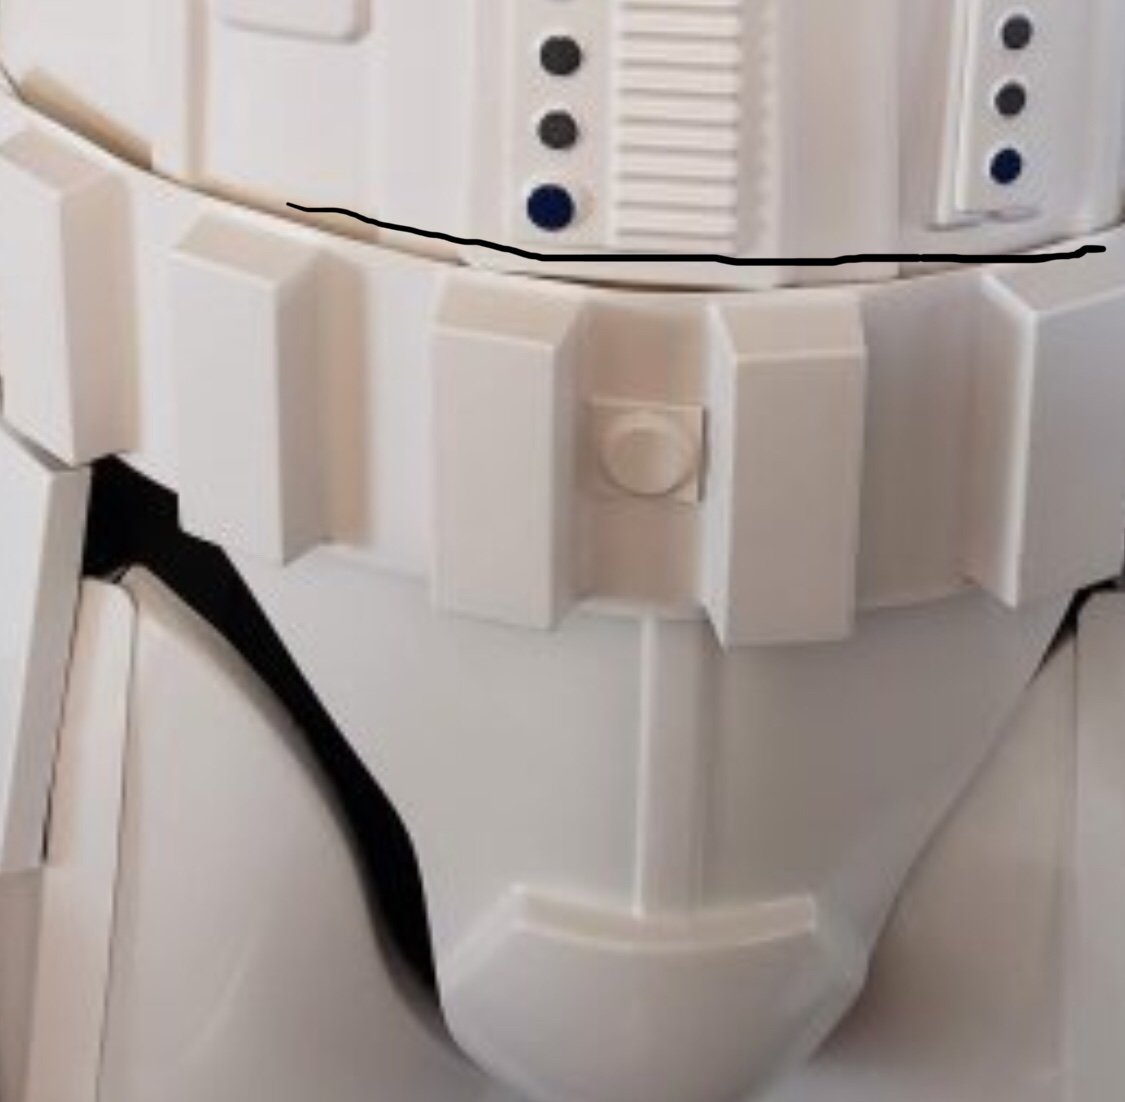
Looking good. If I can make a small recommendation. The top of the belt should be sitting at the bottomof the AB botton plate. Forgive my photo editing skills but I was trying to give you a visual. Good luck with your approval.
 1 point