Leaderboard


Popular Content
Showing content with the highest reputation on 02/02/2019 in Posts
-
Hi Marko, the power cylinders look great and that was a crazy cool idea to build the resistors from wood. Not sure about 3D printed front sight guards, but @fieldmarshalloffers his aluminum version and you could also contact Derrek (@Dday) to ask for a resin version.2 points
-
Costume Approval Information - Legion Elections 2019 With the Legion election period about to start February 2nd, the membership database will be in lock down, during this time new member applications through your local garrison/outpost can not be finalized, you may however still submit them but they won't be processed until the end of this cycle. This does not affect the addition of any new costumes to an active members roster/profile, however it does affect any membership status changes ie: active / reserve / retired and any personal information updates. The period of membership database lockdown for 2019 starts Feb 1 and ends @ Feb 19 (GMT). Thank you for your attention.1 point
-
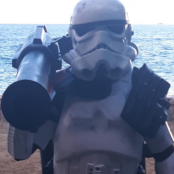
These photos are the same from my EIB submission. I have not gotten to the suggestions yet as I have been busy working on other costumes, and life got in the way. but everything for Centurion should be here. I will say that I will be doing the "extra push" to the things suggested in the EIB submission, but don't feel they will keep me from L3. Name: Jordan Garrison/Squad: Star/Imperial Rough Riders TK-21523 Armor = AM Helmet= AM Blaster= E-11 Hyperfirm Optional Height = 6'1" Weight = 215 Boots = TK Boots Canvas belt = unknown (Second hand) Hand Plates = Justjoseph63 Electronics= Voice Electronics Maker Neck Seal = Darman's Props Holster = Unknown (second hand) Here we go!1 point
-
Mathijs Hertogs Belgian Garisson Anovos Armor, Anovos Helmet Blaster is 3d printed updated with doopydoos parts. I updated the weathering on the Blaster. Not much. The handle and the back. I updated the mic tips I updated the overspray I updated the distance between the shoulder bells and the upper armor. I updated the hight of the belt and made it a little cleaner. This really is the tightest for me to wear this armor. I'm a sports guy and I have a muscular upper body. I can not wear the biceps parts higher than this. Also the shoulder bells cracked in the past and it took me some time to repair them. My pecks are pushing them upward a little but they are fixed close to the upper body. Thanks. MTFBWY1 point
-
Thanks guys, yes, just right after i postet this post yesterday, i saw Fieldmarshalls‘ post :-) I think i will go for that one :-) Gesendet von iPhone mit Tapatalk1 point
-
Here's the blaster. Lens on the counter, real Sterling trigger, functional selector switch.1 point
-
Saturday morning. The cover strips are pretty much done on the arms. Still a little bit of sanding to do, and one of the strips isn't stuck too well on one edge. I have clamped the front strip to the left shin. I'll let it set and work on the back strips for both shins this afternoon. Unlike Bud, I will make sure to put them on the right way the first time1 point
-
Done. Thanks1 point
-
I have screen accurate foam leaf liners available. I made my template after visiting RS and compared my template to the original foam leaf, then altered to match perfectly. My old template on top of the RS foam then changed afterwards.1 point
-
Bump. Since you will need to wait until after the 19th of Feb., I would recommend those of you who are ready to go for 501st basic approval submit your photos here first: https://www.whitearmor.net/forum/forum/191-tk-pre-approvals/ This will allow you to get some constructive/positive feedback and make any corrections if needed, which will make your submission go smoother. Good luck, future troopers!1 point
-
Probably will need to reinforce the inside and fill the seam at a minimum.1 point
-
So the seams will have to be filled and painted just like all the other armor joints that aren’t supposed to be visible just like all other kits? I hope nobody assumed this would just be slap together with no fillers and painting and get immediate approval. That’s an unrealistic assumption no matter what Anovos claims. Are you talking about directly over the shoulders where the back and front look like they overlap?1 point
-
China sort facility1 point
-
Although at this point I have no love for Anovos I will say that we shouldn’t pick apart the model assembly quality. I am sure they slapped this together for pictures and as we all know it’s the assembly and fitting quality that determines approval and qualification level.1 point
-
So after seeing prototypes when ever I pressed Anovos for an answer as to how the new armor wouldn't need filling or painting I would always get a run around answer, not getting exactly how this was achieved, now I see, one of the main places that does need gluing, filling and painting is now two pieces (top right of image), wonder if that's going to get 501st approved Closure on those biceps is a little sloppy Those gaskets are as floppy as my d__k after a cold shower What's up with those overlapping forearms to biceps, don't they know how these should look Miss something on that endcap of the TD? I better stop now or I'll be here all day1 point
-
Just made an E-11 blaster kit purchase from DoopyDoos. On the docket for tonight: torso sizing and strapping. Let's see if i can get it done in one shot xD1 point
-
Looking sharp trooper, know where's those photos1 point
-
Good luck. I’m rooting for you.1 point
-
Some awesome designs here guys, thank you to all those who submitted.1 point
-
Thanks for the tip. I haven't tried fitting the legs yet. I'm pretty fortunate to be 5'9" and 175lbs. Kind of the right size for off-the-shelf trooping, other than my oversized cranium apparently. Looks like there will be a mini armor-party at my place on the 9th. Thanks again to the community for helping out. I look forward to repaying this to all the future troopers.1 point
-
dont worry,,, idid not do this in a quick small run ... i will have these for the future...1 point
-
Looking good trooper. Good Luck with your submission1 point
-
Hi folks, thanks for the appreciation and the help, I am getting from you guys! Some time went by and i was able to go on working with some things on the blaster. The power cylinders were the last part i was working at. The cylinders got its wires at the front now... in addition to that i finished the screws at the cylinders directly as well. As i did not find the correct size of resistors for the braided wire sleeving, i decided to get a wooden piece and sand it down to the needed size. Here we are, the finished product :-)... thanks again to Tino who reacted very quickly on sending another insulation to me, really appreciate that! In addition to that i worked on attaching the end cab clip to the blaster. Still, my goal, to have every part attached in a removable way, is valid. The cab clip is attached with two screws. I counterbored them, to not having problems with the function of the clip itself. Another part has been started, the metal folding stock. I removed the old riffle part from in between of the folding stock. Next step will be, adding it to the blaste itself. One question at the end, does anybody know, if anyone of the 3D printing experts are offering the front sight for buying? Mine is broken and although i fixed it with metal pins, it is very instable. Thanks for your help and time! Marko1 point
-
APPROVED!1 point
-
It’s almost as if these are costumes from a low-budget 70’s movie!1 point
-
Thank you for the additional photos, Siu Kau, but we will need a few more for clarification. Please post at least one close-up photo (preferably a side view) of the bottom ear screws, and a close up of your rubber gloves. Thanks!1 point
-
I also attach detailed photos of the Hovi Mics that were not in my application. Thanks Enviado desde mi SM-G930F mediante Tapatalk1 point
-
The first thing I did when I started this project, was to order a resin kit from DD. Along with the M38, and the Hengstler as resin castings as well. So far I have remade the M38, the Hengstler, and now the Power Cylinders. And I will probably redo a few other things before I'm done. I Wonder If I will have a complete DD resin kit as spares. And could just these into the E11 I set out to build?1 point
-
Hello and welcome aboard, looking forward to the progress, good luck1 point
-
Welcome to FISD Congratulations on getting a great kit and rest assured, everyone here will help you in every way they can1 point