Leaderboard


Popular Content
Showing content with the highest reputation on 11/07/2018 in Posts
-
About time, right? Man, this has been ages in the making and is the result of many people working many months on this. You can see it all at https://databank.501st.com/databank/Costuming:TK_TFA_captain_phasma_TLJ GMLs, you may approve when ready4 points
-
Hello folks, excited for the time ahead... glue areas masked off, time to add grey primer paint to my scope! Pictures to come shortly!2 points
-
Here's a very brief overview of how to re-size thighs (or other armor, in my case it was thighs!) with a mix of scraps (always good to save what you can from trimming/assembly!) and some ABS paste. You will also need: * some spare ABS sheet (you can but it online, some use "For Sale" signs) * glue (E6000 or other) * sandpaper in several grits (I used: 80, 150, 320, 600, 800, 1000, 1500, 2000, and 2500) * a dust mask (ABS dust is probably bad for you) * ABS polish (Novus is what I used) In this case, I had to add several inches to my thighs, but this should work for biceps or other parts as well. The first thing I did was disassemble my thighs. I chose to do this in the back as they are flatter and thus less work would be needed (easier to find scraps to fit) and any gaffs (ABS paste isn't perfect!) would be less visible. I did a quick fit of my thigh armor to determine how much I would need to add, and then cut some spare ABS sheets to span the gap with an inner shim. I then used a heat gun and a large pot (that I use to fry turkey once a year) to give them a gentle curve so they would conform to my existing thigh curve - this will help with assembl versus gluing them on straight, which would probably work but may also add more stress to the gaps we'll be filling. I didn't take pictures here, but the process is simple. Lay your ABS sheet on the side of something round, heat it up with a gun (or an oven in a pinch) until it gets soft, it will start to "bend" and conform to the shape it is sitting on, take it nice and slow being careful not to scorch the plastic. Another quick test fit with the curved sheets to make sure everything still was good to go, then onto the next step: (Note: I used E6000 for all glueing in this process as it's easy to remove if you mess up and also somewhat flexible, but you could use the adhesive of your choice such as ABS cement.) Next, you will need some to rummage though your trimmings/scraps and find some bits and pieces that will work to span the gap you need to cover. You will also need some ABS paste: What is ABS paste? In summary, it is ABS shavings mixed with acetone to form a slurry that can be used to fill gaps and sanded/polished to help minimize gaps. There is a great article that goes into depth on how to make and use it here: (Quick note: I like to make small batches of ABS paste as I have noticed (and heard from others) that it can discolor over time, make just as much as I plan to use within 1-2 days just to be safe.) I went through my bag of scraps and found some bits that would work (3 per thigh, with a slight gap that should be covered by the cover strips). I had to modify a couple parts as they were originally from my shin armor so the curves were wrong, a little help with some pliers and a heat gun fixed them right up. Here they are after some slight trimming to fit, being glued down to the inner shims: After both thighs had dried, I trimmed the top and bottom of each thigh so they were flush with the existing curves, then put down a rough coat of ABS paste, using a combination of a toothpick and a razorblade to spread it out and shove it into the grooves. It helps to leave a millimeter or two so you have space for the paste, otherwise trying to force it into a hairline gap is very, very hard. I then sanded them down with some 80-grit sandpaper, then did another coat of ABS paste to fill in pockmarks, holes and goofs (not pictured). Here is my thighs after two rounds of sanding and filling, in this picture I am in the process of using 150-grit sandpaper on my left thigh (wear a mask!), you can still see the gooey ABS paste mess on the right thigh: Once I was happy with the results and was seeing no more low spots (in my experience it is near impossible to get rid of every small hole) I went on to increasingly finer grits of sandpaper, moving to wetsanding somewhere around 1000 grit: There is a great guide with more information here: After working my way up to 2500 grit, I then switched to Novus plastic polish. This is a two-stage polisher, here are my thighs after about half an hour of polishing: After that it all I had to do was re-attach the rear cover strips and I was ready for trooping: In summary - I wish I'd trimmed them correctly the first time, but this was a good learning experience and hopefully this will help others avoid the same mistake.2 points
-
Hey - back in '77 Star Wars was also marked at kids, and look how that turned out. ;-) It's smart for them to target the next generation of fans. Even for my kids (11 & 13) while they may like Star Wars and Empire, most of their favs are the newer movies like The Force Awakens and Rogue One.2 points
-
Thank you. I appreciate the the reminder. It's something that is going to happen as soon as possible. I am Active Duty Navy, and without getting into too much detail or breaking OPSEC, my deployment cycle over the past few years has been brutal (at best), hence the long build time. Since my introductory post, I have been sent on extended detachment twice. Hopefully now, things have calmed down enough to finally take some good pics and officially request "EIB" status.2 points
-
Name: Ron Brown Future Garrison: SCG Los Angeles Armor Maker: Armor Masters (AM) Helmet Maker: Armor Masters Cloth Belt Maker: Trooperbay Neck seal: Trooperbay Boot Maker: TK Boots Blaster Maker: Praetorian Blaster Height: 5' 8" Weight: 230 TK Type: ANH Stunt Mentor: Russell Rucker (russellr2d2) Others: Ethan Stiffelmann, Brian Hazzlrigg, Justin Reed, Brent Rudmann1 point
-
Nice! Can’t wait to this all together and painted up. AmZing work hollowing it out and adding the finest touches with the micro screws.1 point
-
When the time of primer and glue comes, you know the finish line is closing in fast1 point
-
If someone could figure out how to effectively stuff a VR headset in a bucket then more power to them. Would be a great workaround for visibility issues (especially bubble lenses).1 point
-
Just noticed this thread, Brien.... WOW! Incredible job on those shims, brother.1 point
-
Wow, had I known it was THAT easy, I would have done it months ago. Thanks! Sent from my iPad using Tapatalk1 point
-
Just the exterior, lol. I had a little too much free time on my hands a while back and wanted to go all out, so I used 3-D printed parts from files obtained from Leonardo (Ed Straeker) to do that. It's not screen accurate at all, but is based on what a TK helmet would look like if it were "real", so to speak as seen in the cutaway image (below) that it is based on. I took a bit of artistic license with it. Hint: When building your helmet, it really helps to look at some of the approved Centurion submission threads in the Advanced Tactics area to see what we are looking for, as well as common issues that need to be corrected. When in doubt, always ask before moving ahead.1 point
-
I have Plasti-dip in two of my buckets but went with black craft foam for my Hero (seen below). When using the Plasti-dip, be sure to sand down the inside with 120 grit sandpaper and then clean it thoroughly before applying, which will give it something to cling to. Otherwise it can peel off.1 point
-
I did something a little different. I lined my helmet with the fuzzy side of black velcro. This way it does not get caught in my hair or balaclava, but anything I need to attach (hearing, batteries, fans) all have the hook and I can place them anywhere. Top of the helmet is plasti-dipped.1 point
-
check this out on posting via Imgur1 point
-
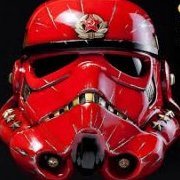
Thanks i m fan of Soviet Union and RKKA and NKVD theme. i am WW2 reenactor)1 point
-
While I wait for the BBB I started glueing my hand guards onto my gloves. Thanks to Joseph for the great Handguards. I’m using E6000 glue and painter tape and athletic tape as I ran out of painters tape. I’m currently ordering more painters tape. Sent from my iPhone using Tapatalk1 point
-
Yeah, it is definitely a kid's show. But hey, Star Wars is Star Wars.1 point
-
Congratulations and welcome! "If Only You Knew"- so accurate!1 point
-
Not bad so far. Agree another pass would help fill in some of the bubbles/low spots.1 point
-
Quick update Gap between kidney and ab plate now closed. TD screws replaced with correct pan head style. I will do another set of photos at the weekend in daylight. Look forward to your feedback, let me know if you require any additional pictures etc. Regards Sent from my iPhone using Tapatalk1 point
-
Just moving along here with more updates - remaining two screws for the side of the scope installed. Green stuff came to save the day having drilled holes a tad too wide. All good now but man, working with micro screws was pretty tedious. [emoji2957][emoji28] Sent from my SM-G390W using Tapatalk1 point
-
Thank you very much, sir. I'm very happy. I will review everything you tell me. Thanks Bros!!1 point
-
The Velcro option works great for a lot of people, but like Cricket I have also handled and fixed a fair amount of shins that popped open during troops (floppy thigh ammo packs are a close second). I've also seen a fair amount of photos posted publicly where the closure has noticeably failed. I will say that if you at least properly align the backs of your shins and/or give them a hot bath so that the Velcro isn't being strained you shouldn't have any issues. Most of the failures I've noted in person is when the back halves of the shins are naturally pulling away from each other. That said, I'll echo the comments that the magnet closures are basically fire and forget, no assistance needed, no worries of them coming open, and you know they'll look just how you intended them to without any extra effort. And there's just something about them clicking shut around your leg that's kinda fun.1 point
-
Doing the shins was daunting and took multiple reads on crickets how-to in order to understand how to build them. And you really should leave them for the 72 hours so they can fully cure. For me, it is seeing the other TK's put on their shins and make sure they line up, and all I have to do is snap mine one and I am onto the next piece of armor.1 point
-
In my opinion, no, because nothing Rubies does looks very good. That is, it looks terrible to the discerning eye of those who really know props, however I have found that even a lot of the general public can tell their TK helmets are off (maybe not in detail why, but just not right). I haven't seen the Rubies Phasma helmet, but I can only assume based on everything else they put out it's the same. For the price of Rubies, you're not very far off from getting it from a reputable seller and having it be truly accurate. I'd check out Jimmi or Shawn Thorrson, they sell helmets individually.1 point
-
A AA - Andrew A., the self-proclaimed original maker of screen-used helmets and armor. ABS - Acrylonitrile-Butadiene-Styrene, a lightweight, rigid thermoplastic used to form white armor. ACD - Armored Calvary Detachment AFX - Armor FX, a supplier/producer/brand of stormtrooper armor. AKA - Also known as (i.e. alias) ANH - A New Hope, Star Wars Episode IV. AP - Authentic Props. A maker of ANH style armor. B BBY - Before the Battle of Yavin. BSN - Bikerscout.net, the official website of the scout trooper detachment. BFG - Big freaking gun, reference to a SW weapon based off of a machine gun, rifle, etc. Essentially any SW blaster aside from sidearms or carbine sized C C1 or CI - Star Wars Celebration I (1999). C2 or CII - Star Wars Celebration II (2002). C3 or CIII - Star Wars Celebration III (2005). C4 or CIV Star Wars Celebration IV (2007). C5 or CV - Star Wars Celebration VI (2010). C6 or CVI - Star Wars Celebration VI (2012). CO - Commanding Officer. CTN - Clonetroopers.net, the official website of the clonetroopers detachment. CRL - Costume Reference Library (http://www.501st.com/crl/index.php) D D*C - Dragon Con, a large sci-fi convention held annually in Atlanta, Georgia (USA). D.O. - Deployment Officer. Responsible for approving level 2 (Expert Infantry) and level 3 (Centurion) TK armor. DL - Detachment Leader, elected head of a detachment. DOA - Dead on arrival, often used to indicate something was broken when you received it. E ECG - Empire City Garrison EIB - Expert Infantry Badge (nee Elite, nee Mark) (http://whitear...?showtopic=8583) ESB - Empire Strikes Back, Star Wars Episode V. EU - Expanded Universe, a term often applied to anything Star Wars that was not seen in the six films themselves. F FIDM - Fashion Institute of Design Merchandising FRS - Family Radio Service, a small and relatively inexpensive two-way radio system. FISD- First Imperial Stormtrooper Detachment-The official website of the 501st stormtrooper detachment. FO- First Order. FX - Generally refers to Armor FX, a supplier/producer/brand of stormtrooper armor. G GF - Gerardo F., a one-time maker of screen accurate stormtrooper armor as well as the original FX sculpts GL - George Lucas. GT - Galaxy Trading : an early purveyor of armor H HWT - Heavy Weapons Trooper, a kind of Stormtrooper found in the EU (Expanded universe). HIPS - High Impact Polystyrene, a kind of hard but brittle plastic. Most common after ABS used for Vacuum forming Stormtrooper armor. Cheaper but more fragile than ABS. I I.A. (or IA) - Imperial Attache. Extended Staff members who assist new members and liaise with the FISD and their local unit. K KOTOR - Knights of the Old Republic KS - Kropserkel L LFL - Lucasfilm Limited LOL - Laugh out loud. M MEPD - MEPD.net Mos Eisley Police Department. A 501st detachment dedicated to the armor and equipment used by the Sandtroopers shown in Star Wars: A New Hope. MG - Mountain Garrison. MOM - Magic of Myth, a traveling exhibit of Star Wars props that toured years ago. MOTF - Matters of the Force, the Star Wars programming track at Dragon Con. MWG - Midwest Garrison. N NEG - New England Garrison. NER - Northeast Remnant garrison. O OL - Outpost Leader (equivalent of a CO). OLG - Old Line Garrison. OS - Outpost Second (equivalent of an XO). OT - Original Trilogy (Episode 4-6) P PA - Polymer Armory, a maker of clone armor PVC - Polyvinyl chloride, a thermoplastic resin commonly used to create plastic pipes. PT - Pirate Trooper (A recaster) / Prequel Trilogy (Episode 1-3) R RA - Richie's Armor RC - Republic Commando. RL - Rebel Legion. ROTJ - Return of the Jedi, Star Wars Episode VI. RPF - Replica Props Forum, a non-501st forum for prop replication information sharing. RS - Rebelscum.com, a website for the Star Wars collector. RT-MOD - a supplier/producer/brand of fan-sculpted stormtrooper armor. S SC - Studio Creations SDCC - San Diego Comic Con, a large sci-fi con held annually in San Diego, California (USA). SDS - Shepperton Studios SF - Star Fortress: a maker of many costumes and props that is shunned as the owner is a wanted pedophile. SL - Squad Leader, or Sith Lord SWW - Disney/MGM Studios Star Wars Weekends events held every summer in Orlando, Florida (USA). T TAG - Terror Australis Garrison TB - 501st Costume designation for Biker Scout TBA - To be announced. TBD - To be determined. TD - 501st Costume designation for Sandtroopers and Heavy Weapons Troopers TDH - The Dented Helmet, a non-501st forum for Fett and related costuming discussions. TE -Trooper Expert, the original supplier/producer/brand of ANH stormtrooper armor. TFA- The Force Awakens TFN - theforce.net, the official website of the Fan Force. TFT - Toys for Tots, a U.S. charity that collects toys for Christmas distribution. TK - 501st Costume designation for Stormtroopers TLJ- The Last Jedi TM - Trooper Master, a supplier/producer/brand of stormtrooper armor. TOD - Tour of duty, a record of your event attendance and participation. U UKG - United Kingdom Garrison. V VoNC - Vote of No Confidence. W WTF - Walt's Trooper Factory. "Vetted" TK armorer. X XO - Executive Officer.1 point