Leaderboard


Popular Content
Showing content with the highest reputation on 08/03/2018 in all areas
-
We're busy but we'll be with you shortly2 points
-
I was told to trim it, so I did. There are examples of the coverstrip being trimmed in this fashion on the RS suit as well. So - I don't think you have to, but I would recommend it as a comfort and durability item (it can get caught on things).2 points
-
i checked out your build and application. I hope you get it man, its really beautiful. I would not be surprised if you are one of the... first or first few ROTK's requesting that level. I wouldn't worry.2 points
-
Well its BBB day for the wife, she will be doing a WIP within her local garrison but as i am helping through out the build, thought i would post here as well so I/we can get additional feedback along the way. we managed to get hold of a old untouched KW kit which was marked #005 and helmet #006 and boots. whole thread will probably be pic heavy and will try and lay it out well due to experience from my build thanks for looking1 point
-
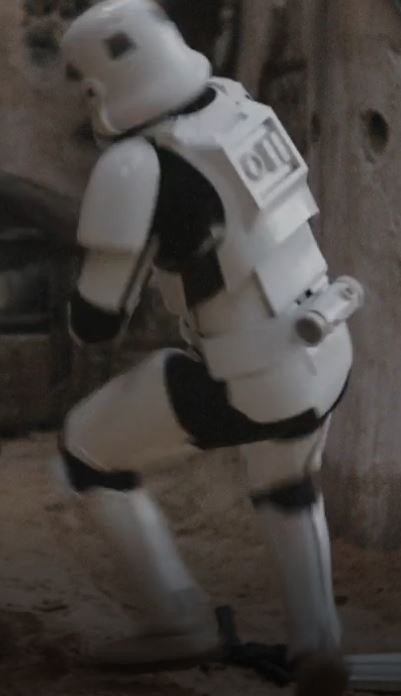
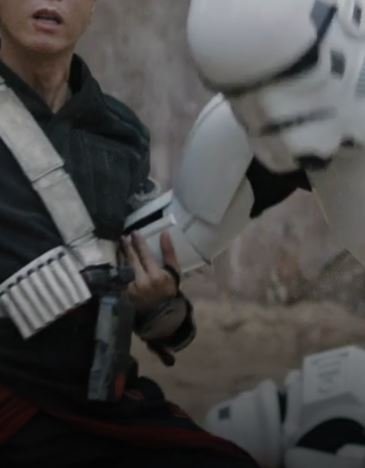
Hey There! A BBB is enroute to me today from across the pond, arriving tomorrow!!! I'm so excited that I want to share. Ahhhhhh, so flippin' excited. I'm currently working on finishing up my WTF Hero build for a garrison friend, and that build will continue (documented on that thread) until she's got full approval. She's aiming for Centurion, so fingers crossed that I can get her there! In the meantime, I get to do my third TK build. The RS Hero TK! Yay! (This build wouldn't be happening at all without @TheSwede and his input, so... Thank you, Daniel!) In the meantime, since I don't have any BBB pics yet, I will share a few choice pics from last weekend's troop. Wearing my RS Stunt TK, of course. First, the ANH scene we recreated... Next, an official BadA$$ pic... Then when Vader left, we goofed off... See y'all soon!1 point
-
http://501st.com/members/displaymemberdetails.php?userID=28607 I started my Jimmiroquai Rogue One TK on April 2nd and was approved on July 22nd. I got this kit to celebrate my 50th birthday. This kit is very different from OT TKs in many ways but perhaps the single largest difference (from a construction perspective) is that it is made of flexible fiberglass rather than HIPS. It must be painted and most of the problems I have run into have been centered on paint more than any other aspect. I have been told that my build thread here in FISD is pretty extensive and comprehensive so I will not rehash all the good and bad things that came from the build. I will simply provide a link to the thread and anyone wanting to read through it can do so. https://www.whitearmor.net/forum/topic/44463-11b30b4’s-rotk-build/ I chose the Rogue One TK because of the detail and I loved Rogue One. This is not my first costume. I have been an active member of the Mandalorian Mercs since January 2018 and have been told that my Mando build was equally extensive. So now I will be seeking EIB and Centurion for my ROTK. I am very excited to be an official member of the 501st and I have been blown away with the support of all the members who helped me along the way. I would like to thank the following members for all their help and assistance: 6306 Thumpy~ Support and recommendations on FISD 42114 Bulldog44 Support and recommendations on FISD and making an awesome scope. 3276 zv288bot Support and recommendations on FISD and in GA Garrison ????? LTM Support and recommendations on FISD and in GA Garrison ????? sskunky Support and recommendations on FISD ????? Zeddy Support and recommendations on FISD ????? GilFran007 Support and recommendations on FISD 10911 themaninthesuitcase Support and recommendations on FISD 72822 Dragon_a Support and recommendations on FISD ????? cbrant Support and recommendations on FISD ????? THMAustin Support and recommendations on FISD 8867 sandtrooper Support and recommendations on FISD 76253 TKSnake Support and recommendations on FISD 55550 Ripper_L Support and recommendations on FISD ????? mikebrierly Support and recommendations on FISD ????? Zsherman Support and recommendations on FISD And a very special thanks to the following members for their selfless contributions and most constructive assistance, without your input, I would not have been able to complete this kit. 8198 Ramblin Trooper For all his assistance and hosting Armor Parties 1183 Lonewolf For all his assistance and hosting Armor Parties ????? Big Deal Support and recommendations on FISD 82214 DEVOLVER Support and recommendations on FISD 10116 ukswrath Support and recommendations on FISD 35679 darthcue Support and recommendations on FISD 18545 Azrok (GA Garrison GML) Thanks for approving my kit and your humbling complements.1 point
-
I really love builds like this. It's so close to they way they actually went about fiddling with these weapons in creation.1 point
-
well since its mostly just paint now...just more complete build pics1 point
-
This is looking really good Kyle, cant wait to see what you post next!1 point
-
Alright. Somewhat nice update here. So I worked on painting the calves and the Yoke this week. Paint went well overall. I was then able to attach velcro to the calves inner seam now too. My compression shirt and pants came in too. So I figured it was time for a quick few pictures. Here's the closer look a the back of the yoke.1 point
-
1 point
-
For the baton, I see no evidence that it has to be telescoping, and agree that it's most likely the one like the patrol trooper. I'd like to udpate the CRL to reflect this, and also allow cordura for the hoslter, as again it's not clear at all that this has to be leather. Plus, I'll add a note about the silver tip being visible on the bottom. Any objections? And, if somone can get me a clear pix of one, that would be ideal, as the CRL shows the telescoping one.1 point
-
Ear bumps and tube stripe questions are fixed. As for the biceps & forearms, if there is a clear screen cap to show that they are using overlap, then it's an easy fix to the CRL. It's been ages since I last looked at this, so if someone is willing to play detective...1 point
-
Heat gun used on the ammo belt to get it to conform to the thigh band a little better. Temporary screws in place in case anyone sees anything wrong, if good to go I will use the rivets. So the pictures are all over the place on centering the ammo pack on the ridge or off to the side. Based on gallery pictures the ends of the ammo belt go to the rear of the thigh, so using the back as the starting point I wrapped around and just had enough material. Cut off 16mm on each side. On this shot I took out the big bends and got it a little more round. Nice view when looking down I did the 6mm from the end and 10mm for the ammo belt, it all lines up now and conforms to the sides Side view with the swoop cut out (used a vegetable can as a template)1 point
-
Coming along nicely mate , like the improvement1 point
-
Congrats on BBB Day! Looking foward to your build thread! Good Luck Future Trooper!1 point
-
What he ^^^ said1 point
-
Hello and welcome aboard!1 point
-
If it were me, I’d check out some of the approved RS Centurion applications to check the fitting. As you have RS, you basically can’t get more accurate armour, so with the right positioning you will be able to get screen accurate. Just remember, the originals were not perfect. But, you can replicate the imperfections of the RS/screen used kits. These are certainly not straight, however they are perfectly imperfect (aka, ANH [emoji6])1 point
-
Let the fun begin! Sent from my iPhone using Tapatalk1 point
-
Congrats on your BBB day! Enjoy the build!1 point
-
Makes perfect sense to me, trimmed down it is. Thanks!1 point
-
Glad to hear you finally received it. Time to start building .1 point
-
Ok guys, thanks for the advice @CableGuy I should easily be able to cut the two plates a bit smaller, with the brow I'm not too sure about how to do that - I think I just screwed up the face placement in the process of putting the rivets into the helmet. But I'll talk to people at a German garrison event tomorrow, and they should know how to solve the issue as well @TheSwede cheers for that, I'll just sneak up to a couple of TKs on Saturday and listen closely1 point
-
Appreciate the input! Removing the upper return edge on the thighs was always the plan, I think that was one of the first line items I wrote in my notes after seeing it advised so many times. lol ------------------------- A little update, both the first forearm and bicep are completely assembled with cover strips and inner strips. Now on to the next arm! Question: Is it required to trim down the cover strips between the points where the arm halves didn't line up? The reference picture for the bicep in the CRL shows untrimmed cover strips & there's no mention of it, so I'm guessing it's not required, yet all of the reference photos I've saved from build threads over the last few months have them trimmed at those spots. So I'm assuming it's to prevent the strips from digging into your arm at those points, especially on the top side of the forearm. I also painted the TD & popped on the end caps (not glued yet) to make sure I masked it off properly. I'll start assembling that once I get the next arm pieces glued up.1 point
-
Welllllllll, I posted my request for EIB on Monday and have heard nothing since. Not one post.... I assume the EIB approval guys are either way busy or they just dont know what to do with a ROTK. Anyway, here is the link. https://www.whitearmor.net/forum/topic/45329-tk-20980-requesting-rotk-eib-status/1 point
-
Thanks guys! So hungry for the front lines1 point
-
Butt flare is a common ”Trooper-issue” and yours isn’t that bad but if you like you could try moving the snaps closer to the edges, use kidney plate to determine placement and/or a hot water-bath to shape it more inwards and you won’t be sneeking up on any rebels I’m afraid - noise is to be expected but hey.. we only do full-out assaults anyway1 point
-
Hi Freddy, Overall, that’s really coming on nicely! Nicely fitted to you. I would just throw in a couple of things. Personally, I would want to reduce the size of both ab plate buttons, straighten the helmet brow and replace or amend the thigh ammo pack. The big plate is “okay”, but could be smaller as per screen used. The smaller one, to me, is definitely too big. The brow is an easy fix. How high the brow goes is personal preference, however, getting it straight will look nicer for trooping. The thigh ammo pack looks like it is trimmed too much. The curvature radius looks too big. Here’s a great ref; Personally, I’d probably consider either filling the holes with ABS paste and trying again or sourcing another ammo pack and starting again. With such a good job in your blaster and the rest of the armour, this will stand out (and possibly not clear) as it is. Keep up the good work. :-) Best wishes Dan1 point
-
It would depend on the "reshaping" because you can change the overall look, which may not allow you to be approved. it really shouldn't be an issue unless its just bothering you that much. I wouldn't touch it, but that's just me.1 point
-
I am thinking of DIY my hand plates but Jim is near my location so ordering from him is not really that a hassle. Sent from my iPhone using Tapatalk1 point
-
Sskunky, thank you. Zsherman, thank you. Ok guys, I have a question for those of you who have a Rogue One kit. Do you have issues with the lewer leg armor (shin/calf armor) rotating outwards when you walk? Even with the flex seal lining on the inside and the foam under the knee, these pieces keep rotating when I walk. They do not fit loosely, so I have no idea why they are rotating and how to stop it. Update, Well I have masked off and painted the two outer teeth on the helmet. After my last group of photos I noticed that when I removed one of the lower leg armors the Velcro pulled away from the armor and took the paint with it. For whatever reason, the paint did not stick to the primer here. So I masked off the area and repainted it. After 45 minutes, I applied a layer of clear gloss and let it dry. Tomorrow, I will reapply Velcro and it will cover most of the area. And here are the new pics of the helmet. Once FISD decides to update my account to Stormtrooper I will be able to apply for EIB and Centurion. And that is it for the update. Thanks for the interest.1 point
-
You could also watch this, the man himself1 point
-
Hey all. As promised its JULY! So that means starting on my armor. I have purchased most of the parts I need for initial build and started gathering rest of the soft parts. I ordered the Legacy Stormtrooper from KW designs like everyone else. I have about a weeks worth of trimming and sanding done. Need about another week to finish that part. As I stated in my introduction thread I am very short at 5'0" and not thin. I will have some shortening to do on most pieces. I foresee the biggest challenge being the torso as it is about 4" longer than my torso. I feel like I started off with an advantage because I not only had the opportunity to attend a local armor party, but another attendee had made this armor for his wife so he was able to give me some starting pointers. Thanks Chris Berban! SO without further ado, here is my progress so far. First started with inventory, like you do... No way to get that back in the box, because Kevin is a wizard... or Hermione Granger's cousin or something... Oh well, now on to trimming1 point
-
Ok, No laughing... first try-on. Keep in mind that I learned during the try on that one of my thigh straps was to long so its sagging just a smidge and my shoulder bells didn't have the snap on yet. The belt was not on cause I wanted to fit the rest. And I just have yet to finish the TD cause I am still trying to figure out if I want to do Statue version or Comic Book. that decision is harder than I thought I would be. I think one day at ATXCC will help me decide if I can troop in the heels. without further ado I give you, a VERY short Legacy Stormtrooper! [/uR Please begin the critique/tutelage/advice portion of our discussion.........NOW!1 point
-
This is a really great build thread for someone that needs to alter the armor. Great job in the Ab Plate mod!!!! Kevin W.1 point
-
Next important step was to try it on all the little girls that have been at my house all weekend. DO NOT SKIP THIS STEP! CHECK!1 point
-
Looking great! Fantastic build thread, btw I think the mic tips look good. Did you back them inside the helmet? The ABS is really, really thin where the mic tips are screwed in. Once in a while an overeager child may grab at your bucket, and the mic tip post could rip through the thin ABS right there. Simply glue a small circle of ABS scrap inside the helmet and that solves that issue right away!1 point