Leaderboard


Popular Content
Showing content with the highest reputation on 08/01/2018 in all areas
-
Last major weathering hurdle - the bucket. There isn’t much reference for the left side or back so I took some artistic license. I still need to attach the Hovi mics and install the lens. Reference Sent from my iPhone using Tapatalk2 points
-
I've hunted and searched and finally have the proof. Now let's add that dlt19 to the crl what say you? Sent from my SM-G955U using Tapatalk1 point
-
Do you have a Bon-Ton store near you? If so, it won't be there much longer. Some 260 stores in 24 states are closing and have been doing sales out the wazoo for the last several weeks. They've recently put their store fixtures up for grabs, including mannequins. Not sure when they started that, but the ones I saw today have been marked down several times. Here's what my local store in Wilkes-Barre, Pa., looked like this morning: Geez, would you look at that? I thought I'd wandered onto the set of the Westworld lower level. I've been thinking about making a mannequin but when I saw a pop-up ad about Bon-Ton's last days, it occurred to me that they might be selling fixtures so I went to check it out. Glad I did. I grabbed this torso mannequin: The price for this? Less than 20 bucks; to be exact it was $19.50. Seriously. It's perfect for how I intend to use it and I'll be able to put the entire upper part of my TK armor on it. If I ever want to add the legs later, that'll be easy to do with some simple PVC stands inside the armor pieces, propped up below the torso. This mannequin is on the large side, and the shoulders match mine pretty closely, which is what I wanted. And -- what are the odds!! -- it even has six-pack abs like mine. Wait, did I say six-pack abs? I meant just a six pack like mine. I have two six packs, actually, and both are in the refrigerator where they belong. Anyway, if you're looking for a mannequin and have an about-to-be-closed Bon-Ton near you, check it out. You're welcome. A.J.1 point
-
Good news guys: Just got approved! I am now TK-17042! Thanks for all of the help!1 point
-
second the E60001 point
-
I didn't use E6000 at all in my build. I used Amazing Goop, but its basically the same thing. so yes E6000 would be what to use. This way you can easily remove the strap later if needed.1 point
-
Im with Wook on this one. elastic will be better for mobility, I just glued mine in. that part of the arm you are going to want to be flexible for when you are reaching out and such. it may all just depend on how tight the armor already is as well.1 point
-
I've done both. Using snaps does give you an easy option for replacing worn out elastic (when/if the day comes). Getting the spacing right with gluing was actually easier - but that is because I suck at snaps. I would avoid webbing here - some flexibility is good. I put my straps along the coverstrip seam - so they need to flex a bit.1 point
-
I glued my elastic there. Some Troopers use snaps to make storage easier but I do not have that issue. For elastic vs webbing think of it this way. Webbing for when you want to control movement elastic if you want it to have some give. For me I feel elastic is better as it makes it a tad easier to slide the bicep and arm like a sleeve and the forearm will stretch a bit rather than being rugged.1 point
-
Don’t worry about them rubbing. That’s perfectly normal. :-)1 point
-
Thanks. Yeah, I used images from this site a lot. Like Daniel mentioned, my helmet is the "stop that ship" guy, but both helmets were well photographed after the fact. Starwarshelmets.com is great reading for anyone in this hobby for sure!1 point
-
No. Three teeth per side. I forgot to use the flash when I took the pictures. - everything looks so dark.1 point
-
Don’t know who I thought I had to velcro it shut. Sewed it. Sent from my iPhone using Tapatalk1 point
-
Greg is doing the ”stop that ship-Trooper” which is a different helmet, they do a comparision in the one you linked though and another article with just the ”stop that ship” http://www.starwarshelmets.com/original-stormtrooper-stop-that-ship-helmet.htm but @wook1138 have you cut a 4th tooth?1 point
-
1 point
-
Absolutely, so long as they're correct on the outside1 point
-
Jeff is correct on both points. For the sake of argument here's a reference pic of the stunt helmet.1 point
-
I think your brow trim is fine. I've seen straight and angled. Good work!1 point
-
So I believe I've found a decent enough cocking handle replacement. Thanks the 420 gods, I joke but a friend had a piece of a glass pipe break and this was that piece, not a smoker myself. However it looks decent enough. The salvaging continues. Sent from my VK815 using Tapatalk1 point
-
Hi Is this better on the frown? Regards Andy Sent from my F5121 using Tapatalk1 point
-
The advantage of this method is that you can make the pieces or redo them as is more convenient. The Shin is closed but it can opened.1 point
-
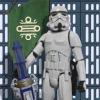
Behold! The Witch-King of Angmar!1 point
-
Cover strips with E6000 Made snaps for the posterior, used plastic and spaced it so that the metal does not touch the outside plastic Doubled up the connections1 point
-
Camera shy? Not so much.. Sent from my iPhone using Tapatalk1 point
-
AWESOME!!! Thank you so much! I will definitely clean up that E-6000 and adjust my shoulder straps. That connection was puzzling - I knew it was weird but couldn't figure out how to modify it. I really appreciate the advice. I'll fix those boxes and get my new pics soon! On to Centurion1 point
-
Put on the first "coat" of abs paste on the back pack and as it dries/hardens I turned my attention to the belt. The rubber part of it was too wide so time to cut again…..used the fabric part that was included as guide (2") could just as easily used a ruler...the belt kit was a 2 part so I got the sponge (closed cell foam) from ebay. Started cutting and....hmmm...that smaller rubber band reminds me of something…. Liquorice!!!! After a well deserved treat it was time to cut the sponge and had it laid out for marking when it hit me Why not peel the adhesive and secure it, surely that`s gotta be easier and faster?! and---so I did, made a little rubber roll and placed it on the sponge and...well...rolled it on cut it and that`s that. And with all three layers (not cut to size yet though)1 point
-
Coming along nicely. Just a tip with painting masked areas, if you use some white first it will fill in any gaps in the masking tape then you can paint black over the top and it shouldn't bleed I actually found it easier to paint the whole helmet white, then mask, a quick coat of white to fill the masking area then black over the top.1 point
-
Nice edition to the collection arrived today1 point
-
Funny you should mention that...lol there was a whole discussion about this awhile ago... It has measurements and discussion... a good read,,, and not to long... http://whitearmor.net/forum/index.php?showtopic=1094 Boozel1 point