Leaderboard


Popular Content
Showing content with the highest reputation on 06/09/2018 in all areas
-
Great thread so far. [emoji1303] Regarding the brow, personally I’d always have a small gap above the eyes for ‘stunt’ lids. Whilst the odd one here and there had a lower brow (similar to Hero), most Stunt helmets had a ‘normal’ height brow. Dan :-) Sent from my iPhone using Tapatalk2 points
-
That time has finally come. The long anticipated, often lamented, childlike (as in a Christmas Story - level) anticipation for something yet to come. The almighty Big Brown Box Day! Yes, a big box of fun with an invoice no less entertaining. My "Men's cotton & silk fancy dress costume" (inside reference from Paul - Troopmaster) extraordinaire) which sat on my porch awaiting my euphoric yelp that could be heard from the far side of my cul-de-sac. The package contents were well protected with individually bubble-wrapped pieces of beautifully sculpted armor. Thanks Paul! Challenge accepted... Now the real fun begins :-)2 points
-
Greetings and salutations fellow troopers. At long last I have received my FOTK kit. It has been a long road that started in June 2016. Anovos unveiled a Premier FOTK kit that was promised to ship in Sept 2016. Welllllllllll, that kit still hasn't shipped to the poor folks who purchased that. I jumped out back in March and ordered a kit from KB Props. Unfortunately, life got in the way for KB but at long last I received most of my TFA kit last week. I was hopeful to suit up for the Ep 8 premier as a member of the First Order, but that just isn't realistically going to happen. I say "most" as there are few little pieces missing, namely the hand guards and the TD "holder" (the 3 ridged piece), which KB will send soon. Also coming from KB is an executioner "upgrade" kit with a black yoke, second back piece and black shoulder bells. I already have a TFA FOTK helmet from Anovos and have the Executioner helmet on order from them too, for now. Surprising to nobody, it has been delayed to next quarter. Goal: Basic approval for TFA FOTK and TLJ Executioner. The builds are similar enough that I hope to get two costumes out of only a little extra effort. By documenting my build and efforts to achieve that goal, I hope and seek your input as I progress on how to best accomplish this goal. Quick Links for my own convenience: Inspiration Build Threads: The great and always thorough Ukswrath's thread. Ruthar's Fabulous KB Build TFA FOTK CRL TLJ Executioner CRL Previous Build Experience: Anovos ANH-S, Centurion certification. Body Stats: Since this matters to some people considering a build, I am providing my body composition at time of build. Ht - 6 ft 0 in (1.83 meters) Wt - 205 lbs (93 kg) Somewhere between Mesomorph and Endomorph body type (I'm muscular but I also like ice cream ) Parts Origin: Buckets: Anovos Standard Line TFA and Anovos TLJ FOTK Helmet from Star Wars: Galaxy's Edge Kit: KB Props FOTK + Executioner add-on Helmet Fans - Henry's Helmet Fans Helmet Audio - Ukswrath's FO Audio kit Gaskets: Geeky Pink's Phantastic Gaskets - Cloth Boots/Gloves: Imperial Boots Belt: Belts of the First Order Blasters - Hestonkent's F-11D blaster with shoulder stock. Laser Axe from Stormtrooper on Weekends Supplies/Tools: Belt Sander - Others have sworn by this and I am now one of them. Great for quick sanding and creating a nice clean straight edge for seams. Contour Gauge - great for trimming the Ab boxes! Gaffer's Tape Heat Gun Industrial Strength Velcro - white, low profile, 3'x1" Lexan Scissors - curved and straight Neodymium 1.26" x 1/8" disc magnets x 6 Needle File Set - for pill holes and general filing needs Rotary Tool Tungsten Carbide Dremel Tip - for the pill holes. Weld-On ABS Cement - 1 Quart (1 Pint would probably be enough) Build Chapters: 1. Trimming (Admittedly, I do not go into great detail on how to trim most of KB's armor outside of the below links, you are better served looking elsewhere for this info) Miscellaneous Trimming Stuff Shin Accuracy Ab Boxes Chest Hole Filing Pill Hole Drilling (Chest, Biceps, Shins) 2. Assembly Ab/Kidney (bottom of linked post) Ab Box bolting to Ab piece Biceps Pt 1 Biceps Pt 2 Forearms Greeblie Sanding and Shaping Seam Filling (Forearms, Shin Boxes, Ab Kidney) Seam Filling (Yoke) Shoulder Bells (towards the middle of the linked post) Shin Boxes Shin Closure Overlap Spats Pt 1 (middle of the post) Spats Pt 2 Thermal Detonator Pt 1 Thermal Detonator Pt 2 Thighs Thigh Holster Yoke 3. Painting My FOTK was pro painted by a friend so this is mostly about preparation for that. I will be painting the black pieces of the Executioner Yoke and Bells and will update when I do that) Paint Prep Paint Progress 4. Strapping Ab/Kidney Magnetic Closures Belt Butt Plate to Back Chest to Back Cod to Ab Decal Application Gaffers Tape (Shins, Biceps, Chest) Gaskets Velcro Hand Plates Knee Plates Posterior Prep (towards the bottom of the linked post) Shins Shoulder Bell to Yoke Spats Thigh Supports 5. Progress Checks First Test Fitting Second Test Fitting (upper body mostly) Submission Photos Epilogue: 18 months later... Finishing up the Executioner costume.1 point
-
I got a brown box yesterday. Not THE Brown Box, but A brown box, it had my boots in it, and my heart fluttered when I saw it. I can hardly imagine how I'm going to feel when I see *the* BBB if just this little one made me feel so many feelings. I can't wait even more now. (Grubby work bench didn't seem worthy of holding it - but such is work) As seen in the title, I'm Lorelei, and Cricket's build thread has left me quite confident that I can attain Centurion as an ANH stunt TK despite being 5'4", 120lbs (thank you, Cricket!). I hope to make this an inspirational thread... or maybe it will all go to pot, and we can have a jolly good laugh while I order replacement parts. I can see it going either way. Regardless, I'm not going to quit until it's up to snuff. Join me! Joseph's list of required build items seems quite daunting, but I'm working on it. My build notes are getting longer and longer... but here's what's what with anything that's anything. Starting with the easy one: BOOTS Totally Killer Boots. Got my small female foot sized in a large men's Brannock device at a shoe store to have the best shot at a good fit despite the men's-only custom-ish nature of TK Boots' boots. They fit perfectly! I got some of their "less than perfect" ones, available upon request, and they're *hardly* less than perfect. So I'd say if they're out of your size, definitely investigate the "less than perfect" option. ARMOR On the ATA wait list as of 5/25. I read good things about ATA and the price was pretty good, too. Since I'm still working on my Seventh Sister garb, I'm fine with the longer wait time. I'm fine with it. I'm fine with it. Maybe if I repeat it enough, it'll be true... SOFT GOODS I'm going to make my own neck seal. Once I draft the pattern, I'll start the fabric hunt. I've read a couple posts with recommendations on fabric types - think I have a good idea of the desired effect. I'll also make my own belt. I need small rubber gloves. Heard there were some at Walmart a couple years ago. May add nomex later, but need rubber for sure. I have had the worst time finding an undersuit! I don't want to spend a small fortune on UnderArmour, and the EastBay shirt I got was baggy around the elbows. I think my best bet will be getting a dancewear catsuit. I have these tiny little stick figure arms and I'm petrified of having baggy elbows showing between my armor... I've also heard good things about Lycra dive skins, but I'm sick of paying return shipping charges and am, sadly, not in surf shop country. Recommendations from other skinny-armed folks greatly appreciated! BLASTER What's the deal with the blaster, anyway? The 501st doesn't require them for admission, but do the EIB and Centurion qualifications require them? If they ARE a must then I'll pour more research into options and all. Frankly, I really like the DLT-19s, but are they only for heavy weapons troopers or something? I'm having a tough time finding info on that. Lorelei out.1 point
-
There are people on here with a LOT more expertise than I have! However, I did get there and I want to just give a tip synopsis of things that are valuable to me. These are tips for those just starting. Much of it can be found on here, but here’s what I wish I knew at the start, with my own personal spin on it, from experience or from a lot of digging in the forums. Of course, some things you’ll still have to figure out for yourself…I wouldn’t take that from you! A million thanks to the FISD community. I owe realizing the dream of proper TK armour to you all! Helmet: Don’t rush it. Everyone’s been looking at this helmet for 40 years, and when it’s not perfect it doesn’t look completely right to people, even though they can't peg quite why. The look and consistency of the original costumes was really quite amazing, overall. Things to hyper focus on … the eye holes and the teeth. Eye holes…I often see people not taking enough out, or crooked lines. Slightly crooked can be cannon I guess, in some examples, as some of those eye holes were a bit messier than others. Sand and look. Sand and look. Teeth…people often make them too long and too square. I initially used a dremel, and then refined with hobby files. Compare them constantly to the movie worn helmets. If you make your teeth right, your helmet will likely stand out as an amazing example! Return Edges: People seem to have a desire to keep return edges. This can create fit, shape, and wearability issues…plus it just doesn’t look “cannon.” Again, look for the screen references. The return edges are often much much smaller than we’d all first think, and often there aren’t any at all. For instance, people often want to have too much return edge on the top of the butt plate, or any at all on the other edges of it. This will give you “trooper dumpy butt” I call it. Again, screen reference and look at the best Centurion submissions. Bending ABS: I know some people use a heat gun. This is outside of my comfort zone. Too many horror stories. I did a lot of bending to get things where I wanted them to be. FYI, I was able to accomplish this by pouring boiling water from a kettle on the parts I needed to bend, and applying a plastic clamp for the weight to apply the bend force. When it was where it needed to be, or just past actually (it goes back slightly), I'd immediately put it under cold running tap water. Sometimes I had to repeat this process. This worked perfectly, on 1.5mm ABS. My Favourite Build Resource: Centurion submissions! The build threads were cool, of course. For me, the single biggest help were the Centurion Submissions. So much detail, and real life scrutiny of what you eventually want to have. Specifically, and this is really important, find submissions of your armour make (RS, ATA, etc.) with someone who is approximately your height and weight. That’s a huge help. Glue: I read a lot about E6000. I was unsure about it, as I heard about how bad it smelled and how long it took to cure. The smell does go away quickly. I couldn’t recommend it more. When you wear your armour, it will flex, and there will be times where it may be called up to really flex. CA glue does not allow for any flex at some points on your armour that have a LOT of tension. E6000 is a way safer route to go. Plus, if you make a mistake you’re not hooped. I can’t imagine using anything else. Also, people talk of 12 hour cure times. On anything that has a bit of tension in it you'll need to go 24 hours. Even then, I put it over a forced air heat register (in cold months). If you push short cure times you'll eventually get some separation. Not fun to go backwards! Cover Strips: I did not use interior strips. I’m not saying you shouldn’t do it. It’s all about preference and comfort level. In my experience, if you do your outside cover strips properly, your armour will absolutely be strong enough, and you’ve just saved yourself an incalculable amount of work and curing time, in what is already a long and arduous process. When using E6000, it is VERY important that you glue right to the very edge of the cover strip where it touches your armour. You want some bleeding out. Most of the force is at the edges. When you clean the glue that has pressed out, if you happen to peel even a fraction of a mm from underneath the cover strip, you can expect your cover strip to come away at the edge at some point. For some people that’s not an issue...lots of people with cover strips that aren't consistently flush and in full contact. For me, I need to have my cover strip in complete flush contact. Better to leave a tiny bead of E6000 at the side edges of the strip, than to completely remove it and have separation. Strapping: Tandy snaps are the best. Reading other's horror stories, I'd go as far as to say essential. To keep gaps very minimal, keep the snaps very close to the edge of each piece of armour, and make the strapping tight. It will stretch and it’ll always seem like you’re making the strap to short at first. In fact, even then you’ll likely eventually make them shorter. I tried elastic strapping and I hated it. It flexed better, but the gaps were a mess. So, for back to kidney plate to butt, I changed to nylon/no stretch strapping. Nice and tight with almost no gap! I just used flexible straps from the chest to ab. Even those, make them shorter then you think you need them, or you’ll have issues with your chest plat ending up under your ab plate on troops. They’re expensive, but buy lots of extra snaps. Don’t be afraid to scrap and start again on strapping for bits that aren’t cutting it. Likely will be shortening at some point. Don’t use velcro for anything that has a lot of force, torsion, or will do any pulling away. The only place I have velcro is for my wide white elastic at the shoulder, from my bicep to forearm connection and for my shins. They work great in those applications only. Even then, use the industrial strength velcro and E6000 it to the ABS or to the strap. Don’t rely on the adhesive that’s already on there, especially on the strapping. Armour ABS Thickness: I have 1.5mm ABS. It’s extremely durable. I don’t worry about it cracking or breaking. I’ve felt others' 1mm ABS armour, and I'd be very nervous with it. Cutting your ABS: Score and snap is your friend! Again, it’s comfort level with how close your willing to go to the final line. Take your time (can’t stress this enough). A dremel to clean up a line and shape a little I think is very necessary. Then, I use a 180 grit sand paper to smooth, and finish up with an 800 grit to make the edge shiny and smooth. Boots: You can research and research, and the conclusion that you’ll come to is that Imperial Boots is pretty much it if you want proper high quality boots at the time I’m writing this. The good news is that they are really really good guys and they do an amazing job, and they’re worth the money and wait. On the wait … plan on getting your boots early. You could end up waiting almost a month for an ordering wave, and then another month for processing and shipping. Don’t be sidelined like I was for 2 months because I wasn’t proactive with this. On fitment ... I did the prescribed, order a size bigger. Out of the box they were a tiny bit loose. However, I put in gel insoles, still leaving the original insoles in, and they're absolutely perfect! Wouldn't have them any other way at all. Check out your local fabric store: You’ll be surprised how much of what you’ll need you’ll find there, and for cheap!! Neck Seal: Do not buy one that has rigid metal wire running through it. They’re a nightmare and you won’t even be able to look down while putting your armour on without breaking your neck. Buy a completely soft ribbed one only. Learn from my pain. Literally. On another note, does anyone want to buy a wire ribbed neck seal? Special price! Helmet Cooling: For helmet, like others, I highly recommend dual 5 volt blowers and a usb battery. You can get all of this super cheap on eBay from China. Will last hours on one battery. When the battery is new, charge and discharge it a couple times to make sure it’s not defective. You don’t want a lithium-ion battery lighting on fire when it’s next to your head! Seriously. Audio: Whatever audio solution you choose, it’s imperative that you have sound dampening in your helmet. All plastic surfaces should be covered. I used sticky back 1/4 inch thick x 3/4 inch wide foam. This should almost completely eliminate most feedback for most setups. If you still have issues, put a bit of foam inside your chest plate at the top, to prevent sound from coming up into your helmet (thank you BDWC for this tip!). Lastly, whatever audio solution your pick, it needs to have the static burst after you talk, at a bare minimum. FYI, I use an Aker amp and mic, and the TrooperTalk iPhone app. Blaster: You’ve spent all this time, effort and money on your armour. Amazing! Now don’t fall short on your blaster! The idea of doing your blaster right can be a bit scary, but you can do it. Actually, if you do it right it can be the most fun part of your custume to make! I did DoopyDoos. It’s an amazing resin casting, it’s cheap, the shipping is fast. They have horrible communication but they get it done. The FISD E-11 Blaster Reference thread is amazing and the build threads by Cable Guy and T-Jay were very important to me too. If you do your blaster right, then you really do feel like you’re back on the movie set in ’77…you’ve gone that last mile on your costume! Thermal Detonator Screws: What a freaking pain! Did you know that the planet earth pretty much stopped making slotted screws? And for good reason! If you do find a slotted pan-head screw, it’ll likely be a threaded screw—which means the only way to make it hold in the PVC is to glue it. So, after much much searching, I found a slotted wood/metal screw, but it had a domed head—not CRL Lvl 3 kosher. Again, dremel is your friend! I just dremel’d off the dome and made it into a pan-head. You can do this, or you can order 4 screws from somewhere in the UK and wait a month. Start to build with Centurion as the end goal! If you have Lvl 3 on your mind right from the start, you’ll easily get there. I notice that people who don’t start their builds this way, have a harder journey and seem to be a lot less likely to get there. Furthermore, their armour at the basic approval level can tend to be a little bit of a mess, because they've been lone ranger-ing it, and haven't been using Centurion submission photos as their go to. I'm guessing that those who start this way, most often have far better looking armour right from the start...even if they never progress to EIB or Centurion. Hope that something in here helps someone on their journey!1 point
-
1st inner support strips being glued on! This is gettin real y’all! Will do inner supports, then front cover strips, then fit and cut the backs. Sent from my iPhone using Tapatalk1 point
-
Thanks i am changing loads between now and then1 point
-
No. After all the advice I got, it was enough to convince him. Sent from my SM-G950U using Tapatalk1 point
-
Good day folks, some notable progress here. Wires outfitted with heat shrink tubing and MDF board installed to support base of rotary switch inside cavity - nice and snug now. Rotary switch knob is nicely oriented too. Ah...that good old green stuff once again - closed cavity with it and shaped it following SMG references. Will need to drill out a hole and sand down slightly to get it just right. Here's a trivial question - why is the 'R' for the selector switch mean 'single shot?' Very curious - what is the meaning behind choosing 'R' for this. Selector lever remains; gonna leave that for next week! Cheers mates! Sent from my SM-G390W using Tapatalk1 point
-
Looks good! Don't forget to paint the screws in white, too! Sent from my LG-M470 using Tapatalk1 point
-
Should be the last fix to the paint on the helmet. If not, I'll boot it like a football.1 point
-
Thanks Luc n David. Appreciate the feedback!1 point
-
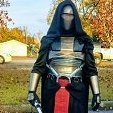
According to this pic the holster is very different. However, the same metal ring on the ends and in the middle of the baton are present, which is what makes me think these are possibly the same.1 point
-
Nice work Zac!1 point
-
Excellent write-up, Colin. Thanks for sharing your thoughts and experiences. :-) Sent from my iPhone using Tapatalk1 point
-
Parquette, Interesting… Here is a shot from the Solo movie. Looks like it is an expandable baton like the ASP with possibly a different end cap. The holster looks like it’s a kydex holster not leather or nylon. I do not know if this is the same type holster used in Rogue One and simply painted black? Daetrin, Sounds good to me. I really don’t have a dog in this fight since I am not planning on wearing the baton but I agree we need to see better pics of the baton holster used in Rogue One. I would even suggest that in the absence of a better source we remove the Level 2 and 3 and holster language all together and simply state that eh holster must be black until we can better verify its actual construction.1 point
-
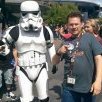
I'm proud to report that TK 87109 is reporting for duty! https://www.501st.com/members/displaymemberdetails.php?userID=28013 Thanks EVERYONE for your help. Any advice on the best way to get connected for future troops?1 point
-
Some people like it high and others keep it almost right over the eyes and that's ok too. Personally, I like it not too high but still with some white showing as Luc mentioned. If what you prefer is just a small gap between the eyes and the brow, go for it. It surely will be okay and still looks real good in my opinion! And great list of mats you posted earlier by the way. This can be really helpful to a lot of newcomers. The more info there is, the better!1 point
-
I allowed for just a few mm of overhang on mine - but I'm not sure what the norm is. Many of the screen shots from ANH look like the front wraps around the knuckles a bit - IMO. At the end of the day, it is the amount of black that is showing at the wrist vs the elbow that will be scrutinized during approval. The location of the hand guard will affect that somewhat. See how it looks with everything else on - but, I have a feeling you will be fine.1 point
-
Well, I jumped off the deep end.......and survived.... Very apprehensively I tried the hot water bath. Pretty much boiling water. Slid the pot off the burner. Dipped the armor piece in for 20 seconds.....nothing. 30 seconds.....hard to tell. 40 seconds.....I think it feels softer. Maybe a bit less "spring" to it when it's flexed. Less aggressiveness to return to it's former shape. 40 seconds, hold the armor piece flexed outward a bit, then under cold water. Bingo!!! I did this a couple of times to each piece. The shape looks slightly different, but not much, but the very harsh corner on the outer forearms definitely looks less abrupt. The piece on the left almost looks like it's got a bit of a "wave" to the left edge. It's subtle though and completely disappears once the pieces are taped together. Now from the photo things don't look much difference, but it feels quite different. Looking at the photo from yesterday there is less space now at the top of the arc. The top of the curved arc fits closer to my arm and the sides aren't as tight. WOOHOO!!!!! Thanks everyone!!! I was freaked out about melting the ABS in the pot of boiling water but for 30 or 45 seconds, it just seems to loosen the rigidity and make it a little less likely to return to it's former shape. I really appreciate everyone's help and encouragement. Mark1 point
-
Hey Mark, To be fair to hot bathes everywhere, they are not that bad. The heat gun, however - can be trouble. If you think a slight reshaping will work, then go for it. So, in summary - option #1 has no place on this forum . Option #2 probably will not work. Option #3 is the winner here. That said, a couple of other AP builds for troopers with larger arms all mention cutting slightly larger cover strips. And you can always add a bit more to the back cover strips if you want to keep your front strips as close to 15 mm as possible. I'm envious of your work space. Looks nice.1 point
-
Hello again, I figured I'd better post an update or everyone will forget about me.. Since Christmas, I've been working to complete my E-11 Blaster so I've been putting off starting on my armor. My blaster is now pretty much at the painting stage so I'll have time to begin things while I wait for paint to dry. So, when I last posted an update I had my BBB under the Christmas tree. Well, after thinking things through, I didn't leave my BBB present under the tree. I figured the repercussion from MY present being larger that my 6-year-old's presents was too great, so I hid my present downstairs. When I finally opened my gift to myself, it truly was a White Christmas... So that was back in December....and the box has sat in my bedroom for the past 2 months. But now I'm going for it.... It's an AP (Authentic Props) kit. Untrimmed with an unfinished helmet. It looks like everything is there. In fact, I seem to have two sets of hard guards, which is a little odd. I did a lot of research before purchasing. I'm 6' 1" and around 195 lbs. That puts me in a bad spot, in my opinion. I'm kind of tall for a "regular" kit and kind of thin for the kits for "larger" troopers. I narrowed it down to AP and RT-Mod. The AP kit is regular sized and the RT-Mod kit is 5% larger. I was (am) really concerned about the amount of black showing for the arms and legs. I was also concerned that I would end up needing to reshape the RT-Mod kit because it would look too big on me. In the end, two things influenced my decision. The first was that (at the time) AP had a surplus of armor and could ship immediately, no long wait. It was my understanding that RT-Mod generally has a 1 year wait. The second thing was that Harrison Ford is just a hair under 6' 1" and he fit into a regular Stormtrooper outfit in Star Wars. So AP won. If the AP ends up with too much black showing, I may end up making a mannequin and turning it into a really awesome display for a home theater room......assuming I ever get a home theater room. Mark1 point
-
Restock of the Stardust B has arrived!!! To take into consideration that the majority of the customers are from the USA, all payments can be done in US$ from now on. Price is 59 US$ This is a price drop compared to the 1st Run, caused by the weak US$! Shipping is 6 US$ worldwide. For other terms and conditions see previous posts. I added a full wiring diagram of the Stardust B which includes all lights, OLED display, trigger etc.1 point
-
Thanks a lot for the huge interest the Legion showed for my Stardust v2 board. There are a lot of boards on the field now, waiting to be installed into blasters worldwide, please do other users a favor and make photos/videos of your builds and share them. Let's show the guys trooping out there how much more fun a blaster is with proper electronics. The 1st Run is sold out and for the Xmas period I will stop sales. But do not worry, I already made provisions to start a 2nd Run run in January. If you are interested to participate in the 2nd Run, you can leave me a PN and I will include you on the pre-order list. Furthermore, many troopers asked me if I could make a complete shopping list to help them get all the items before their Stardust board arrives. Now it is the right time to write to Santa to get these items in time for the 2nd Run. SHOPPING LIST First In include a pictural overview of the most widely used components used: Battery: You do not need to include a battery with 3000+ mAh, blasters do not consume so much power. Important is to have a Li-Ion/LiPo battery (nominal voltage 3.7V), ideally with a caacity of around 500-1000mAh (of course the more the better, but take care about limited space in your blaster). The Stardust v2 board has an on-board charger chip, so you can skip buying an expensive external charger (saves you 20-30$). I've already built blasters with battery type 10440, but I would recomment a 18350 or 18500 (first 2 digits are the diameter in mm, so 10mm and 18mm respectively, the last 3 digits the lenght in mm, so 44, 35 and 50mm respectively). Speaker: You need a max 3W speaker, recommended is a 2W (easier to come by), with 8Ohm or 4 Ohm resistance. The size should be up to 28mm (but free to take bigger if you have space). If you target to make a blaster which feels perfectly like holding a real blaster, take a Veco, it will make your blaster vibrate !!! VECO bass speaker Ligths generally: all light I use are WS2812B type neopixels. You can easily source them from ebay or other online sources. They originate from Adafruit, so if you can, please suport them by buying directly from them. Light for the barrel: For the barrel I recommend using neopixel strips of the type 60LED/m, or 144LED/m (densest currently on the open market) for a more extreme build): Neopixel stripe Light for the nozzle: You can chain up a single neopixel element called a Flora to the end of the barrel stripe, believe me, unless you want to cause permanent damage to the eye of event visitors, the brightness of a Flora is more than enough to impress everyone. Of course you are free to include whatever LED you want to the front. To make the light seem more focussed, you can take a 20mm Carclo lense and glue it to the Flora (they are meant for high-power LEDs like the tri Cree for which you can take the same lense) Adafruit neopixel Floras Status LEDs: They are for status dislay, you can use them to display ammo or currently selected mode, like I show in some of my videos. They can replace or complement an OLED status display. They are the same neopixels are the stripes and the Floras, but slightly more dense than even the 144LED/m and on a rigid PCB, which lends itself better to build it in facing outwards. Adafruit neopixel sticks Trigger switch: Take one with a long lever. You might have to look for it on international sites, but I can link in one from a German vendor to show how it looks like: momentary switch with long lever OLED display: An OLED status display makes an awesome mod to your blaster, it can be used for multiple purposes from ammo count display to intro screen etc. Make sure you pick one with 128x32 dots using I2C interface (4 pins, GND, VCC, SCL, SDA). Color white or blue. 128x32 I2C OLED dislay1 point
-
I am so impressed and inspired with your build. My armour kit is supposed to arrive in the next couple weeks and I can hardly wait. Your and Ukswrath's builds have left me feeling very positive about attacking this seemingly daunting task of building armour. Thank you both for this. 501st membership and having screen accurate Stormtrooper armour has been a dream of mine since I was a kid. I'm 48 now and know I'll be checking off that spot on my bucket list before my next birthday...in February.1 point