Leaderboard


Popular Content
Showing content with the highest reputation on 02/28/2018 in Posts
-
I have a Gaz mag on my doopy and did pretty much what you plan on doing. Cut it shorter minimise how much needed to be ground out. I also trimmed the release latch bit on the mag to where it butted up against the body. Then I did the bare minimum of grinding to get it to fit in to keep the strength. Been fine so far Shame it needed fixing. I keep thinking I should buy and make a mold my self but I don't really have the time at the moment.2 points
-
A very nice magazine - and a cool way to safely carry your blaster. The longer magazine sticks out deeper into your transport case, meaning the risk to break it off is higher as with the shorter one from DoopyDoo's. But it looks like there is enough room inside your box and if not, you still have the 5 magnets to make a removable magazine.2 points
-
So I took Greg's input (thanks again) and added some height to the middle ridge of the vocoder: And then I started painting on the ears, I decided to do the outline first and then I'll fill in with grey once the black dries. I also drilled a couple small holes for the hearing assist, which is obviously where I'll be painting my ear bars: All this in an effort to boost my confidence for painting the traps and tears. lol2 points
-
WOOOOOOOOOOOO!!!!!!!! Thank you all very much! All your feedback is spot on, and much of it was expected - man is it hard to get that armor to sit 'just so' though! See you in Centurion review soon. Thank you!2 points
-
I didn't know where else to put this, but I just wanted to show off my newest wall decoration! I liked my Centurion certificate so much, I engraved it into wood so it would look like a plaque. Its so awesome!1 point
-
I should add, yours isn'tnearly as bad as my biggest boo-boo. I was building my snap plates, burning holes in vinyl strapping with a solder iron, and ended up absentmindedly letting the iron touch my breastplate for a few seconds. Right smack in the middle of it too. I was sickened by the smell of melting ABS. Still haunts me. But with a bit of ABS paste, some good wet sanding, and Novus 1, 2 and 3, you can hardly tell it ever happened!1 point
-
Let's go with D please. FISD's colors are: black, white, infantry blue, and gold. US Army: Black & Gold US Infantry: Infantry Blue Star Wars Stormtroopers: Black & White, plus blue details on tube stripes, etc. So they all tie together.1 point
-
That is certainly the best option but perhaps biting off more than I can chew at the moment. I'll have to give it some thought if I want to tackle that method.1 point
-
Yea try that and see if it works. If not I’m sure some other guys will have a way around it. Sent from my iPhone using Tapatalk1 point
-
Awesome story and probably the best first time in armor you can have. I’m curious when you review the video what your thoughts are. I haven’t trooped just worn mine around the house a bit (maybe enacting a few classic movie scenes). I helped with one troop and it was obvious when your out of your element in a new environment the helmet can be a pain. Sent from my iPhone using Tapatalk1 point
-
Well, I finally wore my armor in public today. I was a special guest at my son's kindergarten show-and-tell day. It was a pretty quick visit and I'm pretty sure I spent more time getting changed/unchanged than I spent with the kids but it was a pretty cool experience nonetheless. It was more of a test drive to see if I could pack and unpack my armor in my Husky 25 gal work cart. Everything seemed to go pretty smoothly. I lost track of how long it took to get kitted up, but I'm pretty sure it was less than 10 minutes. The only glitch was my voice software was playing music from my iphone through the amp for some weird reason. It was easy to fix, but that had never happened before and it created a moment of panic. The kindergarten teacher wanted me to meet the kids first out of costume and make it clear that when I got changed, that it was still me in there. Even with the introduction, a couple of the kids got a bit scared, so my helmet came off fairly quickly. One of the first things I said was that Darth Vader was my boss and he was a pretty good guy. That got quite the response! Let's just say that we agreed to disagree. A lot of them have not seen the movies yet, but they all know the drill. As part of the show and tell, my son had to take questions from the rest of the group. Nearly all the questions were, "I like Star Wars", or "I've watched Star Wars". Ok, not really questions but clearly the excitement was spilling out. Something I wasn't ready for - one of the kids in my son's class is non-verbal. I had totally forgotten this at first. There was apparently some concern about how this child would react. She simply approached me and started touching my armor. She seemed utterly fascinated with the whole thing. I just let her do her thing - if she started to grab at something I just causally shifted away a bit and that seemed to be good. She was smiling when she sat down so I guess everything worked out. The teacher seems pretty excited about the whole thing, but she could not get over the complexity of the armor and the time that went into making it - and why a grown man would do such a thing (ok, she didn't ask that, but I know the look ) So I have to thank my wife for being my handler. She also shot the whole thing on video so I can see how TK-34575 actually looks when interacting with kids. I'll see it when I get home tonight after work - I'm actually nervous about it. Anyway, seeing the look on their faces is something I'm going to remember for a long time. Can't wait to do it again.1 point
-
Anovos armor was the same. I cut the section out then updated the entire seam. Part 1 - https://www.whitearmor.net/forum/topic/31877-ukswraths-fotk-build-thread-tk-10116/?page=8&tab=comments#comment-432413 Part 2 - https://www.whitearmor.net/forum/topic/31877-ukswraths-fotk-build-thread-tk-10116/?do=findComment&comment=4340801 point
-
Looking good trooper! Good luck on the approval.1 point
-
Great thanks! I was out of town last week. Before I left, I started glueing arm armor. I decided to get the tedious part. finished first. Cover strips Gluing inner strips with CA glue. Inner strips on right arm finished. I think I will be gluing the outer strips with E6000 on this build. More to come this week. Cheers! Sent from my iPhone using Tapatalk1 point
-
Here - https://www.whitearmor.net/forum/topic/32487-fs-ukswraths-stormtrooper-hearing-assist-system/1 point
-
Good luck on Centurion... even if you don't need luck - you've got that!1 point
-
Congratulations mate, very well deserved !!1 point
-
I might be a little late to the party, but grats on that EIB!!!1 point
-
Bonne chance pour ton EIB, Dominic!1 point
-
Where did you get the logos?1 point
-
Looking good so far, Freddy. Maybe check some reference photos regarding the front sight cage. That crosshatch pattern is different on front and rear side of the cage.1 point
-
Congratulations.1 point
-
Had a few extra unexpected minutes this evening, so I filled in the right ear with grey:1 point
-
Looks awesome, Matthew! I look forward to having you join the ranks soon!1 point
-
If Only I Had Known Read Ukswrath’s thread all the way through before you begin. It is filled with tidbits that you will want to know ahead of time. There’s plenty to read until BBD. Get more magnets and clamps. I got 20 thin ones; 20 thick ones would have been better. Read the Centurion approval threads. Learn from other people’s errors. Oopses Peel the protective film off before you glue things together. (Don’t worry: It peels off. Then you can reglue the parts.) If it doesn’t feel like it fits that way, then maybe it doesn’t fit that way! Fo your approval photos, get someone to help. The TK Armor is not easy to put on yourself and get right for inspection. Additional Advice The Anovos strapping system is okay for initial fitting and your submission photos. But you will probably want to upgrade that. The Anovos belt is silly. Get a good one like Imperial Issue. Get Centurion-approved boots even if you don’t now plan on that level. The Sterilite 32 gallon tote is perfect and is a good thing to practice masking and spray-painting on. Thanks To The fine troopers in FISD who encouraged and advised me along the way. My friend Razek the Dragon who took time off from his vacation to help me suit up and pay attention to and fix all those finicky details. He earns a 501st patch!1 point
-
Thanks Dracotrooper! This time I’ll be sure to take build pics!1 point
-
Congrats Justin1 point
-
In terms of basic assembly for any detonator, I left one of my end caps unglued- my idea was I could put my keys or other small objects in there while trooping. I have done that exactly once, but the idea was sound . It would be useful if you had an area where bin storage wasn't optimally secure and you wanted to keep your keys and cash on you. Though a detonator would be the first thing a kid might steal (I say this because I have stolen TKs detonators while trooping my Jawa so I can attest to their vulnerability). So that was likely entirely unhelpful. Actually helpful note would be putting the soft fuzzy size of white velcro onto the back of the clips so they won't scratch up the kidney plate.1 point
-
Congrats and welcome to Expert Infantry!1 point
-
Well done, Justin!! Nice work!1 point
-
Congratulations trooper1 point
-
Congrats on your EIB!1 point
-
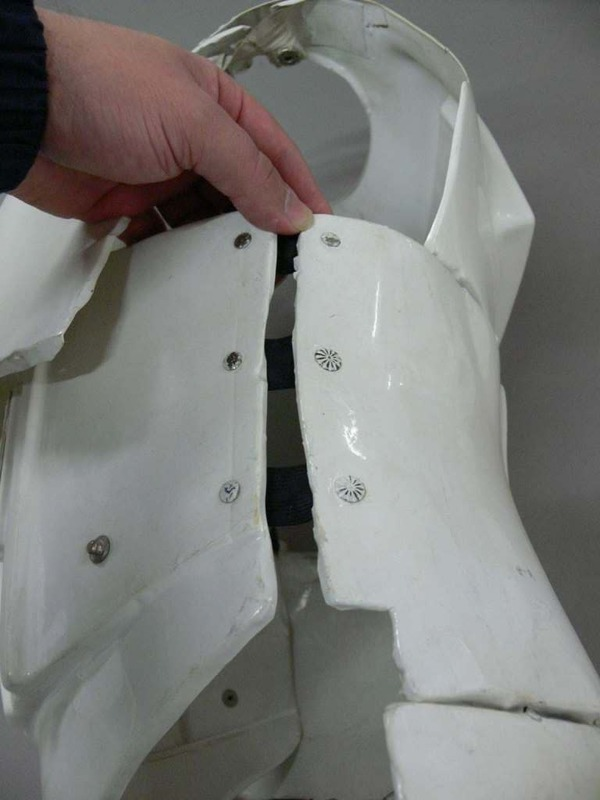
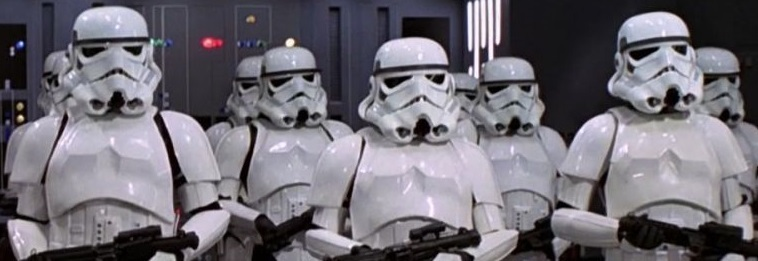
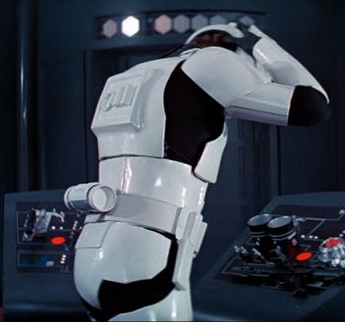
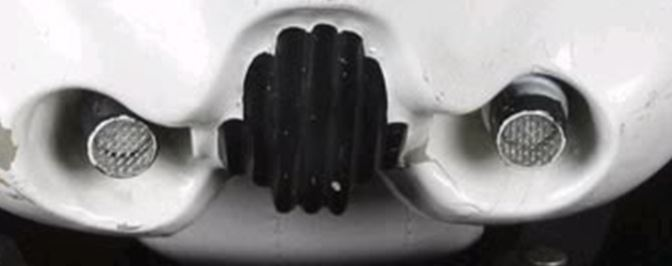
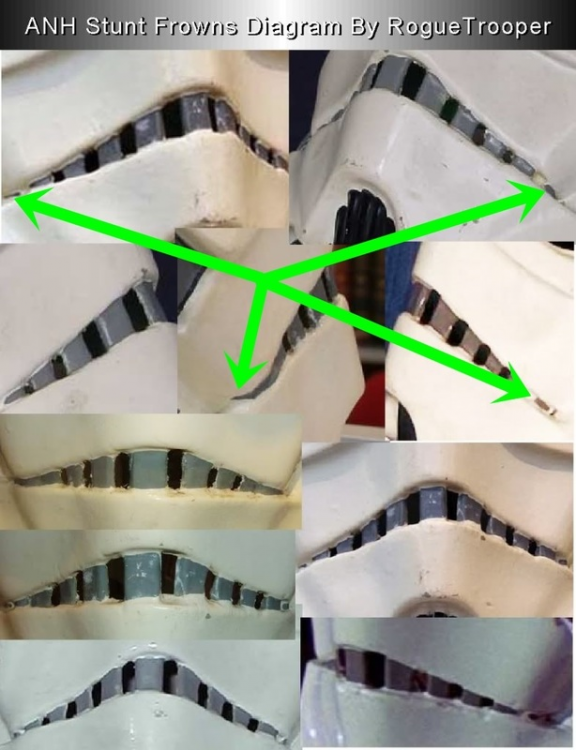
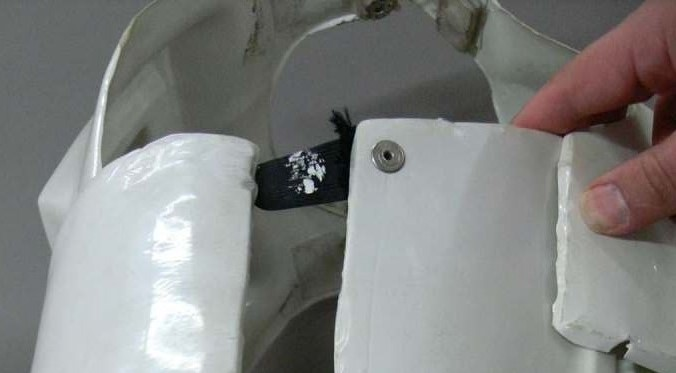
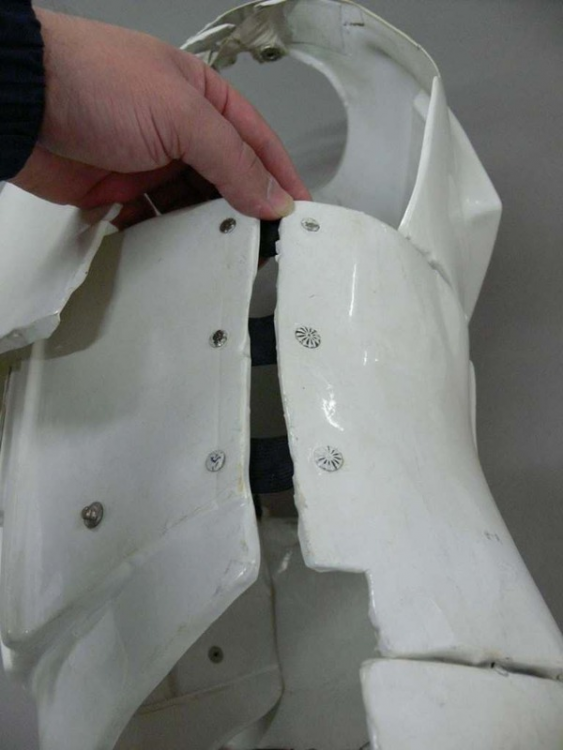
Hey Justin, thank you for your EIB application and your patience. Let's get cracking. CRL and EIB Application Requirements: All the required submission photos have been posted, and your armour meets all the necessary requirements for level 2. With that Tony and myself would like to welcome you to Expert Infantry, congratulations Other-Armor Fit/Assembly: In this section we review observations made by your fellow troopers and ourselves. Some observations may lead to suggestions to improve the overall look of your armor. If any suggestion affects any application, it will be listed separately in the above or below sections. We have some suggestions to get you looking the best you can. Most are dressing issues but there are a few mods we like to see done on the Anovos helmets if you are intending on applying for Centurion. The shoulder Bells should basically touch the plastic shoulder bridge, so shortening those top black connecting straps will bring them in. Next is only a dressing issue, but make sure your fore arms sit evenly spaced from the biceps and the wrist end to the hand plates. It also appears yours are twisted inwards slightly. Align the front cover strips from bicep to fore arm and you are good. Reference Image If you can adjust the Velcro strapping between the back and kidney plate so they sit right on top of each other, it will look perfect. May we suggest replacing the Anovos supplied Velcro system with elastic and snaps as it generally is better for movement and also can last much loner. You will find loads of examples in the internal strapping photos of other EI applications. Also keep an eye on the alignment of your calf enclosure to keep them level. Reference Image Ok now to the helmet mods we will want to see in your Centurion application. The frown really stands out on the Anovos bucket as it finishes too short and very square on the ends. This needs to continue to taper out to a point, and the paint shouldn't go onto the gum line. We see you have replaced the hovi tips in the extra images you added in the application, so thank you, I don't need to talk about those although they are circled., and lastly, if you can sharpen up the edges of the Vocoder so it is more defined on each ridge, its also going to look much better. Reference Images Centurion Suggestions: In this section we prepare you for Centurion. More photos are requested that allow us to make better decisions on possible adjustment etc. If there are any areas of concern they will be discussed here. You are already aware of the extra rivets required for the Abb plate and they are a must as per the level 3 CRL as is the male snap for the upper corner on the opposite side. For level three certification (if applicable) Three rivets, approximately 5/16"(8mm) diameter, are present on the left side of the abdomen armor. Note: The original rivets used for the TK armor were bifurcated rivets or split rivets. Rivets are equally spaced along the depth of the armor and about 10mm from the edge. The heads are rounded or domed. Note: Paperclip brads are not considered to have a domed head. Rivets are painted white. A single male snap on the top right corner of the ab plate is present. Well here we are at the end of your EI approval, well done sir on a successful application. Make your adjustments and modifications and we hope to see you in Centurion review soon Congratulations
 1 point
 -
Hi Lauren, you will see lots of members approved in Anovos kits. It is considered accurate enough for approval though most make some modifications such as cutting out some of the flashing in the eyes, painting the inside black, etc. Take a look in the Centurion applications subforum to see some of the best built Anovos kits!1 point
-
You could put a tiny bit of e6000 on the screw, in the hole, to keep it from unscrewing.1 point
-
Here goes nothing... Centurion application submitted.1 point
-
Glad to see that [TK] badge there, now on to EI and Centurion.1 point
-
Thanks guys!! So no progress on the kit itself, the time just hasn't been there quite yet. But my last day of work for the year is the 19th so I'm really hoping that I can sneak some good armor time in after that. In the meantime I've been comparing the pieces I want to start with (helmet and arms) to what I see in the build threads here to get an idea of what I need to do. Basically just going to take it one step at a time and hopefully watch the box steadily empty out. Meanwhile I received our helmet electronics from ukswrath (thanks again!!), some of the extra parts are for my FOTK helmet: Today over lunch I went on a quick supply run to Home Depot and got the supplies that I didn't have for this build, happy to finally have an excuse to buy a new rivet gun, broke my last one installing a convertible top: Now I just need to get Tandy snaps, S-Trim for the helmet, brown leather strips for the holster-to-belt, elastic & nylon strapping, and some rare earth magnets. Then I should be well supplied (hopefully). And for a slight change of gears, I've seen others share how they've walked down the chain aisle and have seen a random chain link they need to make their E-11 D-Ring just laying on the ground, I guess Home Depot knows when a Trooper is coming: I gave a small cheer and the employee looked at me a little puzzled as I went to pick it up. Unfortunately it was one of the grayish/textured links and I said, "Ah, drat!", although I figured I could have just repainted it. He inquired what I was up to so I explained what I was working on, he thought it was a really cool project and reached into the box that the rolls of chain sit in and pulled out a length of 8 black links, properly sized based on what I've seen posted. He had apparently just cut them off of a length someone bought because a couple of the links were paint chipped (someone was really picky), so they were just going to get thrown away, he bagged them and marked it free. So it worked out in the end!1 point