Leaderboard


Popular Content
Showing content with the highest reputation on 01/06/2018 in Posts
-
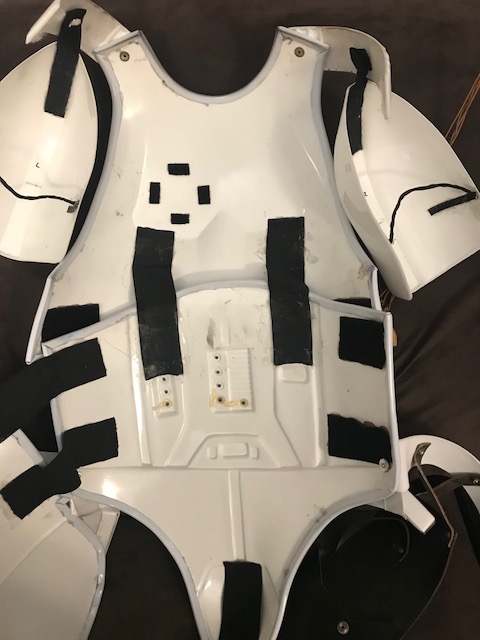
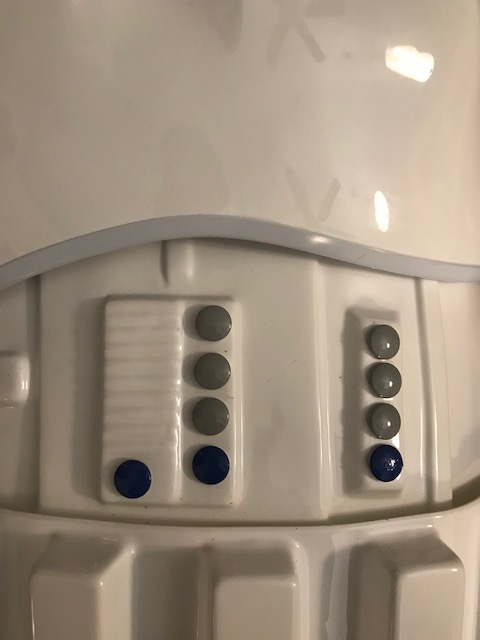
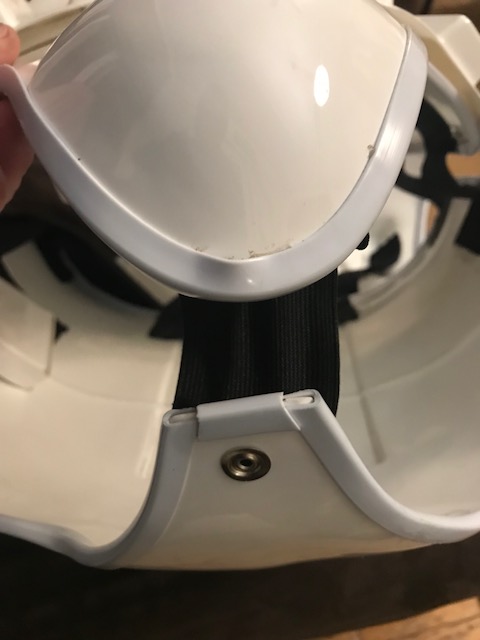
I´m back Found it and there are a few examples out there, this one I "stole" from Chricket`s thread (thanks Christine) I finally wrapped up the "Jorge-inspired" tab stabilization system on my kidney/ab. Glue was still curing on the bracket, which is why you still see the blue tape in there. The black ABS is flexible enough to curve easily on the ab plate. Here's what it looks like from the outside when closed up with the inner tab fastened on the inside snaps: Best part is that it doesn't shift up and down. So I tried it on to make sure it actually works. Yup. It works great.3 points
-
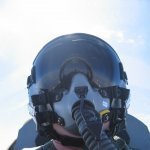
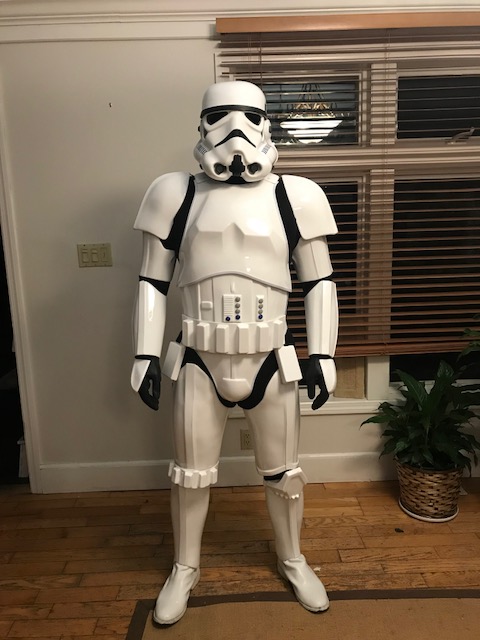
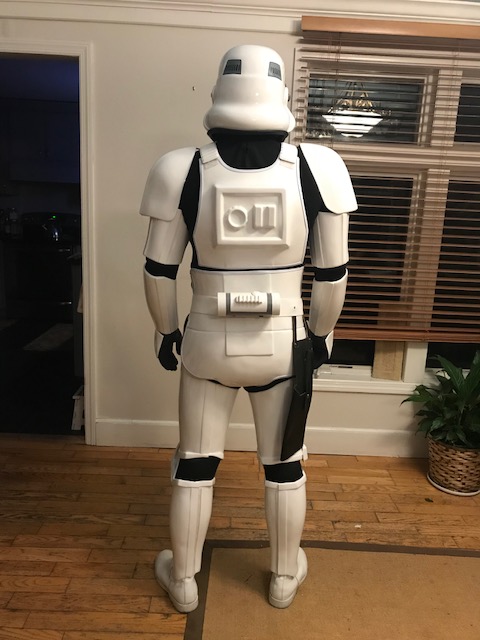
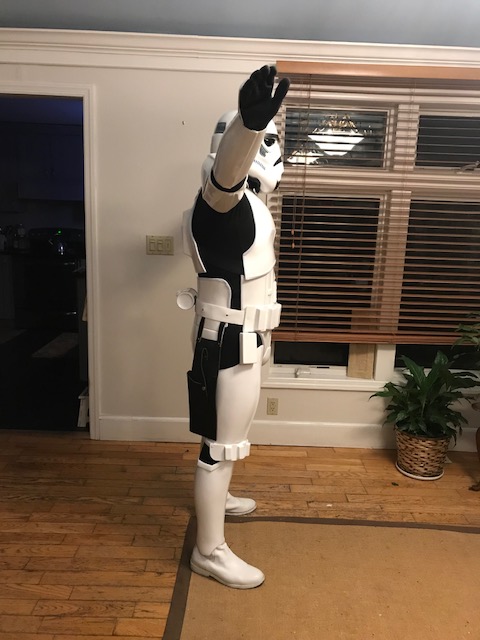
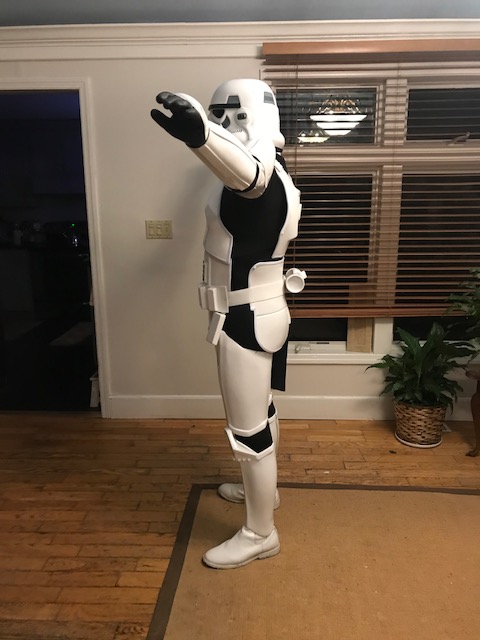
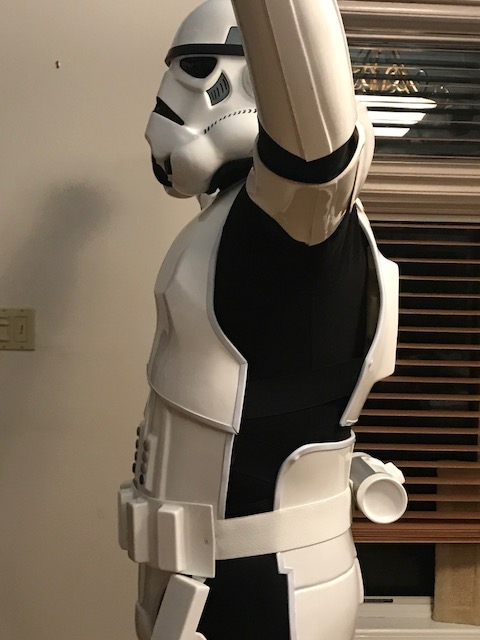
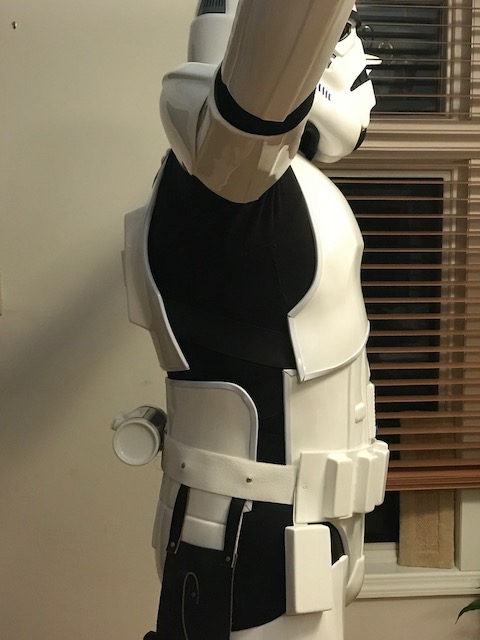
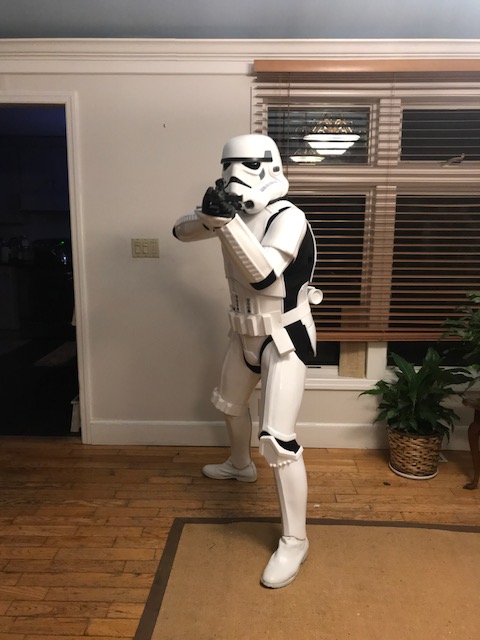
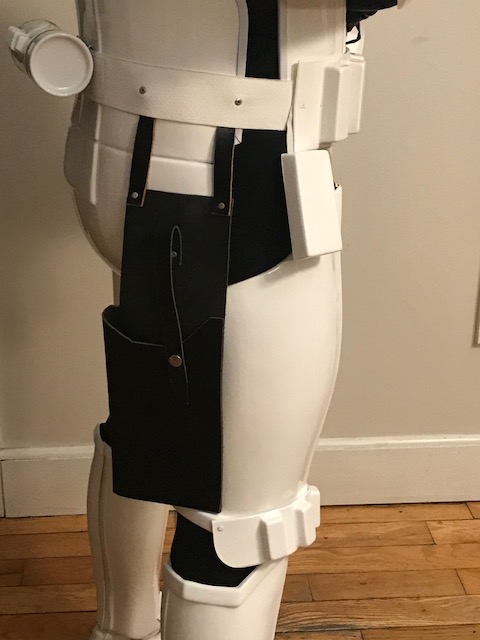
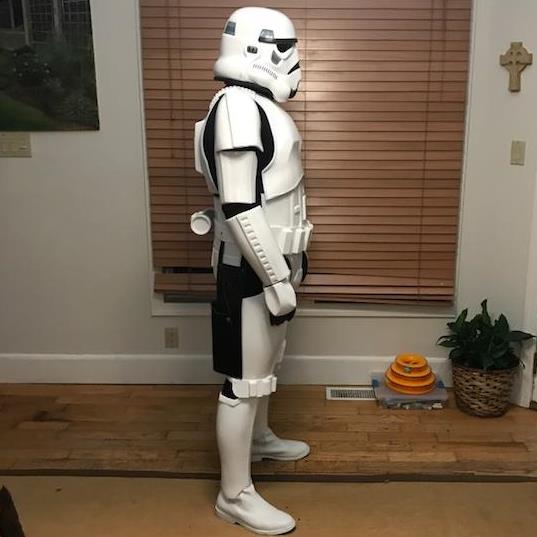
Name: Joe Mantello Garrison: Empire City 501st ID #: TK-91452 Armor Style: Return of the Jedi Armor Maker: Troopermaster Helmet Maker: Troopermaster Blaster Type: CFO, E-11, ROTJ Specific Height: 6'1" Weight: 220 lbs Boots Maker: TK Boots Canvas Belt: Troopermaster Hand Plates Type: Clam Shell, ROTJ Specific Electronics: Aker Amp, TrooperTalk App Neck Seal Type: Darmin Holster Maker: Troopermaster
 2 points
 -
Nice! Good luck Joe, always good to see more ECG getting the higher ranks. Sent from my Pixel 2 XL using Tapatalk2 points
-
You look great Joe! Great job and good luck! Bring another one home!2 points
-
Yes the old Tab and Slot. We have a girl in our Garrison and I recommended the same for her. It works like a charm with some foam padding to keep torso in place. Keep up the good work. These are just bumps in the road to the Death Star!2 points
-
I never knew a suit of plastic space trooper armor could make me so self conscious of my love handles. LMAO [emoji16] Sent from my XT1254 using Tapatalk2 points
-
I second that! after some clean up it will look muck better than my tube stripes2 points
-
Beautiful Joe! Really a nice looking set of armor! Lets bring another EIB to the ECG! Good luck!2 points
-
Oh wait, "really" high density foam? I don't have that.2 points
-
Overlap isn`t mentioned in the CRL, it focus on the more common problem - gaps - however the seam is to my knowledge supposed to sit flush even though there is some overlap in the movie....this is a bit embarrassing but I´m actually not sure if overlap will hinder approval (only ever focused on gaps) so someone in the know need to set it straight....but it looks alot better whitout overlap (and you want to look good right) and...I remembered another set-up to avoid this...just gonna go look for it I`ll be back (of course said with an accent).2 points
-
Hello everyone! I would like to announce a change to the ROTJ TK CRL. Under the Centurion requirements in the old CRL it used to state at that: There are no visible snaps, rivets or brads on the crotch tab of the Posterior Armor tab. After a review of screen captures it has been determined that there was indeed a snap on the posterior tab. Upon staff discussion, this has been removed from the Centurion requirements and the snap is now allowed for Centurion. Please feel free to re-familiarize yourself with the ROTJ CRL here: http://databank.501st.com/databank/Costuming:TK_rotj If you have any questions regarding this update please feel free to contact me via PM.2 points
-
Name: Daniel Melin TK ID: 99665 Garrison: Nordic Garrison Forum name: TheSwede Armor maker: TM (troopermaster) Helmet maker: TM (troopermaster) Blaster: E11 Imperial Warfighters Hight: 5'10 Weight: 202lbs Thank you for your consideration /TK 996651 point
-
EIB #2 is in1 point
-
Wohoo! The force is strong with this one1 point
-
If anyone can pull it off, it is Sean! Sent from my iPhone using Tapatalk1 point
-
You are a truly dedicated trooper, Sean. Sent from my iPhone using Tapatalk1 point
-
Do it...give yourself to the dark side of the force... Ha ha. I think it was about the 5th or 6th try at getting the stencil just right on the right-hand tube that I thought, "This is bull-Sith. I should tell Sean to stick with the decals". But yeah, go for it. The cleaning up is pretty easy. "Bull-Sith." Yeah, I'm hilarious.1 point
-
With what you have now should get you EIB. Seams are allowed and it is like material. So you're covered there. But I hope you dont stop there. You already have the pcs. Just need a backer pc and some paste and some sand and polish you could go Centurion! Hopefully1 point
-
Alright, it's been a couple days since I showed progress... but I was working on the armor. I mentioned before that I got all the final fitting, trimming, and sanding done on the forearms in preparation for assembly. Here's how the parts looked starting with the left forearm: And the right forearm: Tip: I've been using this technique when sanding the butt-joint surfaces to ensure good adhesion with E-6000 I just forgot to take pictures and post it when I was working on the biceps. Since the arm cover strips are 15mm wide, I measured 6mm in from the edge of all the arm parts, and ran a strip of blue painters tape down to act as a guide and protective layer so that I could hit the edges with 120 grit sandpaper to give the surface some "tooth": The photo below shows what the roughed up surface looks like once the tape has been removed. You can see where the reflections stop as they hit the rough area. Oh, and those little pencil tick marks were made to help me put the blue tape down in the previous step (they are 6mm in from the edge): I also have been using a Sharpie marker on the "glue side" of all the cover strips to denote where they go. LF = Left Front, RR = Right Rear and so on. I also consistently make these marks at the "Top" edge of the cover strips so there's no question of which end is which. I say "Top" meaning towards the sky when the armor is on. Another nice thing about the Sharpie markings is that they seem to hold up even when I sanded the glue sides of the strips. Here's a look after sanding. I still know where this one goes : That's it for this post. I'm uploading some more photos right now as I just completed the first stage of forearm gluing. Be back soon, -Dana1 point
-
Oh. Well, that is totally not what I was thinking, but yeah... that would do it! Thanks.1 point
-
Best of luck, Trooper. :-) Sent from my iPhone using Tapatalk1 point
-
I’ll be watching to see how this shim plays out as I was planning on having to extend the existing piece rather than introducing what for me could be called a love handle plate.1 point
-
Troopers helping Troopers! You may be able to have a slightly smaller cover strip when you lose all the return edge. Remember, return edges are not required for any level of certification. Make it fit well and make it as comfortable to wear as possible, especially the top of the thighs. Don't want any pinching there.1 point
-
I also lost the entire return edge all the way around the top of my thighs. Otherwise they would be too small. They are snug at the top as it is.1 point
-
Experiment time! Trying this! Lol! I’m becoming a pro at removing e6000! Once I figure out my size, I will fill it in properly and prep for the abs paste nightmare! Lol1 point
-
Glad to be of assistance Good plan I would go with Seans suggestion1 point
-
The thighs were tricky for me too. Just barely big enough to fit. Perhaps some ABS paste will fill in that line? I know it's a bunch more work but I've seen great results on the forum from people who have used it.1 point
-
Over Christmas and New Years I've been busy with family stuff and friends. I did manage to squeeze in some printing and post processing time though. On the left is the first test print that I've made of the helmet. On the right is the updated version in ABS. You can see the registration shape for the "Nose" pretty well here. Don't judge me for not sanding the welding marks the nose will cover them up anyways.1 point
-
Lovely set of armour. Nice to see some ROTJ for a change. Good job. :-) Sent from my iPhone using Tapatalk1 point
-
That paint looks awesome!! Sent from my iPhone using Tapatalk1 point
-
Glad this has been of help to others! Keep plugging away and you'll be there in no time.1 point
-
Time to paint the tube stripes. I have not been looking forward to this - and I'm not ashamed to say, it nearly broke me. Okay, it wasn't that bad once I got the stencils on, but getting them placed right was a challenge for me. Cleaned the area first. lots of marks from other painting and just getting knocked around my office. The stencils come from Trooperbay. The top is how they arrive on the card. I would instinctively put the one on the right on to the left side of the helmet. But I don't believe that is right. So I switched them around - as per the cut templates below. EDIT: DO NOT SWITCH! I got called on this - and it does look a little wonky if you switch. Pencil's width from the top return edge. The ears will cover the last stripe. so I didn't paint that one. I ended up with 14 stripes on each side. You can see the bubbles on the stencil - these are pretty much impossible to avoid. This is going to bleed. Added extra tape and ready to go. I will just say it here - I hate this paint. for whatever reason, this blue tends to separate and needs to be stirred/shaken a lot. I am applying the paint in thin, dry coats. This is about the third coat. I put on 6 coats. The 4th or 5th coat got a little thick - in started to loose patience and painted a thicker coat with a wetter brush. that was probably a bad idea. Not awesome. Not as bad as it could have been, but not awesome. I'm hoping I can scrap off the bleeds once it dries with a toothpick and maybe some mineral spirits on a cotton swap. Right side of helmet. By the way, this side of the helmet in this area is quite different than the left side. These things really are wonky. Once it is dry, I will test the ears again and see if I need to remove the 14th stripe. The left side (right in the pic) seems a little further forward, but... I'm not doing this again. Sent from my iPhone using Tapatalk1 point
-
Third or fourth time gluing the thighs. I didn't show the right one, but that one is still giving me problems due to the funny shape of the coverstrip area. After much effort I finally managed to get this nylon base plate off. I'm moving it closer to the seam to help with the overlapping along the right ab to kidney seam New base plate. Glue is drying. Sent from my iPhone using Tapatalk1 point
-
Wow - this looks great! Best of luck to you. Great to see such a good looking ROTJ.1 point
-
Awesome-thanks again, will have to go back to the forearms for that and I'll keep that in mind when doing the torso. Tomorrow I'm going to start on the thighs so I'll see how those turn out. Until then.1 point
-
Jedi! Nice work man. Good luck on the approvals.1 point
-
lol thanks Walter1 point
-
starting to put parts on the sites now,,, the trigger frame and body will be another month or so.. Finishing the bolt assembly and the bayonet lug this month.... i think that will be it... ooo and the scope rail... My hengstler replica and the cast m38 are almost done too1 point
-
Thanks guys. I think the foam and new nylon strapping may work. Speaking of coming to terms with my OCD... I'm about to tackle this horror. Sent from my iPhone using Tapatalk1 point
-
That`s totally up to you, the interior is not something that`s regulated by the CRL..however...I always prefer the way they did it in the Movie so I have elastics (brackets and glued in) for all the connections but I know that alot of Troopers use webbing and snaps (single/double) and are happy with that. The elastic need to be of a good quality for it to work the best, same goes for snaps. As you already put in the snap bases then brackets might be out (never too late though) but I would say that if you have the option to try both variants (using snaps) then you can see which works best - other than that it`s up to you to decide...and good progress Great feeling isn`t it1 point
-
And just got my shipping notice. Sent from my VK815 using Tapatalk1 point
-
A little more done tonight! Looks better than I deserve!!! [emoji12] Sent from my iPhone using Tapatalk1 point
-
Hey Lou, Thanks! Just noticed that we're practially neighbors! Are you a GA Garrison member? It's been a slow start to the new year with a flu bug, but I'm managing. My white plastic is staring at me, begging me to get back to assembling it. Once I kick this bug, I'll be full steam ahead on the Hero build. Woo! Here's a taste of the other build that I finished late in 2017. Can you find me? (answer below) Hee hee... I'm the jawa on the left. Being a jawa is fun and very comfy. But it's nothing like being a TK!!! And this is for my own reference, but other Short Builders might find it helpful, too (I refer back to my own threads, is that so wrong?). This is my trim guide for sizing down a TK.1 point
-
I cut some curves into the side straps. Again, just getting a feel for how it will look.1 point
-
Had a little fun, today... (Please don't hate me because I'm beautiful!) I'm guessing I'll need to trim at least two inches off of the top of thighs, which I guess means I'll need to recreate the return edges? I also forgot to trim the sides off of the thigh ammo pack, which is an easy fix, of course.1 point
-
You know those cargo straps extension that comes with your Luggage? I use that. I slide it through the Pauldron back and wrap the straps around the TK Shoulder. So for me, it sits perfectly where it needs to be1 point
-
Mine is attached to pauldron with pop rivets in two spots. Sent from my LGMS631 using Tapatalk1 point
-
I know, right?1 point
-
I don't know how to add a link but I can copy and paste. Thank you TI-3844 for originally posting this Contents [hide] 1 HOWTO: Make Your Own ABS Paste 1.1 Step 1: Cut ABS Strips 1.2 Step 2: Mix with Acetone 1.3 Step 3: Wait 1.4 Step 4: Apply Paste 1.5 Step 5: Let Dry HOWTO: Make Your Own ABS Paste Author: TI-3844 This HOWTO describes how to mix up a batch of ABS paste to fill in gaps and repair your armor. Step 1: Cut ABS Strips Cut thin, short strips of matching ABS into a (clean) cup or similar. A glass vessel is preferred! Don't go pouring acetone into a plastic cup. Step 2: Mix with Acetone Carefully pour acetone so the fluid covers the ABS shards. Go easy on the acetone - add a little at a lime instead of drowning the ABS shards. We're talking really small amounts of the stuff here - a couple of thimbles worth of shards and acetone. Step 3: Wait Depending on the thickness of the ABS pieces, acetone dissolvation time might vary. Check progress every now and then, stir a little with a (clean) rod or stick. Apply more acetone if plastic won't dissolve in a satisfactory way. Go easy on the acetone though - you want a runny, but not watery substance Step 4: Apply Paste When the acetone/ABS concoction is a bit on the runny side, begin applying to damaged area on armour or helmet. Easy does it - make sure you fill the gouge properly. Step 5: Let Dry When happy with the results, leave alone and let the acetone dissolve fully. ABS hardens and fuses with your armor/helmet. Regarding drying time, it depends on amount of ABS goo used and size of damaged area. YMMW. If your ABS milk is runny enough, it will just fill the damaged area - no need to sand. Still, if you get a bump, sand it down with fine-grit sandpaper, buff out the rest with Novus, and you're done! NOTES: This stuff is really flammable and generally unhealthy. Be careful! Remember that acetone starts dissolving right away, so one must keep an eye on the process all the time, and when the mixture is done, use it right away to repair the armour/helmet.1 point


.thumb.webp.27f7939d37871f319ff836257d4a3668.webp)


.thumb.jpg.fe734c2874fe147a5789e833ad00772e.jpg)