Leaderboard


Popular Content
Showing content with the highest reputation on 12/22/2017 in all areas
-
The more I troop in this armor, the more I find I want to tweak/fix. Today's menu is my boots, which like to pop out of my shins. I removed the velcro I'd previously glued to the front and made some new velcro tabs for the front, and leather tabs for the back: These will be used in conjunction with some Velcro tie-downs I bought off Amazon (these ones, for those interested) so I can cinch the boots tight to my ankles: Preliminary tests seem positive, but I'll find out in about two hours (last troop of 2017!).2 points
-
Ok, here's an update covering some work I did a few days ago as well as what I'm working on today. I did start with the torso. I went over all of the parts and did some more trimming, sanding and fitting until I felt that it fit together well, didn't have any biting edges when I held the parts to my body, and I looked at suit reference from screenshots and the Gallery here to see what they had done to various return edges on the torso for the films. Here's a couple of photos showing the chest piece return edge tweaks as well as my abdomen/kidney taped together. It seems to fit me pretty well with no adjustments. I'm 5'10" and 160 lbs. so there's some room in the mid section there (particularly at the sides) but it fits snug against my stomach and back. Next up I made the decision to drill all of the holes in the pieces that are needed for the original bracket system that the film suits had. I'm still not sure if I'm going to use my Mr.Nostripes kit to actually rig my suit, but I wanted the look of the originals with the exposed screw heads so I'm going to do the work required to mount at least the screws and nuts. I'm leaning towards snaps plates right now, but this would give me the option to go either way if I change my mind. Following ukswrath's tutorial, I measured and marked all of the hole locations. And then I quadruple checked all of the brackets would fit and align with other pieces before drilling: And then I went to town drilling all of the marked locations starting with the back: I then test fit the hardware to ensure everything was as planned: Then I went ad repeated the process for the remaining torso parts: Everything went well. I have a few more things to do before I call this step done. Here's what I'm planning: 1. Lightly countersink all holes from the outside to get the screw heads to recess a bit closer to flush 2. Install bracket pads to help reinforce the locations that I drilled just to give the armor a bit more thickness (I'm 3D printing some pads in ABS) 3. Reinstall screws and nuts without the wire brackets for now (this will also help hold the bracket pads in place while glue dries) After that, I plan to start drilling holes for all of the torso rivets/snaps/poppers. -Dana2 points
-
1 point
-
1 point
-
Excellent, my brain told me something good! Thanks for that. On the topic of belts: I’ve been thinking about using snaps to attach the ammo pack/belt to the canvas belt, with the snaps hidden as per usual by the button caps. That way I can swap the belts out easily when I go HWT. Are there any requirements of L2/3 that I’ve missed that would limit this? I can’t see any but I haven’t found anyone else doing this. Yes the belt might sit a fraction higher against my armour but not in a noticeable way.1 point
-
That’s coming on a treat, mate. :-) Sent from my iPhone using Tapatalk1 point
-
Thanks marra [emoji6] Ok so it seems ages since i posted something . A bit further on now . Need to Sort the strapping out a little . lower the chest a touch Shoulder bridges just held in place with a little velcro for photo purposes and not glued yet. Shoulders i can get closer but pulls the webbing under shoulder bridges . Maybe loosen between shoulder bell and bicep . Will keep playing to close the gap . Maybe a little more from return edge of shoulder bell Shins are not showwn . Ill wait to do these once i can size with some boots from rs [emoji4] How things looking ? Thanks Dave1 point
-
Td screws Belt connection armor side D ring Once i finish up at work (pending no baby) i eill get new phtots. Thanks you1 point
-
As many of you will already know, chapter #32 - Downloads contains two PDFs (A4 and US letter size) that are direct copies of this thread content, with only minimum changes to optimize some page breaks here and there. Both PDFs have now been updated with all the additions from the contributors and the links are now also available in the very first posting. A document version (currently Dec. 2017) is stated on page 2 of each PDF.1 point
-
Kits coming out awesome!1 point
-
Congrats Tony - I love the level of depth you put in to the build. There are a lot of smart techniques that you used to make this happen, and the results are stellar. Well done you!1 point
-
Thanks. That will have to wait until after Christmas I think. I'm off to my first charity troop today with my local garrison!1 point
-
Congrats!!!1 point
-
Congrats! Time to get that EIB app in!1 point
-
Lots of progress today! I got the snaps glued in, attached the sniper knee and got the front cover strips installed onto the thighs. For the sniper knee, one of my 501st buddies recommended shimming with a couple layers of abs. This rotates the sniper knee slightly, so it doesn't cut into your kneecap during troops. Sent from my XT1254 using Tapatalk1 point
-
Awesome! Congratulations TROOPER1 point
-
You've come to the right place. This forum has a section specifically for kit builders to log their progress, report problems, and make suggestions. There are plenty of "build threads", each one by one builder. Pick one and read through it. If you decide to take the plunge, then read a few threads again. When you think you have learned the material, read a couple of threads again. There's a lot of detail to cover, and a lot of tricks and traps. https://www.whitearmor.net/forum/forum/152-first-order-stormtroopers/ I don't think you can buy a smaller one; I suspect you'll have to modify yours. You're probably not the first person to have come up against this problem: look through the threads; I'm sure you'll find a couple of threads written by short builders. Best of luck and patience. (You don't have to be skilled to build a kit; you have to built a kit to become skilled.) (Well, you do have to be careful.) Oh, look what I found, just by browsing. This is for the Anovos ANH kit, but it may give you ideas for yours. https://www.whitearmor.net/forum/topic/42043-zels-anovos-stunt-build-for-the-mini-and-vertically-challenged/1 point
-
TK-19165 reporting for duty! Wow, that was fast! Thanks everyone for your help and feedback. I look forward to serving with my garrison and meeting many of you in the future. I will continue my build thread with the mods and electronics I plan for my TK as well as any interesting info I may find useful.1 point
-
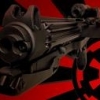
Hi guys, And the moment you’ve all been waiting for.... So, the rubber blaster IS lighter, but not by a massive amount. I tried a little tidying tonight, however it’s not a material I’m enjoying ‘working’ with. Resin is so nice to modify and adjust, whereas this is a bit awkward. It gives me extra respect for the work that Ryan did when making it. As such, I’m not really going to modify this past what is done. From a few feet away, it holds up well against my Doopy’s and, as intended, gives me a lower risk item for trooping. Here’s a few more shots, just for fun. I’ll get a few action shots too, next time I’m kitted up. Thanks for following guys. I’ll update if I make any more changes. Again, big thumbs up for this. Lovely piece from Imperial Warfighters. :-) Dan Sent from my iPhone using Tapatalk1 point
-
Nice one marra [emoji122][emoji122][emoji122]you have really got through this build quickly and your armour is looking great , you have done a beautiful job on your buttons Nice one Sent from my iPhone using Tapatalk1 point
-
Twenty Minutes of Deleted Scenes Coming on 'The Last Jedi' Blu-Ray1 point
-
I added decals after the clear coat, the paint can sometimes soften the adhesive if you clear coat after decals are applied.1 point
-
1 point
-
Great work! The helmet is looking great again!1 point
-
Decided to just hang this around my neck... Sent from my iPhone using Tapatalk1 point


.thumb.webp.27f7939d37871f319ff836257d4a3668.webp)


.thumb.jpg.fe734c2874fe147a5789e833ad00772e.jpg)