Sly11
-
Posts
13,367 -
Joined
-
Last visited
-
Days Won
278
Content Type
Profiles
Forums
Gallery
Articles
Everything posted by Sly11
-
Hey Scotty, DW group photo would be awesome. if we get a descent sized print, get some of our troopers to sign the back of it, and we can give him some trading cards. Sent from my iPad using Tapatalk
-

TK - 25358 requesting ANH Stunt Centurion Status [SDS] [236]
Sly11 replied to SG JIG's topic in Request Centurion Status
Hello to you Jaime and welcome to the next phase of your journey!! thank you for your application, lets take a look at your armour. CRL and Centurion Application Requirements: All required submission photos have been posted. It has been determined that your armor displays all the necessary requirements to qualify for Centurion. Ukswrath and I would like to congratulate you on an tidy build and welcome you to the rank of Centurion! Other-Armor Fit/Assembly: In this section, we will summarize observations made by your fellow troopers and our own. Sometimes these observations lead to suggestions to improve the final look of your armor. I would like to thank you for rectifying the Back to kidney plate gap, it is now sitting perfectly. The eye sockets look nice and clean as well with that litle bit of return edge removed. Everything else is in order. Yet again, Congratulations on your Centurion rank, march on out and make your garrison proud -
TK - 25358 requesting ANH Stunt Centurion Status [SDS] [236]
Sly11 replied to SG JIG's topic in Request Centurion Status
Great work Jaime and your English is excellent my friend. Sent from my iPad using Tapatalk -
Hey Brenden, thanks for your application, lets get it underway!! CRL and EIB Application Requirements: All required photos have been submitted. Your armor contains all necessary elements to qualify for EIB. With that, we would like to congratulate and welcome you to Expert Infantry!!! Other-Armor Fit/Assembly: In this section we will discuss observations by both your fellow troopers and ourselves that are suggestions to improve the overall final look of your armor. These suggestions will not affect any application. Those that do are listed in the above or below sections. As you started your application mentioning the fun and games you have had with your Butt Plate, I thought it fitting to start your review with a suggestion we believe will alleviate the problem. If you move the snap positions out closer to the ends and in closer to the return edges of the bottom of Kidney and top of butt plate, then use wider strapping of approx 50mm wide and a touch shorter, it will prevent the pop out. Basically it gives a lot less room for movement at the joint. Again thicker strapping may help you with the gap opening up between the back and kidney plate as well. Try shortening the straps first to see how it goes, and make sure that Thermal Det is on straight and nice n secure. Your fore arms are just out a little, so raising the lower of the two to be inline or have an even gap, will just get you looking that much sharper. Hovi tip mesh could be changed out for some a little more screen accurate. This is not a deal breaker and wont effect a Centurion application. Image for reference The ear screws can also be updated to a V head type for more screen accuracy as well. Image for reference Centurion Suggestions: Although we attempt to spot and suggest things that make passing Centurion easier, the application requires a more detailed set of pics that can reveal things not always seen here. The final product is ultimately the responsibility of the trooper. The Back to kidney alignment that is actually stated in the above section is something we would like to see adjusted for your Centurion application. It is a higher level and I'm sure you will want to have yourself looking as smart as possible in your photo shoot. A repaint of the Vocoder would also be a good idea. Currently it is loosing alot of the detail and shape and we would like to see it looking more like the screen used style. Please use the Hovi tip images in the above section for a comparrison. Its really only the small details of balance in fit and gaps, those special little touches that are always worth the effort and something to be proud of. Straight Thermal dets, shiny armour and troopers standing proud. Congratulations once again, see you in Centurion review soon.
-
TK - 25358 requesting ANH Stunt Centurion Status [SDS] [236]
Sly11 replied to SG JIG's topic in Request Centurion Status
Hi again Jaime. Almost on to your application, but I just wanted to give you the opportunity to fix one thing for me, and submit a new photo. The full back shot of your armour shows a gap opening up on the left side of the image between the back and kidney plate. Could you possibly shorten up that outer strap so it looks as good as the other side, and post up the new photo. Thank you for your patience. -
TK-11238 Requesting ANH Stunt EIB Status (Anovos)
Sly11 replied to Robotster's topic in Request Expert Infantry Status
Hey Steve, we are are for you when your ready, nice build. -
TK - 25358 requesting ANH Stunt Centurion Status [SDS] [236]
Sly11 replied to SG JIG's topic in Request Centurion Status
Hi Jamie, Ukswrath or myself will be with you shortly. In the mean time I just want to assure you that, the make of armour in no way effects your ability to achieve Centurion, unless it is stated in the CRL that parts are required to be changed. You have done a great job with your SDS armour my friend. -
TK38991 requesting ANH Stunt EIB status [Anovos] [579]
Sly11 replied to rtfitzpa's topic in Request Expert Infantry Status
Hey Ryan!!, thank you for your application, and updating the info and photos, lets take a look at your armour. CRL and EIB Application Requirements: All requested photos are present and your armor meets all the requirements set out for EIB. Ukawrath and myself would like to congratulate you on achieving Expert Infantry rank!! Other-Armor Fit/Assembly: In this section we review comments made by your fellow troopers as well as our own observations. Its good to see you jumped onto the various suggestions from your fellow troopers, that's great work. A few of those things are only needed for Centurion so its nice that they are know ticked off the to do list. The updated image of you back makes a couple of things more obvious to us so we will make some suggestions. 1.Separation of the back and Kidney plate. It looks like the weight of your blaster is the potential cause of this, but also the outer most strap could using a touch of shortening. Second to that, it also shows how much room you have to move in the Ab to kidney region. It does look a little large around the middle, so we see there are two options here. The easiest is to add some pieces of foam to the inside of those parts. This will allow the armor to be in contact a a few extra points with your mid section when you put on your ammo belt . That alone will reduce the chance of your armour sagging as much on that side. The second of the two options would be to trim some material off both sides of the kidney plate bringing the two halves in better contact with you body and giving a better form fit. Definitely try option 1 first as it may make the right amount of difference. Butt plate popping out. This may stem partly from the Ab to kidney fit, but just make sure the straps are not too long. Due to the traditional strapping method, that's about all you can do, unless you add some extra straps to the inside using snap plates and more elastic. No one will see them when you are wearing the armour and you will still have the traditional look from the outside. Please make sure it is all aligned nicely for your future Centurion application, even if it means not having the E11 holstered for you photos. Thigh sizing: We have noticed your thigh armour looks quite large, and judging by the image below you have miles of room to move. Again you have two choices, but the obvious one is to utalise some foam padding inside. This will stop them from twisting and prevent the knock kneed effect . Alternatively, you can resize them to better fit., only suggestions. Centurion Suggestions: Welcome to the section where we do our best to get you ready for Centurion, the ultimate level of accuracy is up to the trooper, but we still like to push the envelope here. Firstly, you have done well to get to this point so lets take it to the next level. The abdomen side snap should be left unpainted, so we would kindly ask you to remove the white paint. Overall your helmet is fantastic, but it appears the lens is not sitting far enough in to the eye sockets, you may have to rew try and drill a few extra holes to get it right in. We would also highly advise that once you have the lens correctly fitted, that you cut off some of the length of the bolts. This is for your own safety alone. Sometimes over zealous fans can whack you across the helmet thinking its funny, and I would hate to hear that in the event this did happen, you were hurt by the bolts . The eye sockets could also do with a little sanding to clean them up. Yet again, thank you for putting the extra effort in with this application, thank you for your patience and Congratulations trooper See you in Centurion soon. -
Congratulations!! Sent from my iPad using Tapatalk
-
I definitely agree with this as one of the best methods. You can also use wider elastic with Two snaps, like 50 mm instead of the narrower stuff on the ends. Great work by the way.
-
Great job Chris [emoji106] Sent from my iPad using Tapatalk
-
Tutorial is posted up guys Sent from my iPad using Tapatalk
-
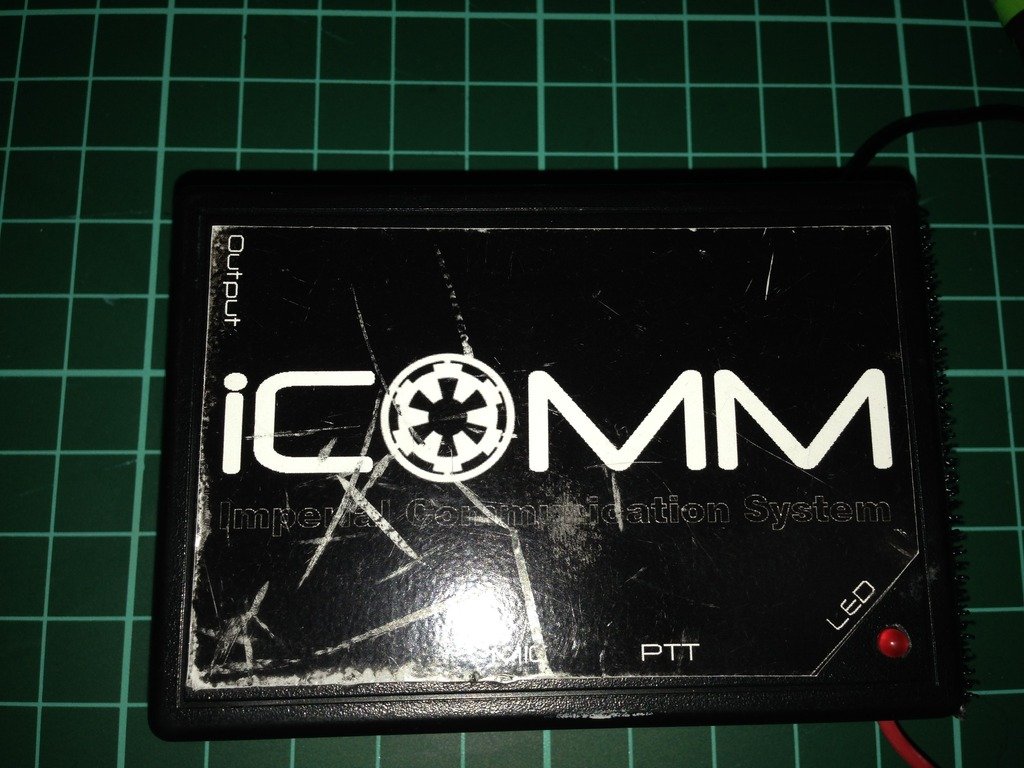
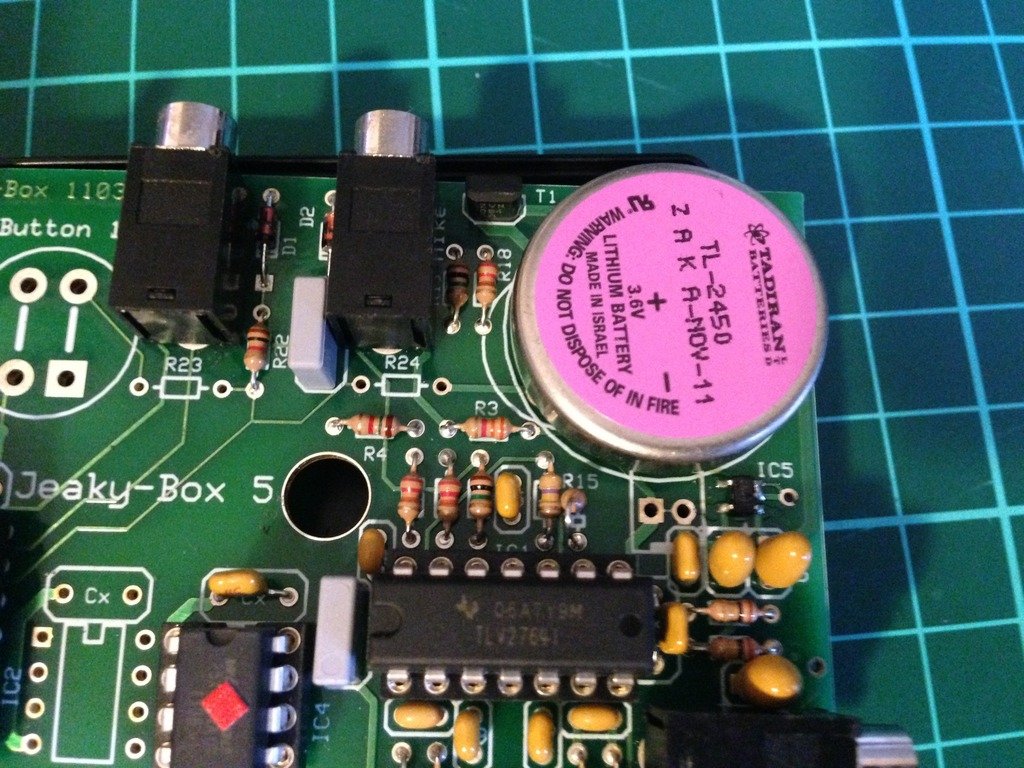
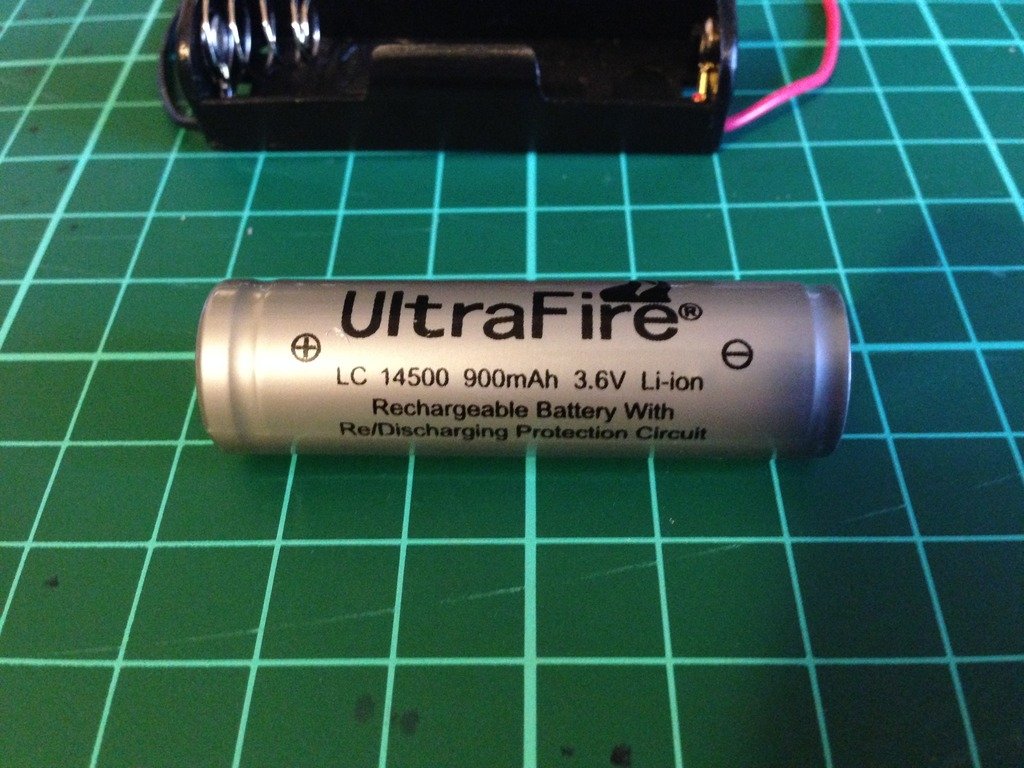
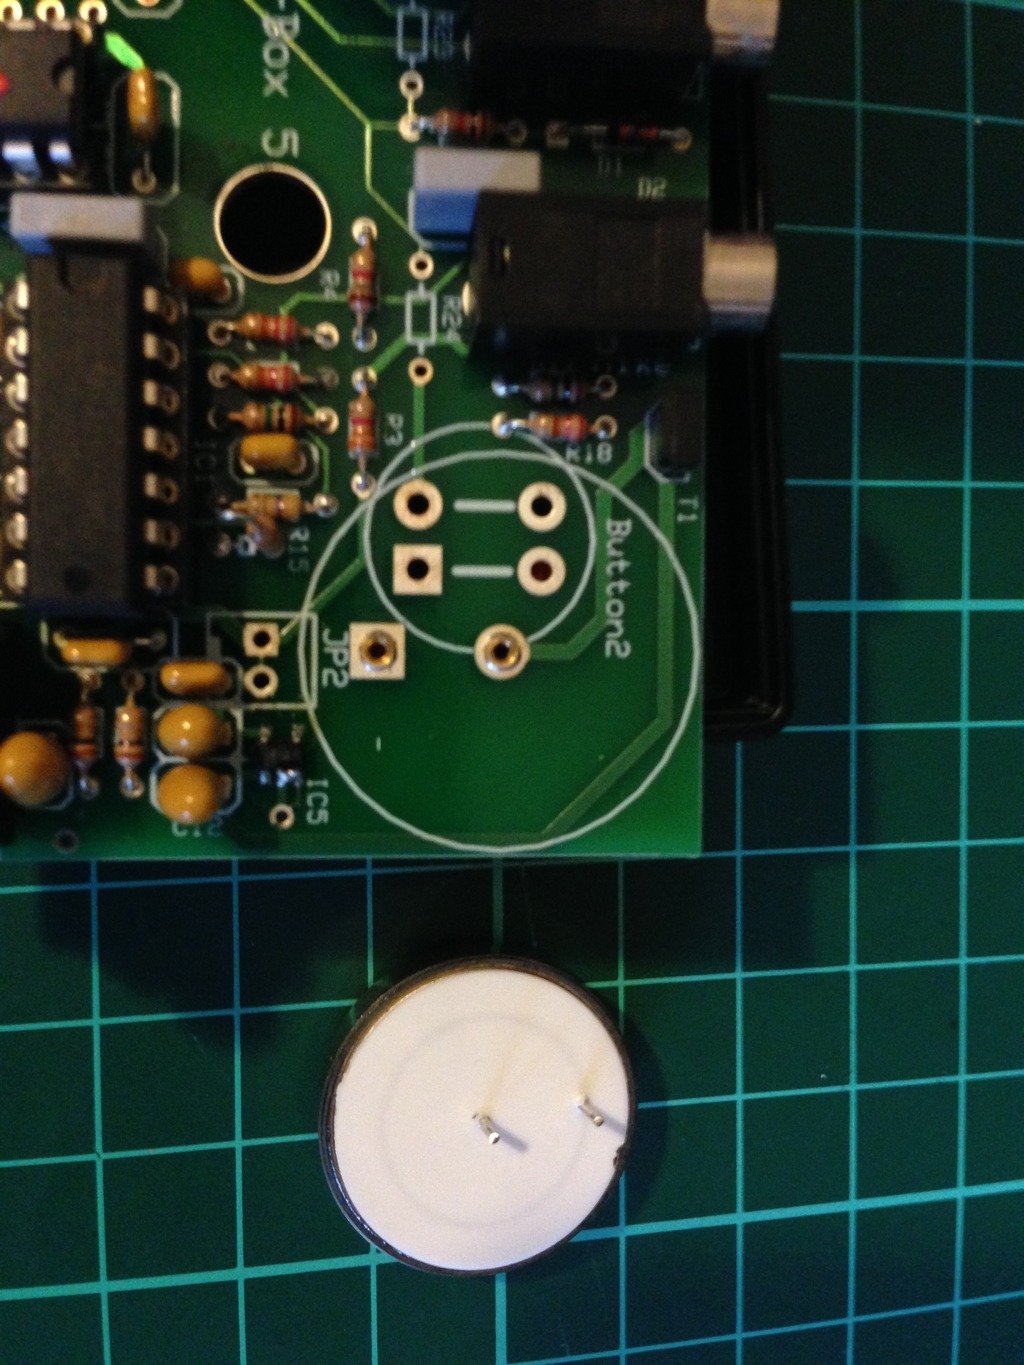
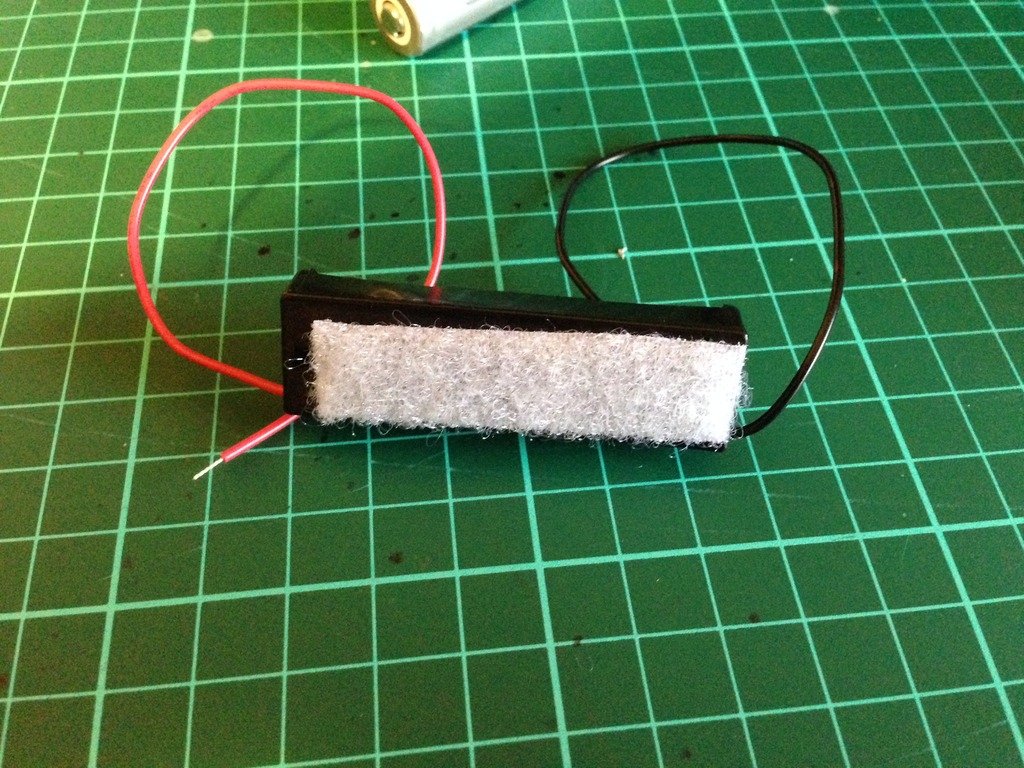
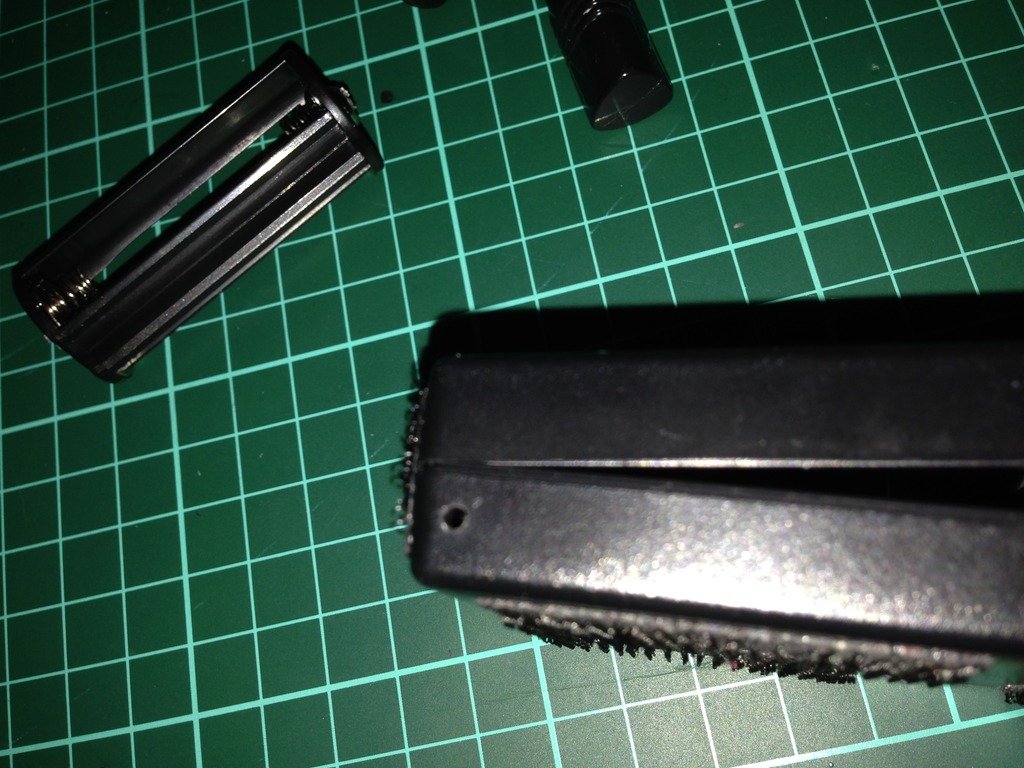
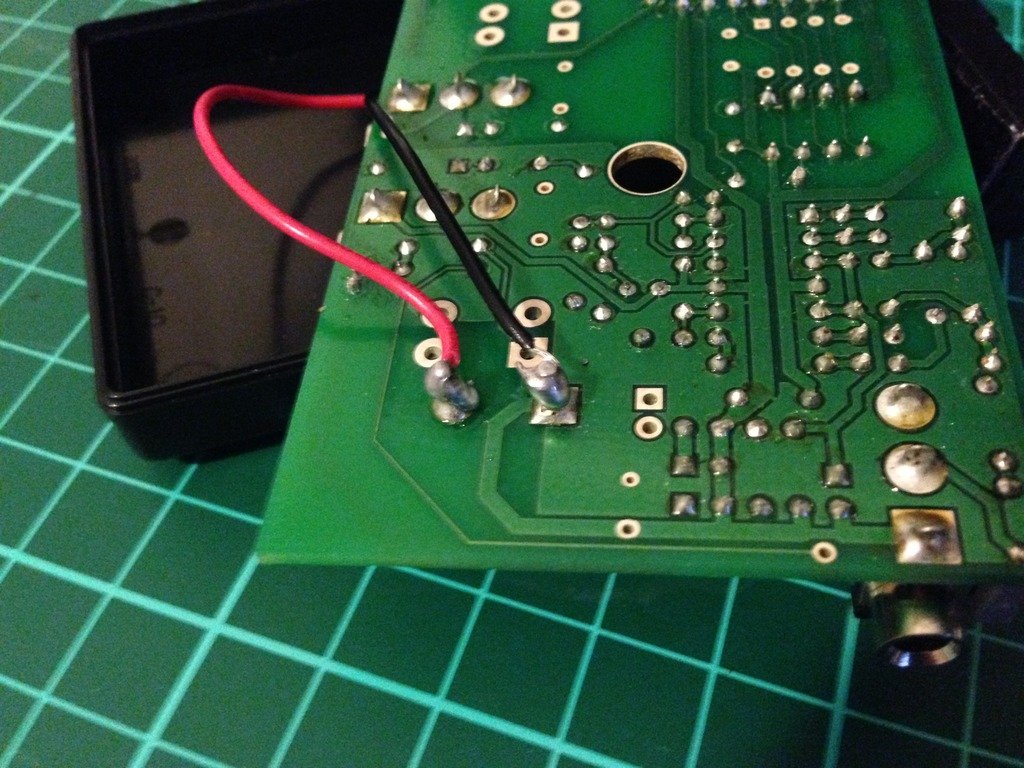
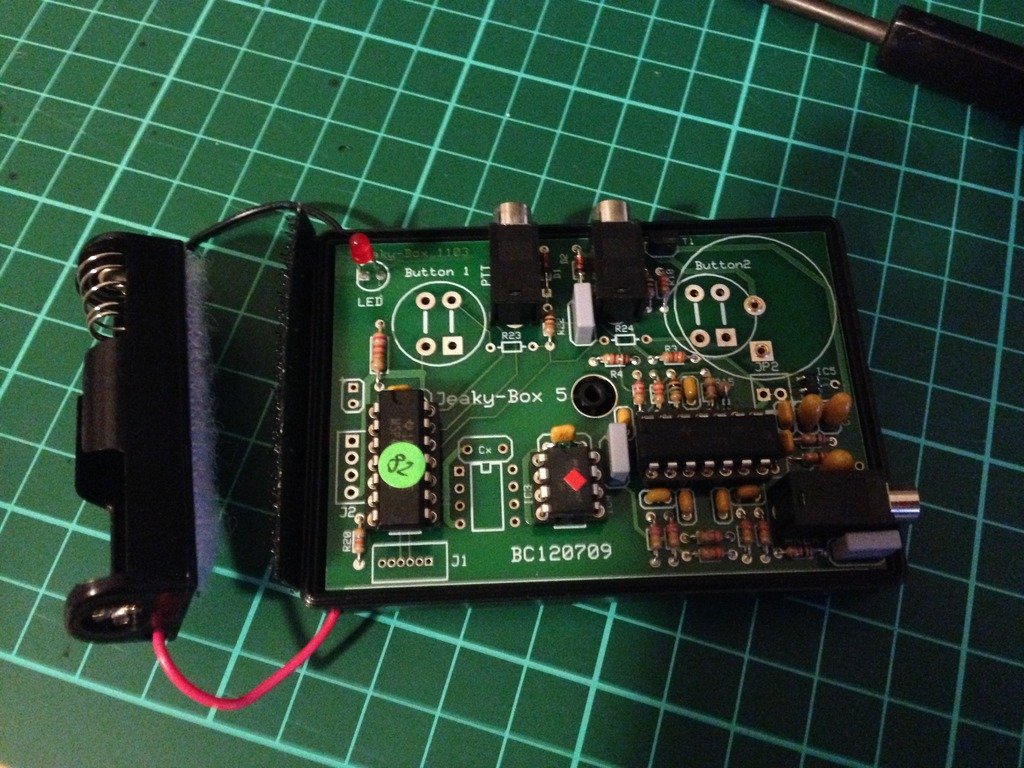
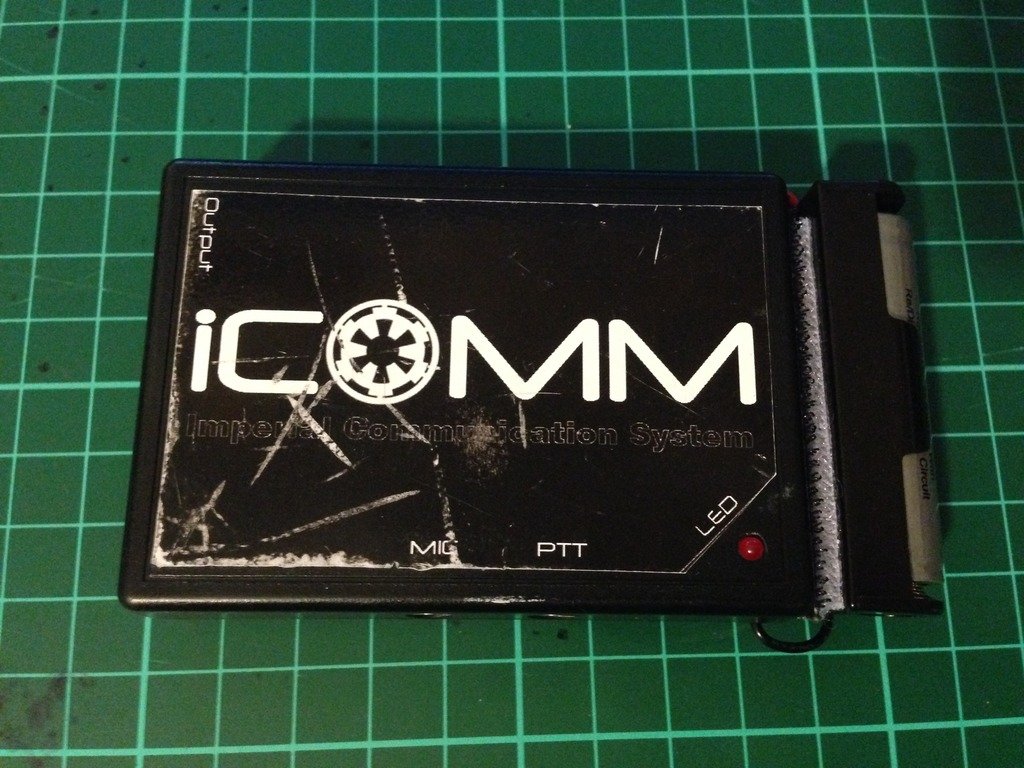
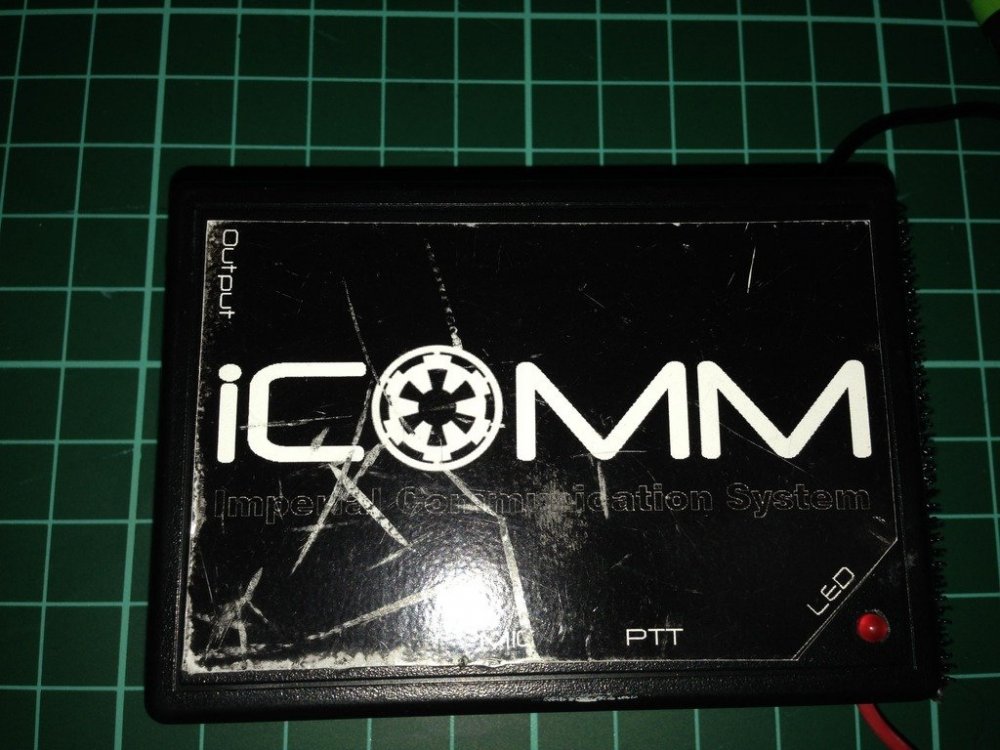
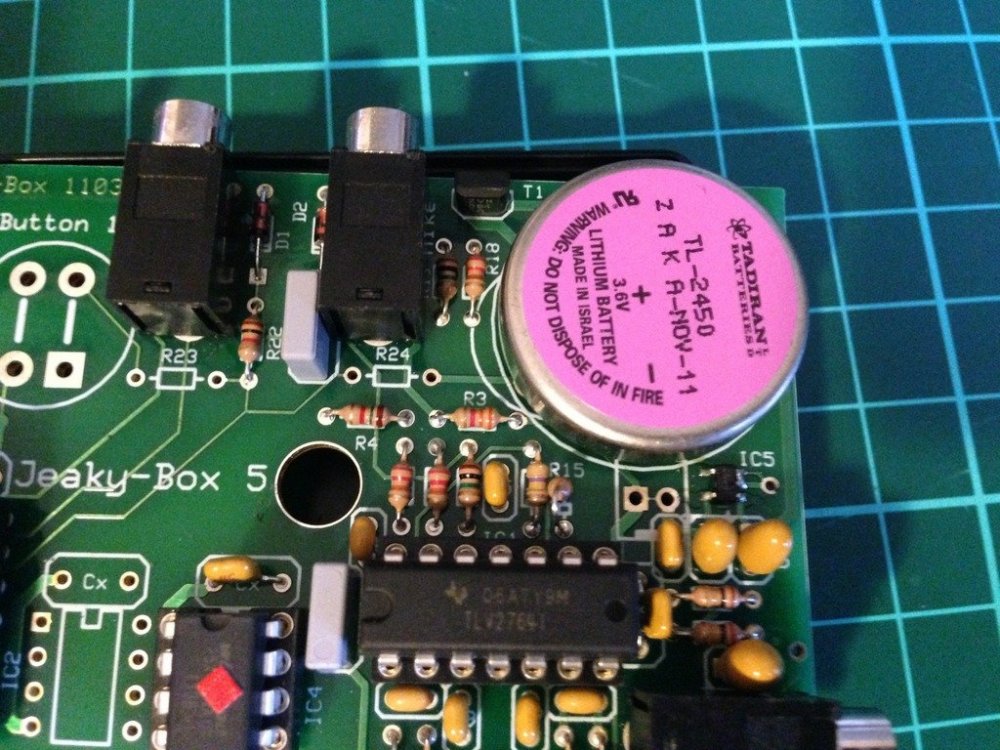
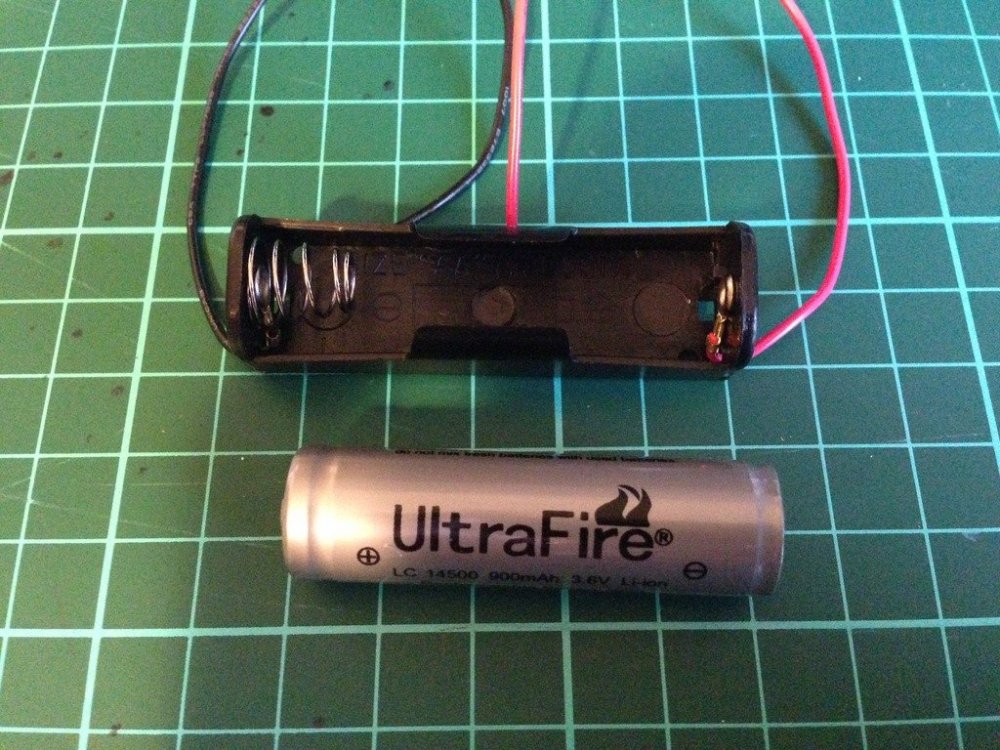
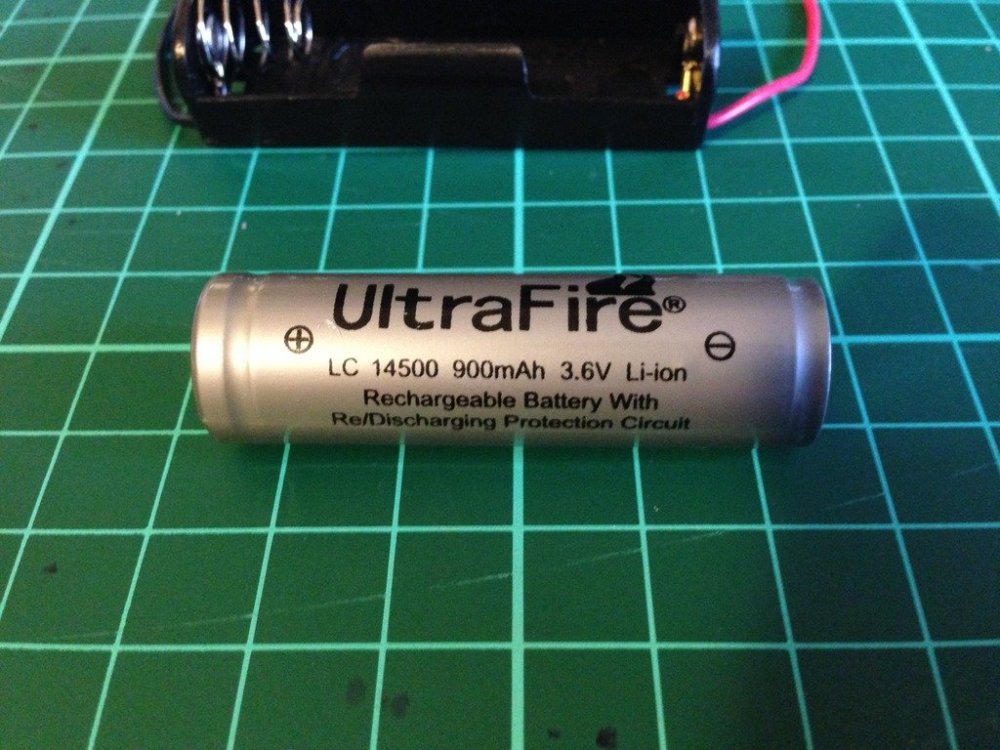
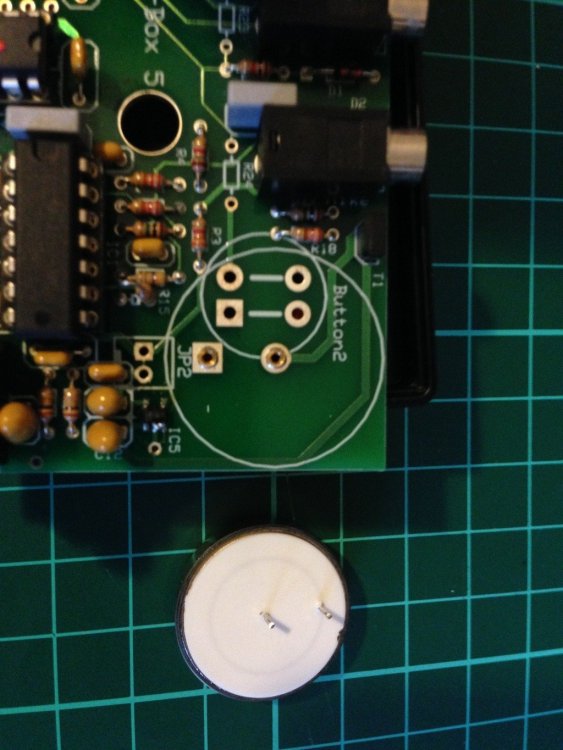
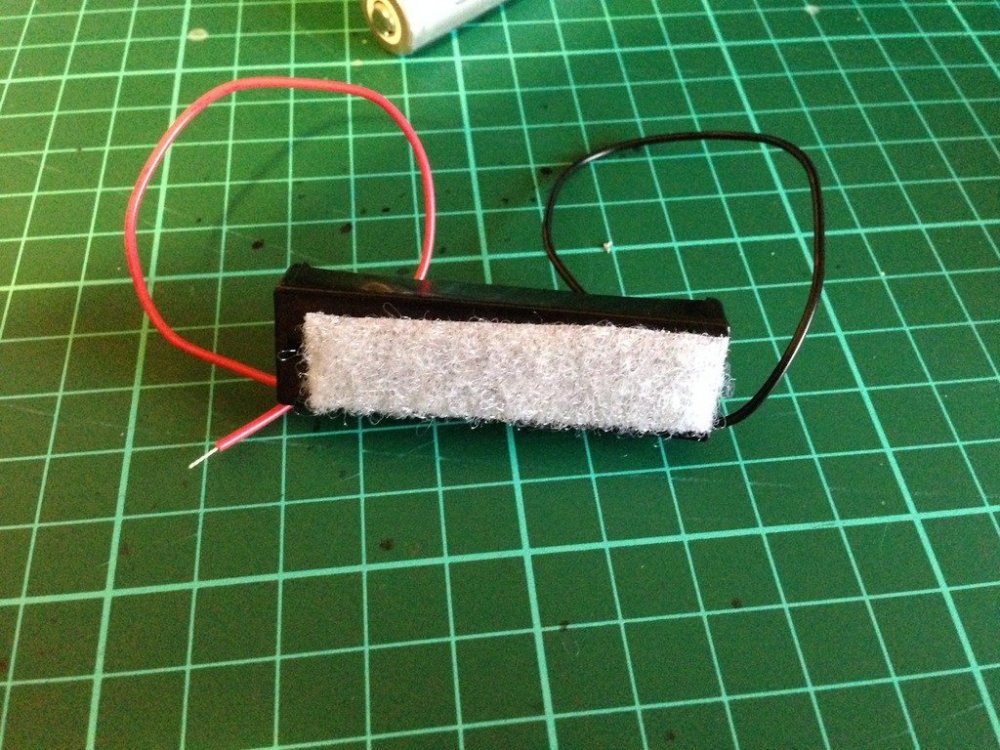
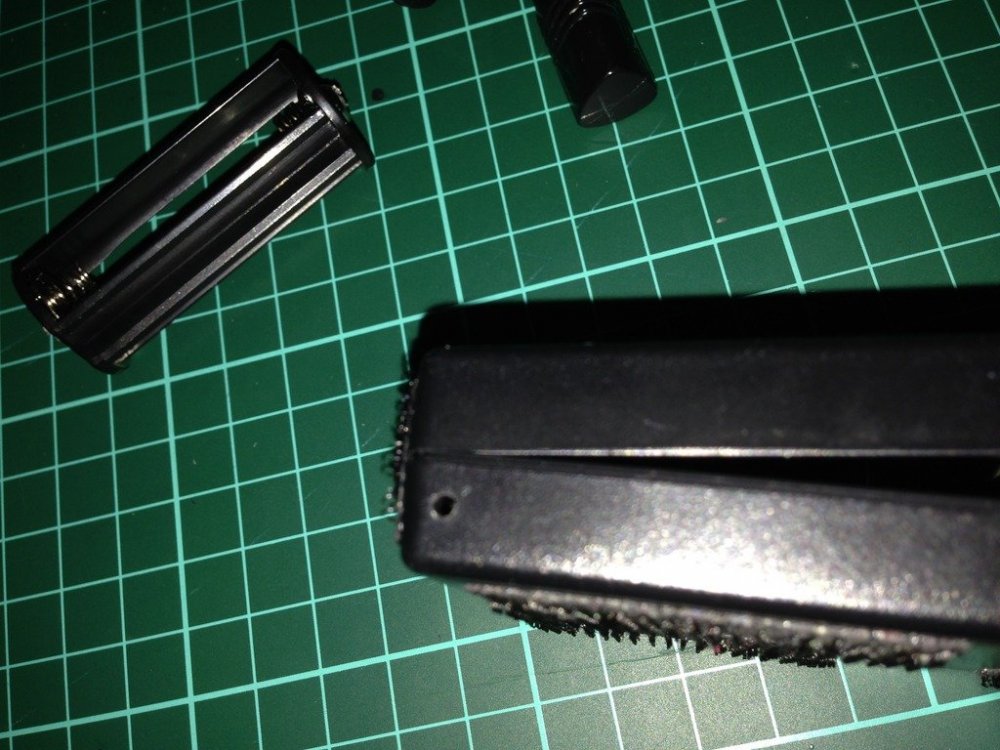
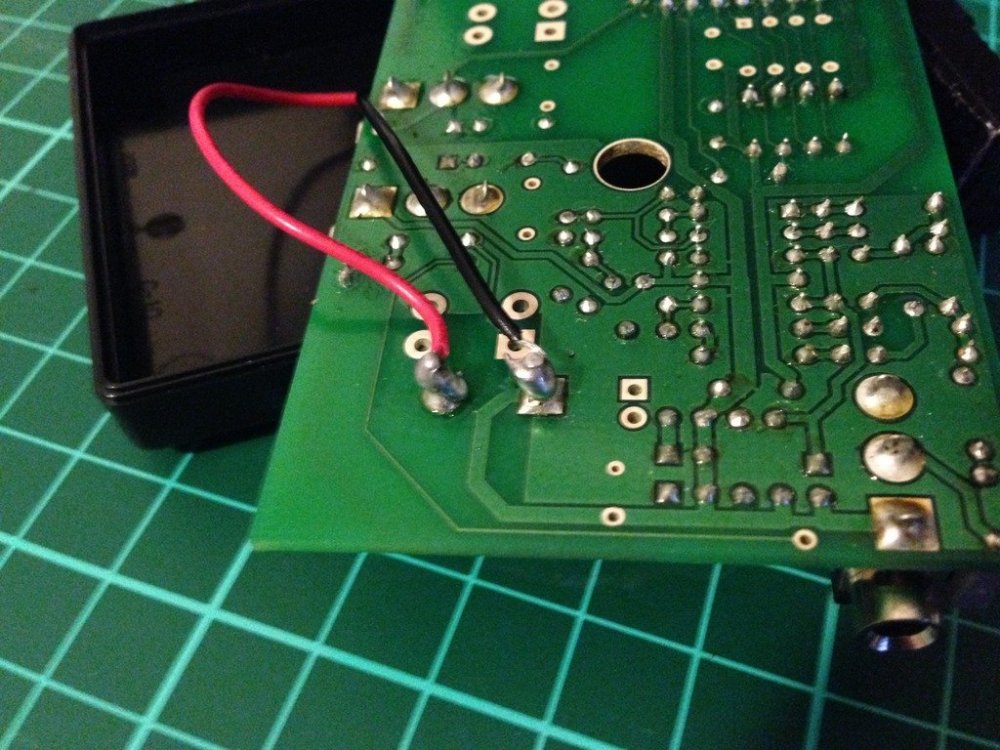
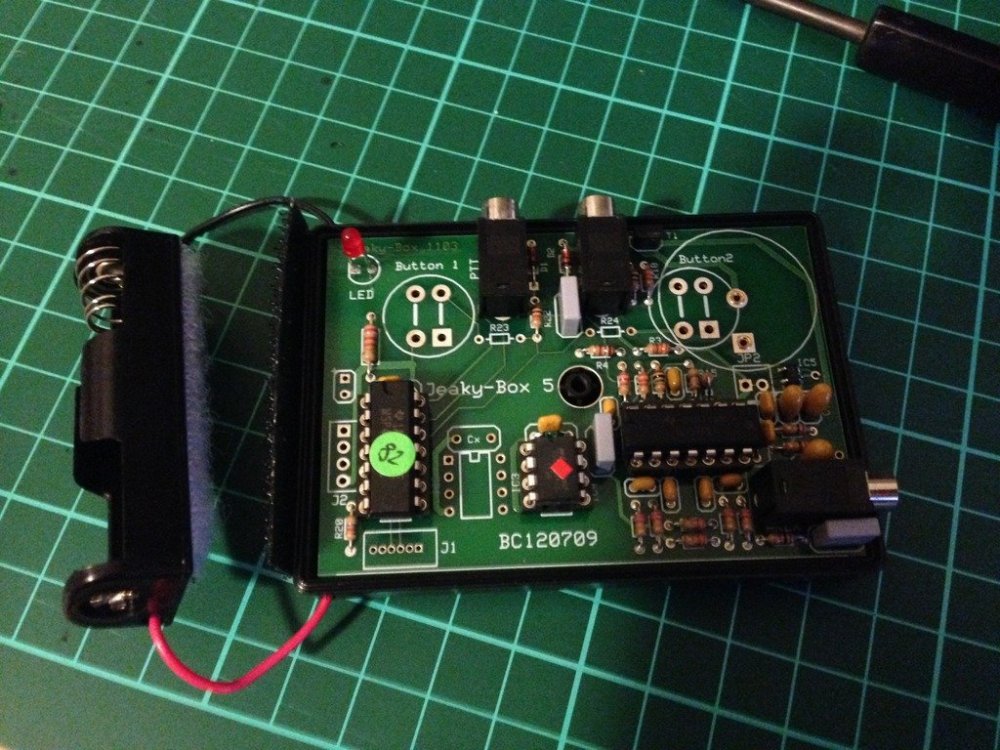
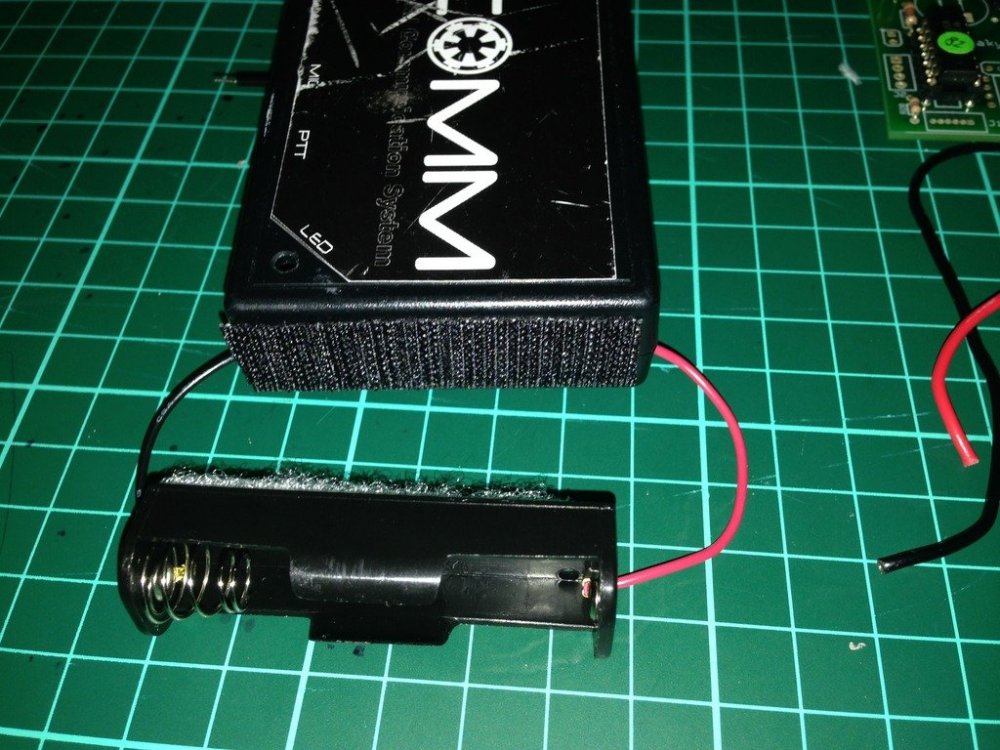
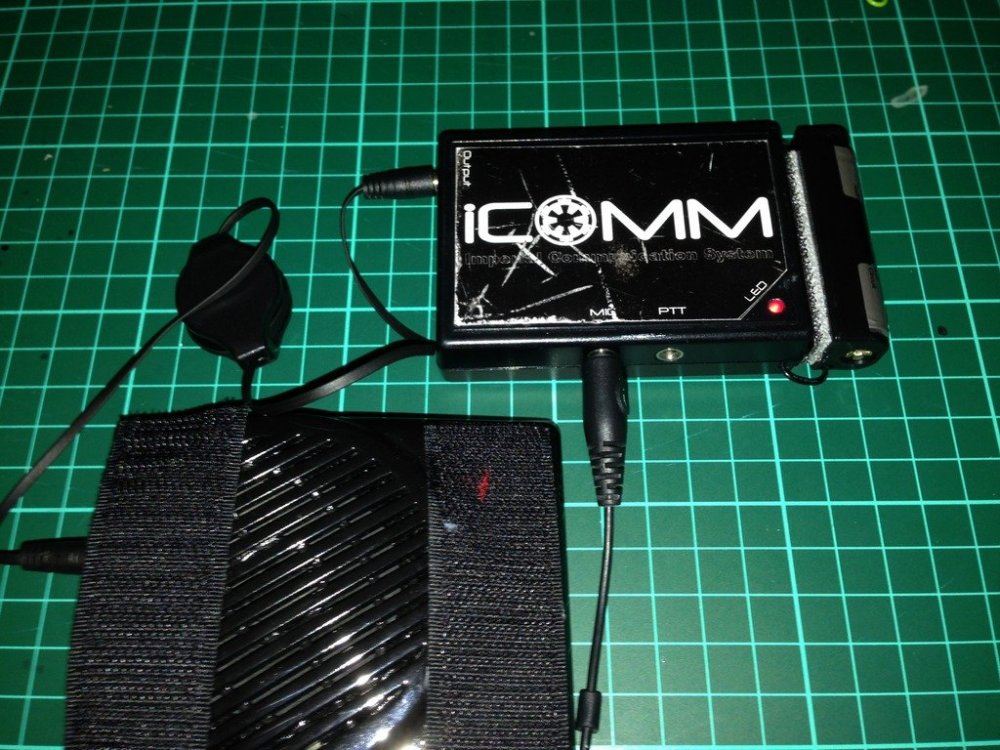
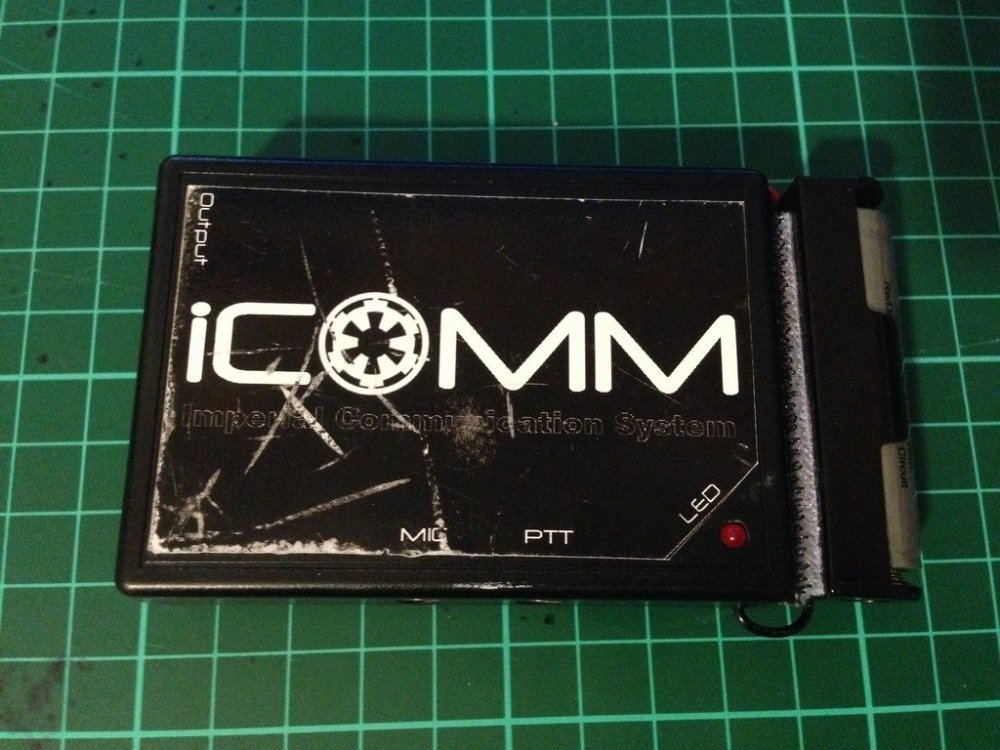
The humble iCOMM, works well while the internal battery is good, but after a year or so..........they stop working. How to tell, its the iCOMM battery. If the little red light no longer comes on and the static burst is not sounding, there is a good chance it is just a flat battery. Image has been scaled down 42% (600x450). Click this bar to view original image (1024x768). Click image to open in new window. Internal iCOMM battery Image has been scaled down 42% (600x450). Click this bar to view original image (1024x768). Click image to open in new window. Freight is expensive to get the very specific battery that is inside. Genuine replacement batt $5 US, freight, $25 US. Whattt!!! $30 US.... for a battery.....at least that's what I said. (approx $38.40 AUS) So I decided to do a little research, and come up with a reasonably simple and inexpensive mod, approx $12-$15 Aus. A simple AA battery holder and a rechargeable Lithium ion battery. Image has been scaled down 42% (600x450). Click this bar to view original image (1024x768). Click image to open in new window. Not just any kind of rechargeable battery can be used. The iCOMM is sensitive to voltage, so a 3.6 volt battery is required. The milliamp hour rating, or how much draw per hour on the battery, is only 560mAh, not bad for its small size, but I have replaced it with a 900mAh, so almost twice the capacity, and rechargeable. Approximate lifespan......Years and years. I chose to go with a battery with an internal protection circuit, as Li-ion batteries are finicky with charging. (have been known to EXPLODE). A digital battery charger, designed to suit 3.6-3.7 volts is perfect. Available on evilbay for as cheap as $5 shipped from China Image has been scaled down 42% (600x450). Click this bar to view original image (1024x768). Click image to open in new window. As I discovered during the research phase, the internal battery is easily removed. Image has been scaled down 42% (600x800). Click this bar to view original image (1024x1365). Click image to open in new window. First I added some adhesive Velcro to the back of the battery holder. Image has been scaled down 42% (600x450). Click this bar to view original image (1024x768). Click image to open in new window. Then I drilled a couple of small holes, one in either side of the bottom half of the iCOMM casing. Image has been scaled down 42% (600x450). Click this bar to view original image (1024x768). Click image to open in new window. Thread the red +, and black - ,wires through the holes of the casing.(From outside through to inside) When you flip the circuit board of the iCOMM over you can solder the wires to the corresponding posts. The outer most post is the positive (+) and the inner post the negative(-). Image has been scaled down 42% (600x450). Click this bar to view original image (1024x768). Click image to open in new window. Flip the circuit board back over and fit back into the case. Please note, you will actually have to fit the circuit board back into the top part of the case as it is the half that has all the plug holes and LED hole. Image has been scaled down 42% (600x450). Click this bar to view original image (1024x768). Click image to open in new window. Place the two halves together, put the screw back in, and add the opposite half of the adhesive Velcro to the end of the iCOMM. Feed the wires in through the holes to keep the excess out of the way. Image has been scaled down 42% (600x450). Click this bar to view original image (1024x768). Click image to open in new window. Tested for success, my iCOMM is again fully operational. Image has been scaled down 42% (600x450). Click this bar to view original image (1024x768). Click image to open in new window. As you can see, the overall size hasn't changed too much. iCOMM 8cm long, iCOMM with external battery adaption, 10cm long. The weight has increased by only 20 grams. Image has been scaled down 42% (600x450). Click this bar to view original image (1024x768). Click image to open in new window. Parts List and cost Battery Holder AA size $1.00 UltraFire Li-ion battery $6.00 (Protected circuit) Digital battery charger $5.00 miscellaneous bits $3.00 Battery holder from Jaycar, all other parts from ebay. Please note: These prices were in Australian $, so would be cheaper again in US$
- 38 replies
-
- 16
-

-
- icomm
- electronics
- (and 1 more)
-
I will copy this work around over onto FISD shortly . Sent from my iPad using Tapatalk
-
I use a $5 charger from eBay. It is a digital charger designed for 3.6-3.7v and has over charge protection. The batteries used in the work around are also protected from running too flat and over charging. The battery capacity last for a year on one charge du to the mah rating. I have know charged mine for the second time as we have a big troop coming up next weekend. Sent from my iPad using Tapatalk
-
Hi Chris, thank you for your application. Ukswrath started to write this application just before he went leave for a few days, so without further delay, lets look at your armour!! CRL and EIB Application Requirements: All the required photos are present. Your armor meets all the requirements needed for EIB. Sly and myself would like to congratulate and welcome you to Expert Infantry. Great job on your build trooper. Other-Armor Fit/Assembly: In this section we make suggestions made by either your peers or Sly and myself to enhance the overall look of your armor. These suggestions will not effect your EIB status. Though very minor, we do have a couple areas we would suggest you update. One would be the shoulder bell to shoulder and chest gap. We like to see that as minimal as possible. Shortening the connecting strap would really help in this area. Reference picture The other is a Centurion suggestion, see below. We see in your application thread that you have taken some suggestions from fellow troopers with regards to the your thigh armour. We would like to see the updated photos of those corrections in your future Centurion application Centurion Suggestions: In this area we make suggestions to prepare you for your Centurion badge. We get a bit more picky here. The following suggestion is up to you. It is not a requirement but more a accuracy suggestion. Hovi screens. The Anovos screen mesh is very fine and not very accurate. We've been suggesting to Anovos owners to replace the screen. They should be a bit heavier in construction. Reference picture Please show the new photos of thigh rotation and thigh lift and that's all we could find. Excellent work on a well deserved Expert Infantry badge, and see you in the Centurion application thread soon.
-
Man clean up those darn pencil lines on the side will ya!!! Lol, only joshing Josh [emoji6] Sent from my iPad using Tapatalk
-
Yes different seller. The Thai armour is definitely a recast of Kevin Brice armour, and he has plenty of photo evidence to back that up. Sent from my iPad using Tapatalk
-
TK-19812 Requesting ANH Stunt EIB [Anovos] [577]
Sly11 replied to TK19812's topic in Request Expert Infantry Status
Hi Sean, thank you for your application, time to see how you went!! CRL and EIB Application Requirements: All the required photos are present. Your armor meets all the requirements needed for EIB. Ukswrath and I would like to congratulate and welcome you to Expert Infantry. Great job Other-Armor Fit/Assembly: In this section we make recommendations to enhance the overall look of your armor. These areas are suggestions made by your peers, Sly and myself. These suggestions will not effect your EIB status. Firstly, thank you for adjusting your thigh armour, its looking better positioned correctly and slightly higher, well done. Now that they are even, maybe wear your forearms a little higher to close the gap between then and the bicep armour, approximately half the gap you currently have and you are good to go. Another thing is to watch those shins as they look like they tent to rotate a bit. There are a couple of things you can do to reduce or stop this. 1. Place some pieces of foam in the area at the top of the shin to prevent the movement. 2. Velcro on the upper front part of your boots and in the same place on the inside of the lower shin. There is also a stirrup you can make up that runs under your foot and stick out the top of the boot. again using Velcro to secure the end inside the front of the shin. Lowest ear screw. This might just be the angle of the shot, but the screw looks different to the others, if it is, and only a suggestion but you could replace it, or tighten it to change the position a little. We can see your attention to detail with the screws and mic tip mesh all replaced, and its obvious you are gunning for Centurion with the extra photos included in this application. Nice!! Centurion Suggestions: Tony and I do our best to spot anything that would effect a future application, and I am happy to say everything looks to be ready to apply. Congratulations again on a very slick set of armour, and we look forward to your Centurion application! -
TK-10488 Requesting ANH Stunt EIB Status (TM) [575]
Sly11 replied to bmth chris's topic in Request Expert Infantry Status
Hey Chris, welcome to your long awaited EIB review!! Thank you for your patience and for the upgrades you have made. Looks like the Planets have aligned and here we are on May the 4th Star Wars Day, lets get into it. CRL and EIB Application Requirements: All required photos have been posted and your armor contains all the necessary elements to qualify for Expert Infantry!! Congratulations and Welcome to EIB!! and May the 4th be with you Other-Armor Fit/Assembly: Its great that you have taken on board the comments some of your fellow troopers had made and decided to do some mods and upgrades before we did your review. Originally, we may have had some suggestions, but from what I can see you have addressed virtually all the concerns. The only real suggestion we have is to trim the sharp looking corners down on the sniper plate in case they catch on something or mark your under suit. Your armour looks well balanced for someone 6'2" and slim build, we think you have done a great job indeed. Centurion Suggestions: In this section we do our best to get you primed for a future Centurion application, we do try and spot everything but the final accuracy is up to the trooper. Again Chris not really anything to comment on here. For your Centurion application, follow the photo check list and CRL to make sure you have everything covered, and get that application in. Its a beautiful set of Trooper Master armour you have there, and your fellow garrison members will be proud to have you marching along side them. Again welcome to the rank of Expert infantry, now get out there and report for duty!! -
CFO ANH/ESB Hovi Pa2 Mic tips project
Sly11 replied to sskunky's topic in Build Threads Requireing Maintenance
Fabulous work Mark!! Sent from my iPad using Tapatalk -
TK38991 requesting ANH Stunt EIB status [Anovos] [579]
Sly11 replied to rtfitzpa's topic in Request Expert Infantry Status
Hey Ryan, the guys are all over this one, please fix your belt and post up new the photo. Also can you please put your details in at the top of the post as mentioned above, and lastly, can we please get a clear action shot, yours is very blurry. We actually use them in a separate thread on the forums. Thank you. -
TK-29118 requesting ESB EIB Status [AM 2.0/RT-Mod] [574]
Sly11 replied to sharkbait's topic in Request Expert Infantry Status
Hi Rebecca, good to see another lady trooper aiming high!!, thank you for your application, and the new modifications, lets take a look! CRL and EIB Application Requirements: All submission photos have been posted. Your armor displays all the necessary elements to qualify for EIB. Welcome to Expert Infantry trooper! Other-Armor Fit/Assembly: In this section, we review suggestions made by your fellow troopers and our own observations. All go towards improving the final look of your armor. If there is anything that would affect a future Centurion application it will be mentioned in that section at the bottom. You really have a nice set of armour Rebecca, so lets have a look at a couple of points that are going to really top off this great build. Shoulder Bells: the strap appears longer on one side compared to the other, so if you could shorten the longer one up so the bells are balanced, it will sharpen your finished look. The top of the bells should be virtually if not touching the bridges, as in the below image. Shoulder bridge alignment: This one circled may require a little heat to bend it more in line with the back plate, cosmetic, yeah, but it will look beautiful sitting the same as its counter part on the opposite shoulder. Centurion Suggestions: We do our best to spot everything, but ultimate level of accuracy for Centurion is up to the Trooper. You are well on your way to achieving the next level with a few minor changes, you will have it in your grasp. One thing we would like you to fix is your belt. Currently it is bunching down at the top as it appears you have it on upside down. Most belts, as mentioned in your thread, have a plastic insert that prevents the fabric from folding over. In the below photo, it does look like a thicker part of the belt is at the bottom, (starts about half inch down from the top. Hopefully the drop boxes are easy enough to remove and place back on the other side. I would at least put the belt on the other way to see if the same is occurring, and take a photo both ways. If it is still the same then I will stand corrected. Everything else looks in good order, so all we can suggest is you follow the Centurion CRL carefully and the photo check list for that level. As to the Helmet photos, the list do mention 4 photos, one from each side, and we would like to see these separate and not as part of other photos in your application. Thank you for being so patient with us, and congratulations once again on a great set of armour and your EI badge Hope to see a centurion app from you soon. -
TK-29118 requesting ESB EIB Status [AM 2.0/RT-Mod] [574]
Sly11 replied to sharkbait's topic in Request Expert Infantry Status
Excellent work, we will be with you shortly When you get a moment, could I also have you update your action photo with the newly modified thighs please. This wont hold up your process, but we do use the action shots in another part of the forum. Thanks again for your patience. -
Any chance we can see photos of all the parts of the kit, and even an assembled one. I am sure if you post those up your 20 kits will sell quickly