


gmrhodes13
-
Posts
31,206 -
Joined
-
Last visited
-
Days Won
1,069
Content Type
Profiles
Forums
Gallery
Articles
Everything posted by gmrhodes13
-
 Great work trooper, congrats, welcome to the ranks
 -
HOWTO: Draw an approximate ear trim line with no gaps
gmrhodes13 replied to bpoodoo's topic in Tutorials, Tips and HOWTOs
Exactly the way I did mine -
Clean/isolated classic TK sound files
gmrhodes13 replied to AFMedic's topic in Electronics for Helmets / Blasters
Very interested, pm sent -
Looking good nice work
-
Looking good so far, nice work keep it up
-
Congrats and welcome to the ranks trooper
-
Awesome news, looking forward to the build thread
-
Chookaboom's Walt80 ANH Stunt Build
gmrhodes13 replied to Clamps's topic in Build Threads Requireing Maintenance
Looking good Clamps -
My ATA build thread (I think I goofed already)
gmrhodes13 replied to Swollendeathray's topic in ANH (Stunt and Hero)
Try to get into the corners of the teeth a little more, perhaps a small square file -
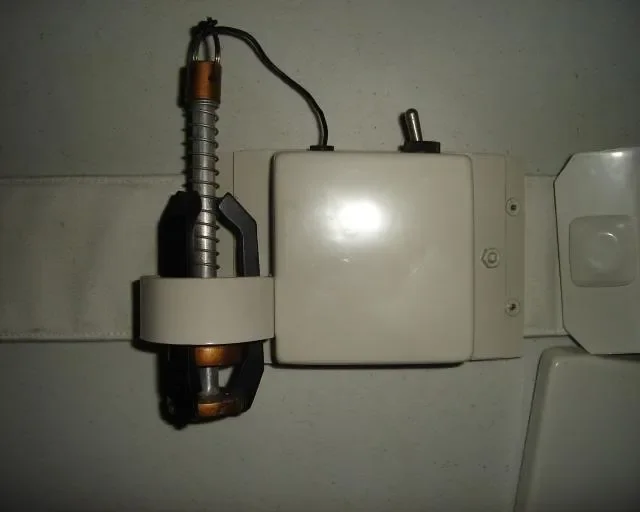
The grappling hook was made from some tube, a spring, 3 roll pins and the arms and head are pieces of pvc pipe, heated and glued together then shaped. Size I obtained by bringing a screen shot up of the belt with grappling hook, blew it up on the screen so the belt measured 90mm then took the measurements of the hook. The comlink was made from a mic tip and two pvc fittings, then covered with O rings
-
Hello from Syracuse, Utah!
gmrhodes13 replied to Gardentrooper's topic in Build Threads Requireing Maintenance
Hello and welcome aboard -
Welcome aboard, looking forward to the obligatory brown box photo's and build thread
-
TK - 60366 Requesting ANH Stunt Centurion Status[122][RS]
gmrhodes13 replied to HawkFan24's topic in Request Centurion Status
Congrats and welcome to the ranks trooper -
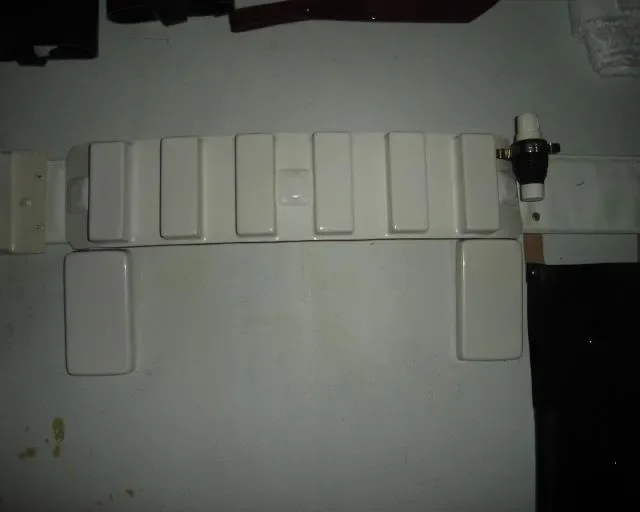
I'm using Paul's grappling box, made my own grappling hook and comlink
-
There is a very good ROTJ build thread on the RPF A nice thread showing some fine details of the ROTJ version, also the differences between each movie style E-11 found here
-
TK 70701 requesting ANH Stunt Centurion status[121]
gmrhodes13 replied to Oztrooper's topic in Request Centurion Status
Congrats and welcome to the ranks trooper -
My ATA build thread (I think I goofed already)
gmrhodes13 replied to Swollendeathray's topic in ANH (Stunt and Hero)
Looking good to me, in the movies you will see brows at all different heights, I'd say you are pretty spot on for the average look -
My First Armor Build Thread ANH-S CAP Armor.
gmrhodes13 replied to Stormy1992's topic in Build Threads Requireing Maintenance
This should help you -
Looking good, I did clean mine up as I applied a nice dark burgundy stain to it which really shows up the wood grain, really it's just personal choice. Keep up the good work
-
TK-16666 Requesting ANH Stunt EIB Status [AP][378]
gmrhodes13 replied to TK16666's topic in Request Expert Infantry Status
Congrats and welcome to the ranks trooper -
TK-23230 Requesting ANH Stunt Centurion Status [RS][120]
gmrhodes13 replied to Flyboy's topic in Request Centurion Status
Congrats trooper, welcome to the ranks -
TK-27703 requesting ANH Stunt EIB status (RS)[377]
gmrhodes13 replied to Kiyomasa's topic in Request Expert Infantry Status
congrats trooper, welcome to the ranks -
TK 70701 requesting ANH Stunt EIB status(AP) [376]
gmrhodes13 replied to Oztrooper's topic in Request Expert Infantry Status
Congrats trooper, welcome to the ranks -
Brand Spanking New
gmrhodes13 replied to Reverend Sand's topic in Getting Started - Read this First!
Hello and welcome aboard -
I had to use a little heat on some of my surfaces to get the cover strips to sit properly, more so on the backs of parts