gmrhodes13
-
Posts
31,219 -
Joined
-
Last visited
-
Days Won
1,070
Content Type
Profiles
Forums
Gallery
Articles
Everything posted by gmrhodes13
-

ANH TK helmet paint color - Dupli-color
gmrhodes13 replied to wook1138's topic in The Replica Section
I have some polar white which is 70's Ford UK and it's got a cream tinge to it, much darker than armor I have on hand. Very hard to color match from the lids on spray cans too. If you find a color code you could have some made by an auto paint supplier, many did this for the Anovos FOTK's to match their supplied helmets. -
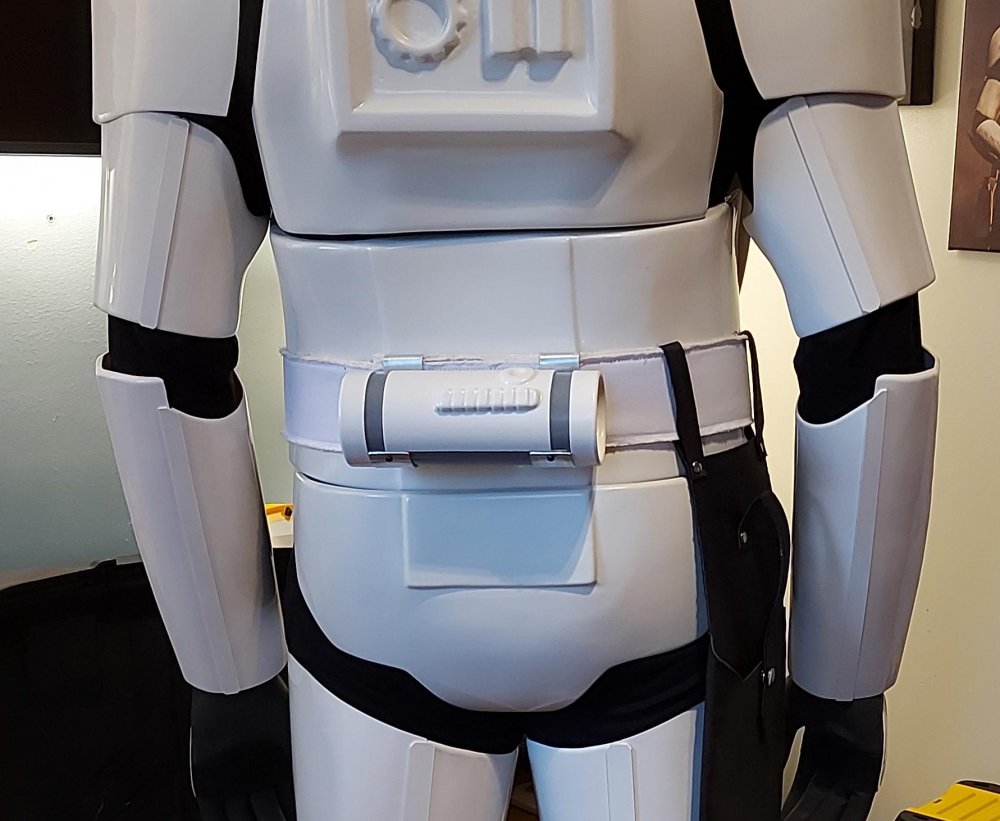
I'm pretty skinny so I just placed some foam behind the ab which holds it out a little more and the ab/kidney meets nicely on the sides, just don't over tighten your belt.
-
FYI if you use the "direct link" option the larger image will show, not just thumbnails "Direct link" "Link"
-
Comparison references
-
TK-46116 checking in
gmrhodes13 replied to CallMeMrTibbles's topic in Newly Approved Members - Sound Off!
Here is the legion's trooper survival guide https://databank.501st.com/databank/TrooperSurvivalGuide -
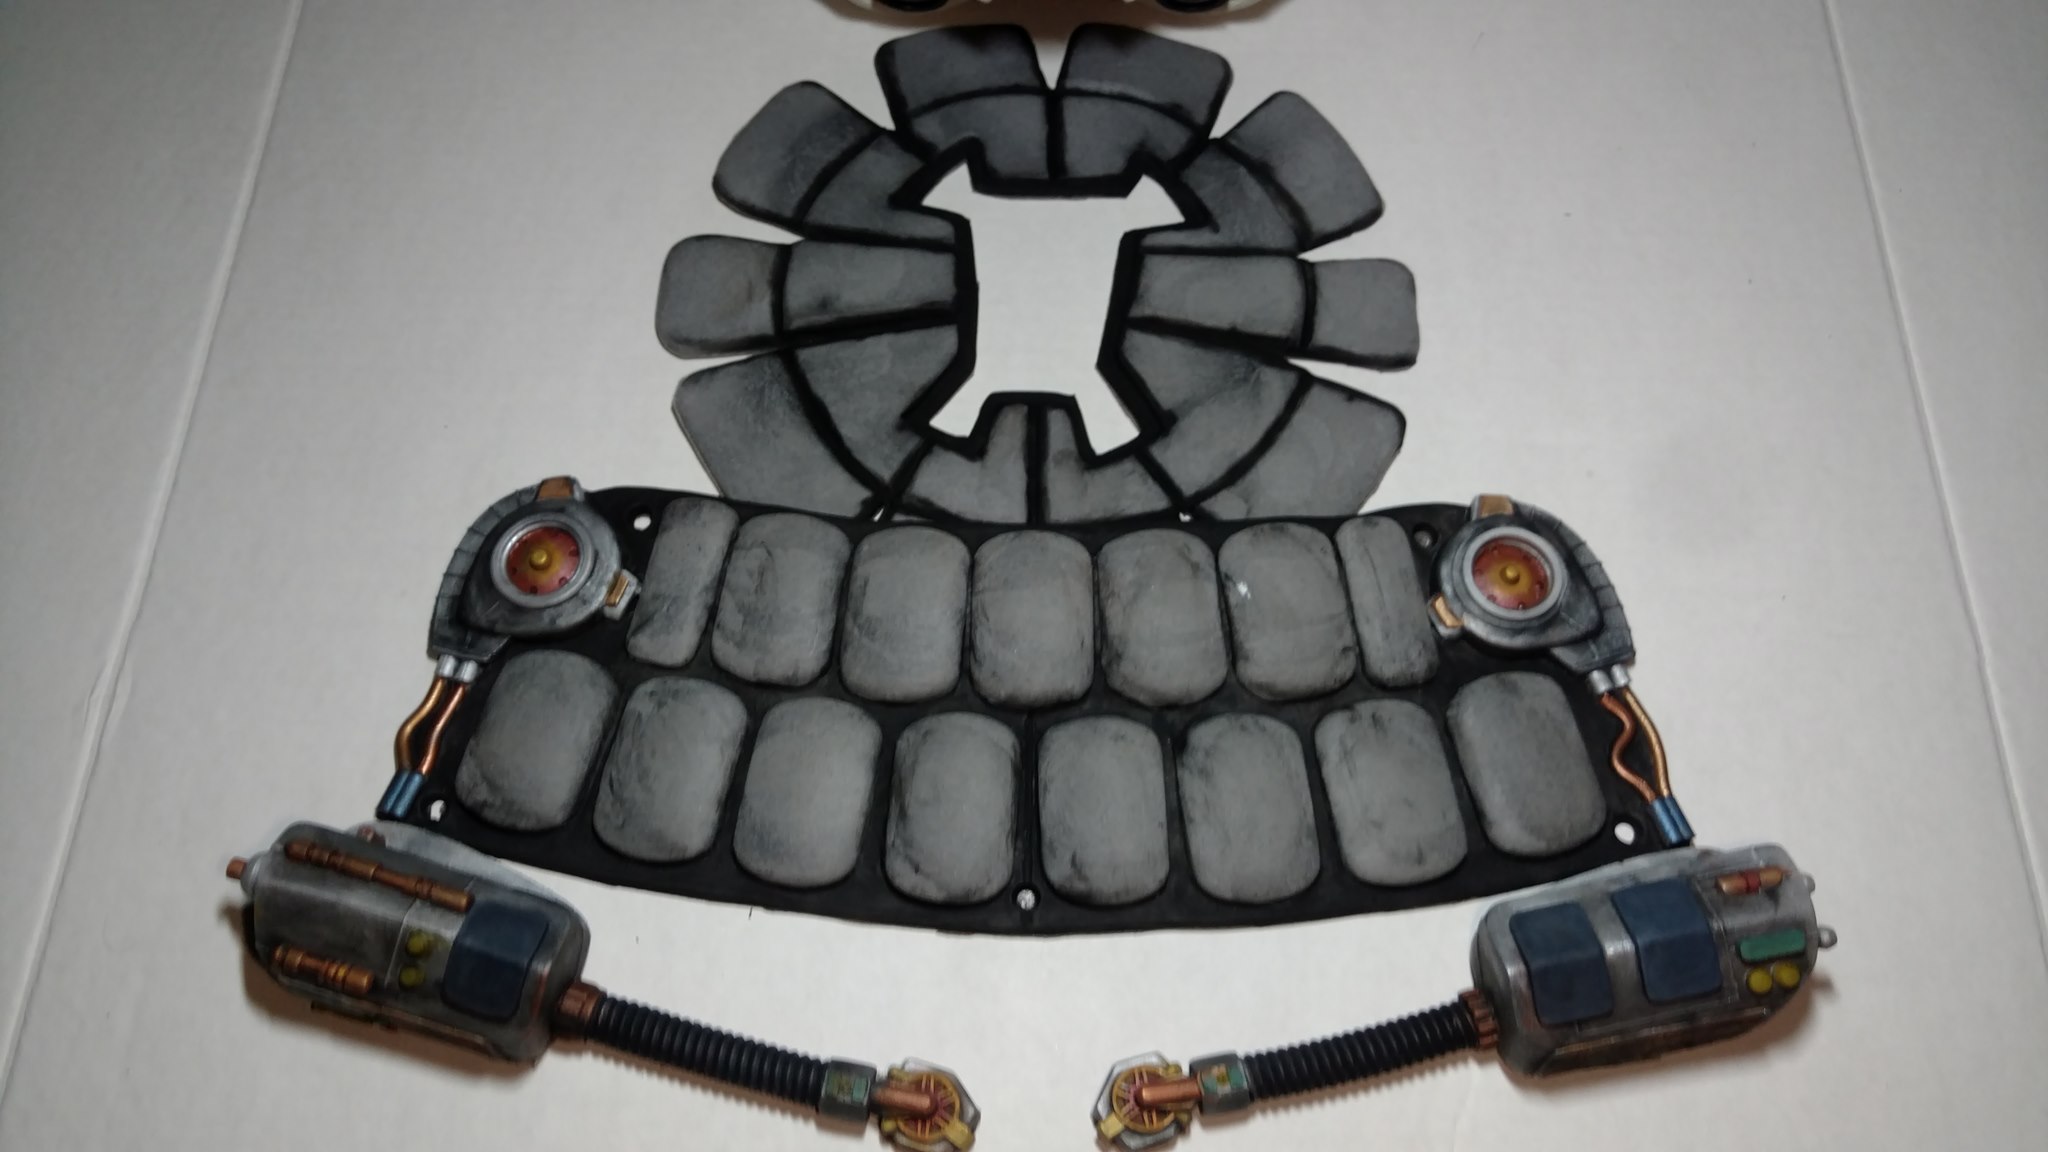
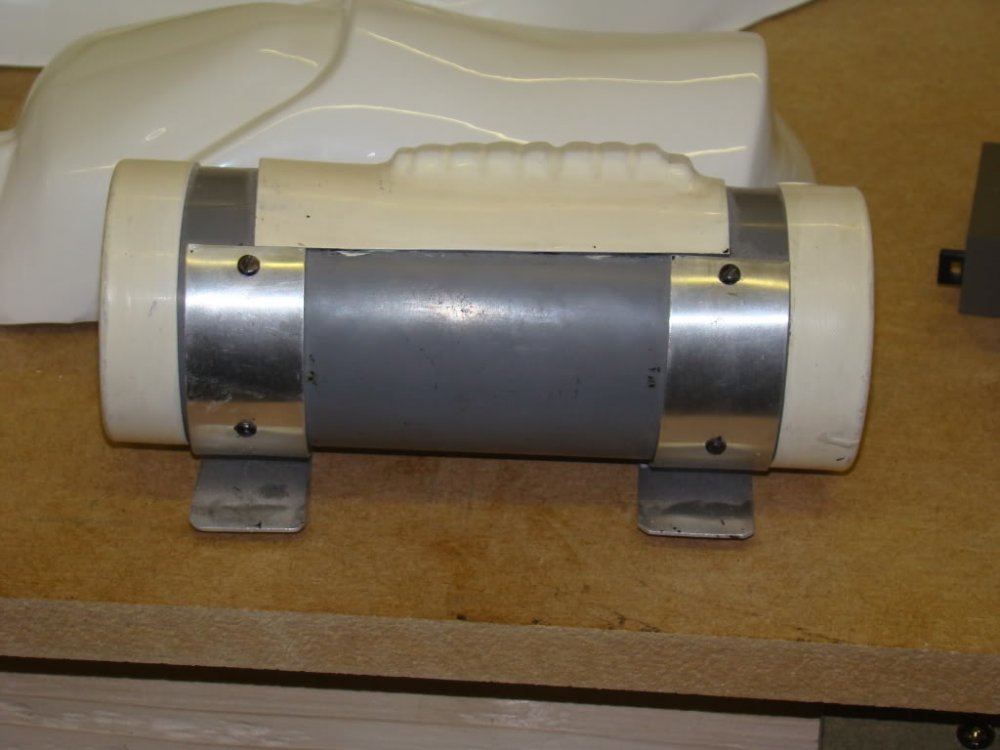
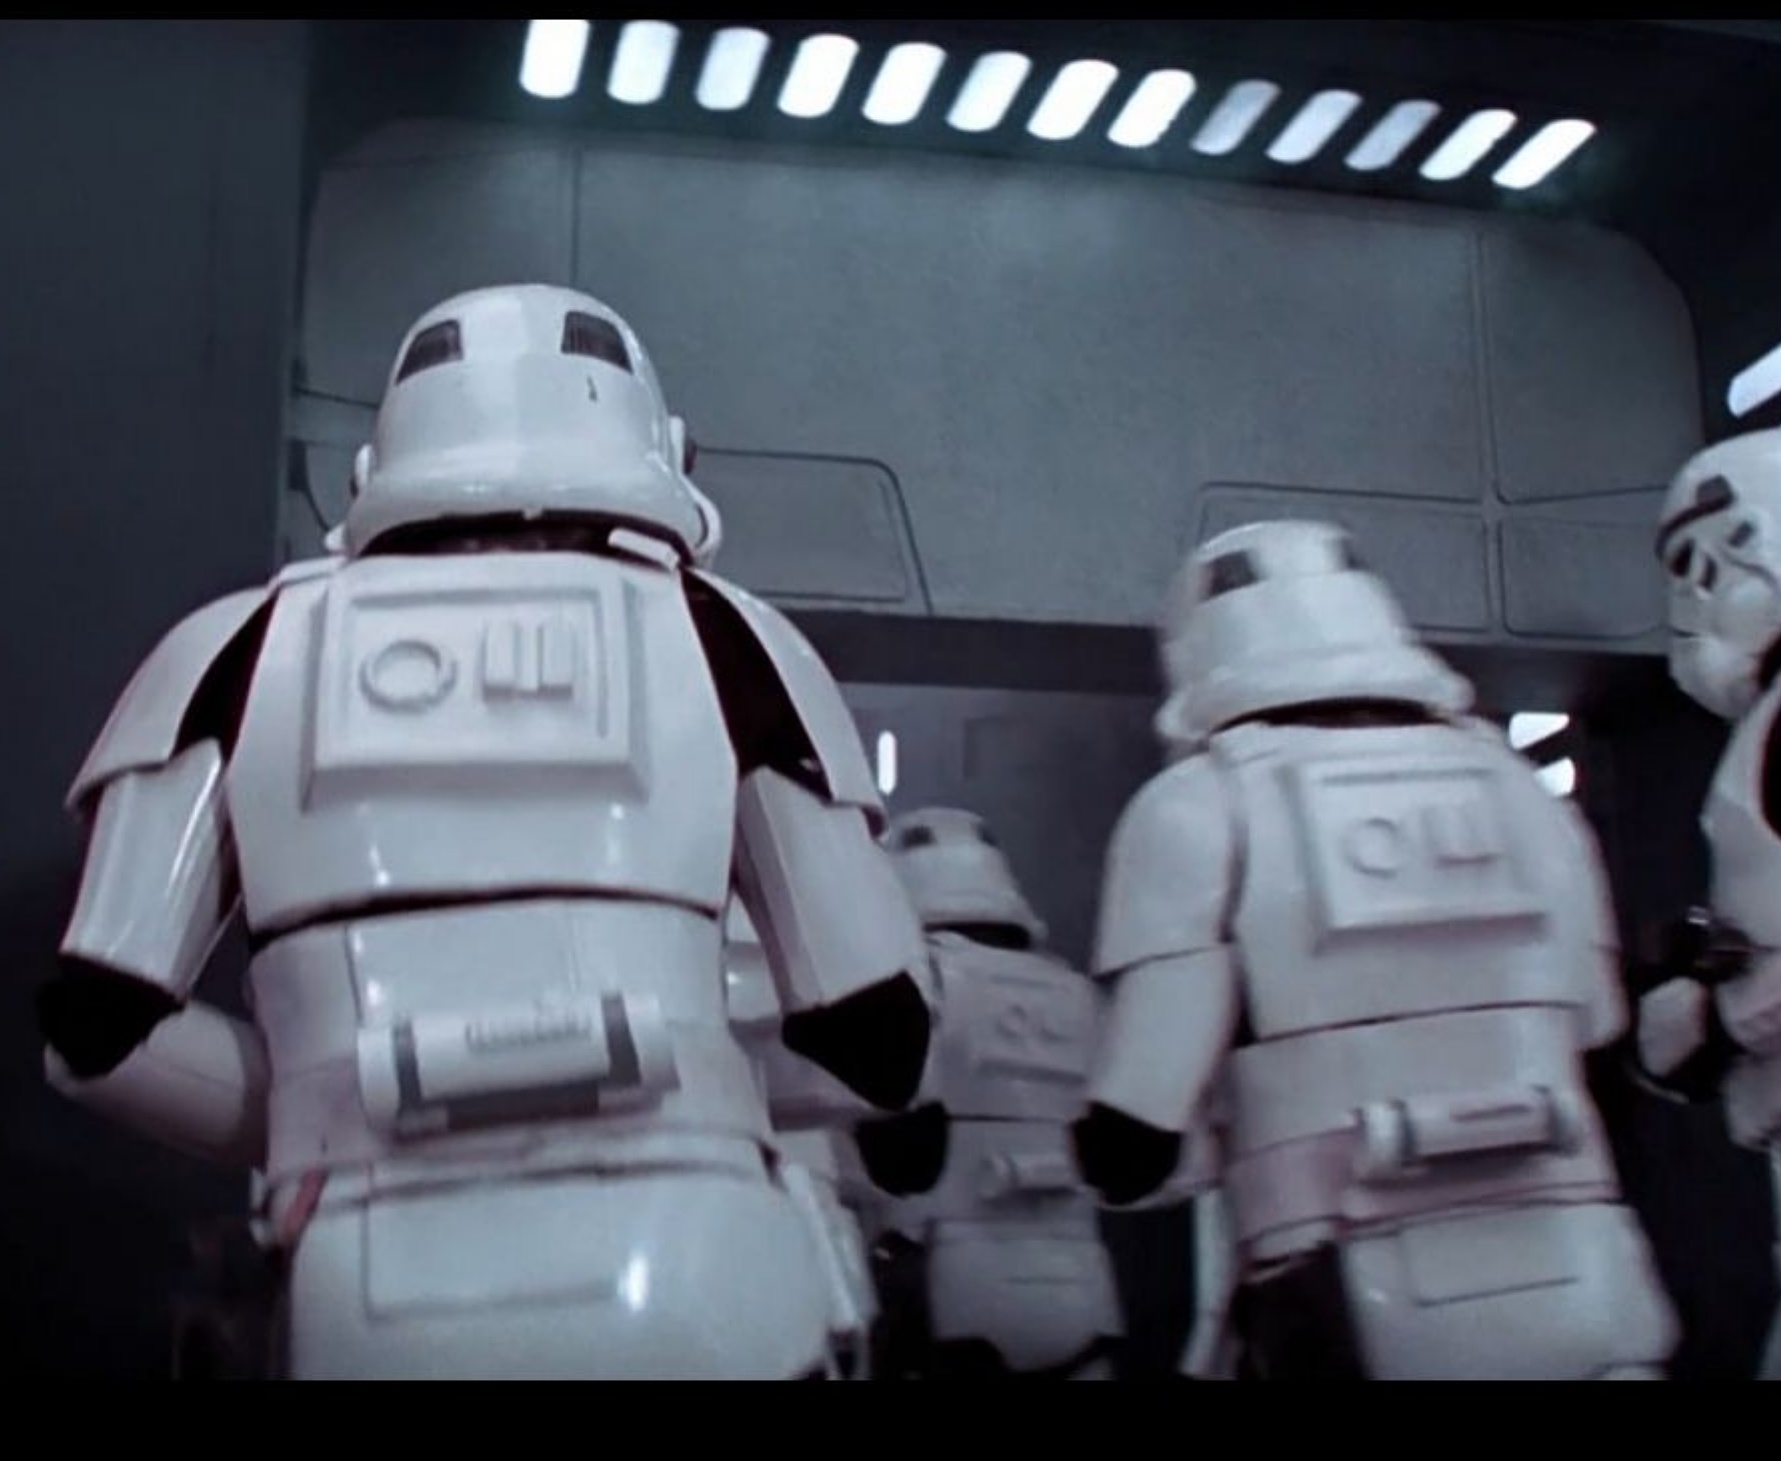
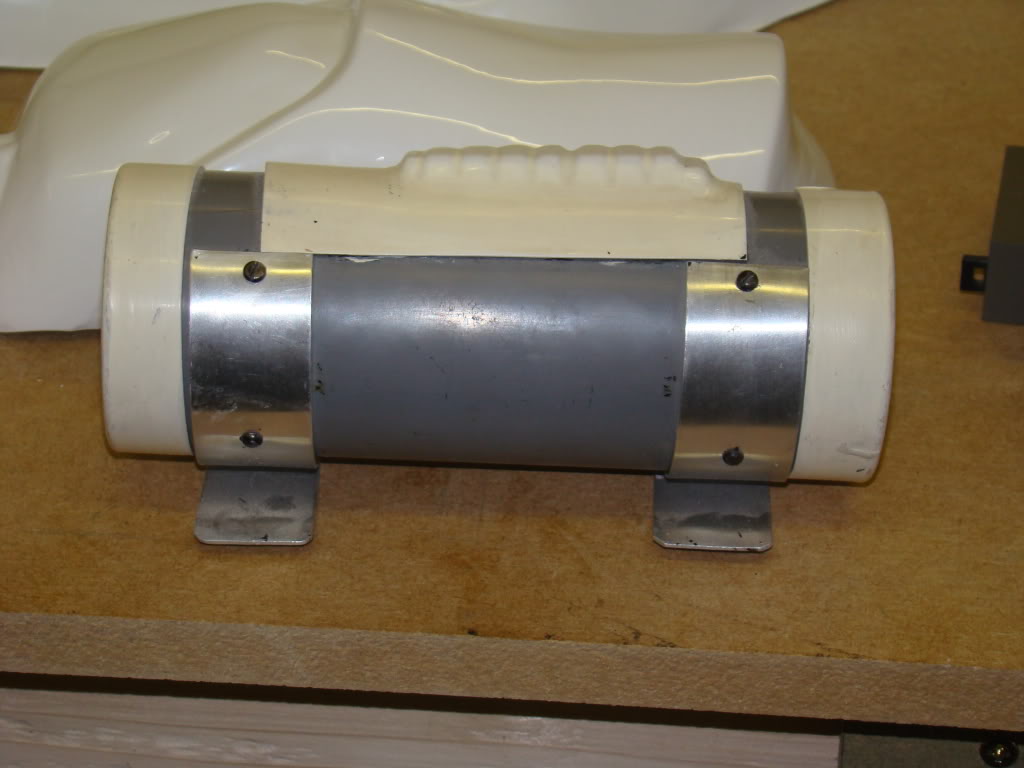
There is no specific measurement, try to emulate references, you can work out from this image the measurement is less than 1/4 or the pipe diameter Here is the gallery for detonator images
-
Dead Post Links & Broken Photos, How You Can Help
gmrhodes13 replied to Sly11's topic in Forum Help & Support
ANH (Stunt and Hero) Page 15 Complete gmrhodes13 Page 14 Complete gmrhodes13 Page 13 Complete gmrhodes13 Page 12 Complete gmrhodes13 Page 11 Complete gmrhodes13 -
Some lens material can be quite thin, there are a couple of things you could try. Check to see if your eyes are still visible while wearing the helmet, does darken Paint the inside black, really helps darken the appearance. Use another material for lenses, I find the green safety shields work quite well and there is left over material for other helmets.
-
I used JB weld, held up great over the years, it is also sandable.
.thumb.jpg.24427fe4fd3e242e8a143be24c8635d8.jpg)
-
Can I dye canvas belt fabric?
gmrhodes13 replied to Shinyarmour1's topic in Boots, Soft Parts, and other Accessories
There are dye's out there which you can find mainly at haberdashery shops, really depends how much of a color variance you want, a cheap option would be to do a very light tea/coffee wash, just add a little of either tea or coffee to hot water and soak the belt. -
TK-46116 checking in
gmrhodes13 replied to CallMeMrTibbles's topic in Newly Approved Members - Sound Off!
Congratulations and welcome to the ranks trooper -
TK-11705 Requesting ANH EIB Status(RS)(1022)
gmrhodes13 replied to Code3345's topic in Request Expert Infantry Status
Congratulations and welcome to the EI ranks trooper -
No real surprises there. Just a couple of really nitpicky items Looks like your ab / belt are on an angle, lower on your left side, may be able to straighten with adjusting strapping Remove any loose thread from belt, you can see some between your ab and kidney Belt could come down at the back it's quite high TD could come down a little, you can see the clamps are not quite hitting the top of the belt The ab/kidney plates should not overlap You could also try to get your right back shoulder strap to sit down against the back plate. As I say these are really nitpicky details but something to watch out for for higher levels Good luck with approval
-
TK SPartan TFA FOTK Build Thread (KB Props)
gmrhodes13 replied to TKSpartan's topic in TFA Build Threads
Great work, they came out nicely -
Looking good
-
Dead Post Links & Broken Photos, How You Can Help
gmrhodes13 replied to Sly11's topic in Forum Help & Support
ANH (Stunt and Hero) Page 20 Complete gmrhodes13 Page 19 Complete gmrhodes13 Page 18 Complete gmrhodes13 Page 17 Complete gmrhodes13 Page 16 Complete gmrhodes13 -
5 years after Big Brown Box(es) Day, 'Ere we Go!
gmrhodes13 replied to ViceroySparky's topic in ESB Build Threads
Hello and welcome aboard, good luck with the build -
fishgoh0nk Requesting Pre-Approval Review (ANOVOS)
gmrhodes13 replied to fishgoh0nk's topic in Request TK Pre-Approval
Nice work, came out great -
Idealized Stormtrooper Helmet Build
gmrhodes13 replied to ChaoticAmanin's topic in The Foundry - Armor and Prop Making
Correct, came up in search on RPF -
Idealized Stormtrooper Helmet Build
gmrhodes13 replied to ChaoticAmanin's topic in The Foundry - Armor and Prop Making
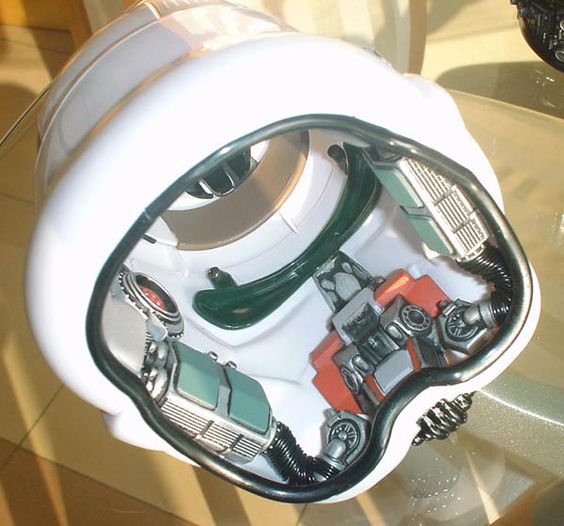
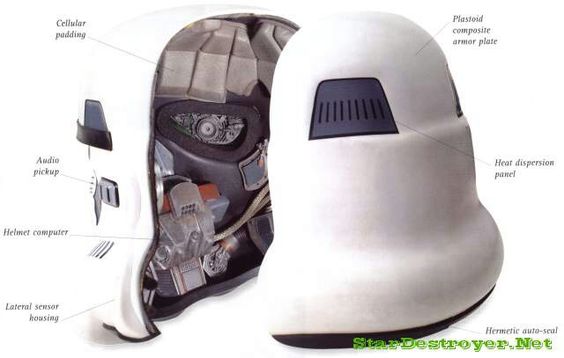
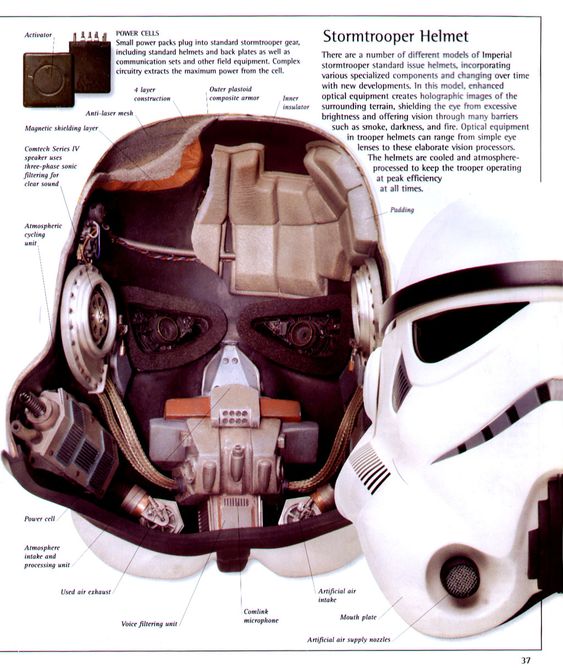
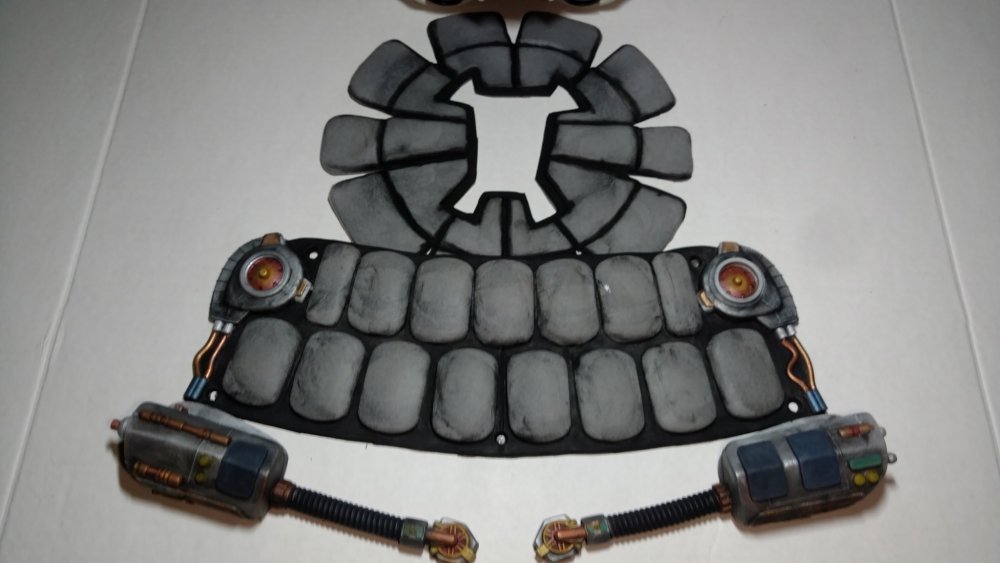
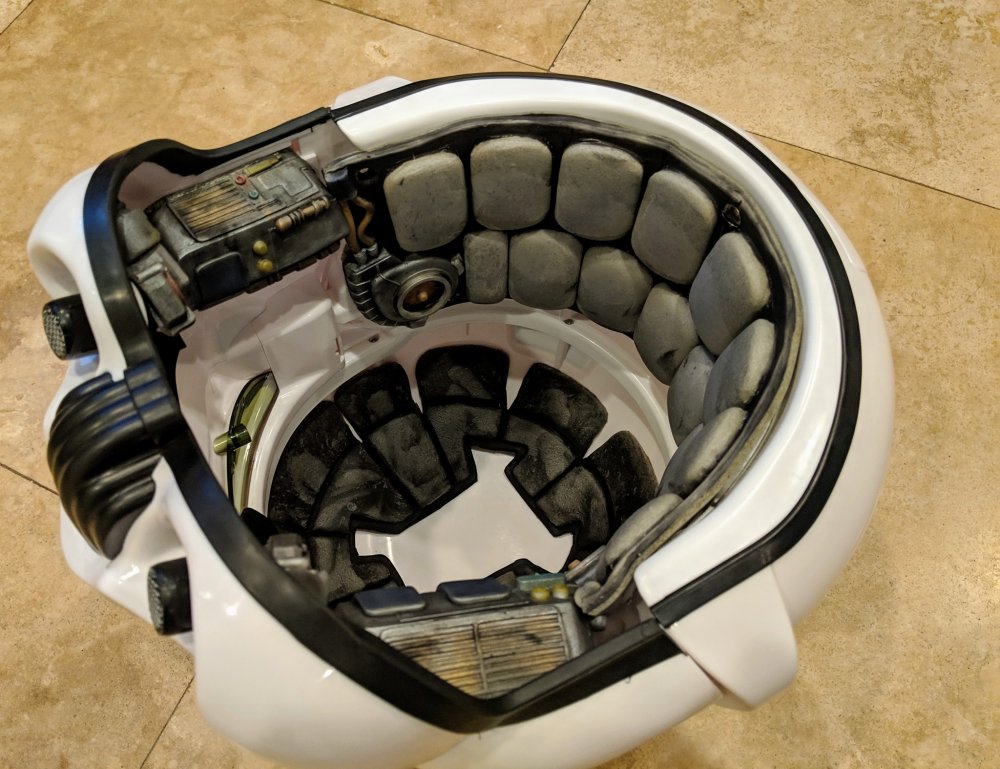
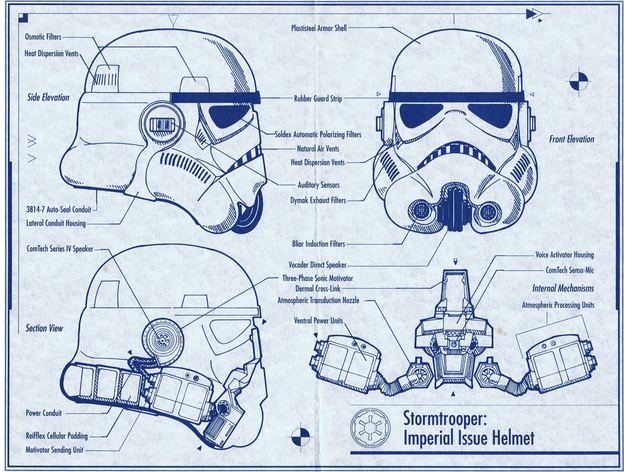
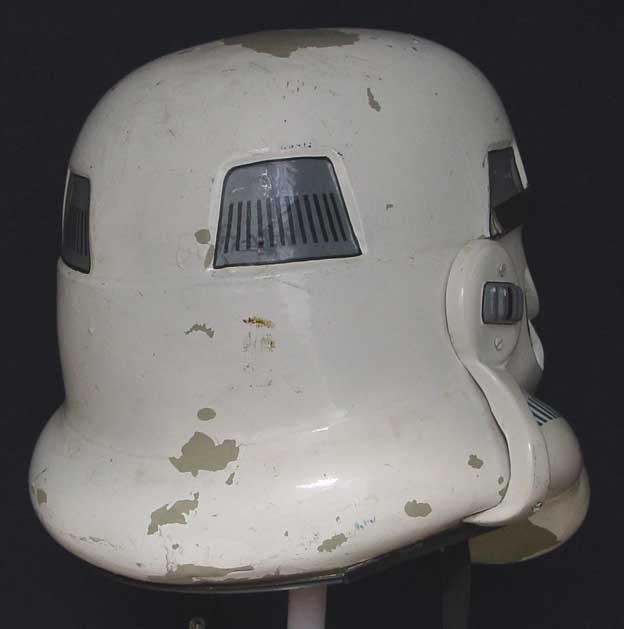
Hello and welcome to the forum Many of us use an online fee image host for photos, upload then copy the "direct link" straight into your post, here is a tutorial. The images you have are from the visual dictionaries, various issues, well before Rogue One was ever envisioned, it's an artists impression of the inside of the helmet not true to screen accuracy, we have a member who created 3d files for those pieces. The blueprint is another artists impression so both could be very different. Here are a few other versions of that particular image. One from a members build The versions of vents cut out would only be for Rogue One, Mandalorian, Solo Stormtroopers, all others (RS included) use decals/stickers. You can add what ever you want (space permitted) inside the helmets, some use hearing assist, wifi/bluetooth mic, fans and so on as long as it doesn't change the outside appearance. If you head over to the RPF you will find a lot of "reveal" helmet versions there Here is another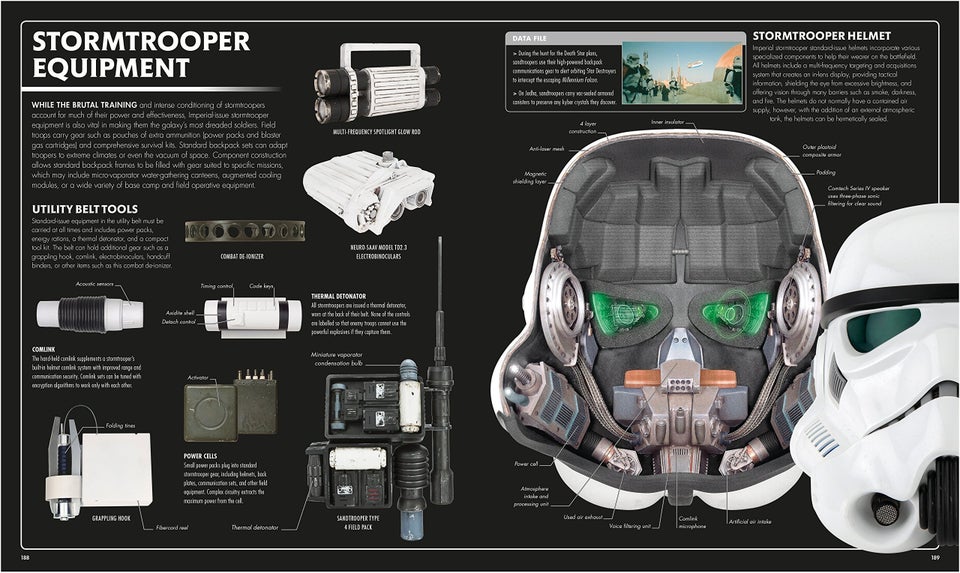
-
I came up with a V tab bracket system which helps pull in the butt plate. With a heat gun (or oven) you bend strips of ABS plastic into the shape of a V, only glue the butt plate side and the other remains free to allow movement when you bend. Just helps stop the butt plate from pushing back from the back plate.
-
I have some room in mine and I added some foam as my forearms are pretty thin. You will hopefully find once you have gloves on and your gaskets the gaps will reduce. If you do want to downsize I have seen a few cut the sides, reduce the width, add strip of ABS behind then fill the seam with bondo (automotive filler) but I would definitely wait until you have other parts assembled and check the full look for sizing.
-
Dead Post Links & Broken Photos, How You Can Help
gmrhodes13 replied to Sly11's topic in Forum Help & Support
ANH (Stunt and Hero) Page 25 Complete gmrhodes13 Page 24 Complete gmrhodes13 Page 23 Complete gmrhodes13 Page 22 Complete gmrhodes13 Page 21 Complete gmrhodes13 -
fishgoh0nk Requesting Pre-Approval Review (ANOVOS)
gmrhodes13 replied to fishgoh0nk's topic in Request TK Pre-Approval
Correct the handles are both quite different. Here are the two reference areas for OT and RO blasters, you will find the RO thread will mention quite a few differences. -
Looks pretty good to me, you could go further if you want but screen helmets had bigger gaps. Adding a step to the top of the ear helps them come in closer. How to here You can countersink the screws slightly for a nice flat appearance. Nice work
.jpg.48bf93daa5eaf5fab46c5ba482bef131.jpg)


.jpg.da3d7f5b83c8ba730ca2d8fddc219a01.jpg)