gmrhodes13
-
Posts
31,219 -
Joined
-
Last visited
-
Days Won
1,070
Content Type
Profiles
Forums
Gallery
Articles
Everything posted by gmrhodes13
-
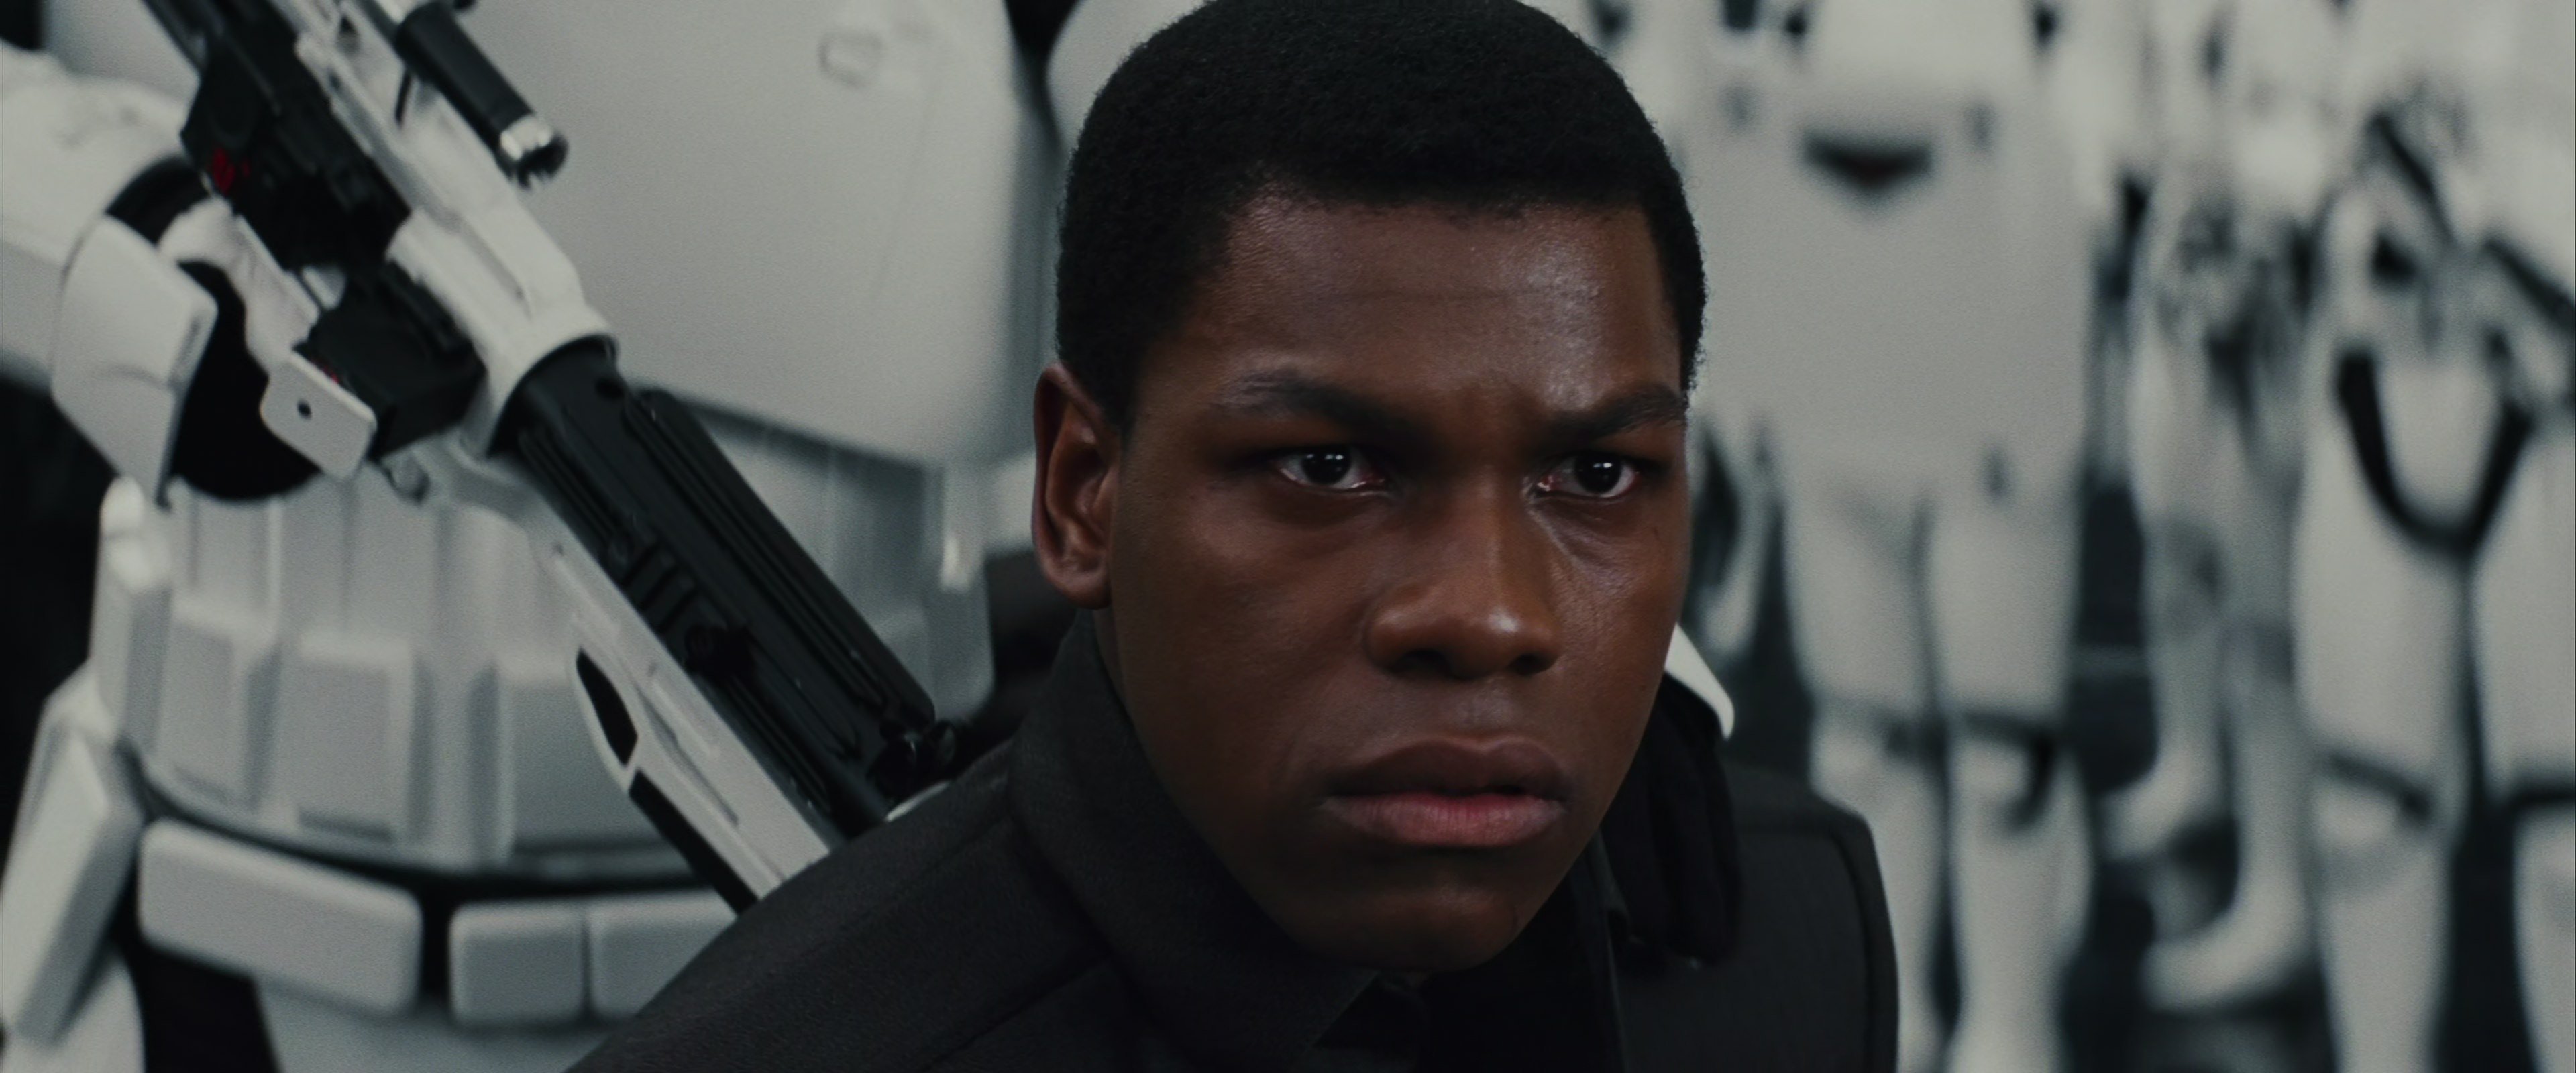
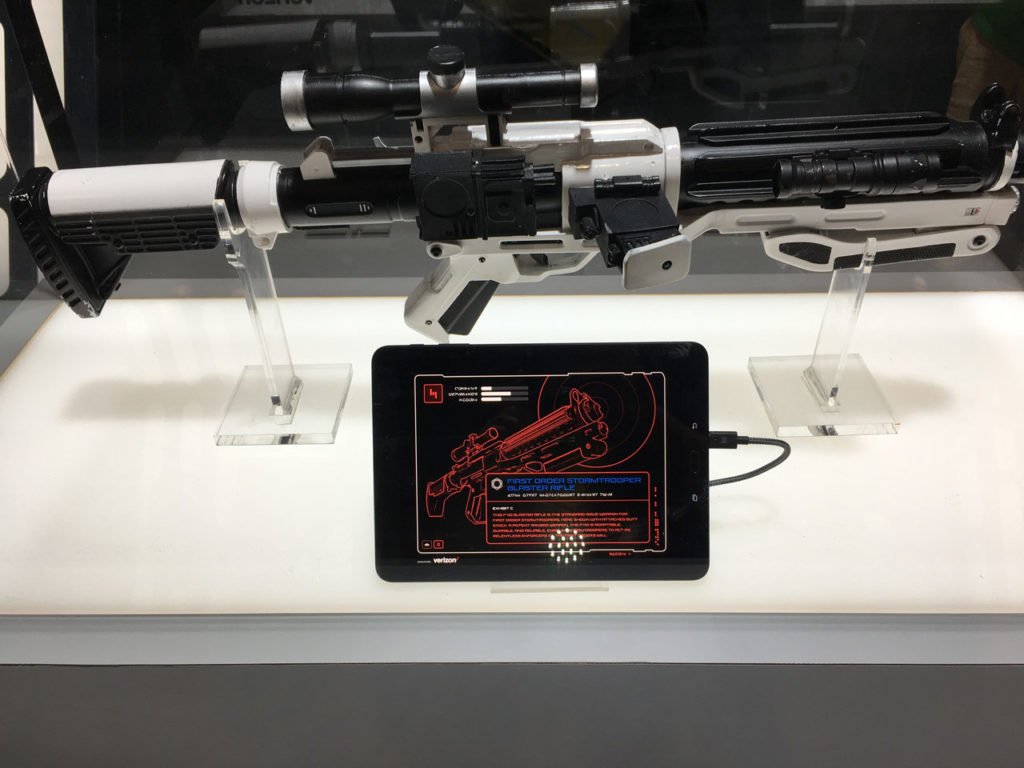
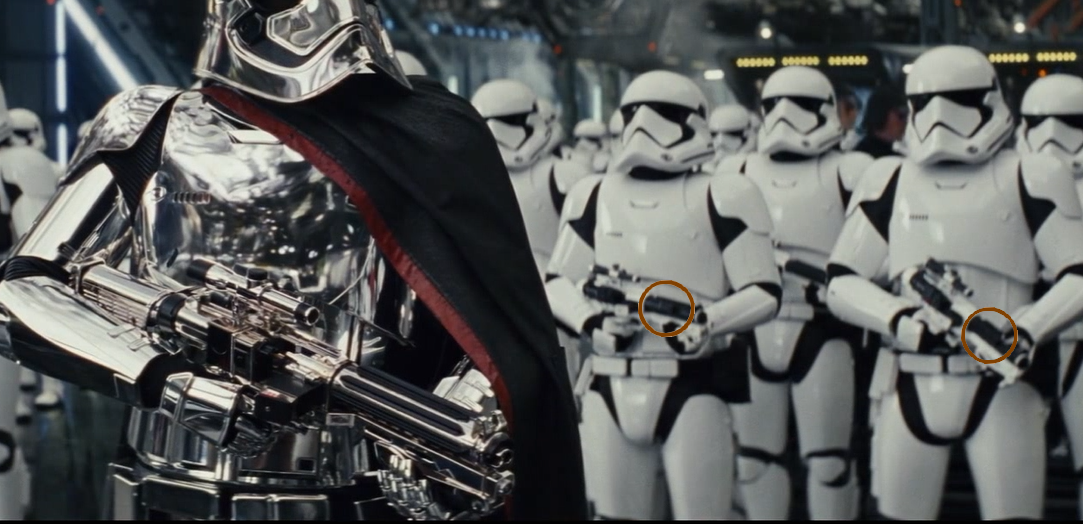
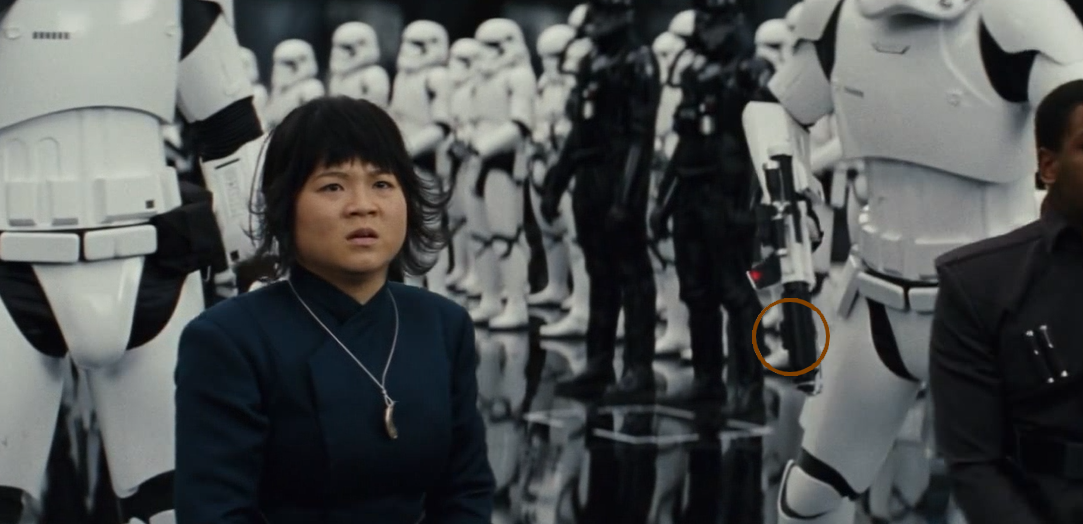
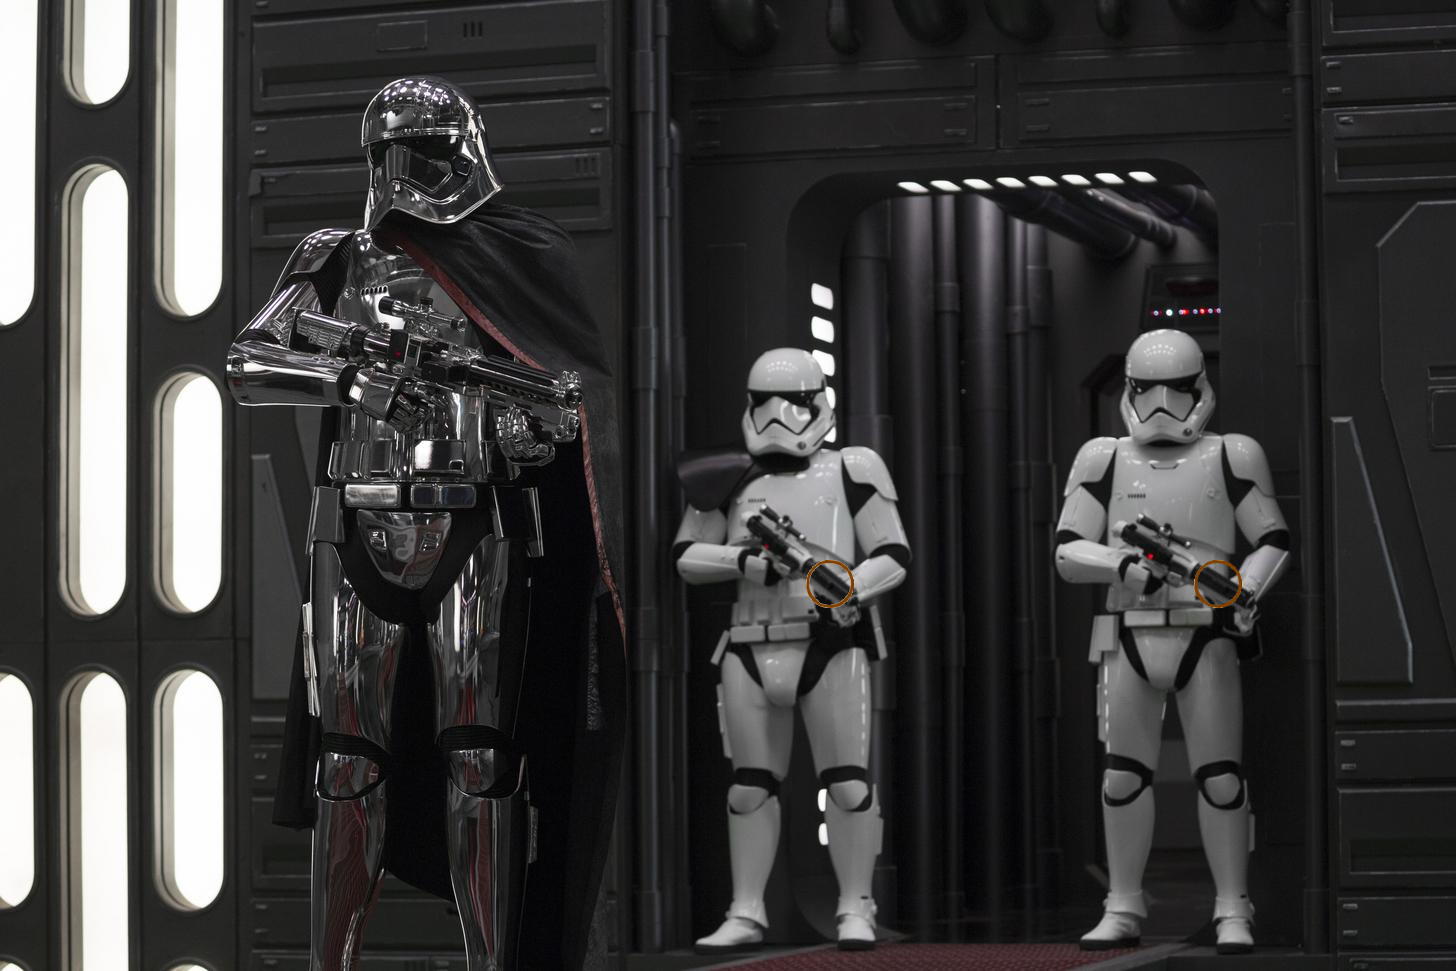
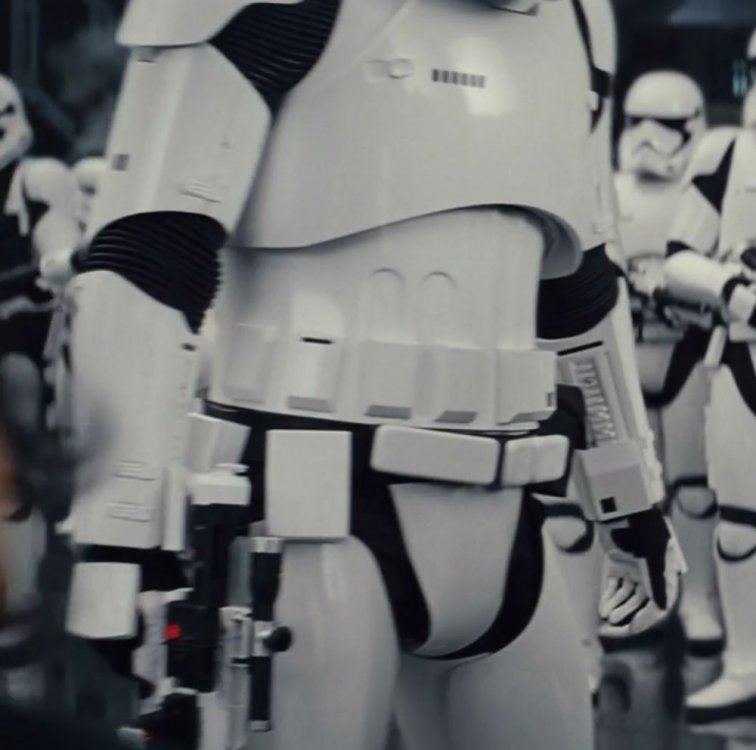
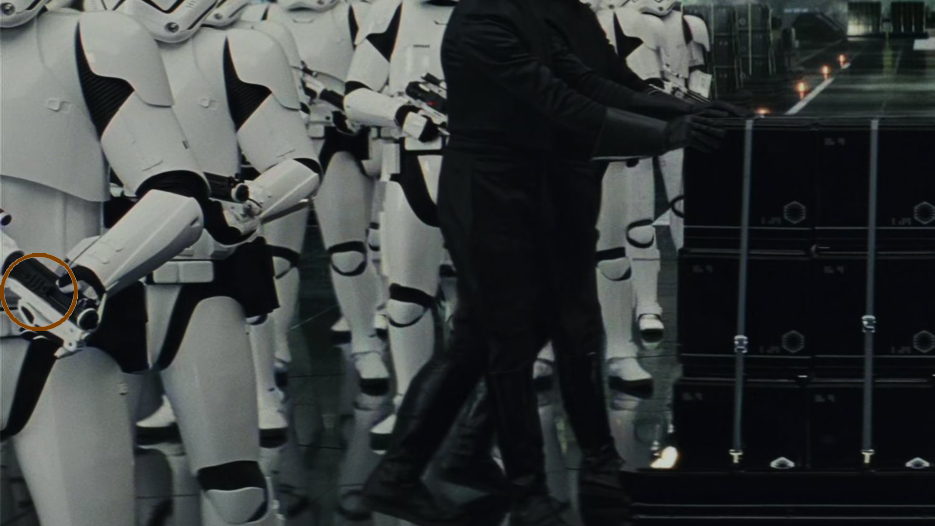
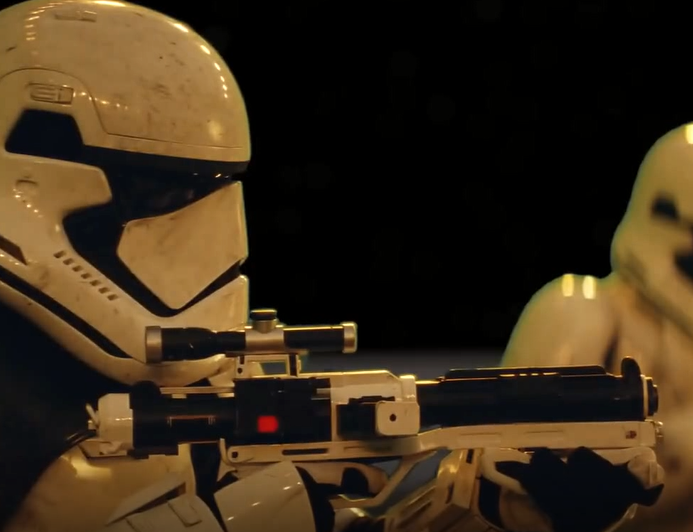
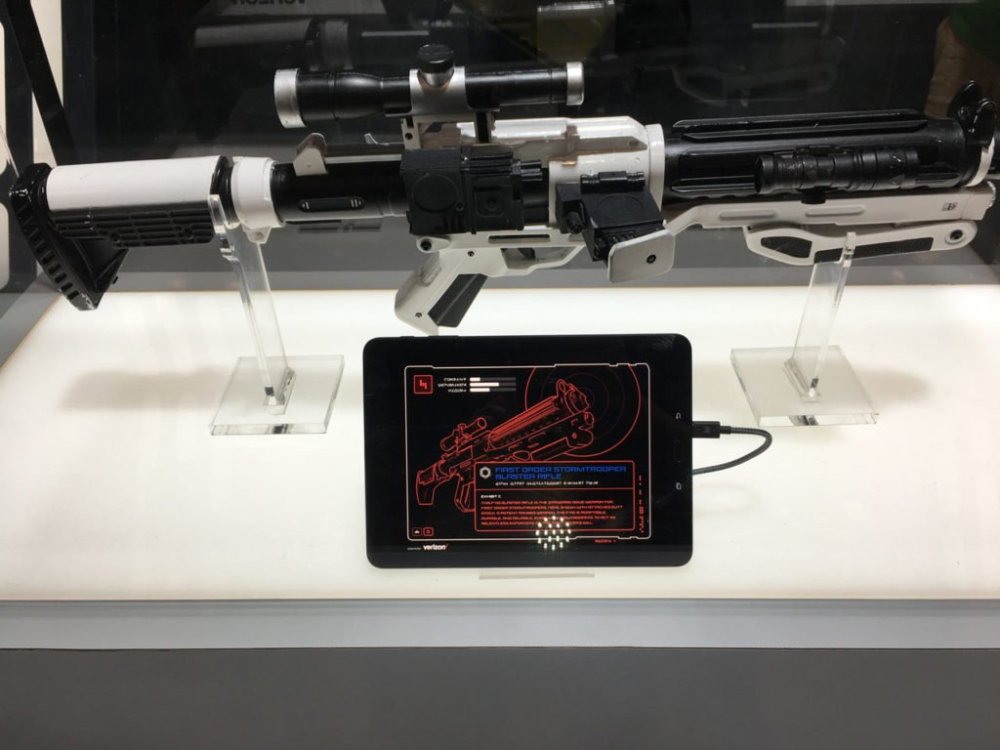
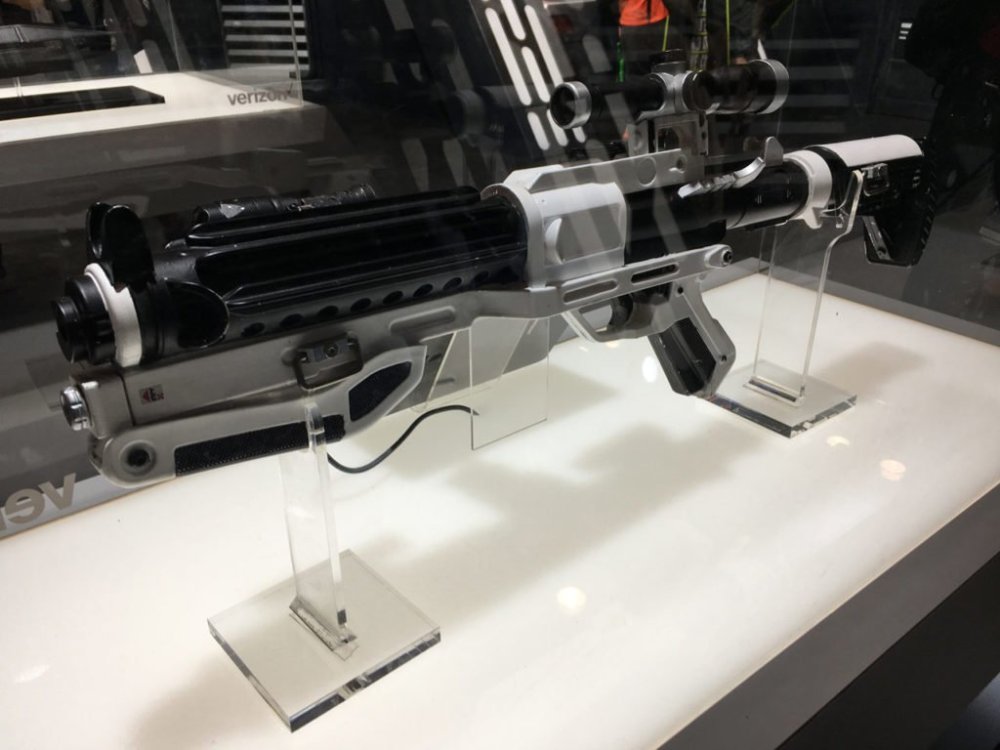
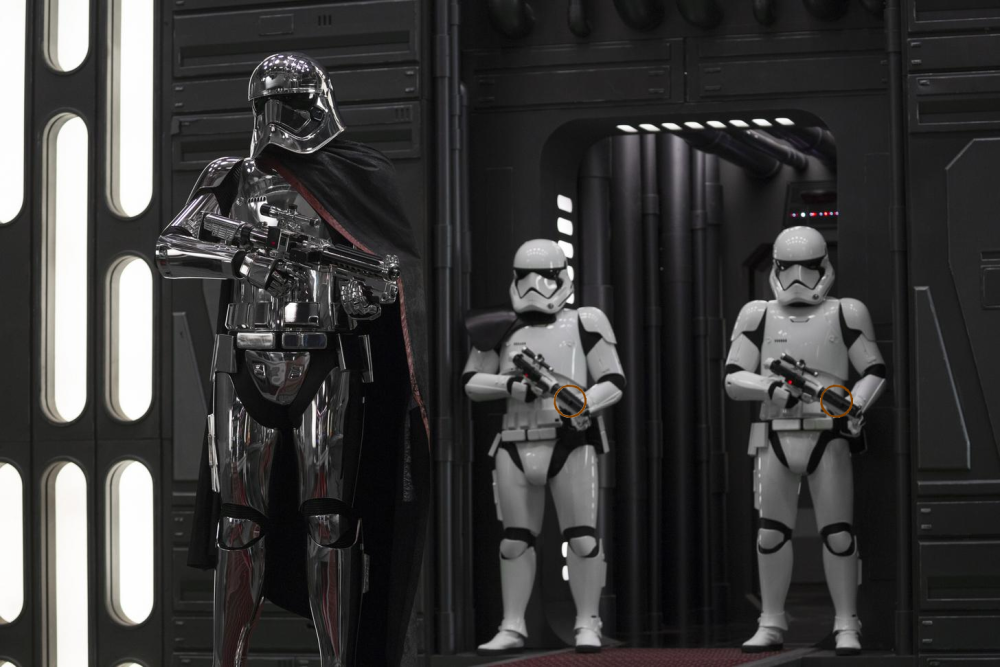
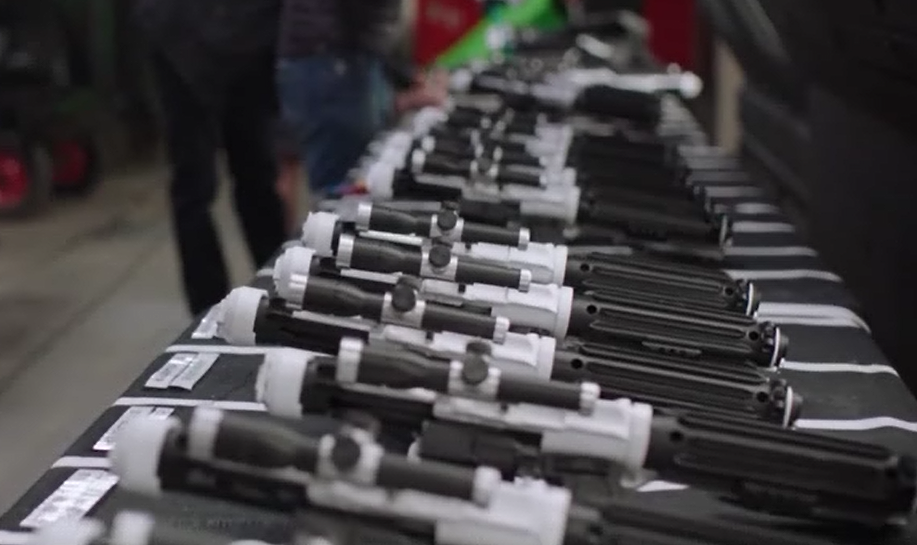
 Congratulations once again Ardeshir. For anyone following and using this for future reference for their own applications as many do, Ardeshir is correct this is not currently a CRL requirement but may very well be in future once the TLJ / TROS CRL is finalized, thread here. Some good examples of differences of blaster details in each of the movies can be found in that thread, some interesting combinations also used in TROS. In regards to the inconsistency of details, we see this in a lot of movies so a "generalized overall look" is used, in other words what most troopers had been seen with. We know some blasters from TFA had been used as well as in TROS, but references are used of what is generally seen and produced for that particular movie. One of the main images with close up and used as a reference is the execution scene, notice this troopers F-11D has the light rail and also the white rectangle ring (D ring) (so does the trooper on the other side, image below), which many others also had. BUT there are instances of other variations, this is called a "Mr Nostripes" situation, seen in the movie but a one off (or two or three) like "Mr Nostripes" in ANH. White rectangle ring (D ring) Other instances of the light rail Execution scene background characters Phasma scene And from the deleted scene Behind the scenes TLJ (also note the holes in the top of barrel) And the only instance of a light mounted from a LFL display. Interestingly it also had a mount on the other side just under the barrel for a sling. Sling mount Personally I think the light was a little overkill, which LFL may also have thought so not used, the blaster already has a light mounted in the front just under the muzzle. Apologies for derailing


-
With any metalic paint you want the black base as flat as you can get it, for my Mando I wet sanded with 2000 paper, then added the top metailic coat and finished with a 2K clear, I hadn't used it before but was amazed how the orange peel disappeared when drying, gives a deep gloss shine also. Like any paints it's a trial and error so definitely practice before going over all the armor
-
Dead Post Links & Broken Photos, How You Can Help
gmrhodes13 replied to Sly11's topic in Forum Help & Support
Armory Boots, Soft Parts, and other Accessories Page 25 Completed - gmrhodes13 Page 24 Completed - gmrhodes13 -
Just a tip but if you give it a light mist spray with black when sanding it will show any low spots or lines
-
You need to add a link to your 501st membership profile, have a look at others posts
-
Nice work adding the zip
-
Nice start. One detail which some miss is the rear sight, on the standard F-11D it is black on the F-11D Heavy it is white
-
Nice work, you may like to start another build thread for the heavy version
-
Looking good, should be fine for basic approval, as always that is up to your GML (garrison membership liaison) If aiming for higher levels be aware of that your sides of the ab and kidney looked stepped in this image and should be level. For L3 you will need to fill the shim seams on both sides. Shim on your right side is overlapping Ear screws are protruding and should be counter sunk Using a bigger drill bit by hand you can removes some of the plastic Backplate over lapping kidney on rear To be picky the belt could come down a little at the front, L3 The top of the ABS ammo belt should sit at or just above the bottom of the central and vertical abdomen button panels. Hope to see you approved soon and submitting for higher levels, good luck
-
Personally I would take a touch off, if you compare with the reference images they stop just short of the base. Most use humbol paint so it's already glossy, as yours are flat in appearance you could go over with some gloss clear to give them a shine, would also help the acrylic paint from coming off as easily as the clear will give it a little strength. Oh and just in case you haven't should always try to rough up any areas with sandpaper before applying glue, will give the glue something to grip too Don't worry many of us made mistakes when we first started, but at least it's only a small modification for the ab plate well small to me
-
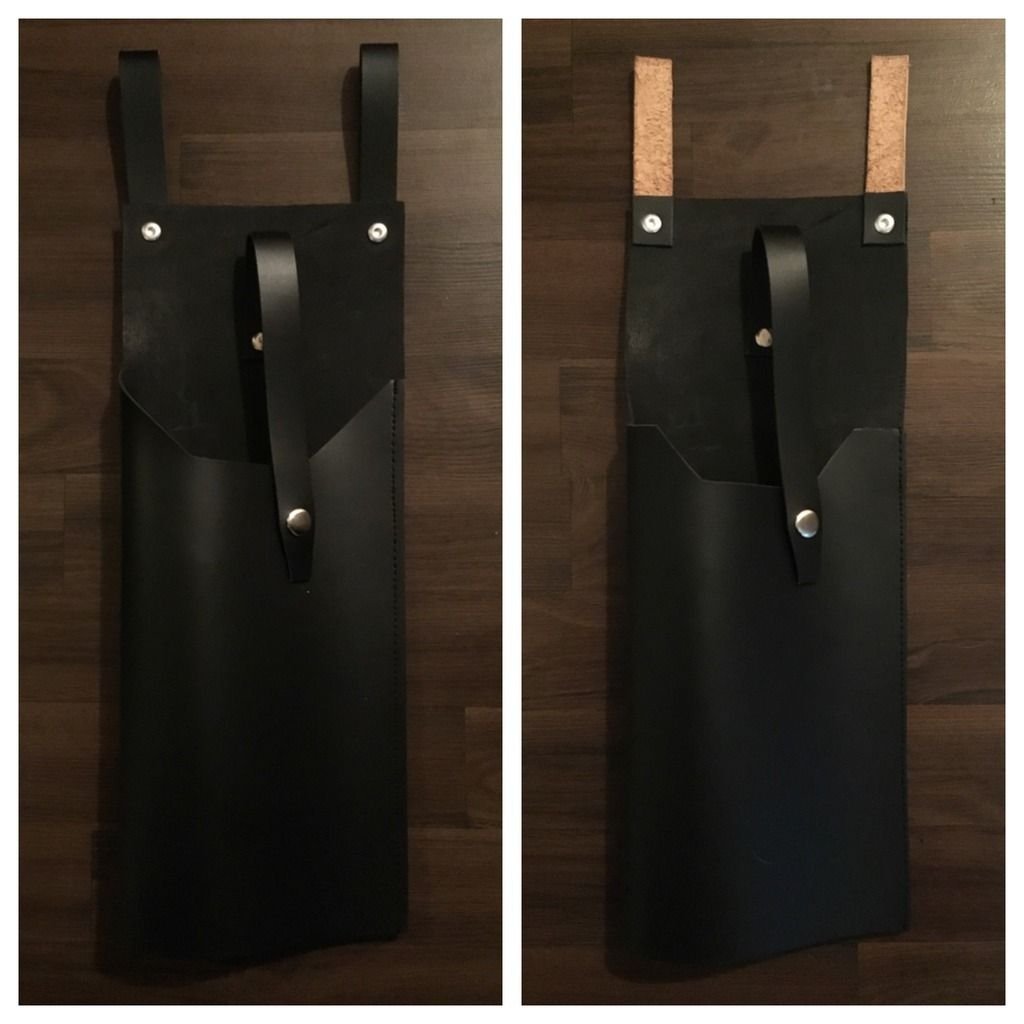
Also with your holster: Your holster will need the black loops added, as they sit over the belt and on your right side, not left like ANH ESB right side ANH left side Datasheet of differences between the versions https://drive.google.com/file/d/10tEVteIreh6AHMogW010cuH_Bf8TBfU6/view
-
Looks like you have over trimmed your large Ab plate Notice the back edge around the ab plate. You could add a piece of ABS plate behind, glue then fill in the seam Another build with same problem Below are two which have been glued to a piece of ABS the first the seam filled with ABS paste, the second with blade putty, I presume painted afterwards. The rest of the pieces, smaller ab plate and button covers need the back return edges sanded off, you want them to lay flat
-
I must say I haven't seen a belt glued with the fabric belt for quite some time, most choose to add snaps or rivets for easy removal as well as you have snaps added so it can be locked on to your ab section so it doesn't move. If it was me I'd pull that off before the glue sets and think about adding snaps. Approximate location, you will need to adjust to fit you. Examples
-
I normally use anything I have handy, most base whites should be ok, but some armor is a different shade of white so you may need to eye match. I would think though any white that blocks any leaked areas could be removed after your top coat color has dried. I know the humbrol white paint a few have used has been ok but is quite cream appearance, I think that one was #22 from memory
-
Dead Post Links & Broken Photos, How You Can Help
gmrhodes13 replied to Sly11's topic in Forum Help & Support
Armory Boots, Soft Parts, and other Accessories Page 28 Completed - gmrhodes13 Page 27 Completed - gmrhodes13 Page 26 Completed - gmrhodes13 -
I believe he did
-
Also applying some white paint first into your template should block any areas which might bleed, once dry paint blue as normal
-
TK-19984 "March to Centurion" ANH TK Centurion Build Thread
gmrhodes13 replied to Ebio Amisi's topic in ANH Build Threads
For E-11 lens and a cheap mod is use a CD for the relfective appearance and use the clear CD cover for the lens. -
Contact (well that's what we call it here) book covering plastic film can work well. For some projects I reverse the image and print on the back of the contact sheet as its paper, then you can trim out the stripes and you have a nice template.
-
TK-19984 "March to Centurion" ANH TK Centurion Build Thread
gmrhodes13 replied to Ebio Amisi's topic in ANH Build Threads
Really depends how much room you have, I use a 4 x AA battery pack and only run one fan at a time, fits in nicely in the bottom curve of the helmet, a few in this thread may give you other ideas. -
Posted in your other thread
-
Potential new member in Wisconsin
gmrhodes13 replied to GoBuckeyes's topic in New Member Introductions
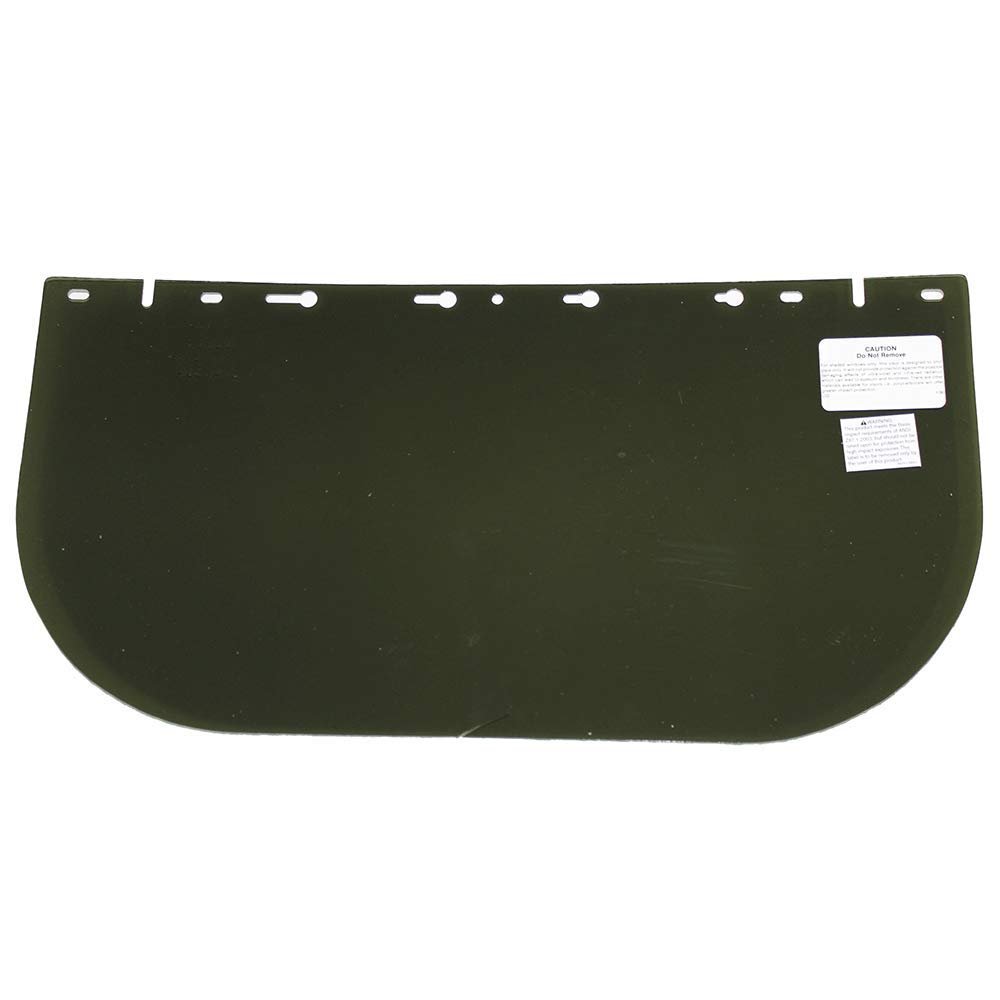
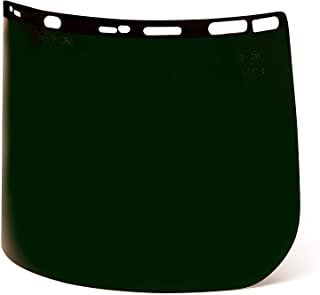
Painting the inside black does reduce light and the ability for people to see inside but it's not a requirement Green safety shield screens work well https://www.amazon.com/Pyramex-S1035-Polythylene-Tinted-Shield/dp/B00YA27DRC/ref=sr_1_2?crid=2T71ALI25UYPX&keywords=green%2Bsafety%2Blens%2Bshield%2Bwelding&qid=1642971298&sprefix=green%2Bsafety%2Blens%2Bshield%2Bweldi%2Caps%2C290&sr=8-2&th=1 https://www.amazon.com/S35120-Replacement-Shade-Visor-390/dp/B00B62BOK6/ref=sr_1_3?crid=97RELBCOAIRU&keywords=safety%2Bshield%2Bscreen%2Bgreen&qid=1642980004&sprefix=safety%2Bshield%2Bscreen%2Bgree%2Caps%2C309&sr=8-3&th=1 Some use aftermarket padding kits for their helmet padding, I just use foam, maple leaf for top and a 2 inch block either side so it holds to your temples so it doesn't wobble fine. For the top I use 10mm soft foam, you don't need as much as the image below or your helmet will sit up too high and show a lot of neck https://www.amazon.com/Universal-Airsoft-Replacement-Motorcycle-Accessories/dp/B08YX68K96/ref=sr_1_9?crid=3DVJ4347CIXID&keywords=universal+helmet+padding&qid=1642973328&sprefix=universal+helmet+paddi%2Caps%2C592&sr=8-9


-
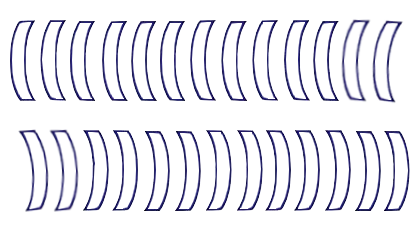
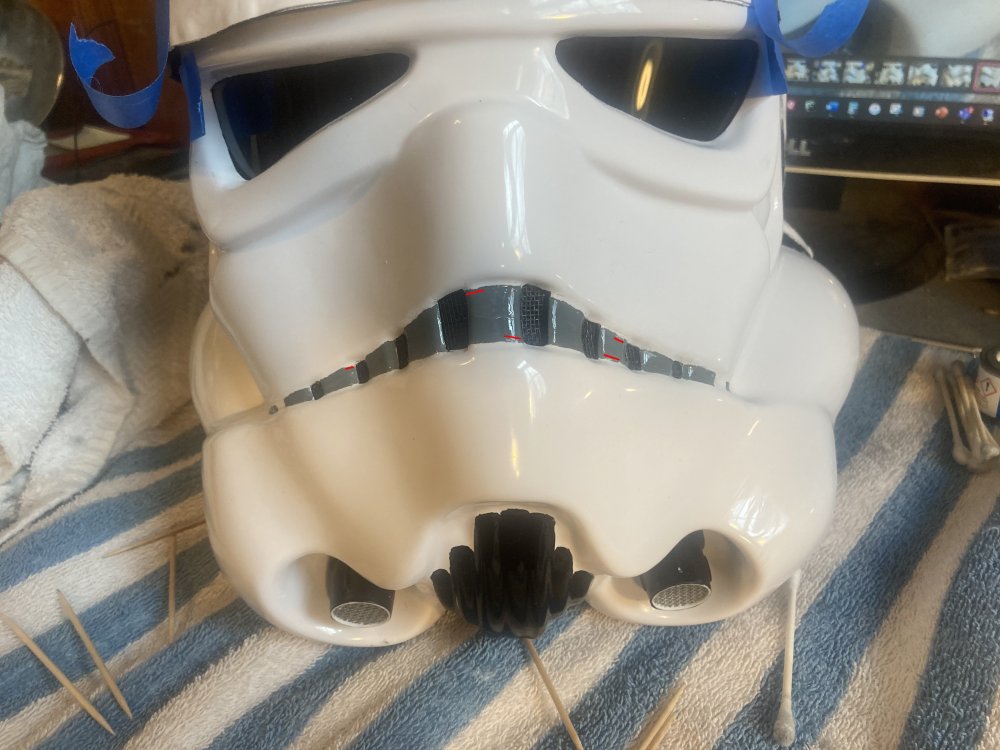
I vaguely remember something about the height of them being too long, need to be 16mm (which is noted) so as long as you print to that size. You will need to angle the front stripe downwards, when the template was first made that detail was not known. Just modified the file so it falls forward now from the tops A great thread on the position and fall of the tube stripes
-
Looking much better, you may just have to touch up any wobbly areas, just marked a couple that appear to stand out
-
Dead Post Links & Broken Photos, How You Can Help
gmrhodes13 replied to Sly11's topic in Forum Help & Support
Armory Boots, Soft Parts, and other Accessories Page 31 Completed - gmrhodes13 Page 30 Completed - gmrhodes13 Page 29 Completed - gmrhodes13