gmrhodes13
-
Posts
31,219 -
Joined
-
Last visited
-
Days Won
1,070
Content Type
Profiles
Forums
Gallery
Articles
Everything posted by gmrhodes13
-

Troopduino Install
gmrhodes13 replied to Highlandscout's topic in Electronics for Helmets / Blasters
Not sure if this thread may be of any help Or this one -
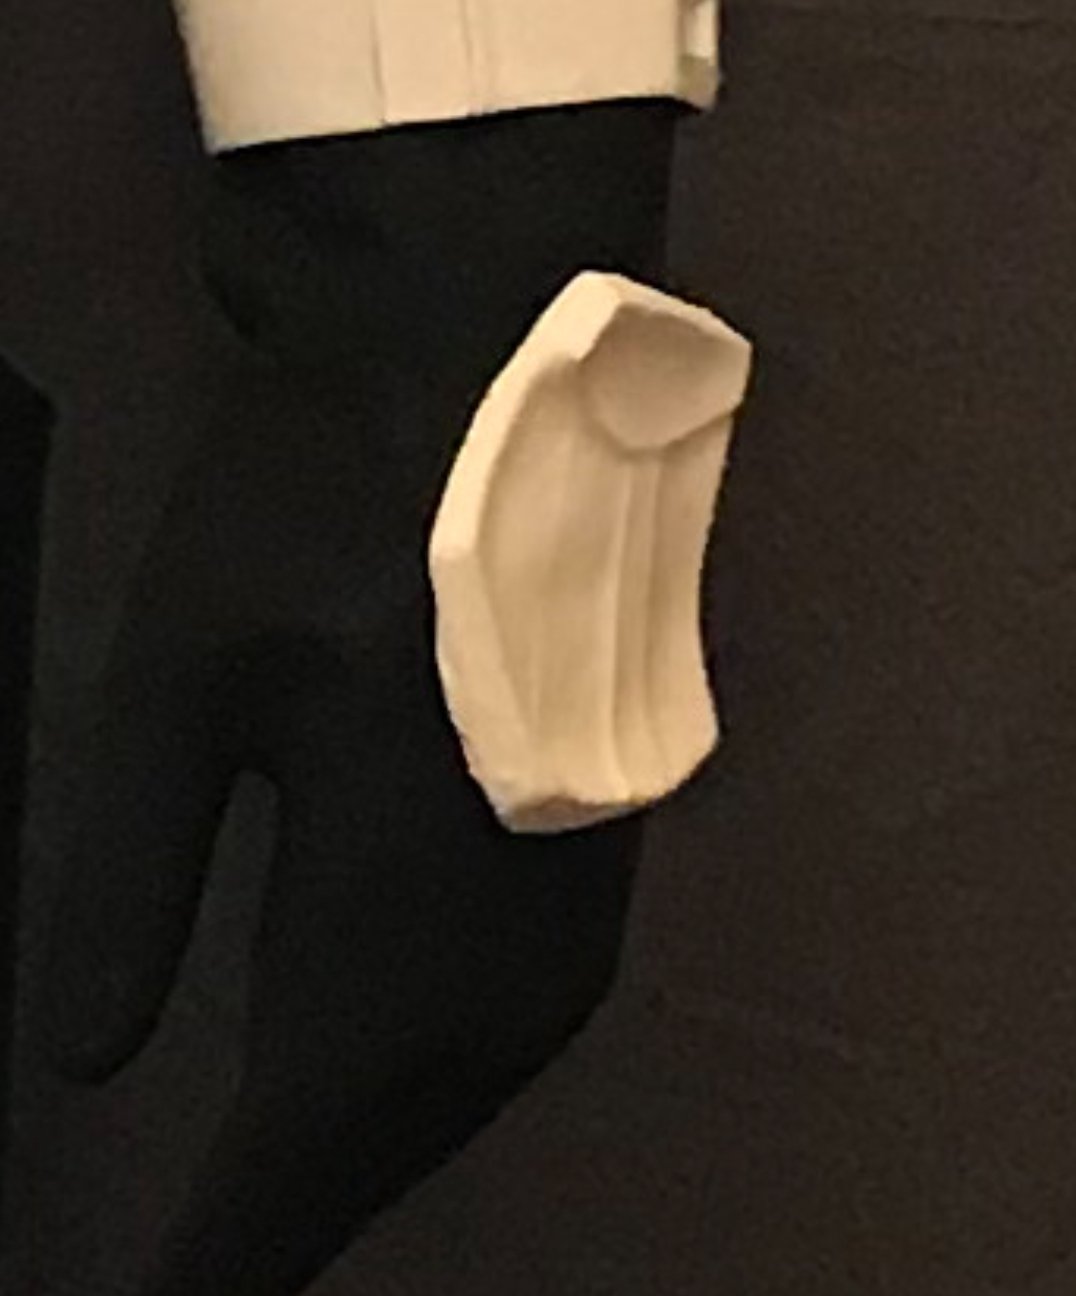
Recently I found some new to the market tape, it was called Frog tape (painters tape), it has a finer glue residue and seems to lay a lot smoother, doesn't allow as much bleed, may be something to look out for. I do find if you give a light coat of paint first that this will fill in any bleed areas, once dry you then go over with the grey. Appears you may just be touching the gums in a few places, you could use a toothpick or something similar or mineral spirits to rub off the extra paint, here are a few references, notice the gap between the grey and gums Here is an example from one of the EIB applications.
-
Got the builder and looking for tips on E-11, boots etc
gmrhodes13 replied to BATS2150's topic in New Member Introductions
For the the shorter trooper these are some great builds to follow https://www.whitearmor.net/forum/topic/38416-crickets-rs-stunt-build-for-the-vertically-challenged/ https://www.whitearmor.net/forum/topic/38842-fragarocks-rs-stunt-build-not-to-scale/ https://www.whitearmor.net/forum/topic/42868-sha-shas-wtf-anh-stunt-build-complete/ Imperialboots do runs of TK boots Undersuit, sporting compression shirt and pants work well, normally can find them quite easily E-11 suppliers Neck seal Teresa Geeky Pink Don't forget to check out this thread for resources -
Great news, the wait will kill You know have time for researching, the All in One Resources thread can be a great help, also don't forget we have galleries full of reference images. Waiting for those BBB photos
-
This has come out a treat great work. It may be the photo but appears your henglster might be on a slight angle.
-
WTF TK ANH Stunt Build thread - newbie needs help
gmrhodes13 replied to cnsf's topic in ANH Build Threads
As I mentioned previously just look at the paint consistency, it have thickened over time an may need a little thinning. I have found I've had to add 2 coats at times, also make sure your first coat is completely dry before adding another coat, 24 hours is normally enough in warm weather. -
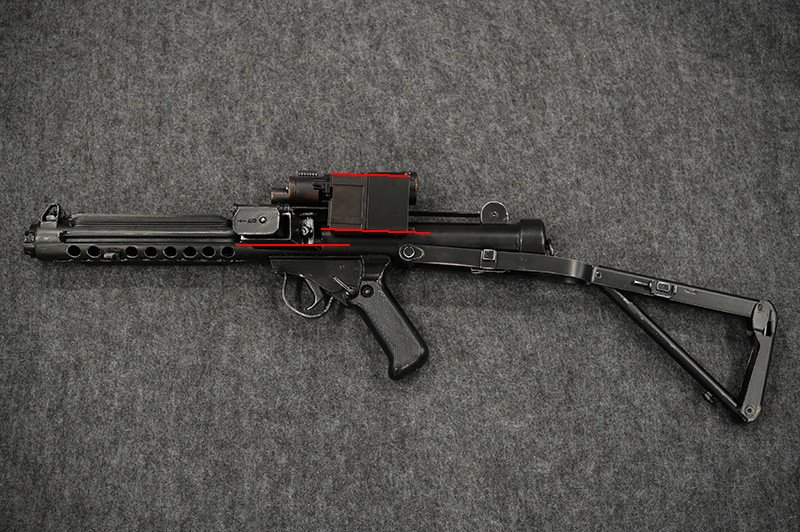
Also note when searching for the picatinny rail, between the holes they are angled cut, I've managed to find them on Aliexpress in the past.
-
Congratulations once again trooper
-
Dead Post Links & Broken Photos, How You Can Help
gmrhodes13 replied to Sly11's topic in Forum Help & Support
Armory Boots, Soft Parts, and other Accessories Page 34 Completed - gmrhodes13 Page 33 Completed - gmrhodes13 Page 32 Completed - gmrhodes13 -
Dead Post Links & Broken Photos, How You Can Help
gmrhodes13 replied to Sly11's topic in Forum Help & Support
Armory Boots, Soft Parts, and other Accessories Page 37 Completed - gmrhodes13 Page 36 Completed - gmrhodes13 Page 35 Completed - gmrhodes13 -
Congratulations and welcome back trooper
-
WTF TK ANH Stunt Build thread - newbie needs help
gmrhodes13 replied to cnsf's topic in ANH Build Threads
They do look a little rough to me but hopefully one of the @Deployment Officer Team will chime in. I would not build up the paint anymore it will just make it look worse. I wouldn't sand either as you will scratch the gloss finish of the plastic. I normally use rough automotive buffing compound to clean off any mistake paint or mineral turpentine which is a little more gentle than using thinners, which could also damage the plastic depending on what type of thinners you are using. -
WTF TK ANH Stunt Build thread - newbie needs help
gmrhodes13 replied to cnsf's topic in ANH Build Threads
Looks better but to me the paint appears very thick and a bit rough, normally it will go on quite thin and smooth, I normally have to apply a second coat, next time you use the paint perhaps add some thinners to it and see if you get a better result. Here's mine for comparison -
Dead Post Links & Broken Photos, How You Can Help
gmrhodes13 replied to Sly11's topic in Forum Help & Support
Armory Boots, Soft Parts, and other Accessories Page 40 Completed - gmrhodes13 Page 39 Completed - gmrhodes13 Page 38 Completed - gmrhodes13 -
New Member Costume Approval Info - Elections 2022 With the Legion election period about to start January 31st, the membership database will be in lock down, during this time new member applications through your local garrison/outpost can not be finalized, you may however still submit them but they won't be processed until the end of this cycle. This does not affect the addition of any new costumes to an active members roster/profile, however it does affect any membership status changes ie: active / reserve / retired and any personal information updates. The period of membership database lockdown for 2022 starts January 31st and ends Feb 21st.
-
- 5
-

-
Terrible news, could you perhaps try paint stripper/remover? Once I've given everything a light sand I go over with 3 thick coats of spray putty, that tends to fill the lines nicely, also apply a very light mist of black, then once fully dry wet sand, the black is used to show any spots not filled after you sand, for any lines still remaining I use glaze putty (blade putty). From reading others posts the spray putty we use here is similar to primer/filler in other parts of the world.
-
Dead Post Links & Broken Photos, How You Can Help
gmrhodes13 replied to Sly11's topic in Forum Help & Support
Armory Boots, Soft Parts, and other Accessories Page 43 Completed - gmrhodes13 Page 42 Completed - gmrhodes13 Page 41 Completed - gmrhodes13 -
TK-19984 "March to Centurion" ANH TK Centurion Build Thread
gmrhodes13 replied to Ebio Amisi's topic in ANH Build Threads
You could also use a piece of rubber pipe or pvc tube for a smoother handle -
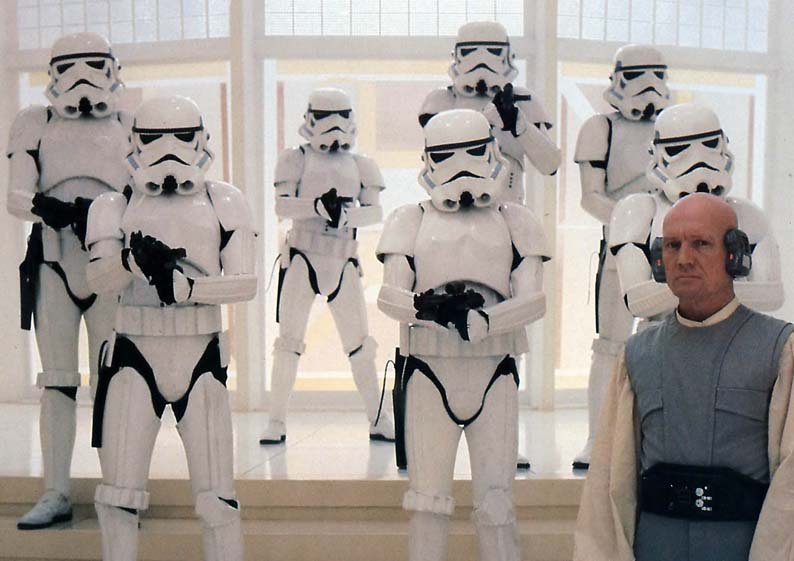
Some with larger biceps have decided not use the strap as the bicep sits tight enough on the arm and doesn't fall You may notice some troopers in ESB with very low biceps, appears they didn't use the shoulder/bicep strapping They can also rotate if not tight enough on the arm
-
RS Propmasters ESB TK slow and steady build in Portland, OR
gmrhodes13 replied to Infern0's topic in ESB Build Threads
A blaster is required for EIB and Centurion its only optional for basic approval -
Hello and welcome aboard, perhaps this thread could be of help Here is another great thread full of info
-
Dead Post Links & Broken Photos, How You Can Help
gmrhodes13 replied to Sly11's topic in Forum Help & Support
Armory Boots, Soft Parts, and other Accessories Page 46 Completed - gmrhodes13 Page 45 Completed - gmrhodes13 Page 44 Completed - gmrhodes13 -
TK-19984 "March to Centurion" ANH TK Centurion Build Thread
gmrhodes13 replied to Ebio Amisi's topic in ANH Build Threads
Looking forward to seeing your progress, good luck -
From Ben's EIB app


-
Hello and welcome, there are (or have in the past has been) 2 makers of original stormtrooper children sized helmet/armor WTF (Walt's Trooper Factory) and the other TM (Troopermaster) both can be found on facebook. Here is a thread with some info First Order child sized Stormtrooper helmet/armor, Imperial Surplus https://imperialsurplus.com/product/kids-first-order-stormtrooper-armor/ Some other threads for modifying 2 piece toy helmets (First Order version helmet) A third option would be having one 3D printed, there some free files on Thingiverse