-
Posts
104 -
Joined
-
Last visited
About indiechixor

Standard Info
-
Name
Brit
-
501st ID
42442
-
501st Unit
Central California Garrison
Recent Profile Visitors
The recent visitors block is disabled and is not being shown to other users.
-

TLJ Captain Phasma CRL Thread
indiechixor replied to Daetrin's topic in Captain Phasma - TFA and TLJ
I had the same issue with my own build in that regard. I only saw 1 strap so I sewed one strap. But as you can see here, there’s definitely two. Regarding the glossiness, I feel one should use the same method in preparing the strap as the rest of the cape, that is, they shouldn’t be two separate materials. They don’t look any different Sent from my iPhone using Tapatalk -
Did you get your submission photos taken? Can't wait to see your approval!
-

WIP Build Laura's Captain Phasma
indiechixor replied to Laura's topic in Captain Phasma Build Threads
Nice to have another Phasma among the ranks! Looking forward to updates -

ZaanSolo super newby build (Jim Tripon TLJ)
indiechixor replied to ZaanSolo's topic in Captain Phasma Build Threads
Lookin Good, excited to see the build progress! -
indiechixor started following TK42442 Reporting for Duty and ZaanSolo super newby build (Jim Tripon TLJ)
-

TK42442 Reporting for Duty
indiechixor replied to indiechixor's topic in Newly Approved Members - Sound Off!
First, I got to meet the maker! Shawn Thorsson, who cast my helmet. I really liked this Kylo's Kintsugi helmet Next, another badass female character, the Armorer And finally, another photo I considered using for my "official", what do you think? -
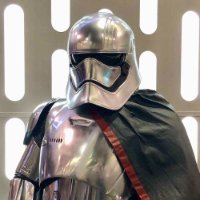
TK42442 reporting in! I’m Brit and I use They/Them pronouns. I got my first ever BBB from KB in Sept of 2020, and spent the pandemic learning and building my shiney suit. I was able to debut my TLJ Captain Phasma at SWCA in May, and thankful to join your ranks today. I’m also a serving member of the Air National Guard, so currently stationed in Texas and have 95 days of training left before I return to home in California and can start Trooping!
-
indiechixor changed their profile photo
-
TK42442 officially reporting for Duty to the Central California Garrison! Been looking forward to this for 2 years. Very excited. Since I last posted, I’ve been Training for the Air Force, so I haven’t been able to even socialize or hang with my local members. Counting down the days to my return - 95 days!
-
Thanks for your vote of confidence! I'm going to have husband touch up some of the chroming that was dinged and get those sweet close-ups I might need for basic approval!
-
A huge should-out and Thank you to all you amazing FISD folks, whom I couldn't have possibly have finished this without help and support. Speaking of, I was surprised (and honored) to be invited to join in the group photo, unfortunately i'm not a fully-fledged member yet but here is a pic my amazing husband/handler took for me Helmets off! here's the last few pictures I took of the con If you can't tell, I was a bit exhausted Speaking of handler, here's a few shots with me and the. husband! And with a droid friend!
-
SO this update is a bit belated, but we've been busy! I'm going to start with the finished chroming first, as that was the last big step! Ultimately I believe she came out beautiful, and Celebration was a great Debut! Close-ups in the garage - Pre-Decals!
-
Lots of work done in the last 24 hours! I tackled my white whale... finally. Sewed the bib! We attached the top and heel foot armor, thanks industrial-strength velcro I re-shaped the spatz... I know they won't fit this low in-cosume, but good for photo-op. Something I"m kicking myself over with this build was that I had my shin armor close facing the front, so you can kind of see a gap with the velcro. I might tighten it up with another strip that's closer to the edge. After getting feedback from some folks, I cut down the cod piece. This is about as small as I can reasonably make it, so I attached it the abs using snaps. Here it is with. the in-progress belt... nearly finished being chicago-screwed down. I also finished attaching snaps to the shoulder bells, just need to punch out the webbing that comes from the yolks, and that'll be done I also found the most permanent way I could think to attach the knees, so they are now snaps. Finally, we Finished re-painting the TD after filling all the gaps, I think it turned out really good. All that we have left to do... will we finish in time?! Silver everything Bell fastener snaps repurpose Helmet liner, add Helmet padding Attach beak to helmet Attach belt box backing plates Glue box tops to belt Helmet electronics Back Pills Armor/Detonator Decals Butt / cod fastener


