


gmrhodes13
-
Posts
31,206 -
Joined
-
Last visited
-
Days Won
1,069
Content Type
Profiles
Forums
Gallery
Articles
Everything posted by gmrhodes13
-
You may want to bring that belt up a little more. The top of the ABS belt shall sit at or just above the bottom of the central and vertical ab button panels. A slight overlap is suggested, but not required.
-

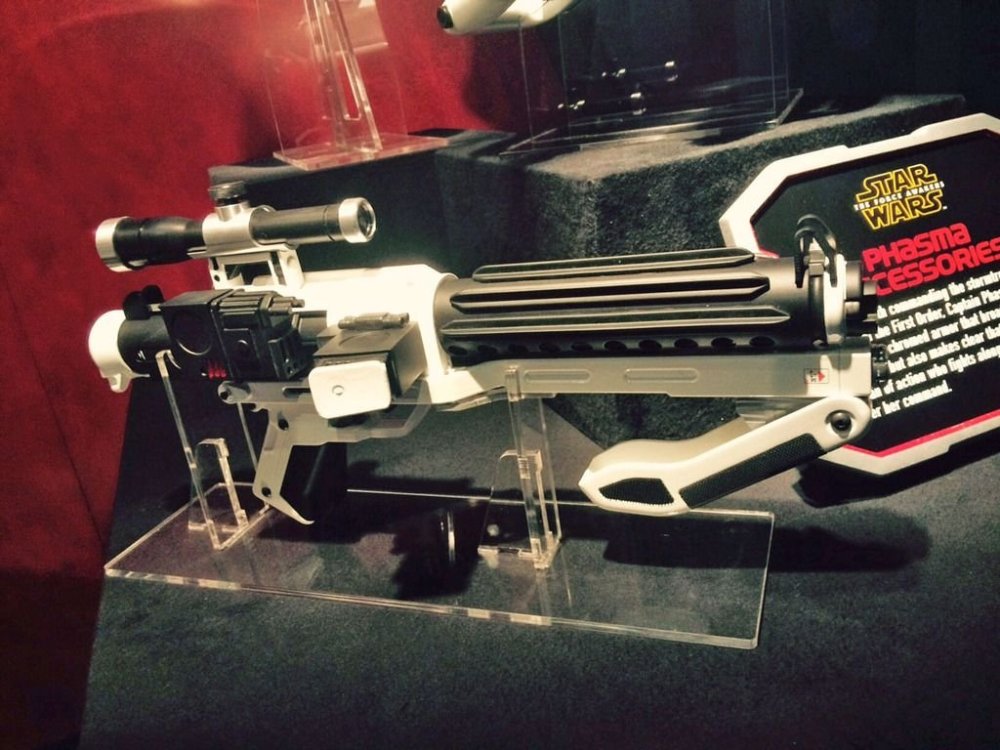
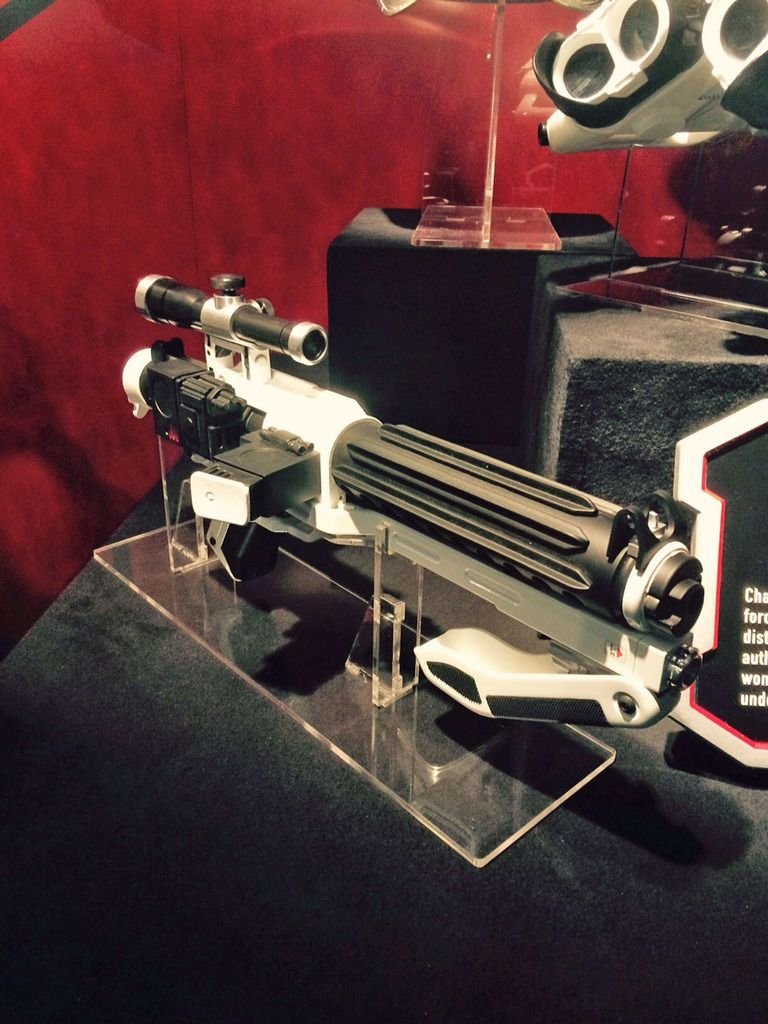
Sonn-Blas F-11D Blaster References TFA
gmrhodes13 replied to gmrhodes13's topic in Weapons of the First Order
There are images out there showing the F11D's front grip are functional, here's just few.thumb.jpg.fa19bf2284ae213a4e0fefbc8c23bc73.jpg)

-
I would first look at reducing your padding, all I use is soft foam, 5mm on top and a block @ 1 1/2" on each side in front of the ears. You have padding on the back of the helmet which may interfere with your ear. You can trim a little more but remember if you do your neck S trim will be too short. Also make sure you don't trim too much, you don't want younglings to be able to see your face under the front of the helmet
-
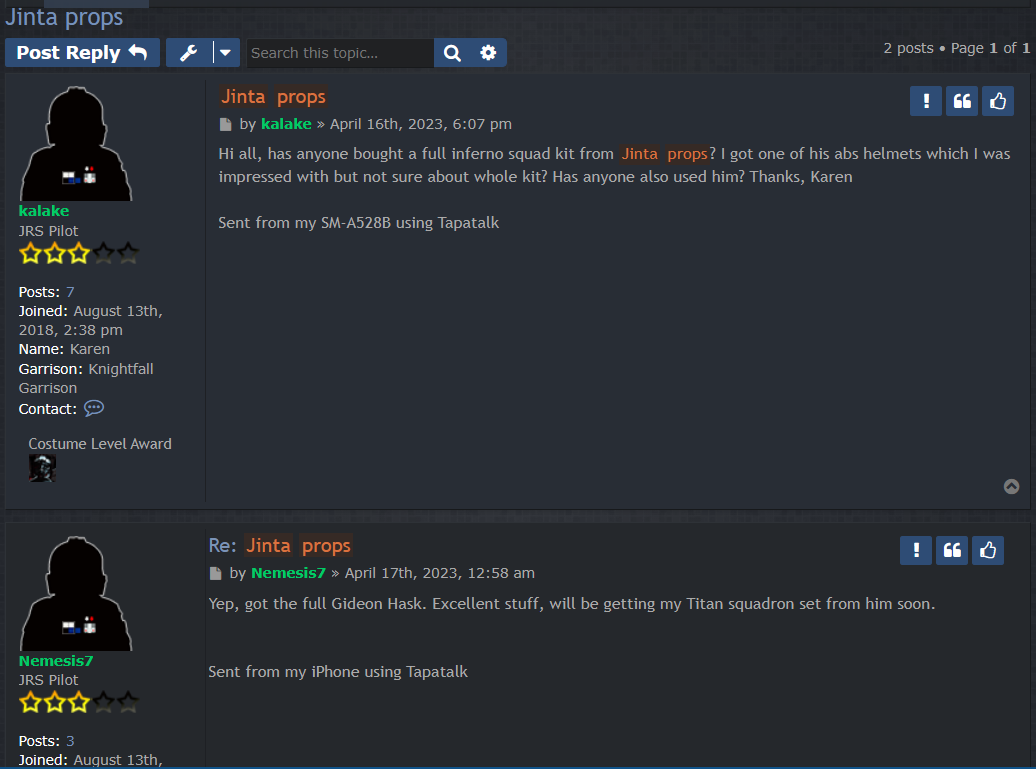
Question about Jinta Props/Studio
gmrhodes13 replied to theshape.78's topic in Hard Armor (General Discussion)
Must be in a members area. Here you go
-
Question about Jinta Props/Studio
gmrhodes13 replied to theshape.78's topic in Hard Armor (General Discussion)
Try over at Jolly Rogers they look after all tie related costumes https://www.jrs501st.com/forums/ This post mentions them https://www.jrs501st.com/forums/viewtopic.php?f=255&t=18065&p=155043&hilit=Jinta+Props#p155043 -
TK-16970 Requesting [ANH] Centurion Status (526)
gmrhodes13 replied to Manvi Viztoria's topic in Request Centurion Status
Congratulations and welcome to the Centurion ranks -
This is the link you need https://www.501st.com/members/displaymemberdetails.php?userID=16138
-
Please add a link to your legion membership profile, instructions in first post of this thread
-
TK Crotch Strap replacement snaps on the ABS plastic
gmrhodes13 replied to Kingeric291's topic in Forum Help & Support
Depends how it has been attached. Some use the rivet to secure the snap, some use a snap plate, some use nylon to hold the snap. -
Been a long time coming, congratulations Dino
-
There are no words
-
Same as ANH but on the other side with loops
-
TK-16970 Requesting [ANH] Centurion Status (526)
gmrhodes13 replied to Manvi Viztoria's topic in Request Centurion Status
You will need to add the following info to your application: Mandatory Information Armor = Armor Maker Helmet= Helmet Maker Blaster= Blaster Type [Expert Infantry Request Thread URL] Deberá agregar la siguiente información a su solicitud: Información obligatoria Armadura = Fabricante de armaduras Casco= Fabricante de cascos Blaster= Tipo de Blaster -
WIP 3D print PLA TLJ Phasma Build!
gmrhodes13 replied to MikeWazowski's topic in Captain Phasma Build Threads
With 3D prints I like to sand everything first with 80grit sandpaper, this will get rid of most of the lines, I then apply 3 coasts of spray putty (primer filler in other parts of the world). Leave dry for a few days, wet sand, makes the paper last longer and less dust. Spot (blade) putty for anything remaining then wet sand those areas again. Coat with primer and you are ready for paint. Prep work is the key, especially for a character with such a shiny appearance. Looking forward to seeing your progress -
You may want to read again. Trimming here will allow the gap to be reduced The back plate overlaps the front, which causes a step, adding a cut on the ear's top with help it sit better over this step
-
The top section is what is holding it outwards and causing the gap. Adding a step to the top piece can help Take a look at this build
-
Congratulations and welcome to Expert Infantry and the EI Honor Gallery
-
Doesn't hurt to ask just to be sure This is probably a better reference. Called a "Han" snap as it was prominently seen on Han Solo's armor.
-
declared aim : ANH Stunt tk centurion
gmrhodes13 replied to Trime Mudor's topic in ANH Build Threads
Buttons look great, when you paint don't go all the way to the bottom of the button Note: For Level 3 the paint does not extend to the bottom of the actual raised button. Top of the TD looks fine for placement, just make sure you can see the O detail once worn, you may want to straighten the trim line though..thumb.jpeg.9c00ddc626c1ab17880ef7963d289ef1.jpeg)
-
Congratulations trooper
-
Sometimes referred to as the "Han" snap, for Level 3 a single male snap on the top right corner of the ab plate is present. Note in the photos that it is the bottom of the snap that faces outward and is not painted. This is also sometimes referred to as the "Han" snap.
-
Well that's annoying. Great thread for snap setting (when you have a tool )
-
I contacted him some time ago, he is happy to share his files, the only stipulation was you have to purchased Nico's files, which you have. Looking forward to seeing the progress
-
Click on his forum name viewoptic which will open up his forum profile, then click the blue box MESSAGE, COMPOSE New will open, type away just like an email.
-
Cod looks ok, see how it feels on, you could always trim a little more if you need to Also, looking at this post. Do most people reinforce their shoulder bridges? I didn't with my first set of armor but I do now, those lasted about 7 years without cracks (ATA is pretty thick) but constant flexing over time you do get cracks so it helps to glue a support piece underneath.

.jpg.56237041784f84b0b956bff2dcf7b182.jpg)

.jpeg.517dbfa5073ac8153124327ca0b18e16.jpeg)