gmrhodes13
-
Posts
31,206 -
Joined
-
Last visited
-
Days Won
1,069
Content Type
Profiles
Forums
Gallery
Articles
Everything posted by gmrhodes13
-

Helmet & Ab paint detail reference guide
gmrhodes13 replied to Billhag's topic in Assembly, Mods, and Painting
FYI the Mediterranean blue is no longer used -
From memory they were @ $40 us when they first came out. It's a little expensive in my mind for a blaster that isn't troopable.
-
Lot's of places it appears doubled or even tripled over. I agree it is very see through with one wrap
-
Won't pass base approval, albeit check with your GML (garrison membership liaison) as they look after base approvals. Blaster came out a few years ago https://blasterhub.com/2016/01/review-star-wars-stormtrooper-deluxe-blaster/
-
Whats next? 501st TK requirements?
gmrhodes13 replied to StarWars4Life's topic in Getting Started - Read this First!
-
Looking good, does get pretty warm in there without fans as you found. Great to see you have listed a dew adjustments, almost at the finish line
-
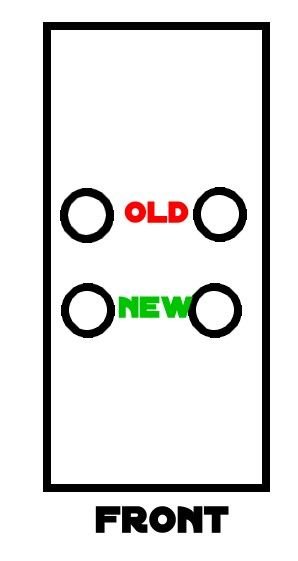
If you wish to you could also help with the CRL text, ROTK copied below, adjust to suit the Night Troopers, copy/paste from below then edit, strike through what needs removing and add in green for new text. If aiming to be the CRL model you would also need to provide all CRL images required, I would suggest using a contrasting background, makes photo editing a little easier. Required Costume Components The following costume components are present and appear as described below. Helmet Traps (trapezoids on dome of helmet) and tears (area beneath the corners of eye lenses) are gray. Rear traps and tears have engraved vertical black lines. Lenses can be flat material, green in color, sufficiently dark enough to obscure the costumer's eyes. The “ear” bars are gray or painted gray, with the largest bar oval cutout painted black. Frown is painted gray and does not leave the teeth area. The space between the 8 teeth is hollow and backed with Black or Dark grey wire screen mesh. Tube stripes are medium blue, numbering 12 per side. The stipes are straight, not curved like ANH. Vocoder (vertically ribbed chin detail) is painted black. Aerators/Hovi mix tips (cylinders on either side of the vocoder) have a black exterior and silver in color screen mesh. Tears and traps may not be hand-painted. Tube stripes are recessed, and the recessed section painted blue or backed by blue mesh. Note: The helmet is accurate in detail and proportion to official references. Many commercially available helmets or those considered disproportionate in size or shape are ineligible. The Black Series helmet is approvable if modified to meet the level 1 CRLs. OPTIONAL Level two certification (if applicable): Lenses have a very slight curve and are convex in style. Flat lenses and ANH style bubble lenses are not permissible. Rank bar area on ear must be of the correct RO style and pattern, no ANH style ear bumps allowed. Head opening has black trim running all along the edge. Brow trim should be positioned ¼" above the eyes. Ear screws must not have a visible slot mark and be flush to the ear. Any gap between the ears and helmet will only appear to be a seam, not any bigger. Correct 'Hovi mic' aerator tips. Chin section has a well defined seam from the angles of the mouth. OPTIONAL Level three certification (if applicable): The Tube stripes are completely hollowed out with a blue section underneath. Vocoder is tubular in nature with 7 vertical tubes. A visible gap must be present between the Vocoder and the helmet. The inside of each tear will be a raised area that is grey, with 8 engraved black lines, hand painted lines like ANH are not permitted. The frown shall be recessed to the proper depth, unlike standard ANH. The inside of each rear trap will be a raised area that is grey, with 13 engraved black vertical lines, hand painted lines like ANH are not permitted. The inside of each side trap will be a raised area that is grey. There is a small bump in the right eye socket (when worn) under the lens as an intended flaw to pay tribute to the original trilogy designers. TK anh stunt neckseal.jpeg Neck Seal Black with horizontal ribs, fitted to the wearer, and extending from the base of the neck to conceal the entire neck. Under Suit Black non-textured material, either one-piece or two-piece construction with no visible zippers or logos/designs. OPTIONAL Level two certification (if applicable): Top, where visible shall be fully ribbed with all horizontal ribbing on the arms, chest, and back. The centre of chest and back may be mesh as long as it is covered by armor. Pants shall be black non-textured material and have horizontal ribbing at the knees only. Knee gaskets are allowed as long as they correctly match top ribbing material, spacing and color. The hip section shall not have ribs. OPTIONAL Level three certification (if applicable): All ribbing on knees, arms, chest, and back must be stitched between each rib in detail and proportion to official references. The armpit area shall have the correct hexagonal mesh detail Shoulder Straps They may be affixed with Velcro or adhesive. OPTIONAL Level two certification (if applicable): OPTIONAL Level three certification (if applicable): These shall be inserted behind the chest tabs and into slots of the backplate. Shoulder Armor One on each shoulder. The shoulders are considered effectively symmetrical; they may be worn interchangeably on the left and right shoulders and may have a black elastic strap that wraps around the inside of the bicep. OPTIONAL Level two certification (if applicable): OPTIONAL Level three certification (if applicable): There is no swoop on the shoulder bell raised area. There is no elastic strap that wraps around the inside of the bicep. Upper Arm Armor Both biceps are symmetrical and interchangeable. The front strip is bevelled and approximately ⅛" thick that does not extend beyond the bicep, and has a smaller cover strip layered thereon. OPTIONAL Level two certification (if applicable): OPTIONAL Level three certification (if applicable): Cover strips will cover both the front and back joints. Biceps are loosely held closed in the back with elastic, shock cord (bungee cord) or white Velcro and are designed to remain flexible. Forearm Armor The front strip is bevelled and approximately ⅛" thick that does not extend beyond the bicep, and has a smaller cover strip layered thereon. OPTIONAL Level two certification (if applicable): OPTIONAL Level three certification (if applicable): Forearms are loosely held closed in the back with elastic, shock cord (bungee cord) or white Velcro and are designed to remain flexible. Cover strips will cover both the top and bottom joints. Hand Plates Roughly pentagonal in shape, the hand plates are mounted securely over the back of the glove. As an alternative to plastic, these may be made out of latex or latex-like material. OPTIONAL Level two certification (if applicable): Hand guards shall be made of plastic. OPTIONAL Level three certification (if applicable): Hand guards should follow the correct RO shape, ANH hand guards are not acceptable. A small indent in the front of the hand plate shall be present. Gloves Black in color, made of Nomex, leather, or leather-like material, with no visible straps or logos/designs. The fingers are enclosed, non-textured. Rubber ANH style gloves are not permitted. OPTIONAL Level two certification (if applicable): The base material of the gloves will be a black synthetic material similar to Lycra, Spandex, Elastane, or Nylon. Palms of gloves shall be shiny black fabric or leather or leather-like material. On the index finger shall be a stitched piece of fabric made from the same material as the hand's underside that while stitched to the finger has one cutout towards the end of the finger that reveals the netted material underneath. Gloves shall have the correct leather pattern along the fingers/palm. OPTIONAL Level three certification (if applicable): Chest Armor Chest plate overlaps the abdominal plate OPTIONAL Level two certification (if applicable): There are raised trapezoids at the top of the shoulder section beneath which the straps insert. The chest and back sides shall be connected by black extensions pieces. OPTIONAL Level three certification (if applicable): Top pectoral out lines swoop correctly outward. Bottom of ribcage flares correctly outward. Back Armor Back plate contains an "O II" design. There are raised trapezoids at the top of the backplate section beneath which the shoulder straps insert. The backplate continues past these trapezoids towards the top of the shoulder OPTIONAL Level two certification (if applicable): Top of box wall has a trapezoidal indentation. There is a roughly 8mm circular indent near the right top corner of the backplate. OPTIONAL Level three certification (if applicable): Bottom of backplate is curved and extends past abdominal back cover plate. The O cog shall have 16 spines. The 11 bars have 5 horizontal evenly spaced raised bars on the bottom of the face. There is a rectangular tab protruding from the bottom of each of the two raised trapezoids at the top of the backplate. Abdomen Armor The abdominal armor consists of a one-piece corset design with a vertical opening centered on the back. The back opening is covered by a rectangular cover plate that is worn under the back armor. There are 3 vertical ribs centered on the front of the abdomen and two (one left and one right) ribs further spaced to each side of the center. There are two (one left and one right) angled (approximately 70 degrees) ribs on each side of the abdominal armor. There are two (one left and one right) angled (approximately 70 degrees) recessed ribs on each side of the abdominal armor behind the raised angled ribs that are black Any side shims added are to be added to the white areas of the armor. The center front detail consists of a raised rectangular panel. On the right half of the panel, there is a vertical column of 4 buttons approximately ⁷⁄₁₆" (11mm) in diameter. The bottom button is blue while the other three are grey. On the left half of the panel, there is a vertical column of raised evenly spaced horizontal gear teeth with a recessed trapezoid at the top of the column. The rectangular inside bottom of the trapezoid is black. The left front detail consists of a raised rectangular panel with an angled top. There is a vertical column of 4 buttons approximately ⁷⁄₁₆" (11mm) in diameter. The bottom button is blue while the other three are grey. The right front detail consists of a primary raised rectangular panel with an additional secondary raised rectangular panel covering the top ⅓ of the primary panel. There is a column of three thin horizontal evenly spaced raised lines across the top ½ of the secondary panel. The abdominal armor is accurate in detail and proportion to official references. OPTIONAL Level two certification (if applicable): The cod armor is separate from the abdominal armor. The right front detail panel is centered between the two outer vertical right ribs. The left front detail panel is centered between the two outer vertical left ribs. OPTIONAL Level three certification (if applicable): The abdomen armor has two horizontal recessed rectangles centered above the center front detail panel and on each side of the center rib. All 8 Button details are recessed and bordered with a thin edge, only the recessed portion is painted. The center front panel column of raised gear teeth has only 9 teeth. There is a recessed edge (approximately ⅛" 3mm wide) along all four sides around the face of the center front panel The right front detail panel is centered between the two outer vertical right ribs. The left front detail panel is centered between the two outer vertical left ribs. There is a recessed edge (approximately ⅛" 3mm wide) along the sides and top around the face of the left front detail pane The abdominal armor back cover plate has two protruding tabs along the bottom that rest inside the back hard belt. Cod Armor The cod armor consists of a body shape formed triangular plate with a raised center rib and raised lower portion and is accurate in detail and proportion to official references. OPTIONAL Level two certification (if applicable): The cod shall be a separate piece from the abdominal plate. OPTIONAL Level three certification (if applicable): Kidney Armor The kidney armor is separated in the back and covered by a rectangular plate. The rectangular plate is separate from the posterior armor. OPTIONAL Level two certification (if applicable): OPTIONAL Level three certification (if applicable): Posterior Armor The posterior armor shall be a separate piece from the abdominal armor OPTIONAL Level two certification (if applicable): OPTIONAL Level three certification (if applicable): Belt The Ammunition belt consists of a hard belt made of the same or similar material as the armor in two separate parts front and back (with overlap). The back belt overlaps the front belt on the sides. There are 6 ammunition boxes mounted to the belt. There are 2 (one left and one right) drop boxes suspended by black webbing approximately 2" (50mm) wide. Drop boxes must be accurate in detail and proportion to official references. The ammunition belt is accurate in detail and proportion to official references. OPTIONAL Level two certification (if applicable): The only detail visible on the front belt is the mounted ammunition boxes unlike the squares present on ANH belts. The top edge of the front belt has protruding teeth that nest inside gaps between the ribs and detail panels of the abdominal armor. The two center ammunition boxes are thinner than the other mounted ammunition boxes. The second and fifth mounted ammunition boxes are slightly wider than the two center ammunition boxes. The two outermost ammunition boxes are almost square. The two drop boxes are rectangular and as wide as the mounted square boxes. OPTIONAL Level three certification (if applicable): The ammo boxes across the front are all made separately from the main belt and are secured to it The two drop boxes hang no more than 1" 25mm below the front belt and the black strap is visible. The second and fifth mounted ammunition boxes have trapezoid detail on the top of each ammunition box. The front belt protrudes past all mounted ammunition boxes above and below by approximately ⅛"–¼" 3–6mm. All ammunition boxes have slightly beveled edges on the face of each box. Thermal Detonator The thermal detonator consists of a grey tube approximately 3" 76mm in diameter and 8" 203mm long approximately. There are two white endcaps and a white control panel. The white control panel has a horizontal row of white rectangles along the bottom of the control panel and a grey “D” shaped recessed on the left side of the horizontal row. There is an oval greeble that protrudes from the control near the top right side. The thermal detonator is mounted to the rear hard belt and there are no visible screws or clips and is accurate in detail and proportion to official references. OPTIONAL Level two certification (if applicable): The thermal detonator mount should be fully enclosed with solid walls on all four sides. The center of both end caps is gray. OPTIONAL Level three certification (if applicable): The control panel bottom detail is a raised panel with 7 raised rectangles, all are evenly spaced except the right most rectangle. There is a panel line approximately ¼" 6mm from the edge around the control panel. There is a panel line approximately ⅛" 3mm from the edge of each endcap. The inside edge of both endcaps is beveled. The oval greeble consists of an oval tube protrusion with the top edge slightly extending past the tube wall thickness and is visually similar to the Deathtrooper chin greeble. Thigh Armor The thigh armor is mirrored for each leg and not interchangeable. The cover strips are beveled and approximately ⅛" thick that does not extend beyond the thigh and has a smaller cover strip layered thereon. The top edge of the thigh armor is unadorned, and the bottom edge has a raised detail that fallows the bottom edge contour. The small ammo belt consists of 5 evenly spaced rectangle ammunition boxes and is installed on the bottom of the right thigh, there are no visible screws or rivets. OPTIONAL Level two certification (if applicable): Thighs are loosely held closed in the back with elastic, shock cord (bungee cord) or white Velcro and are designed to remain flexible. Cover strips will cover both the front and rear joints. OPTIONAL Level three certification (if applicable): The bottom outside edges of the small ammunition belt are angled at approximately 45 degrees. Thigh armor is suspended by a black strap approximately 1" 25mm in width with a plastic side release buckle that is covered by black webbing or elastic that runs down the side seam of the leg. Lower Leg Armor The greaves are mirrored for each leg and are not interchangeable. The top edge of the greaves has a raised detail that fallows the top edge contour. The bottom edge of the greaves flairs out to cover the top of the ankle and boots. The cover strips are beveled and approximately ⅛" thick that does not extend beyond the greave and has a smaller cover strip layered thereon. Greaves are loosely held closed in the back with elastic, shock cord (bungee cord) or white Velcro and are designed to remain flexible. Cover strips will cover both the front and rear joints. The trapezoid knee plate (sniper knee plate) is affixed to the top of the left greave and there are no visible screws or rivets. Sniper knee plate must be aligned with the vertical cover strip and the top raised edge detail on the greave and is accurate in detail and proportion to official reference. OPTIONAL Level two certification (if applicable): The sniper knee plate has raised detail that fallows the top edge contour. The sniper knee plate has 3 trapezoidal lugs on each side and 2 on the center bottom edge (totalling 8) of the knee plate. OPTIONAL Level three certification (if applicable): Boots Boots are above ankle height and the same style as the First Order TK. Chelsea type boots in the style of OT TK are not acceptable. Boots are all white and made of leather or leather-like material Flat black soles without a heel. Patent leather or high gloss is not permitted. OPTIONAL Level two certification (if applicable): There is no seam present on the front of the boot. The wearer's inner side of the boots have zippers and no side elastic. OPTIONAL Level three certification (if applicable): Optional Accessories Items below are optional costume accessories. These items are not required for approval, but if present appear as described below. If adding in an accessory after initial approval, the item still needs to be submitted to local GML for approval before use. E-11 Blaster Manufactured by BlasTech Industries, the E-11 is standard-issue for many Imperial troops. Light, compact yet powerful, the E-11 blaster is always in high demand throughout the galaxy. "Note, the E-11 holster as seen in the Original Trilogy movies is not an authorized accessory for rogue One armor". Based on a real or replica Sterling Airsoft Gun, Sterling Sub-Machine Gun, scratch-built, or a modified commercial toy Stormtrooper blaster. A small flashlight shall can be mounted on the right side of the blaster centred over the T-Tracks. OPTIONAL Level two certification (if applicable): Blaster shall be based on a real or replica S&T Sterling L2A1 AEG Airsoft Gun. (Folding Stock does not need to function) D-Ring shall be present on the rear end cap. Scope shall be a real or replica M.H.R. (Minneapolis Honeywell Regulator Co.) M38 Telescope. 1943 model is preferred. Counter shall be a real or replica Hengstler 400 Series counter. Eagle logo is preferred. Power Cylinders shall be mounted on top of the magazine well. R1 style power cylinders are preferred over ANH style. 6 rows of T-Tracks cover the Sterling receiver holes except for the lower left row with the bayonet lug. Flashlight if fitted shall be a real or replica Element M300A Mini Scout Light. 3D printed blasters can not contain visible print lines and must be sanded smooth for a more realistic appearance. OPTIONAL Level three certification (if applicable): Scope shall be a real or replica 1943 M.H.R. Co. M38 Telescope, 1942 model is not allowed. Counter shall be a real or replica Hengstler 400 Series counter with Small eagle logo. Large eagle logo is not allowed. Power Cylinders shall be R1 style, ANH style is not allowed. BlasTech DLT-19 Heavy Blaster Rifle Based on a real or replica MG-34 machine. OPTIONAL Level two certification (if applicable): A DLT-19 is an MG-34 with T-tracks on the barrel, ejection port cover added, and a small disk on left side. 3D printed blasters can not contain visible print lines and must be sanded smooth for a more realistic appearance. OPTIONAL Level three certification (if applicable): A small flashlight shall can be mounted on the right side of the blaster forward the front sight. BlasTech T-21 Light Repeating Blaster Rifle Based on a real or replica Lewis Mark I machine gun. For this prop the magazine disk and bipod of the original gun are left off. Rubber or rubber-like tubing is wrapped around the barrel shroud covering about ½ the length of the shroud. A small flashlight shall be mounted on the right side of the blaster forward the front sight. OPTIONAL Level two certification (if applicable): A black nylon 2-point sling shall be attached. Front sight shall be present on top of forward most large barrel ring. 3D printed blasters can not contain visible print lines and must be sanded smooth for a more realistic appearance. OPTIONAL Level three certification (if applicable): Three large barrel shroud rings are present, two before the rubber tubbing and one prior to the shroud transition. Small barrel ring is present at end of the barrel. Charging handle is mounted on right side of the blaster. Gas Key Adjustment Lever greeble is mounted on the bottom of barrel shroud before forward most large barrel ring. Oil Cleaning Brush greebles are mounted on stock. Sling is mounted to blaster and stock and not wrapped around either. Flashlight shall be a real or replica Element M300A Mini Scout Light. Baton and holster Flat or matte black in color, free of adornment or decoration. Is composed of three sections that extend outward when in use. When not in use, it appears as one cylinder. Is approximately 14" long when collapsed and 1" in diameter. The baton hangs off of the left rear belt, on a black holster. It is be attached at two points on the holster: one at the top, and one at the bottom. The baton should not swing when holstered. The holster is made from leather or leather-like material. OPTIONAL Level two certification (if applicable): 3D printed blasters and any approvable accessories can not contain visible print lines and must be sanded smooth for a more realistic appearance. Imperial Binders Imperial binders accurate in detail and proportion to official references is an authorized accessory. OPTIONAL Level two certification (if applicable): 3D printed blasters and any approvable accessories can not contain visible print lines and must be sanded smooth for a more realistic appearance. Tk rogue one pauldron.jpg Pauldron Rogue One Pauldrons denote rank or mission specialization. The Rogue One Pauldron is specific to Rogue One and differs from the original trilogy in color and stitching. Original trilogy Pauldrons are not an authorized accessory for Rogue One armor. An Orange, white, or black ornament made of leather plastic or leather-like material, worn over the right shoulder. The Orange is specific to Rogue One and a different shade from the original trilogy. The colored panel is divided into three sections by color matched stitching to conform to the wearers shoulder and has black piping around the outside edge. The remainder of the Pauldron is black and divided by black stitching into 10 segments. The neck closure is black and has two black snaps visible. There is a black elastic strap that runs from back to front and is worn under the bicep to hold the Pauldron in place. The strap is conned to the Pauldron on top by two black snaps inlayed in black “D” shaped leather or leather-like ends. The underside of the Pauldron is white regardless of top color and is divided with white stitching into 13 segments. The entire outside edge is finished with black piping and the underside of the neck closure is black. Comlink A comlink may be worn on the belt
-
Minor thing you don't seem to have much of a gap between the belt and drop boxes, there is normally a small area of black seen between (elastic) which allows them to move when hit by the thighs.

-
I like to use double snaps as I've had one fail on the shoulder before, also if you bring your connection point further forward it help to bring the forearms in at the front at rest.
-
Whats next? 501st TK requirements?
gmrhodes13 replied to StarWars4Life's topic in Getting Started - Read this First!
Hello and welcome to the forum, good luck with the research -
Nice work, one thing that has been noticing is any pieces of armor that would open for dressing has the wraps wrapped each of the opening sides, not wrapped when dressed.
-
You could reach out to troopers in your area who may do commission work. Denuo Novo's kit is not quite ready to wear, needing a few adjustments/filling in some places for legion approval. Occasionally you see FOTK armor for sale which may be another option for you. RS ANH you will be happy with the quality.
-
Looking forward to seeing your progress. FYI you can request 501st access here Great thread full of helpful information
-
thecreatormatt's Anovos ANH Stunt TK Build
gmrhodes13 replied to thecreatormatt's topic in ANH Build Threads
It is important to have your shins close as flat as possible before adding the velcro, yours appears it may be on an angle leaving a bigger gap on the side. The good thing is having the velcro on the inside it's not as noticeable from the outsides, here's a comparison with one of my kits, L3 approved There is also an option to bring the velcro further in by adding an inner strip and gluing the verlco to that, note the step on the left and how much lower the velcro sits. -
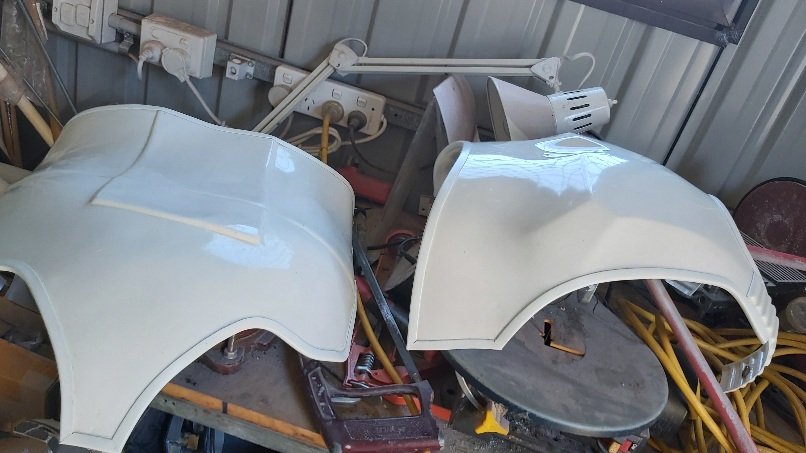
I used a matt black, from local automotive shop, was their own brand so not available outside Australia. I also used a matt clear because every time I'd touch the matt black it would leave marks, clear has reduced this immensely. It's a great feeling hitting those milestones, I hit 25 then started to on sell some of the costumes that I don't wear often.
-
Tracking/looking up followed posts and members
gmrhodes13 replied to pkzipper's topic in Forum Help & Support
When I first started I used to copy the URL (link) of the threads I found into notepad and named each of the links, it's a little bit of work but well worth it if you have a memory as bad as mine. Bookmarking your sites and keeping them in your favourites is another good idea, you can also change the name of the bookmark for easier recollection (well in Edge you can) Depending on what browser you use you may be able to look at your history to see particular links -
TikiTechie TLJ First Order TK Build Thread
gmrhodes13 replied to TikiTechie's topic in TLJ Build Threads
Cod photos being taken down, that's weird, wonder if anyone else has had that problem. ABS paste is challenging to get to a nice finish, a lot of times it's also small bubbles from the drying of the thinners. I have found thin coats to be the best, I also use fine sandpaper towards the end of the process and automotive cutting compound as that is a little coarser than just polish and can help to bring back some of the shine. -
New here, best TK supplier options in AU?
gmrhodes13 replied to Croissant_Guard's topic in Getting Started - Read this First!
Hello and welcome aboard, don't panic many of us who have come before you have been in exactly the same spot. As well as link Andrew has given you there is this compiled thread for everything you may need on your journey which should make things a little easier. Don't be afraid to ask questions, there are no silly questions, just silly mistakes from not asking a question Good luck -
Being AM armor both sides should look the same so you may get away with having the offset side facing the rear so it's not as noticeable. Making adjustments while taking photos is fine, cough cough, if you get my meaning. But yes it could be fixed, work out were the middle should be, cut that off the larger side, glue a support piece behind, then fill the gap with ABS paste
-
Link not working, goes to classified German member profile. Try this one https://www.501st.com/members/displaymember.php?userID=37262&costumeID=124
-
Cover Strips for an old GF kit?
gmrhodes13 replied to Docmani's topic in Hard Armor (General Discussion)
Another option is of course paint, I wanted to match the color of some U trim to a RS kit and used waterbased acrylic paint, inexpensive and easy to mix shades. I used a sponge to apply the paint and once dry coated in a clear to seal it, only down side is if you scratch them you will see the difference. Before After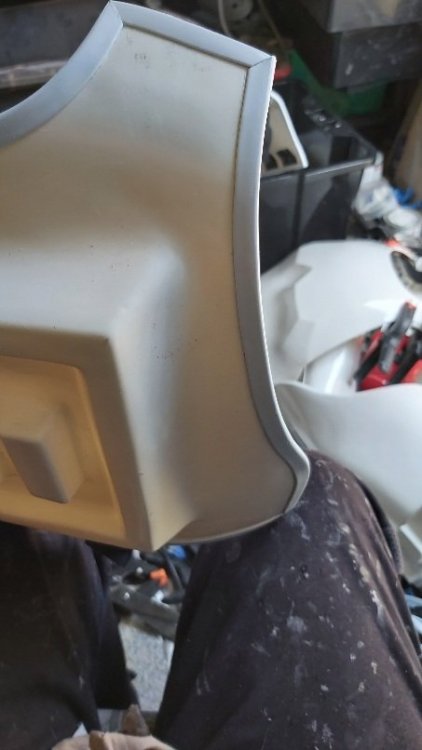
-
Cover Strips for an old GF kit?
gmrhodes13 replied to Docmani's topic in Hard Armor (General Discussion)
Hello and welcome aboard, always best to ask questions than make mistakes. Big color differences between the makers, you may be better off reaching out to local troopers and try to view different makes, of course this doesn't always help as there can be different colors from their suppliers from batch to batch. Normally there is some coverstrip material left over from builds and you may be lucky finding someone with some excess pieces and in the right color. -
Hello and welcome to the forum, lots of research material here on the forums, this thread should help you navigate the forums a little easier Good luck and looking forward to seeing your build progress
-
CableGuy (may he rest in piece) had a few projects with helmet replication, perhaps some of his videos may be of interest to you
-
TikiTechie TLJ First Order TK Build Thread
gmrhodes13 replied to TikiTechie's topic in TLJ Build Threads
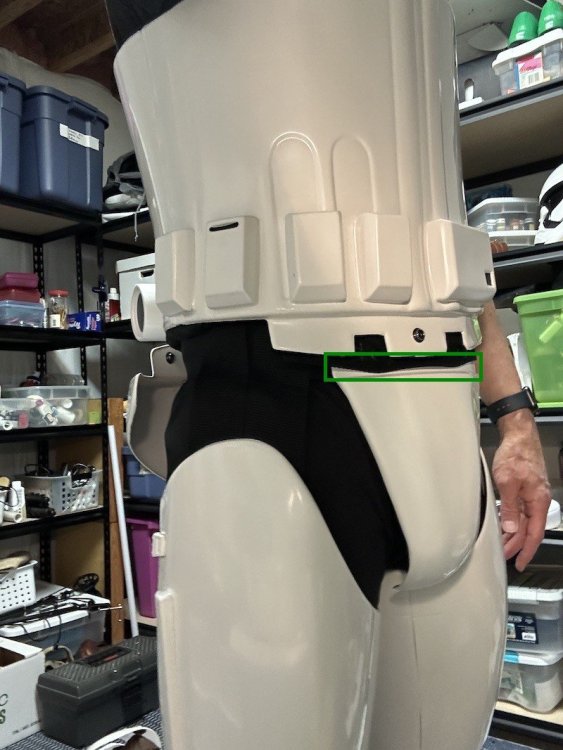
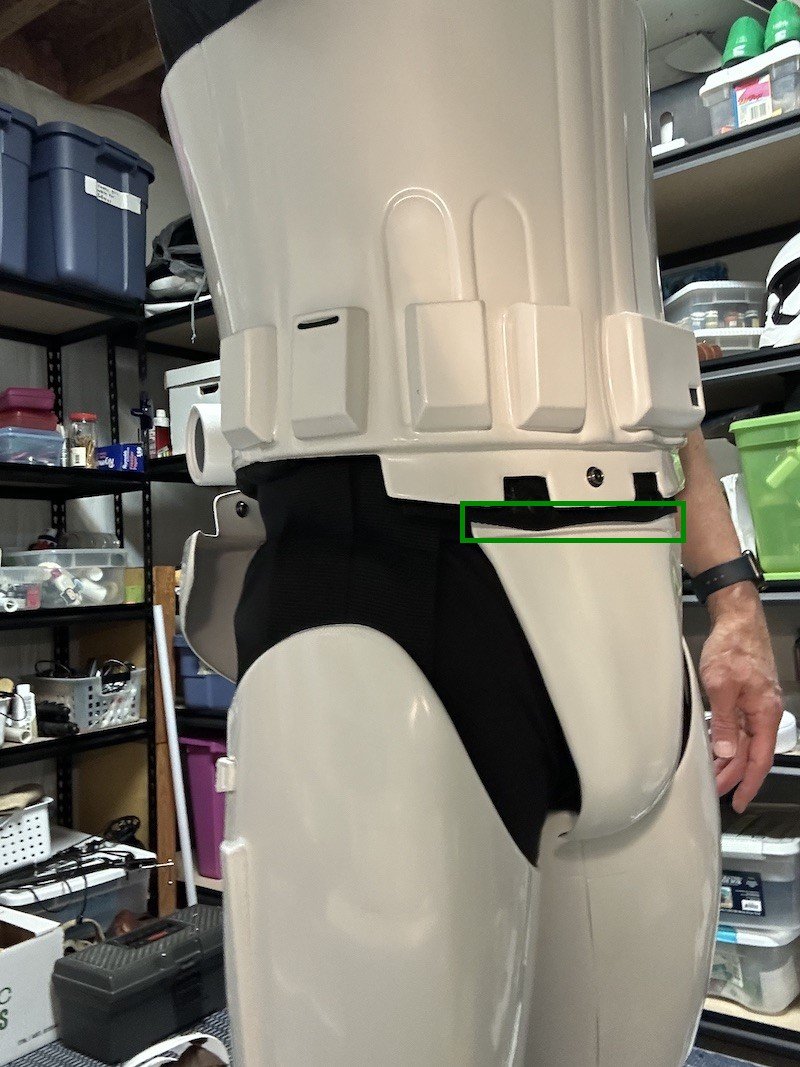
When standing straight you do appear to have a little gap between the cod ridge and under the abdomen, the belt is squished out a little. I would try to bring the cod up a little then have someone else take your photo. If you look at this EIB application she was 5'5" and appears to have cut her cod down. Albeit I think the thighs needed rotating a little to reduce the large amount of black showing And here's a very nicely spaced cod and thighs, height 6'2", gives you a better idea about heights and adjustments