Leaderboard


Popular Content
Showing content with the highest reputation on 10/09/2022 in all areas
-
A couple more mishaps.. I knew I wanted to install a real metal D-ring, but the mounting was securely fastened to the cap. After snapping off the printed D-ring it was time to break out the Dremel and grind off the mounting. Only took a few minutes, and then it was filled/sanded smooth. When trying to remove the site guard to be able to do some detail filling/sanding, guess what. I snapped it in half. (You built this a little TOO well, Kevin)! I could glue it back together, but I had another idea. Although the end cap clip assembly was 100% accurate, I decided to replace the 3D printed U channel with an aluminum one. With some brute force, I removed the entire thing but since the metal pin that holds the clip in place was glued in I knew I needed another one, otherwise it would not fit into the channel. Since I needed several new pieces, I hit Kevin up for some replacements. He not only stepped up to the plate, but (again) paid postage as well. What a guy! Raw prints Filled/sanded Primed (D-ring mount is NOT glued on) New clip/Aluminum U channel Next up, the Hengstler counter.5 points
-
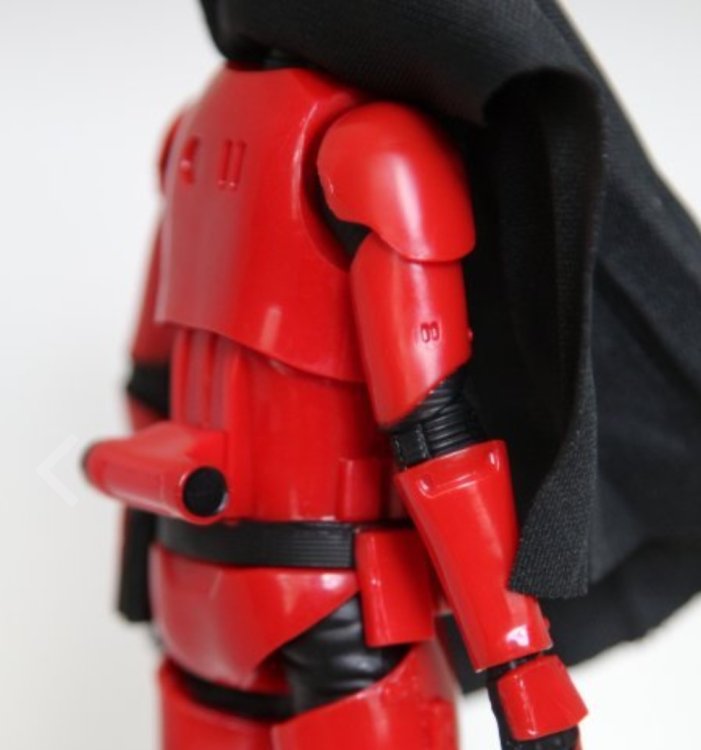
I’m very pleased at how the belt looks now that the drop boxes are tacked down with glue. Painted the screws on my thermal detonator. …..and I filled the backs of my thighs with Sugru. Sent from my iPhone using Tapatalk2 points
-
OK, so bear with me.. I am in the middle of constructing my new workshop (from the ground up) so that has taken a lot of my spare time. Time to get back to it! Taking a break from the shroud to work on a few bits and bobs. I decided that I wanted to install real lenses in the scope, but I applied way too much pressure and broke it trying to take it apart. Oops. In theory I could have repaired it, but being as this would have taken a lot of extra time I decided to reach out to Bryan (Bulldog44) of the Japan Garrison for one of his phenomenal cast from original M-38 resin scope kits. I have used these in the past, and the details are as accurate as you can possibly get! Unfortunately he said he could not sell me one, but would be more than happy to donate one for the cause. I got that in the mail last week, and all that needs to be done before painting is to remove the lenses (easy). Screws will be added after painting. THANK YOU for your generosity, Bryan.. you saved me a ton of work, brother. This will make an awesome addition! Wrapping removed, accurate screws/lenses included! Insanely easy detailed instructions.2 points
-
Name: Adam Wolf Height: 5'11" Weight: 146 lbs Armor: AP Helmet: AP Blaster: Denix / Blaster Factory / Self Boots: Imperial Boots Canvas Belt: AP Hand Plates: Rubber (AP) Electronics: Ukswrath (Hovi-tip Speakers, Hearing Assist, & Fans) Neck Seal: Darman's Props Pauldron: Trooperbay Ammo Pouches: Ebay seller Luckyline1945 (full leather) Pack: Garageboss / Self 501st armor link: https://www.501st.com/members/displaymember.php?userID=34307&costumeID=122 Pack Build Thread: Previous Centurion Thread for base armor: Note: beyond weathering, there's no change to the base armor config. All photos re-shot anyway. Full Body Photos: Front Back Right Right Right Detail Left Left Left Detail Action Shot Armor Details: Ab buttons Cod Interior strapping Shoulder/bicep strapping Wrist opening Ab/kidney rivets Shoulder bridges (hidden when suited up, so I did these pix) Other shoulder bridge Shoulder bridge rear (also hidden when suited) Sniper knee front and support Sniper knee sides Ammo pack knee and split rivets Helmet Details: Front Left Back Right Interior and lens color Vocoder and Hovi Tips Accessories: Neck seal and thigh garter Pauldron and chest pouch Pauldron weathering, pouch attachment snaps, and foam filler. Belt and pouch front (New belt created for HWT, still AP sourced) Belt and pouch rear Belt and pouch detail (hopefully) showing alignment. Pouches have foam filler. Rubber gloves Boots Pack Front Base - Garageboss Button box, Vent box, Tombstone box, radio knobs, and drop siphon are all printed in ABS. All lines sanded and smoothed with acetone. Wipe box - Meguiars Radio box - plastic junction box with laser cut acrylic fascia Mortar tube - PVC with AP shoulder strap and TD end caps. Pack Rear: Shoulder straps - Camelbak 50oz hydration pack Galaxy's Edge bottle cap Jersey velcro cover Blaster: Right Left Details. Base - Denix metal replica (18 lbs) T-tracks - Blaster Factory Disk - Blaster Factory Right Side Cover Plate (small): Blaster Factory (printed) Left Side Cover Plate (large): Self fabricated (aluminum U channel) Thank you for your consideration!1 point
-
Thanks Glen. I looked all over for that info. I need to brush up on my browsing skills. LOL.1 point
-
Great to hear you finaly got your armor, way overdue. You may want to still do the detonator for Cardinal as the LMO's may reference the black series figure which has a detonator as there are no other back images. Phasma has a detonator in the TLJ version, no references of one from TFA though to my knowledge.
 1 point
 -
1 point
-
Don't be afraid to sand the blob down with your Dremel tool. When you get it closer to flush, switch to sandpaper. But there's no reason to punish yourself with sandpaper before it gets closer to flush. You're doing great with that fix!!!1 point
-
Thank you Christine. Starting your review now. I'll be with you as soon as possible.1 point
-
Looking good so far1 point
-
I started working on the suggestions from my EI approval to get ready for centurion approval. items to correct: 1. Droopy left eye on helmet 2. Trim back return edges on top surface of kidney and ab plates. 3. Move Han snap closer to the corner of the ab plate. 4. Straighten drop box. For the Droopy eye, I removed about 3 mm of material with the Dremel tool. Return edge on the upper ab and Kidney plate trimmed and sanded. The Han snap was a bit tricky due to the closure supports on the inside of the armour. First removed the snap by drilling out the post. I needed to remove some of the closure support material but I used CA glue to attach it. Once again, Dremel time. Next came the ABS paste. Still good in the tightly sealed jar from a couple of months ago. Sanding and polishing will come later once it is set.1 point
-
Hello! I've completed the changes you requested. Teeth: I used paint remover and pushed back the paint on the teeth. Ear Screws: Replaced with flat slot-head screws. I needed to lift the glued s trim to change the screws. When I get the ok on them I'll glue the trim back down. Mic tips: Painted inside of mic tips entirely white. Ab button plate: Removed, trimmed and re-glued rectangular ab button plate. Forearm opening: Trimmed off remaining return edge from hand opening on both forearms. Belt: Starched and Ironed belt. Re-took photos with belt on tighter. As you mentioned, I think it was just on a bit loose before. Knee: Removed and re-glued sniper plate higher; now it follows the ridge line.1 point
-
Great idea Adam, looks awesome too.1 point
-
UPDATE: Sorry for the delay, but I am awaiting a few "surprises" for this build in the mail.1 point
-
Haha. Adding this thread to the E-11 section of the resource compilation for kicks and giggles.1 point
-
The Phasma book jacket has it on the right as well. I always took that as just an effect for juxtaposition as they were "enemies" and therefore "opposites." However using the logic that it is "a uniform" and should be "uniform" I feel like it should be on the left. Just like all pauldrons are worn on the same arm. Drastically different armor, but they are both captains.1 point
-
I'm built my boots to match Phasma's, but in red. Cardinal is a Captain with specialized Armor from Hux. There are passages in the book description of him that includes references to armor on his boots. While the Figure opens the door to finally do the Armor, the book offers in-depth description of his bits. The figure is just the cheapest parts they could use to make a figure. As illustrated by his cape being on the wrong shoulder. As a Captain he'd have Armored Boots. A Full Size F-11D with Stock. And Pistol on his thigh.1 point