Leaderboard

.thumb.png.69856e02550a2e6d07e44a2b1bda020c.png)

Popular Content
Showing content with the highest reputation on 05/31/2022 in all areas
-
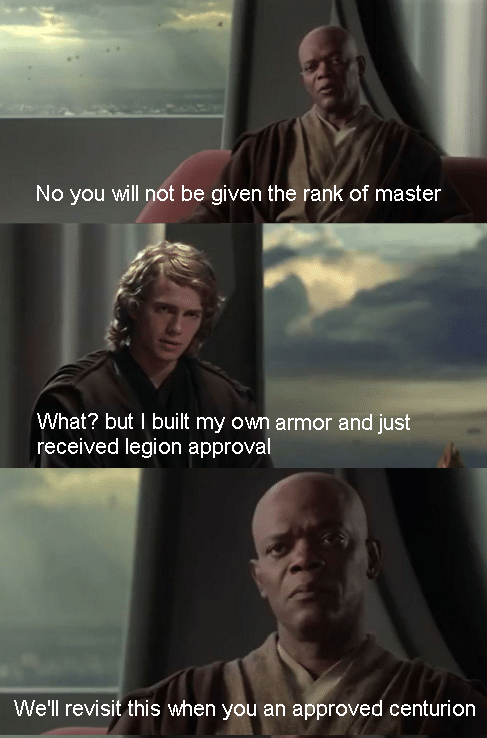
Exams are almost done which is nice, between studying I have managed to work on some more files. Here is a sneak peak at the new V3 files that will be available to purchase soon as well. First up are new leg and arm moulds: Now for the full show off. Its a bummer I cant show the dips and bumps as well as I can in the renders so ill have to show em off at a later stage once theyre printed. The little details and accoutrements are still being worked on but the main parts are almost ready. Please note some small details are missing like arm squares and also theyre still quite sharp and havent undergone the softening procedures yet. Here is a comparison to my old file:5 points
-
5 points
-
All finish and back out there weirdly enough trooped the location for next years celebration at the weekend Hopefully we will see some of you there Sent from my iPhone using Tapatalk4 points
-
I've been slowly working on the blaster. Initial painting and weathering. I got a little bottle of Aluminum Black and started etching some items. The mag release button is chilling in there in this shot. It's just a tarnish that's pretty easy to wipe off, so it's not suited for something that will be actively trooped with. However, I think it's gonna be perfect for the bolt and some small screw type items. I gave the bolt about 10 weatherings with this stuff, wiping it on and letting it sit, then dunking in water and drying, then repeating. I sanded in between several weatherings. The result is a lovely darkened bolt that shouldn't stick out quite as much as a non-weathered one. It looks quite dark in this shot with the unpainted aluminum around it, but it reflects light nicely in person. I think the etching will be juuuust right. I sealed it in some wax to preserve the weathering. I was really hoping this would be more like anodizing than dipping in ashes, but it's a lot more like ashes. Still, I got these small hardware pieces decently blackened. I'll apply some wax to help protect and then just use to let them age naturally should give a beautiful finish. I hope. I mean, I can always paint these things if I need to. I also sanded off casting flash on any metal parts that had it. The mag receiver (above) was pretty filthy with flash. It's now beautifully smooth. The scope and folding stock needed a bit of sanding as well. And here's the real working Hengstler 400 from @T-Jay It's glorious. No eagle, but it has everything else. I gave the tan cover a little paint and thought some disassembled pix would be nice. Being a pleb who's never seen a real one, I was geeking out. The little white bit at the bottom goes between the reset stalk side and the body keeping the reset stalk from pressing. Quite genius. I also really dig the zinc coated interior finish. 24 volt coil. Tino pre-set my TK number on it. Not sure how he did that... hopefully by rolling the digits by hand and not by letting it count 89400 little 24 volt pulses. Here's the Fieldmarshal replica on the left vs the real 400 on the right. EXTREMELY similar. I'll be honest, I wouldn't mind that open frame on the original... not sure if I could make it fit though and I haven't yet tried. I did mask off that original sticker from paint though. And the number side. The Fieldmarshal is a lot more rough and ready looking. The original 400 looks more refined. I just have the replica numbers wedged into place for these pix. They'll come out later. So what am I doing with both of these (very nice) counters? I plan to temporarily mount the real one to the Leveller with my best guess at the original wire fastener. Then, when my BlastFX arrives, I'll remove it and install the screen in the replica counter. It'll then be held on in the modern way, with screws on the scope rail. I'll keep the original on a shelf to fondle and ogle. It'll lie in wait till I have a new project for it to live with. Thanks again for the counter Tino!!! It's such a beauty.3 points
-
My shed floor always has some shavings, even after a sweep, I normally trim a full set of armor in one sitting so it gets pretty messy, even the chair3 points
-
Hello there! Been wanting to get involved with the 501st for years and since I can't start working toward it yesterday, today will have to do. I'm interested in building an TK set of armor, although I'm currently looking into the differences between the various iterations including Rogue One and ANH Hero armors. There's a ton of resources here to going through and trying to absorb everything. Just collating data as they say... Currently in North Las Vegas, but will be relocating to Southern California late this year, early next. I'd like to have a good jump on my projects by then. Dream suits would be TK - Stormtrooper, TA - Imperial Combat Assault Tank Driver and TX- Deathtrooper (got the height, need to lose a few pounds to fit that slim silhouette - motivation!) More about me: US Air Force veteran, avid gamer (board and video) and sci fi enthusiast. I look forward to meeting as many of the Empire's finest as possible at events and I'll see you in the galaxy!2 points
-
Guess what I worked on tonight? I guess you need to become a snowman before you become a stormtrooper.2 points
-
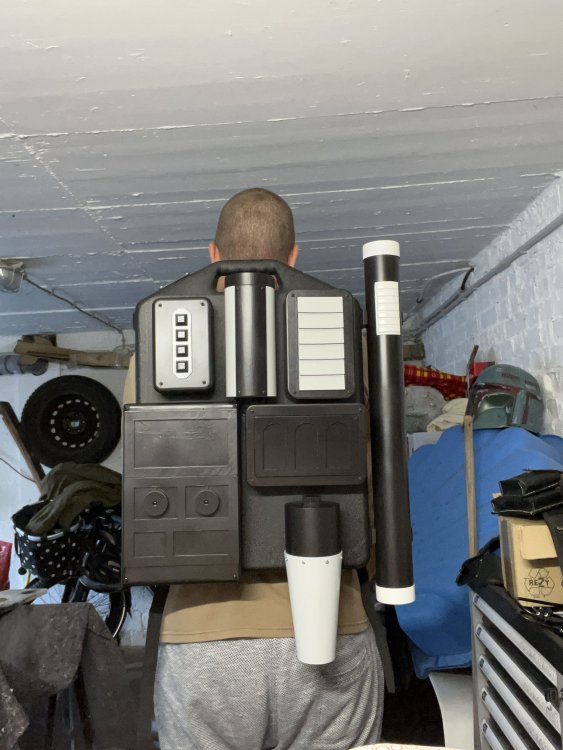
Hello there, id like to get some meanings about my HWT Backpack. I know the Color of some Parts could be a Problem, but i Build it from a Manuel from here wich was colored like mine.
 1 point
 -
When you get to ab button painting, Paul, I would suggest not taking it too low. The reason I say this is that with the quality and attention to detail you have shown if (make that when) you apply for Centurion it needs to have a small gap between the paint and the bottom of the raised part. This applies to the small 4 button panel as well . NICE job on trimming those plates!1 point
-
The ab buttons are adhered in position, ammo belt will be raised on completion of painting the dots.1 point
-
Straight or a little curved is ok. Try to smooth with some sanding to avoid scratches on the skin1 point
-
A missing piece arrived from RSpropmasters today, the right bicep! The build continues...trimming first, fitting, cutting, sanding, some more fitting and gluing.1 point
-
Thanks so much, gmrhodes, you've been super helpful! So for trimming that corner, should I just cut it straight across or maybe curve it? Is it under the shoulder piece so maybe it doesn't matter?1 point
-
Looking good. Here some references for the Thigh ammo belt rivets position.1 point
-
Personally I would trim the end of the excess plastic on this bicep otherwise you may skewer yourself at some time, although it does match a screen references the way it is sometimes you have to go for comfort not accuracy Magnets have bitten me more than once, some find wrapping material around them help to save your fingers, I just learned to be cautious with them, occasionally thought two will click together and break, but at least my finger isn't in between.1 point
-
My garage cabinets are STILL covered in a fine layer of lil plastic... like 9 months later.1 point
-
The addition of suspenders also can help stop belts slipping down1 point
-
Win lottery. Book hotel. Quit job and leave singing and dancing. Finish all the costume builds that I would want to take with me. Look into cost of chartered flight to and from London because #4. Run “Why should I pay for your trip to Celebration” contest. Wake-up, realize that everything above was a dream, and plan for Celebration 2024 (did someone mention Orlando?)1 point
-
1 point
-
Good Morning everyone. Today we're starting out with long overdue revisits towards the posterior plate and the shoulder pieces. I got rid of the slight bumps/irregularities at the marked areas. The shoulder pieces have been realigned and recentered. Notice the ridges go over 3 times over the chest plate. Once I have been assured that this is an acceptable placement I intend on cutting off the rear tabs of the shoulder strap. Lastly, for todays post we have the ab control panels. What we're looking at here is how I marked the underside of the mold pull for cutting out. I marked the panels edges at approximately half a centimeter for final cutting. The corners are cut at 90 degrees. Notice the markings for paint application do not touch the base of the raised buttons. Finally, we have the painted panels. For the blue color, I used what I believe to be the last bottle of Humbrol 14 French blue glossy enamel paint on Earth, haha. As always, thank you so much for your guidance and assistance throughout this build. 2022 may be the year it gets done lol!1 point
-
In case anyone wanted an Imperial Commander Cody concept. (Not perfect) The world seems to be going nuts. However I will try my best to get at least the helmet(to clarify the 501st design) 3D printed this year(hopefully).1 point