Leaderboard


Popular Content
Showing content with the highest reputation on 05/13/2022 in all areas
-
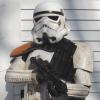
New CRL Half arsed TK'S Description: Stormtrooper, Whatever we could pull together at a moment's notice. Prefix: TK?? Detachment: First Imperial Stormtrooper Detachment Ahhh I don't think so Jack! Context: Episode: not in this universe buddy! These Stormtroopers (Stunt/Hero/rubies/various fond parts from costume shops) were the pre-emptive laughing stock in the boarding party, or boring party, cosplay event of the Rebel blockade runner the "You ain't bringing that costume in here IV", and made up the main garrison of poor man's productions that could be seen throughout the corridors of shady conventions and at cheap events.5 points
-
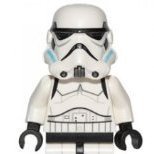
Disregard the other helmets in the back, took these for Promo on my page, but youll get a better idea of the shelmet with this sandy paint up. Did a move along style sandy on a B grade I had, I think I got it close though the weathering around the teeth was too dark. Contrast is quite high in this pic.3 points
-
Much happier with the posterior now. Added the v tabs, trimmed and added the snaps. I still have to add the split rivet to the cod area and make the strap. I was able to get the wife to take some quick pics with it on. I should have taken them with the under suit on instead of a t shirt and shorts, but I grab her when I can... Let me know if anything seems off or could be better. I know I said the belt is next, but I forgot I need to do the shoulder bridges next.2 points
-
2 points
-
Cracks are not that unusual, and it looks like you caught it before it extended into the outside. I would suggest cutting the ABS shim longer than needed. That way you will have more of a surface for the glue to adhere to and keep it from worsening. I would also recommend sanding down/cleaning the area first before gluing and then clamping it. Some have used CA glue for this type of repair, but I would (pardon the pun) stick with E-6000. The reason being is that it is not a perfectly flat surface, and the glue will fill any voids. It's a pretty clean split, so I honestly don't think you need to add ABS paste as it will probably not be noticeable and may be covered by your TD.2 points
-
Hi Alex, you can use this as a guide for ANH/ESB TK thermal dets Go here to the gallery and you will find measured sizing of the RS suit TD Bear in mind the TD do vary slightly in length from maker to maker so close enough is good enough. Here are a few more images that have been measured up Hope you find these of some assistance.2 points
-
I feel ill2 points
-
Thanks, Dan! Awesome references, love especially how they show the curve of the brow trim. If I ever go for a fully-screen accurate replica build it'll be interesting to see how one can add that -- my brow always seems to be on the lower side As evident with the S-trim as well, I've changed a few details from screen-accurate to more idealized, trying to find an in-between that I like. Therefore I think I'll stick to the angled cut at the edge of the brow trim for now. Still, given the current cut of the brow trim a change to more screen-accurate is still possible, so if this ever becomes a Centurion requirement (it isn't as of now, last I checked), I can still easily change it around, doing what you suggested. Thanks for your feedback Glad to hear that, Mario! Thankfully I got the ears done for now, so I can move on to more interesting parts1 point
-
Great progress, Luca. [emoji16] As you’ve mentioned Centurion (so you are aiming for high accuracy), I thought I’d mention the ends of the brow trim. For both ANH and ESB, the ends of the brow trim is typically cut straight up and down, not at an angle. Please see below from ANH: From ESB: From the original RS helmet: Suggestions: Keep up the good work. [emoji3526][emoji1303]1 point
-
The armor seeming like Rubies (RotJ Style with a messed up ANH-bucket seems slightly familiar) isn't the worst thing. They didn't manage to suit up correctly. The one on the right has managed to switch his handguards and the one on the left has two left biceps Not gonna look for more details, I'll probably be happier ignoring this1 point
-
Ok, more final detail work. Got the mesh and gaffer tape on the pills and the chest vent finished. I added some decals to the vent to make it look a bit better with more depth…1 point
-
These TK suits look alot like the stormtroopers at Disney parks. The helmets appear symmetrical and the armor looks a bit loose (in order to fit many actors).1 point
-
Those suits get worse the closer you look at them. One of the reddit threads had a really high res. You could see such thing as... - The shoulder bridges being held on by white rivets in the middle. - Huuuuuge ab buttons. - ANH style helmets... maybe hero ones? But the whole bucket looks odd. - White trim on the torso edges. That's just scratching the surface.1 point
-
So I was just scrolling through FB today and I guess there was a BIG Obi-Wan PR event today. Well... I am not sure if these are screen used suits or what they actually are. I just wanted to share the images. https://www.facebook.com/DisneyPlus/posts/4496253740476967 Let's just say the more I look the more questions I have
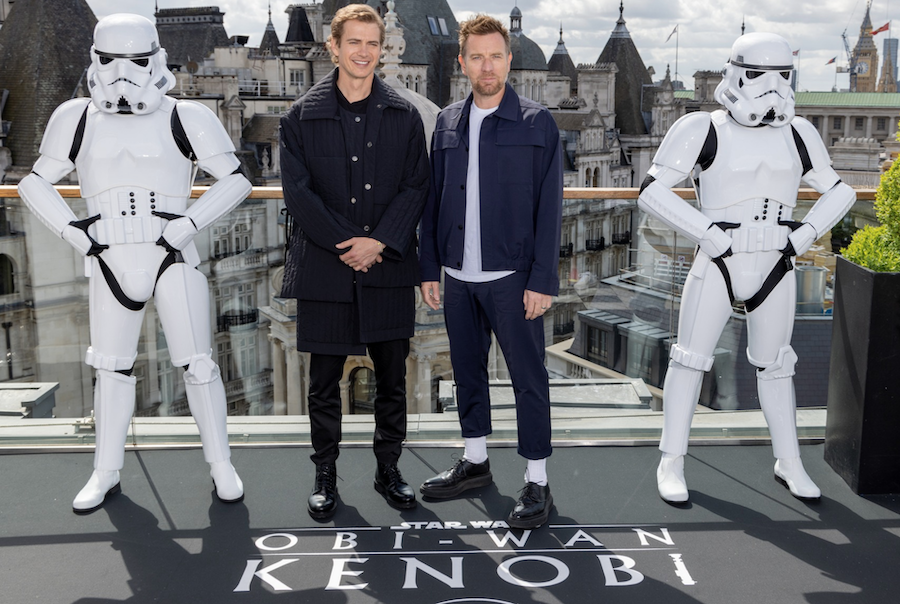 1 point
 -
Helmet Ears and S-Trim After a few hours of work (gotta love fitting the ears...) I got to a point where I was fairly happy with the look and over-all appearance. It's not gap-free, but neither were the originals, so that's alright. Truly nothing extraordinary about this part of the build except for the fact that it was very time consuming and sometimes a bit frustrating. The S-trim in comparison was fairly easy and quick, a simple matter of wrapping the material around the bottom and squishing everything into a tight fit that will hold the S-trim in position without any need for glue. Whereas the original helmets had the ends meet at the back of the helmet, I went with the option of moving this to underneath the vocoder. This simply helps to hide any potential gaps and, in my humble opinion, looks a bit better. As always, I'd appreciate feedback. Given what's coming up soon, I'd also love advice regarding the application of decals, as I've never done so before1 point
-
Welcome to the forums, Martin! What part of Sunshine state are you located in? If you haven't done so, I would suggest signing up at the Florida Garrison site. For Basic 501st approval you will need to submit your armor photos to the GML Officer here, and once you get your official TK# you will have access to all the events to attend. Before you submit, you can post up your photos in the Pre approval area here, and we can help make sure that the process goes smoothly. Looking forward to seeing your armor!1 point
-
Not actually a FISD meme but does hit the mark for the 3D printing community
 1 point
 -
Helmet Back and Cap and Face Well, before I got to the assembly, I trimmed the outside following the lines in the plastic and then trimming the eyes and teeth: Personal choice, but I think, adding the U-trim before assembling makes the most sense. I also cut the edges of the rubber to run along the traps. Just looks a little sleeker. Then I assembled the the two helmet parts: Most people use rivets for this, but as I don't own a rivet gun I went with these things that I could always remove and reassemble. Makes things a little easier, I'd like to believe. This was the result. Right now I'm working on fitting the ears, so once that's done you can probably expect another update. If anybody would like to share some feedback in the meantime, I'd look forward to it! FISD Resources Used Most helmet assembly resources can be found in MaskedVengeance's Resource. I did not refer to any particular source. I used this image from Cableguy's Helmet Alignment Thread as a rough guideline for the alignment, as well as my ANH Stunt helmet.1 point
-
Nice work the only downside is you can see the ridges of the elastic which is quite noticeable, I found doubling over the fabric quite a few times helped stiffen it ( from memory I folded 5 times) also using a stiffer fabric can help. I also add a piece of plastic in the section the belt will be hung on, not as important with an ESB as you use the loops but can help any sag when the blaster is holstered. Here is an image from the How To Belt thread, notice how close to the edge the elastic is, also the stiffness of the fabric when compared to yours Holster stiffener He used Heavy duty canvas, I used a similar duck canvas which is a little thinner and cheaper1 point
-
Little update: Hello everyone! It´s been a while since my last update. Currently I´m unable to build a whole lot because I got Covid and feel pretty sick. On top of that in 3 weeks I need to write my final exams so studying is key right now. Currently I´m not sure when I will be posting new updates.1 point
-
Ah, they're actually using Rogue One/Anthology TK's, we have a CRL for them already But yess! I've been looking for an excuse to carry a holster, now I do1 point
.thumb.png.69856e02550a2e6d07e44a2b1bda020c.png)