Leaderboard


Popular Content
Showing content with the highest reputation on 04/19/2022 in Posts
-
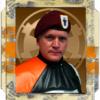
I will get around to doing those Centurion modification, I promise, but as I got this brand new helmet kit last weekend... This build (or rather conversion as it's based on my ANH Stunt armor) will be a slower build than what some of you already saw with said armor. No daily updates this time. Nor can I promise a meme for every step of the build, but I thought it was fitting to start with one. What do I need to do? Given that I've already got the main armor built, there's only a few parts of the armor that will need to be exchanged, due to the similarity of the ANH Stunt and the ESB TK. The Helmet This one might be the most obvious when comparing the ANH Stunt to the ESB. The helmet has a black frown and uses decals as opposed to the grey frown and hand-painted details of the ANH. As I do love my ANH Stunt and am not looking to replace it, I had to get myself a second helmet kit. This one is an RS kit to match my armor, but I ordered the decals from Trooperbay, because I heard good things about those. Haven't heard anything about whether they fit an RS helmet so far, but I think that won't be a problem. The Canvas Belt and Holster The ANH holster is attached to the canvas belt on the left side via Chicago Screws. The ESB holster is held up by two loops on the right side -- on a canvas belt without holes from potential chicago crews. This means that I need to replace the canvas belt and the holster. As I had a bit of time and access to a sewing machine last weekend, I already took care of the canvas belt (mostly, at least, pictures to follow), but I still haven't done anything about the holster. As this build isn't urgent, I've considered asking a friend if he could do me the favor of sewing one for me. An additional problem is, that as of now, my ANH canvas belt is attached to the ABS ammo belt with rivets. I'll have to remove those and replace them with press studs, so that I can remove the canvas belt at any time. One thing that I've seen happen to other troopers is the ammo belt popping loose, so that might be an additional problem in the future. The Handguards and Gloves Lastly, I'll have to exchange my ANH rubber gloves with latex handguards for the ABS clamshells over rubber gloves. As said clamshells don't fit over the latex plates, I'll have to buy new rubber gloves. The ESB handguards were included by RS in my initial armor kit, so I've already got those ready to go. The E-11 As I'm currently only aiming for a Centurion level armor and not the Centurion badge itself, I'll just continue running around with my ANH E-11 for now. Not accurate, but on troops nobody will notice. Basic approval is possible without a weapon (as I've already seen during my initial approval with the ANH Stunt), so an E-11 is a problem for the future. Still, I've been considering building a 3D-printed E-11 in the future, so I'd probably build that one as an ESB E-11 when I get to it. So much as for what I've planned so far, if you notice anything missing, something that could be improved or anything along those lines, please let me know. I love getting feedback!2 points
-
Long time no see! There has been a lot in the way recently, school mostly, but today I managed to take some hours to work on this. I managed to make the whole groin ensamble; The boot straps; And the brackets for the chest. (I couldn't really hammer in the rivets very well so I tried to glue some e6000 on them, went so-so, will clean it up soon.) Hopefully not this long wait for next time, but until then, see ya!2 points
-
I think the cubes are perfect cubes, same size all sides, ill try to recreate one with those measurements Sent from my GM1900 using Tapatalk2 points
-
Hi everyone, My name is Paul (sithping) and I live in Scotland UK. I've recently received my BBB and slowly gathering all the valuable information from the threads here on the forums to assist me with my TK build.(Thank you!) I'm a lifelong fan of Star Wars & it's been a dream until now to have my own set of Stormtrooper armour. I love the idea of joining the 501st when I complete my kit with all the approvals, just lacking a bit of confidence & a little bit nervous about joining a garrison. I'm still trying to navigate my way through the appropriate threads and perhaps I should start a build thread? Keep up the fantastic work guys/gals!1 point
-
Thank you Glen ! awesome1 point
-
Congratulations Mario EI image updated1 point
-
Welcome to the White Zone!!1 point
-
Congratulations Mario!!! That armor is an inspiration!1 point
-
Hi Mario, and thank you for your EIB application! CRL and EIB Application Requirements All required photos are now in and, after review, we are pleased to welcome you to EI! On behalf of the entire DO staff, congratulations!! Other-Armor Fit/Assembly In this area we review observations made by your fellow troopers and the DO team. Some observations may lead to suggestions to improve the overall look of your armor. Note that we consider both text (CRL) and pictures (screen caps/reference images) when reviewing submissions. -Nada que añadir aquí hermano. Se el trabajo que te ha costado llevar tu armadura hasta este nivel de detalle, así que sólo me queda felicitarte por este excelente trabajo... -Nothing to add here brother. I know how much work it took you to get your armor to this level of detail, so I can only congratulate you for this excellent work.... Centurion Requirements In this section we prepare you for Centurion. More photos may be requested in the future that allow us to make better decisions on possible adjustments. If there are any areas of concern they will be discussed here. Because Centurion photos show much more detail than EIB, items to pertaining to Centurion might be seen there and not here. We try to point out all that we can from what is seen, but the final accuracy is the responsibility of the trooper. -Sólo una cosa aquí, Mario. Para L3, Elbow, Knee, and shoulder gaskets, deben estar fabricados en goma(hule). Estoy seguro de que ya estás buscando unos... -Just one thing here. Mario- For L3, Elbow, Knee, and shoulder gaskets, must be made of rubber. I'm sure you're already looking for them.... -Enhorabuena de nuevo Mario...Y gracias por tu paciencia... -Congratulations again Mario...And thank you for your patience....1 point
-
Haha, love the image at the top! My plan is to implement the same conversion in the future, and it looks like you have your task list ready to go. The only thing I'll add is that you may be able to get away with using the same holster and simply replace the tan straps with the black loops. I acquired black straps from my holster maker for the easy swap out with chicago screws. Looking forward to following your completion of this next project!1 point
-
Congratulations and welcome to the ranks of Centurion!1 point
-
Good luck Daniel and looking forward for your advances !1 point
-
Stripes are coming along well. May be the photo but looks as if your last blue ab button is slightly bigger than the others, be entirely up to the DO's though. I find once dry you can go around the edges with wooden pop-stick or scrap of abs plastic and you can scrape away any excess paint around the edges.1 point
-
It would be great to use one of these to transport my TK armor.1 point
-
Wow thank you very much. I'm delighted it has helped so many. Troopers Helping Troopers1 point
-
Done Sir. photo updated1 point
-
Congratulations Ben, well done Centurion!!1 point
-
Well in this case I nominate Tony's @ukswrath EPIC Anovos build thread for memeification. Nearly three quarters of a MILLION views and over 1K comments.1 point
-
Congratulations and welcome to the centurion ranks trooper1 point
-
Look at the crates compared to the people carrying them. Specifically the width of one square segment vs the guy's thigh side profile. That gives a rough, yet close estimate of the total crate size. Both imperials are of medium build. So... 8 to 9" for a thigh side profile? That would give about 9" per square with about 1" spacing and 2" between the two linked cubes. Total of perhaps 42" long, 20" deep, and 20" tall? 10% margin of error? I'd bet those measurements would create a prop that's near the right size and with the right paint and weathering would be instantly recognizable.1 point
-
After a few minor touch ups I am pretty happy with how the stripes came out. Now for the tube stripes...wish me luck. Thanks, M1 point
-
I got busy and managed to not update things here yet. This is the tiny circuit board inside the Disney blaster. It's about 20mm wide which juuuuust fits inside my QD blaster's small inner recess. Not sure if this diagram would be helpful to anyone else in the future, but I referred to it a lot while rewiring the board. And just like that, the old handle is off. It was almost that easy. I used a dremel cut off wheel and sliced through about half of one side, waiting to hit some sparks. No sparks ever appeared, making me think that only glue held the handle in place. Sure enough, there weren't any pins. I snapped the handle off easily by hand after slicing what I sliced. I think this may have broken at some point in the future anyway. I'm amazed it was only glued on. Also, pretty happy with the low amount of gouges I managed to make. They'll be easy to fill. Bolt cut. This gives me access to allow the handle to be bolted in place. The inner plastic on the QD is SOOOO thick. It just insane. Not letting any grass grow under my feet. The handle bolted on easily for a test fit. About 20 minutes of careful measuring followed by two holes and a slot for wires. My blaster was only without a handle for a half hour. Front bolt attachment. SUPER easy access with this nice big hole. I'll also fit the pew-pew brain in this hollow. The rear bolt is a lot more challenging to get to, but a rounded end hex key makes easy work of it. The angle is just right to let things spin and tighten up. This grip is so pretty! So very very pretty. Even without pew-pew noises, this is a solid upgrade already.1 point