Leaderboard


Popular Content
Showing content with the highest reputation on 08/14/2021 in Posts
-
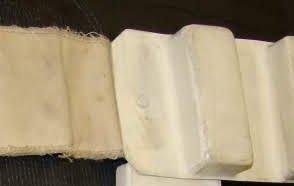
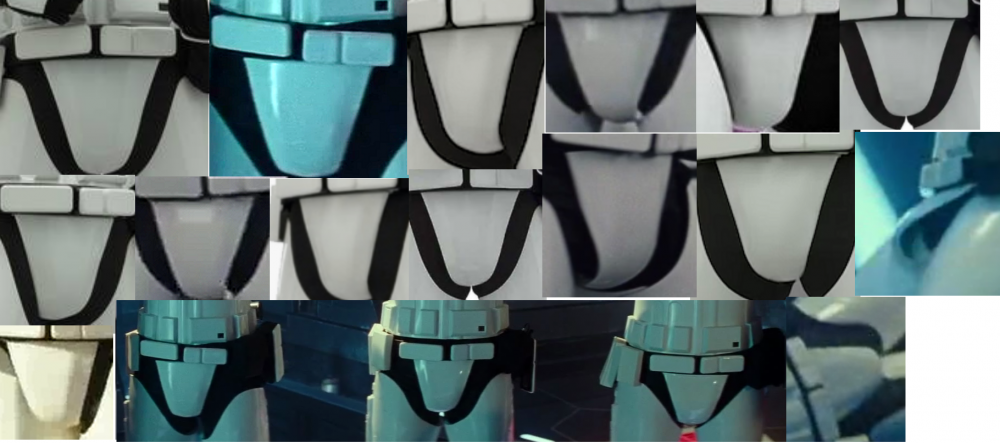
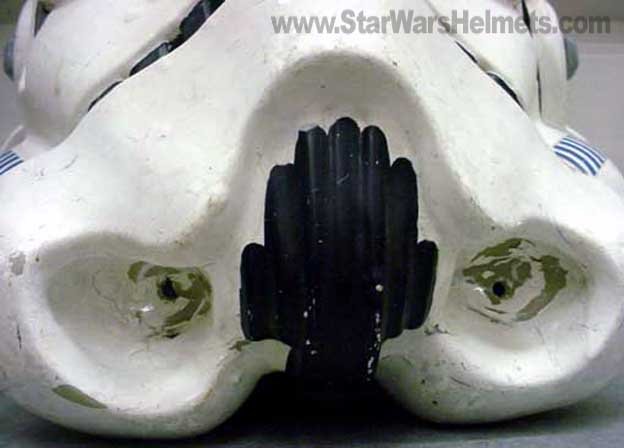
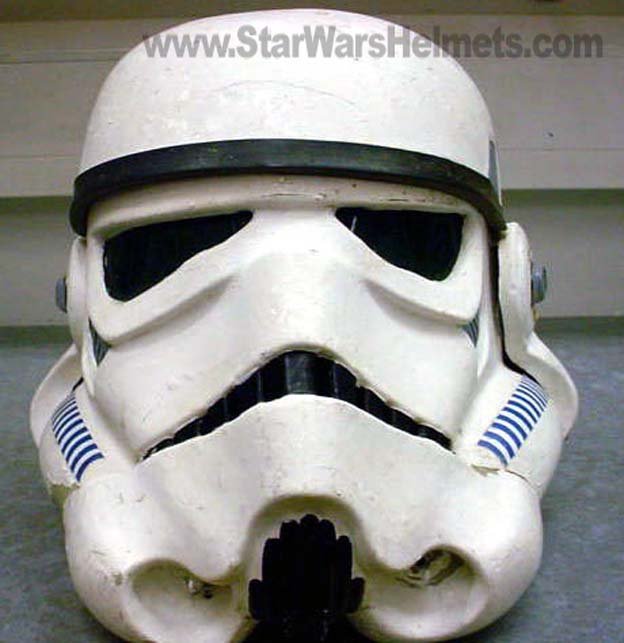
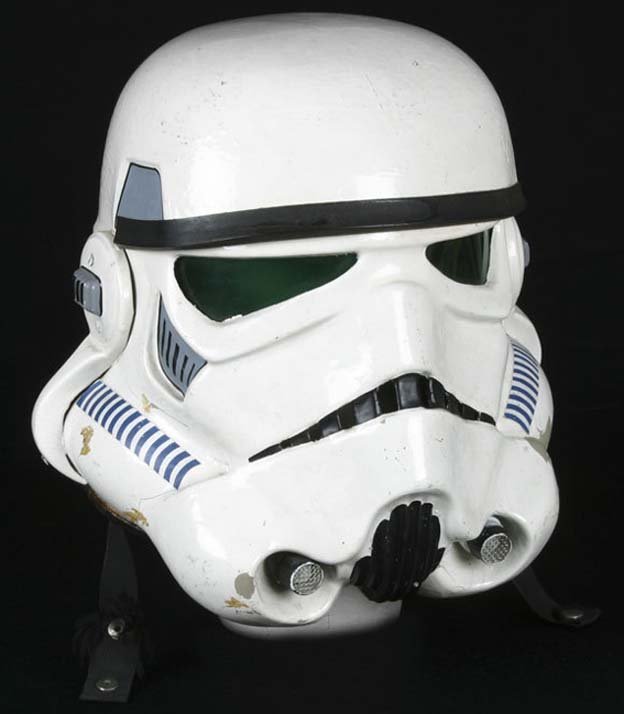
Could we be a step closer to knowing what these parts actually were used for? Thanks to Daniel O'Keeffe this looks to be the closest we have come in over 40 years. Here is the full story from the man himself Daniel O'Keeffe but first I'd like to take this opportunity to welcome Daniel to the FISD forums and thank him for allowing me to share the below information, taking us another step closer to solving the mysteries of this found part mystery. Following information and images property of Daniel O'Keeffe I have recently come into possession of a pair of genuine 1970's aerators. I'm posting this up here as I think it could be of interest to a lot of people and wish to gauge that interest for reasons I'll explain a little further down. Just to give a little background on this, back in 1977 as a young boy a friend of mine saw an afternoon matinee screening of ANH at the cinema and at the time recognised what the parts were on the helmet. After watching said matinee he then got his father to take him to a plumber's merchant where he was bought a set of these aerators and they just sat there in a tub for years. Sadly he passed away and whilst helping to clear out some rubbish from his house I clocked these parts in a pile earmarked for the bin. Now what is interesting is that it opened up a couple of previously unknown things about the tips, namely that there was a serated push fit tube on the back of these which fitted into a hose. What is now obvious is that these were cut off from the original backs for the threads to fit through and attach to the helmets. Another thing that stands out is the internal fitting, in the past I have seen the pictures Gino Sabatino shared of the hero helmet aerator and the insert appears to be a one piece. It isn't, the middle piece is actually a two piece moulding that fits together. Something else that doesn't seem present on the screen used tips is a black O ring seal. As you can see from the pictures the colour itself is actually off white, with a definite yellow tinge to the plastic as opposed to an all white moulding. When I first saw this part I actually thought it was a resin cast as the colour was very reminiscent of a polyurethane casting resin I use and to be honest I almost dismissed it! I think it's fairly obvious that these were moulded in different shades of plastic, and that the internal components were also moulded in different colours as Gino himself in the past has stated he had seen a mix of aqua and white. Another difference to the screen used tips and these is the filtration mesh, this is a different pattern. From what I can ascertain there is a moulded groove on the inside lip and you can see how the mesh was inserted from the inside before being fixed in with an adhesive. Another interesting thing about these was that he actually had what appears to be the connecting hose that they fit into. When I found the first one it was sitting in the wider end of the tube but I actually think it's supposed to fit in the narrower end and the wider end fitted onto a tap or a tap adapter. This would make sense of what my friend had told me a while back, that these aerators were tap mixers for hot and cold taps back in the 70's. The tube itself bears a very consistent appearance to how they appear today, they are called rubber swirl mixers and are still in manufacture although not to this exact design. Also the rubber on this is obviously aged and shows signs of perishing particularly at the base where the aerators would most likely connect. I think for this reason the aerator was stuck in the larger end to prevent the narrower part from further deterioration. So onto the great unanswered question... what I HOVI MIX pa2? Well, on that one I really have no answer I'm afraid. Like most people curious about these I've spent far more time than is healthy trying to track this info down. I've even tried thinking outside the box I case VI is actually roman numerals rather than text! I have asked around several old time plumbers and will continue to do so but for the time being all professional opinion seems to agree that this is actually the part code or name as opposed to a manufacturers name. One thing that does seem a lot simpler to clear up however is what pa2 means, this is simply the formulation of the aerators' operation. P= pressure, A = area and the 2 is the equal mix of water and air into the nozzle. So far all attempts to identify a manufacturer have proven fruitless. One thing that does seem conclusive is that this was a UK manufacturer rather than an imported product. My initial hope was that if somebody I talked to could have identified the part there may have been an outside chance of then finding the company that sold these and then the manufacturer and pursuing the chance the dies could have still been in existence with a view to recommencing manufacture. Sadly this seems to be impossible to bring to fruition. So, what I have done is what I hope will be the next best thing. I am currently part way through the process of having these parts reverse engineered. At the moment I'm still in the early stages but my plan is to have these parts remanufactured exactly as they would have been back in the 70's. This means having them produced as injection moulded pieces and making them available to the community. As of yet I'm afraid I can give no further details for the simple reason I don't have any myself at present, but as soon as I know I will be making it known! Below is the YouTube video that RS Propmaster posted on Daniels beautiful pieces.3 points
-
Thanks again, everyone. This armor is a full commission and not a kit. I looked quite a bit at kits and will continue to learn more about them. I fully intend to build whatever character I decide comes next. By then, I will hopefully have met people like those in this group and can make the best decision on how i will proceed. In the meantime, the full commission kit “should” allow me to get active with FISD with not too many adjustments or alterations. I’ll do what it takes though for sure.2 points
-
Thanks guys for your time and for the advice on how I can improve the accuracy of my suit. I will have a look at those issues over the next few days and see if I can fix them. Once again thank you. Regards, Colin Sent from my iPhone using Tapatalk2 points
-
Now updated to match current CRL requirement. Note: This checklist has been updated on 1/18/2024. wingnut65 Visual guides updated by TK-50297 Wingnut65 Printable PDF at bottom TK50297 wingnut65 latest addition NEW Helmet exploded view fine detail visual guides suits Level 2 and Level 3. Note: This checklist has been updated on 1/18/2024. wingnut65 Printable PDF below 04 FISD ANH Stunt L3 Centurion - Ver 03 1-2024.pdf 30 ANH Stunt Helmet - Ver 02 1-2024.pdf1 point
-
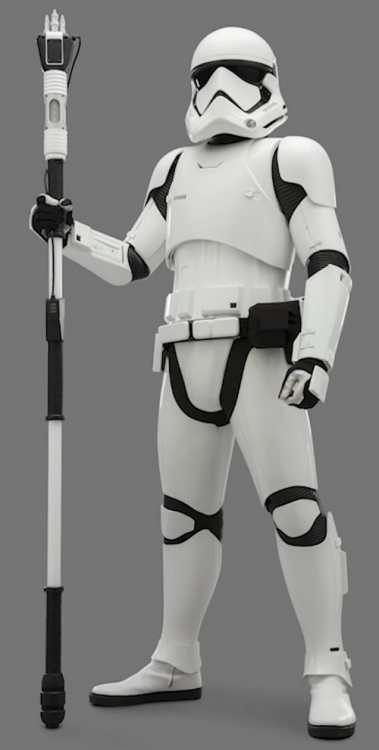
Hello everyone. Been a little MIA due to work. Here is my TLJ Executioner submission. This is the same suit that is EIB approved already. That TFA is being submitted for Centurion. Name: Ardeshir Radpour Username: equuspolo TK-42128 Southern California Garrison Los Angeles Squadron Height = 5'10 Weight = 165 Armor Maker = KB Armor - Trimmed to fit like Anovos Helmet Maker = Anovos Plastic Helmet Boot Maker = Imperial Boots Gloves = Endor Finders Belt = Trooperbay Belt Pouches = Trooperbay Pauldron = Trooperbay Neck Seal = Imperial Seamstress Holster Maker = Dan Sczudlik Gaskets = production made silicon rubber gaskets F-11 = Branfuhr Studios Resin Kit- Custom built by me with custom light system. SE-44C = 3DPrintMerchant Electronics = Wireless Microphone with Acker Amp Custom Parts = Chest yoke and Backplate welded together with ABS Slurry. Chest Pills and Chest cut out backed with Textured Fabric, TD slurry welded. Entire armor painted with Rustoleum 2x Glossy White. Belt, Cod, Butt Plate attached to armer with Anovos leather waist tassets EIB Approval for SAME TFA Suit EIB Approval UPDATED TLJ COD PIECE Updated Gray Painted Rail Button1 point
-
Hello everyone, I usually like to get right to my approvals, but work had kept me from it. All requested changes have been made for this centurion submission. I am also submitting this with both helmets. Fiberglass and Plastic Anovos Helmets. Name: Ardeshir Radpour Username: equuspolo TK-42128 Southern California Garrison Los Angeles Squadron Height = 5'10 Weight = 165 Armor Maker = KB Armor - Trimmed to fit like Anovos Helmet Maker = Anovos Plastic Helmet and Anovos Premium Fiberglass helmet Boot Maker = Imperial Boots Gloves = Endor Finders Belt = Trooperbay Belt Pouches = Trooperbay Pauldron = Trooperbay Neck Seal = Imperial Seamstress Holster Maker = Dan Sczudlik Gaskets = production made silicon rubber gaskets F-11 = Branfuhr Studios Resin Kit- Custom built by me with custom light system. SE-44C = 3DPrintMerchant Electronics = Wireless Microphone with Acker Amp Custom Parts = Chest yoke and Backplate welded together with ABS Slurry. Chest Pills and Chest cut out backed with Textured Fabric, TD slurry welded. Entire armor painted with Rustoleum 2x Glossy White. Belt, Cod, Butt Plate attached to armer with Anovos leather waist tassets EIB Approval TFA Anovos Plastic Helmet TFA Anovos Premium Fiberglass Helmet1 point
-
1 point
-
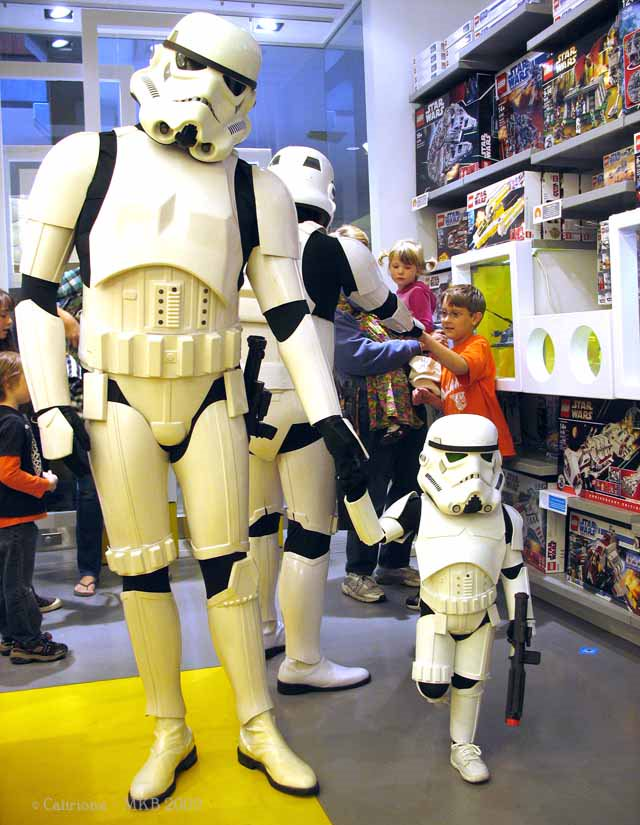
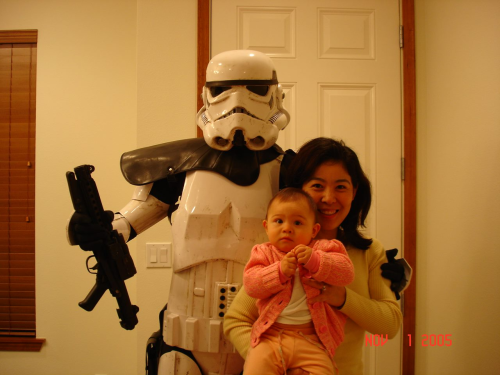
I had one of me from Celebration Los Angeles where I was wearing an Alpha 75 TFA TK and walked in to one of the displays and froze for about 10 minutes. People came in and started taking my photo thinking I was one of the displays, it was pretty funny. At the time. Thanks for the Rose Parade pix Glen, man those are some mighty fine memories.1 point
-
POST 60 1. 2. 3.

 1 point
 -
Strange, I see them. I wonder if it's a permissions issue. Trying again...


 1 point
 -
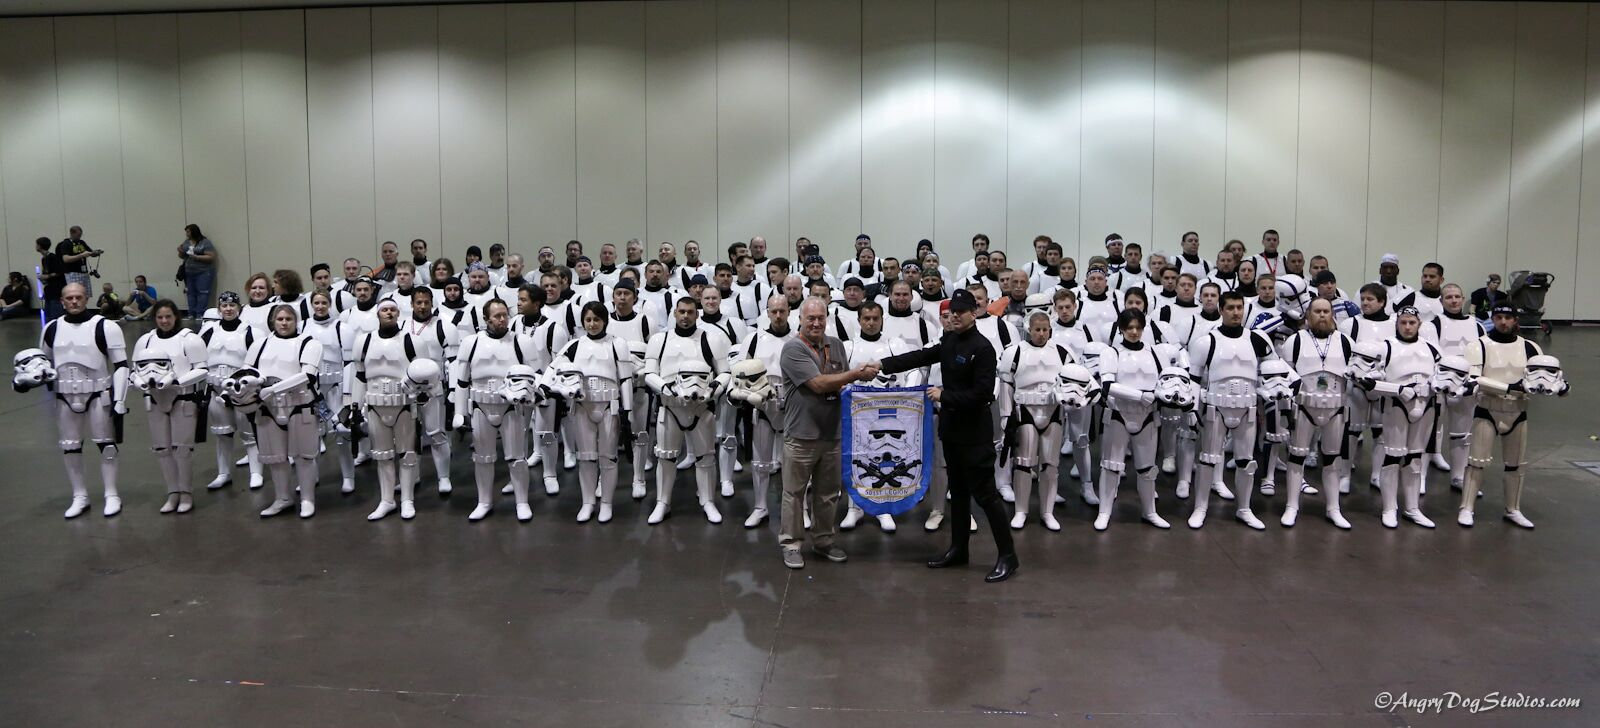
POST 58 Not me in armor, but it's a great shot. This was a professional photoshoot for the garrison. 1.1 point
-
Quick pictures of today's work, my friends steve & steve showed up for emotional support and guidance in triming those vents in the helmet https://imgur.com/a/kcgPQvQ1 point
-
Thanks Rich. Sent from my iPhone using Tapatalk1 point
-
Just hit space or enter after posting the link and it should change the link to an image For higher level approval on the belt the corners of the plastic belt should meet the outside of the fabric belt.
 1 point
 -
Thanks1 point
-
So true! Sadly I have neither the money, nor the space and soon probably no time to actually start another build -- and I would need to decide on a costume as well, which would be difficult because there's so many good costumes out there...! Thanks! Maybe I'll take some pictures this weekend (won't be the quality that I want for approval pictures though) so I can get some last advice before getting the approval pictures taken on the 29th. I will have to see how my time management allows a suit up. Afterwards I can upload the approval pictures to get advice for L2 and L3. Quick question: because I'm not actually applying for L2 yet because of the blaster, I should stick to the pre approval threads for getting feedback regarding L2 and L3 issues, right? And because I'm the type of person that prefers to showcase an update when it's possible, here's the crotch snap elastic that I folded and glued with E6000 to pull the butt plate in a bit better. I've also been busy scraping paint off of my ab plate buttons, which has the nice side effect of making it look chipped. I'll probably be able to upload a picture later today or tomorrow once I spend another hour or so finishing up the last buttons. Now that I can (hopefully) (soon) cross off the ab plate paint clean up and the crotch snap elastic on my to-do list, I've remembered that I can add adjusting the ABS ammo belt to touch the lower button onto it. I've still got some velcro lying around, so if anybody would like to share some pictures of how they did it, I would appreciate it!1 point
-
Congratulations Colin! Awesome work here mate. So happy you get that EIB award next to your name, and confident you'll be getting the Centurion award too1 point
-
Welcome to the ranks Colin! Well Done!1 point
-
Congratulations Colin, welcome to Expert Infantry!1 point
-
Congratulations and welcome to the EI ranks trooper1 point
-
Hi Colin, and thank you for your EIB application! CRL and EIB Application Requirements: All required photos have been submitted, and on behalf of the entire D.O. staff we are pleased to welcome you to the rank of Expert Infantry. Congratulations! Other-Armor Fit/Assembly; In this area we review observations made by your fellow troopers and the DO team. Some observations may lead to suggestions to improve the overall look of your armour. Note that we consider both text (CRL) and pictures (screen caps/reference images) when reviewing submissions. Let start from top. We are recommending to trim the excess of plastic from your helmet eyes a bit. This suggestions looks to give more accuracy and that menacing look that the Imperial Stormtroopers have. Reference Images Ideally, the ears screws ride aligned with the traps line as you can see from the references. Reference Images You did a great work with the requested fix of the frown paint so, we are confident that you can deal in great manner with extending the ears traps paint to fill the recessed area. Reference Images Here we have a little painting fix to give a better shape to your vocoder. Reference Images The front join of your right forearm and the rear section of left one have a little gap on top. This could be solver by changing the cover strip, (the toughest way) or by trimming a bit the top section to match the cover strips end. Reference Images It looks like the small ab buttons panel has a little rounded corners that can be trimmed for more accuracy. Reference Images Moving down your thighs , they look to ride a bit high , (almost touching the butt plate). To avoid some "armor bites" when trooping, we recommend to lowering down or trim a little the top section. Reference Images This one look like a simple dressing issue that you can take care of every time you put on your armor and is the small gap between the upper ridge on the back of the shins. Reference Images Finally in this section, we have the ammo counter of your E11 Blaster. It looks like is sitting a little low and as the references it should, ideally ,be moved up a little. Reference Images *************************************************** Centurion Requirements; In this section we prepare you for Centurion. Because Centurion photos show more detail than EIB, items pertaining to Centurion might be seen there and not here and additional photos may be required. We try to point out all that we can from what we see, but the final accuracy is the responsibility of the trooper. Just another dressing issue here Colin, easy to fix and take care of it. As you can see, you are wearing the zipper of your neck seal in the front and it should be back. CRL: The top of the ABS ammo belt should sit at or just above the bottom of the central and vertical abdomen button panels. Yours is sitting a few millimeters down the line. A common solution for this is to add a piece of velcro behind de AB belt to ensure it stay on site Reference Images Your Ab section shows a little overlap in the right side that that is translated in a gap visible from the front and for the left side we have the same overlaps but in this case is causing the Ab buttons to get vertically misaligned. This could be solved by loosening the belt a little or making a strapping adjustment. Reference Images As we can see in the reference images below, the plate on your TD needs to come down a little in the back. The washer style detail and the ribbed area should face toward the rear. You can try by just rotating the TD or by trimming the lower section of the panel and relocate it down a bit. Reference Images Finally , it looks like you have done some advance with this fix by placing an ABS piece behind the back of the thighs ridges, You could fill that gap with ABS paste and you're golden . Easy fix! . Reference Images Congratulations again for reaching EIB Trooper!! . Just a few more adjustments, (we are confident you are going for more), and we'll add the Centurion Badge under your name . As always, please reach out to us or any of your fellow troopers for assistance.1 point
-
Glen nailed it there, Tim. As seen in the reference images the paint on the teeth for ESB and vocoders is neither shiny nor flat, but in-between (satin).1 point
-
POST 53 1. Toronto Woodbine Beach 2018 Rogue One shoot 2. Hearse Power Station 2018 JEDI FALLEN ORDER COMMERCIAL SHOOT FOR LFL/XBOX/EA GAMES 3. Toronto Fan Expo 2014 4. Toronto Fan Expo 2018 5. Toronto Fan Expo 2018 I had a fantastic response from my Garrison and have so many more, I can send direct to you to save bombarding this awesome thread. Looking forward to the project.1 point
-
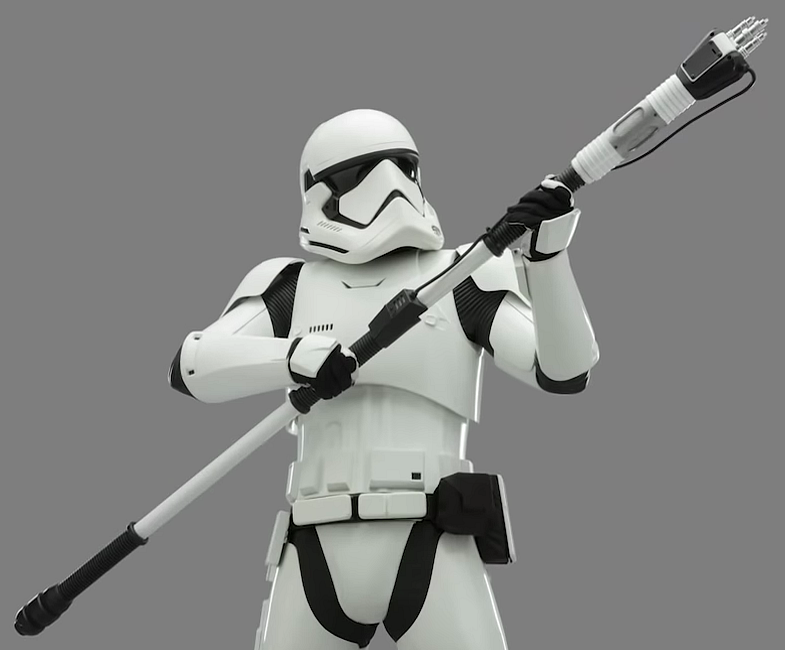
I agree on the forearm/picatinny rail but had to mention it Some more electroprod references More cod references And some bendy cods, just because TLJ reference, side view cod and extended wrap underneath

 1 point
 -
I actually use a satin black, I find matt can appear too flat, almost dark grey and chalky. I also use satin on the teeth, you can just see a hint of shine.
 1 point
 -
Whelp! I made it! I just got approved for my ANH stunt TK! Thank you everyone for the input and feedback!1 point
-
Here's how I use Imgur on my phone: First you have to upload the picture. Once that's done you should have the option of clicking on "View" in the upper right corner. When you view the picture, you press down on the screen (a long hold, the way you do when usually selecting something for copying it, for example), so that the "share" menu pops up: Then you click on the link that I marked. Hope this helps!1 point
-
Thanks. I like seeing how people pack. A year into this and I’m still trying to figure it all out. I’m not exactly happy with how mine fits. Sent from my iPhone using Tapatalk1 point