Leaderboard


Popular Content
Showing content with the highest reputation on 07/03/2021 in Posts
-
Strapping should be on the top inner side, this stops any length/movement issues, many add them to the wrong side, even some armor suppliers
 3 points
 -
Man I definitely use the help to get suited especially after having a bad shoulder. I'm lucky enough to have done a few troops with the same trooper who knows my kit well and basically just helps me out a little bit to get situated.2 points
-
Got a lot of the little strapping done I was missing still a few more left. Need to do some black abs paste to fill in some small spots. shoulder bell to shoulder strap (sew in snap) and clean up and I should be finished and ready to take some pics.2 points
-
Yep, as Glen said you've got the elastic in the wrong place. This is definitely making your situation a lot worse. Mobility isn't perfect at the best of times without creating other problems [emoji1] Hope this sorts your problem!2 points
-
Yea I learned that a month ago, but thought I could run with the way I had it. I think if I want more mobility as well, I might have to increase the bicep circumference a bit and maybe take a few more mm off the forearm top edge. I've been working out a lot during the pandemic...2 points
-
You have truly mastered the dark arts! Yep. I think I'm just put together badly [emoji23]2 points
-
Well, I've finally received my Jimmiroquai ROTK kit and washed it. Now the fun begins! Since I don't currently have access to paint, primer, or a paint booth, I'm going to start working on the helmet. If anyone has any tips or tricks for drilling/cutting out the vents and teeth, please feel free to share! In the meantime, I'll be perusing other build threads to get some ideas on where exactly to start.
 1 point
 -
Well this is not something I would have thought that I would need to consider; however, recent experience has caused me to investigate this issue, here is what I have learned. When I started my ROTK build, the only supplier of ROTK gloves that I knew of was Imperial Boots (IB). IB calls these gloves Anthology Trooper Gloves (ATG) and they sell them for $69.90 plus shipping from the Philippines. I just checked their web site and they have reduced the price to $59.90 plus shipping. https://www.imperialboots.com/product/anthology-trooper-glove-shore-trooper/ So I purchased a set of the ATGs along with the T-7 boots for my ROTK build. When I received the gloves I tried them on to test the fit and the wrist immediately separated from the gloves in several areas. Additionally, the side seam separated as well. I assumed that I may have received a bad pair that were not stitched properly and decided to not contact IB about the issue since I had a sewing machine and I did not want to wait for the extended shipping from the Philippines. I re-stitched the gloves and did not give it another thought. I put the gloves on several times since then for application pictures and test fitting of the armor as I built it. My first troop in my ROTK was at DragonCon 2018. This was 4 months after I purchased the gloves. During the 3 hours I wore my kit, I observed that the gloves seams along the thumb had separated. I detailed all of this in my ROTK build here on FISD. https://www.whitearmor.net/forum/topic/44463-11b30b4’s-rotk-build/ In this picture you can see the re-stitched wrist (Yellow Circle), the freying of the elastic wrist from contact with Velcro (Red Cricle) I assume, and the separated seam on the thumb. So after DragonCon I first did a search to see if the gloves that they used for the screen version was a modified off-the-shelf glove. I was unable to discover any existing gloves that match what was used for the movie; however, I did find another manufacturer who sells a ROTK glove. The company is Endor Finders (EF) and they are located in the USA. EF sells a Rogue One Trooper Glove for $55.00 plus shipping. So I ordered a set and received them. https://www.endorfinders.com/costume-accessories/rogue-one-trooper-gloves Shortly after I ordered the glove from EF, I contacted IB about the issues I have had with the ATG gloves. After a few back and forth e-mails, IB sent me a new pair of the ATG gloves. I won’t say it was a painless experience but they did replace the gloves so there is that. I have held off doing this comparison until I received the replacement ATG gloves and now that I have them, it is now time to do this. At first look both gloves look almost identical. Honestly, I expected the gloves from EF to be the exact same as what IB sells. Once I got the EF gloves I quickly noticed the differences. As you can see the cuff on the EF gloves is longer although both gloves are the same size. The EF gloves fit a bit tighter but that is because they are lined on the inside while the IB gloves are not lined. Here is the palm and back of the IB glove. And this is the EF palm and back. A side by side of EF (left) and IB (right) Inside lining of the EF (Left) and no liner on the IB glove (Right). Inside the EF glove. Inside the IB glove. Wrist of the EF glove. Wrist of the IB glove. The EF glove with armor. The IB glove with armor. My observations: 1. The ribbed fabric used by each manufacturer is different. So I looked at some reference pictures from SW celebration. In this picture the glove fabric looks like the grid fabric used by EF. However, in these pictures, the fabric looks more like the ribbed fabric used by IB. So I am at a loss to determine which is correct. I suppose that both could be correct. 2. The wrist on the EF glove is fabric and not elastic. The fabric on the IB glove is elastic. 3. The EF glove is lined and fits like an Isotoner while the IB gloves are unlined and fit like Mechanix gloves. 4. The stitching quality appears to be better in the RF gloves while even the new IB gloves are poorly stitched. 5. The Velcor patches on the back of the EF gloves are opposite (One soft and one hard) while the Velcro patches on the back of the IB gloves are both soft. 6. The leather on both gloves looks to of similar type and quality and screen accurate. Conclusion: The EF glove seems to be a better product and is sold for a few dollars less than the IB glove. I have not trooped the EF glove as of yet, so my opinion may change once I get more experience with them but I doubt it. I hope that some of you find this information helpful. Happy trooping.1 point
-
Holy cow, I can't believe I'm finally doing this. Hi everyone, I'm Matt (39) from Toronto, Canada. After years of deliberating, I'm finally pulling the trigger as a treat to myself in my 40th year on this Earth. I've dreamt of joining the 501st ever since I found out about it, but when my buddy James (we share not only the exact same birthday, but have many common interest, making us the perfect non-twin twins), agreed to build a suit at the same time with me, I didn't hesitate. So, we've both ordered an AM armor kit, to ensure a proper fit (sadly, Princess Leia's famous line wouldn't apply to us as Troopers, we ain't short!). Very, very excited to get started on this journey and look forward to sharing our experiences with you.1 point
-
Hey loose an N, we were poor and couldn't afford the extra N, it's Glen There's no crown, no extra money in your pay packet, only thing you get is a change of color on your EI badge, no glory or celebration, I just like building and as accurately as I can, over at IOC I broke their award system, I have 34 L2 and 9 L3 approvals, had to help come up with some new graphics for awards as nobody ever reached those heights, it was called the "Glen Effect" . History lesson: I wasn't the first to 7 EIB approvals, that would have been Todd "Toddo" TK 6647, he reached that goal before we had FOTK costumes, he also had a Skytrooper which is now homed at Spec Ops. Incidentally Todd only has 1 Centurion approved costume, so I was the first to 7 centurion approved costumes, again no fanfare or glory only self satisfaction. I think Richard means FISD costumes I retired a few costumes a few months ago to recoup some credits, I have 4 reserved BUT I recently was approved in a couple of others so back up to 25, I know I have a problem, the suitcase wall just keeps getting bigger, one day they will find me under an avalanche of suitcases1 point
-
Perfect James... . Thanks for your patience!!!1 point
-
1 point
-
The D.O.s are far better placed to answer generally about screen accurate vs practical, but specifically your lower right hand strap definitely won't be a problem. I recently achieved centurion, and I have that strap. Moreover, without the strap you're more likely to not achieve the higher levels because of struggling to keep the gap closed. Really glad to hear you're thinking about those higher levels. From what I've seen it should be minimal work, and the sense of achievement everytime you put it on is worth all the effort [emoji16][emoji106]1 point
-
Hi folks, I’ve ordered my materials for the additional strap which shouldn’t be a problem to add. I’ll post some pictures when done. I just have a couple more questions: 1. This is around screen accurate vs idealistic builds. RS build the suits as they did in ANH which has no lower right strap. When pursuing a higher level, how much of the screen accuracy is considered given that it will result in some unsymmetrical results? In my case, the gap on the right side of the body armour. I’m fairly new to this world you see so I’m trying to understand the balance of building the suits as they were but on the other hand, modifying armour to fix issues that are a result of the way they were originally built. 2. Before ammo belt frays to the point it doesn’t exist anymore, can anyone give me a solution for this. I’ve looked at Prym Fray Check, would this be any good? Thanks, Tim1 point
-
Awesome build Wayne. Nice one. One of your pics hasn't uploaded properly, the one of your left hand side. Thought I'd jump in and let you know. Good luck mate1 point
-
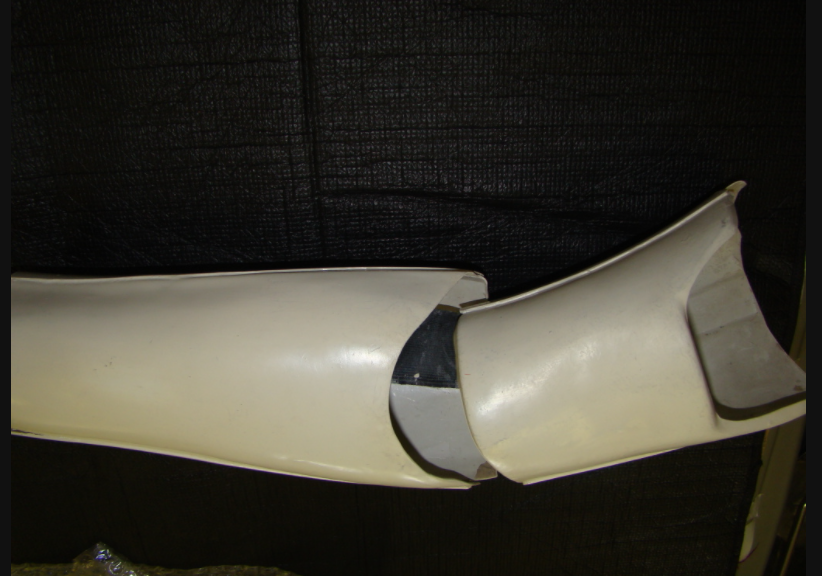
The calf pieces are lined up perfectly, but the thighs are twisted out a bit and the highest parts are almost on your sides. Ideally, the cover strips should line up as seen below: Twisting them in may just get rid of the chafing from the thigh ammo pack, but until you get the strapping done it's hard to tell. The areas that I would be concerned about are those in the groin. I don't suggest having ANY of the return edges there, as after an hour of walking they have the potential to really cut into you ("armor bite") depending on how tight they fit.1 point
-
Thanks Rob. Starting a helmet collection isn't something I'm going to find difficult I won't be able to do my belt the same way you did, as I'm going to take the outfits up to centurion level, but reassuring to hear about others that have done similar things.1 point
-
Just a gloss white. All systems will have one. The Humbrol enamel is a little more on the yellow where a Tamiya is more of a pure white. For an ABS armour the slightly yellow colour works but for a acrylic capped a purer is probably going to look a bit better. If your worried about accuracy the humbrol enamel is probably the one you want.1 point
-
Hi Matt, Welcome to FISD, we have a lot in common. I’ve always loved the stormtrooper and wanted the helmet. I turn 40 in August and decided to get the full regalia as an early birthday gift to myself. I also didn’t know anything about the 501st until I read Anthony Daniels book. I wasn’t brave enough to build my own so went with an RS commission but it’s honestly the best thing I’ve done. You’re going to absolutely love it and the people on this forum are absolutely fantastic and helpful. Enjoy the journey and I look forward to welcoming you to the 501st trooper Tim1 point
-
A couple of years ago I made an ESB conversion kit for my RS props new hope armour . My garrison trooped at a live orchestra screening of the movie ESB , so I quickly sorted an ESB costume . the main thing was the helmet, and as a helmet collector I luckily already had an RS ESB helmet , that would have been the expensive part . I picked up some cotton gloves and ESB handgards from RS , leaving just the holster issue . Luckily the RS holster is attached by Chicago screws, so I unfastened the holster straps , ( ok, it left holes in the belt on the left... but hardly noticeable) then with some offcuts of leather ( a cheap black leather belt from the cheap shop) I made two ESB loops to fasten to the holster with the original Chicago screws , allowing the holster to loop onto the belt on the right side. It was a quick and simple conversion kit that was completely reversible , and I've got it saved for another event one day . The whole " kit" is stored inside my ESB helmet .1 point
-
[emoji1] If its useful to you then you can be sure it'll be useful to someone else too, so no worries! Best advice I can find for now would be live in it as it is for a little while, and keep trying the armour on. You may find twisting your arms or your armour in a particular way gives you the reach you need. If you still find that you can't do what's needed then we can try and find other ways together [emoji16][emoji106]1 point
-
Thanks for the welcome. I totally intend to go slow and enjoy this. Especially doing it with James, it's going to be a blast. I do have a question already, about boots, but wasn't sure where I should post. Still trying to learn ettiquete on this forum.1 point
-
Having it on the inside of the forearms most certainly helped. I guess depending on the day, how large my biceps are, mobility degrees would change. Trying it on right now, I can get my hand closer to my face, but there's still some pressure between plastics on the forearm and bicep. Having the bicep sit higher would reduce the pressure, and possibly allow me to flex my hand into my face. I want it to look natural however, because the soundboard controls are in the chin, I don't want to be struggling to speak LOL The inner bell strap helps the bicep from separating from the bell. Without it, flexion of the arms would cause the bicep to pop out from the bell. I have seen some other troopers with a similar solution, and I definitely like it.1 point
-
That was quick!! [emoji1] Have you tried it on since changing the forearm elastic? If not I'd recommend doing that before changing anything else. You may find it's made enough of a difference. As you said, changing strapping is pretty painless and is reversible if needed (always a good thing!). Not right or wrong, purely an observation... I only connect my shoulder and bicep on the outside area (plastic to plastic, where you have). I don't have a connection on the inside (from elastic to inside of the bicep). It 'could' be that attaching in both places at the same time is restricting movement. Maybe not, but something to consider.1 point
-
Easy when you got a whole roll of the good stuff. Next step I think is to tighten up the bicep to bell, but I slightly fear in doing so, will cause the bell to pull more on the shoulder elastic. I double layered the shoulder elastic, but it has limits too. 'Have to strike a balance here I guess...1 point
-
oh man I just screenshot parts of the video too because I was thinking maybe cant upload videos.1 point
-
For some reason this forum doesn't like using links to mp4's I found upload to Youtube then post the link. Here is the full link to your video https://i.imgur.com/q6c5dyX.mp4 Doing the USA proud1 point
-
Nice I have the jb weld stuff too I can use in case this doesn't work. Will definitely see after this parade march.1 point
-
This is the video I used for where to put my forearm elastic, and its worked pretty well for me [emoji106] Good luck mate1 point
-
Yup! Anytime I don't have to rewire, paint match, or resculpt something on the armor, I take it as a minor win. Restrapping is pretty low risk so I'm optimistic I realized I won't be break dancing in the suit, but I'm still questioning the suit's capabilities to reach the electronic switches in the chin of the helmet. Hopefully I don't have to move the switches, I like the bucket not being encumbered by wires to the torso. Wirefree is mobility.1 point
-
I can try to illustrate. The image shown below is the left arm strapping, the velcro elastic that secures the bicep to the forearm is facing behind. The yellow lines represent my arm, the blue the armor, and the green the elastic strap and the red arrow the dominant pull of elastic. As I bend the elbow, the green elastic is stretched and begins to fight the bell to bicep strap, ultimately winning, causing more of a collision between forearm and bicep. Ross from RWA can demonstrate. As he bends his elbow, the elastic in green is lengthened.1 point
-
Make that 3! I’ve been on hiatus due to work, but mine are trimmed and ready for attachment. Glad we can all learn from one another! Sent from my iPhone using Tapatalk1 point
-
Hi James. before any cut, I would like to suggest to check this video about dressing solo. It has been so useful to me, but most of the time when trooping and if it's possible , I ask for some help from fellow troopers mainly with arms . Note that in order to gain more mobility you can turn the forearm curve to allow more space between the bicep and forearm. Hope this can give you some light.1 point
-
Yes, same problem. I am considering trimming a little more in the curve of the elbow pit part of the forearm to allow more easy bending, but its a fine line before you could remove too much. The armour definitely wasn't designed with practicality in mind! I don't have voice system yet, but I do have fans and hearing assist, both of which have controls in the helmet. All I can suggest is to try as much as possible to position your system such that the controls are as easy to reach as possible (easier said than done I realise).1 point
-
Great News !! Congratulations!!1 point
-
Tino's E-11 upgrade kits are incredible, and I wouldn't do a build without one! They definitely add the level of authenticity that us OCD types look for, lol.1 point
-
Have you stopped happy dancing Great news, hope the fitting goes well1 point
-
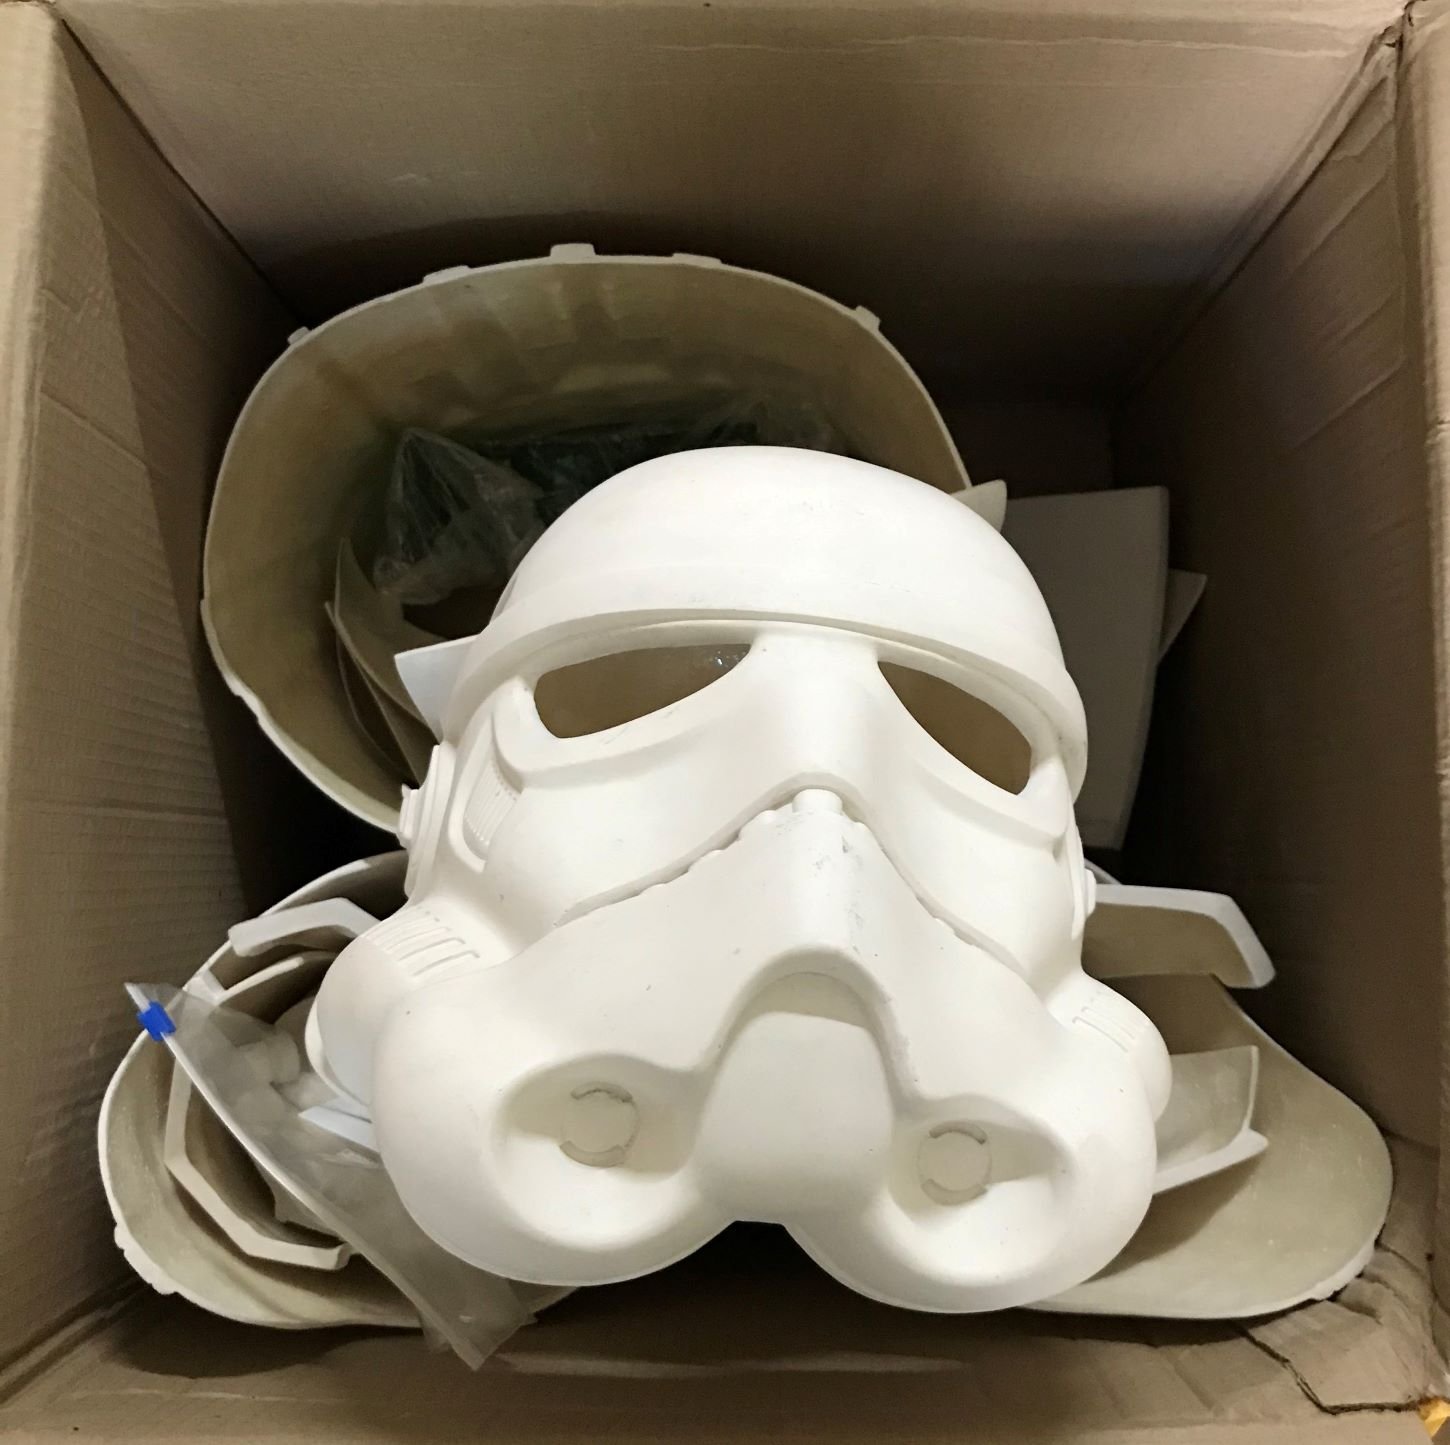
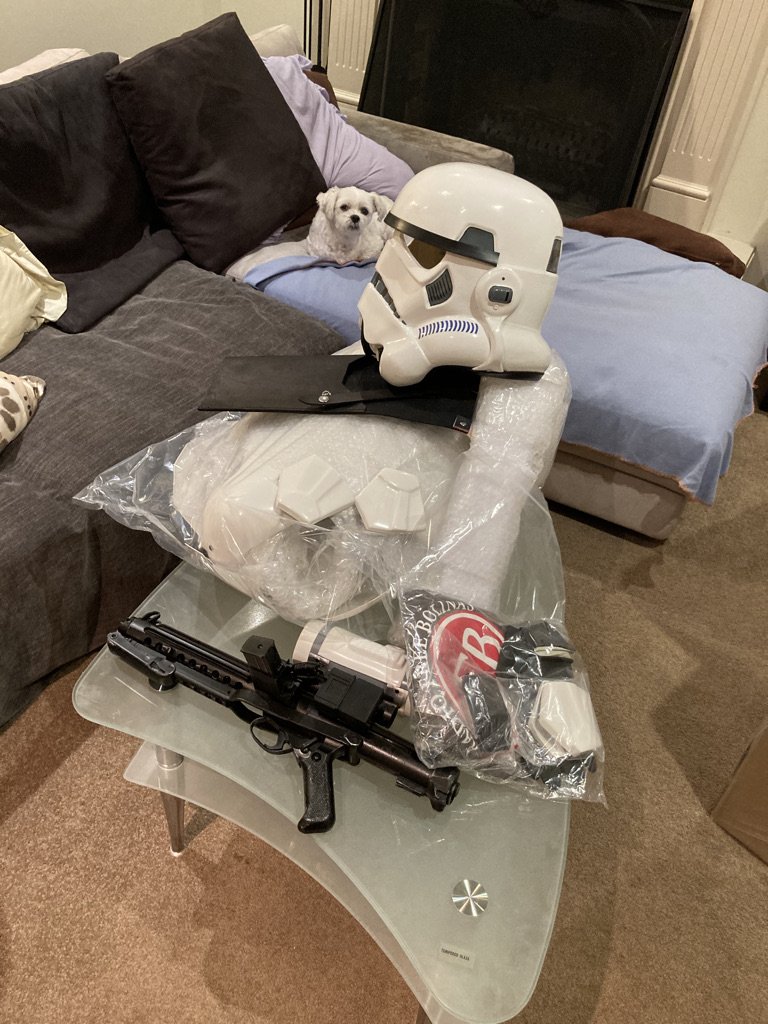
Sensory overload - RSProps delivery arrived today - haven't unpacked it all but OMFG
 1 point
 -
I've seen a similar method using fiberglass resin and T-shirt material, it's a neater way than using fiberglass matting. Problem I find with a lot of super / instant glues is that they are not very strong, adding the T-shirt material may help. There are other two pack glues which some of us use on our FOTK's, I use JB weld and some others use Devcon, there are of course others out there. The thing I like with JB weld is it's sandable and very strong when dry. At the end of the day it's what ever works for you.1 point
-
@1nfern0 @TKSpartan so my buddy suggested taking a piece of white t shirt and soaking it in super glue and putting behind to reinforce that area. So I used abs paste first and followed his suggestion it really does feel solid. We will see how it holds up for 4th of July march.1 point
-
Any luck with the updates on this, Wayne?1 point
-
Geez Glen, a week?! We should have a race. Put the two fastest builders (whoever they are) in their workshops, and livestream their contest-funded armor assembly. Sleep not required, or set at an equal amount per 24 hours. First one to EI-standard completion wins. Sorry to get off topic ;-) Sent via Imperial Tapatalk Comms1 point