Leaderboard


Popular Content
Showing content with the highest reputation on 06/04/2021 in Posts
-
Thanks Glen. May try the elastic w/velcro method. Will see how it all goes when finished.2 points
-
Rough fitting and and gasket gap testing. Sent from my iPhone using Tapatalk2 points
-
Thanks! Definitely going to try [emoji16][emoji106] Sent from my SM-A715F using Tapatalk2 points
-
Congratulations Richard!!! Your build is looking awesome, and we all hope you think about taking your armor to the next level!!! The EIB Badge is waiting for you!!!2 points
-
Ignoring the blue tape and cracked plate [emoji23], I'm thinking this looks a lot better, but is it correct? As close to looking vertically down on it as I can Sent from my SM-A715F using Tapatalk2 points
-
No worries, it's not the worst that could happen. I can use the old one to get the correct dimensions making the new one easier to get right. Every mistake is an opportunity to learn, right? [emoji1] There are no induction events scheduled in the UK yet anyway, so I may as well use this time to go for the advanced levels (and document my mistakes along the way) Sent from my SM-A715F using Tapatalk2 points
-
Just a few updated pics. I noticed my sniper knee plate/thermal detonator weren't cooperating the other day for my original pics.2 points
-
Stickers don't like covering curves, you cold use the water detergent trick but the sticker will take a long time to dry out so you'll be continually pushing until it dries. I use a little heat from a heat gun to help shrink the sticker while I apply pressure, BUT I would caution you it does take a little practice, I tried on a lot of left over sticker material before attempting the actual helmet stickers. Another trick is to cut with a knife and remove excess material, again a little trick2 points
-
Thanks guys, I've now started a pre-approval thread.2 points
-
Oh man, it's been a while lol! And with good reason at least haha! Ya see, I had hoped to have most of the trimming and fitting work done before our first born introduced herself last December. Well, our little one had something to say about that and decided she was ready to hatch a few weeks early! So on Thanksgiving Day appropriately enough, little baby was born! Meet Frances Leonor, the newest member of the Galactic Empire! Coincidentally, she goes by "Lea". That is pure coincidence and not a Star Wars nod I swear haha! After moving across the country a few months back and little Lea FINALLY sleeping through the night I now have the time to devote at least a couple of hours a week to my armor. I've decided to forgo adding shims to the sides of the kidney plate (or was it the ab plate?- idk). This gives me a reason to lose weight and maintain a healthier lifestyle so that's gotta have some worthwhile benefits right? Taking baby steps (No pun intended lol) I'm now gonna work on those little nick-nacks like the gloves, ab attachments and thermal detonator-or is it the o2 canister? Today's progress is just me sharing how I've measured the canister for eventual cutting. For accurate measurements, I've referred to several threads including : Without further ado... Here are my tools of the trade. And the measured pieces. I've got a PVC pipe in mind for the actual canister piece but would like to clear it with more experienced builders first. I've managed to track down a 2.5" pipe which I'll of course, color the right shade of gray. I'll have to do more research on the best paint. And hey it's shipped from my state! https://tinyurl.com/4mck9ke9 care of Ebay. Is this a good find or am I completely barking up the wrong tree? I, of course, will be ordering those super nice clips from Ukswrath. I hope they're still available haha. So that's it for this week's post guys. I eagerly await your well-educated responses and suggestions. Thanks as always!2 points
-
Picture-heavy update! First, I’m pleased to have "finished" my initial sand/primer phase on these, and setting these aside until later. Next, I finally glued the bells and sanded best I could. Not perfect, but the tops won’t be seen much. And then, the abs… I’ve gone with joining the sides, and separated the back to use a clasp to close. I’ve sanded down the sides to make closing it that much easier. Sent from my iPad using Tapatalk2 points
-
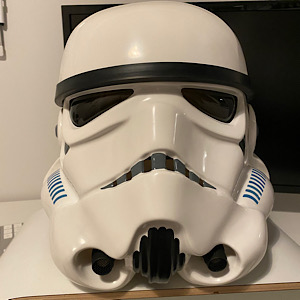
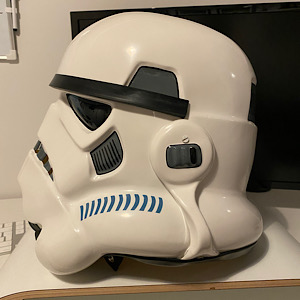
Ok, so I’m not exactly building my armour (I’ve commissioned RS to build it for me) but thought I’d start my own thread to mark the journey. Now, before I ordered the full armour, I had already paid for the helmet which arrived today. Ever since I was a kid I’ve wanted one and great work by RS on the care and attention they’ve given to this, so I’m absolutely thrilled with the perfection (and imperfection) the helmet has. I am looking to join the 501st and aiming for centurion level (aim high right). The armour will take a while longer as I ordered separately but any initial thoughts are welcome on the helmet.
 1 point
 -
Hi Joe, this is a real challenging section , mine is a RWA armor too and what I did was to align the best possible the sniper knee to the ridges of the shin and make strong pressure with clamps, lot of clamps. This pressure for about 48 hours drying let the piece stay in place and mold to the shin. Here is my Sniper knee, as you can see there's a little gap in the bottom, It doesn't have to align perfectly but ideally we look for the best possible.1 point
-
So the day has finally arrived and I’m picking up my stormtrooper armour from RS tomorrow. Can’t wait to try it on for the first time. couple of questions: Can anyone direct me to somewhere that lists the photos I need to take for 501st approval? Where do I find an armourer to feedback on my suit and suggest adjustments? Thanks all. Looking forward to sharing with you all.1 point
-
Looks much better .1 point
-
I am aiming for ANH stunt in Japan. I am currently making armor. I joined to get a lot of tips. I made it while consulting with my friend's 501st member. I can only speak a little English. So I use Google Translate. sorry.1 point
-
Gatchan, ようこそ! 英語困ったら、日本語を書いて下さい。この訳サイトはとても便利です。https://www.deepl.com/translatorGoogle訳よりDeeplのがいいと思います。 アーマー作る間にビルドトピックを作って、心配の所皆さんと確認して下さい。 TKSpartanはANHのビルドトピックのリンクをシェアした: https://www.whitearmor.net/forum/forum/80-anh-build-threads/ 写真ホストのおすすめサイトはImgur。 https://www.google.com/url?sa=t&rct=j&q=&esrc=s&source=web&cd=&ved=2ahUKEwidsp-Oo_7wAhWHfXAKHfU7A5UQFjAAegQICxAD&url=https%3A%2F%2Fimgur.com%2F&usg=AOvVaw3p6bMJ-O8flkpiRYoN0oZ9 無料アカウント登録して、写真アップロードして、自分のビルドトピックで写真のリンクをシェアする。すいませんいい説明じゃない。もし分からなかったらZoomで説明します。これからよろしくお願いします。頑張って下さい。1 point
-
I think the same as you Richard. Great attitude Trooper!! keep up the great work!1 point
-
Oh my goodness!!! What a strong glue !! I'm sorry you have this .1 point
-
They make sense to me, Being conservative, You could try making a paper mold over the plastic before trimming and compare how it looks.1 point
-
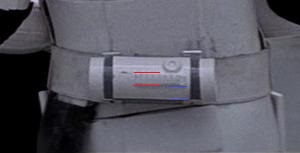
On my RWA TD plate the distance between the red lines is 18mm, and the distance between the blue lines is 30mm. Looking at this pic, even allowing for curvature, I reckon the distance between the blue lines is no more than 5mm more than between the red. If so I should be able to safely shave 7mm off the bottom of my plate, which would go a long way to bring it in line. Do you guys think my measurements sound OK?
 1 point
 -
As I know and searching into the gallery section I haven't found a measure detail. Mostly we use the to the reference images for an average location.1 point
-
Hi Richard, Just in case, If I can make a suggestion for "Plan C", If you used E6000 to glue the TD panel, You could take the panel off , trim a bit the edge, as the image below and rotate it to the new position . This is what I did with a recent RWA Armor I built . Reference Images1 point
-
Hey mate, yeah no worries ill get them done didnt know they were on the CRL thought that was centurion but sweet .. easy as. Also the gaps are fine i can sort them (ironically lost some weight and a bit of tightening will bring that right in) one for the weekend.1 point
-
Hi Wayne, and thanks for you submission for EI! Overall a fantastic build, brother, but there are a couple of items we need you to jump on before we can move you along and get that EI badge under your name . The wire mesh size in your Hovi tips is spot-on, but as per the CRL for ANH Stunt Level 2 the "...rim of the mic and inside are white or painted white". It should be a pretty quick job to pop the screens out, hit the inside with some white paint, pop em' back in and touch up the rims a bit. As noted in the requirements for Level 2, the "...gap between the abdomen and kidney is no more than 1/2" (12.5mm) wide".*** Depending on how snug it fits at present, you may be able to get away with just tightening up the connections. Otherwise, it will be necessary to add shims to the sides. This is not as difficult as you may think, but it does take some effort. We have several great threads on this, and we are here to help in whatever way you need. You obviously have some mad build skills, so this should be pretty straightforward and would give you a much better screen accurate look! ***Note that for Centurion there is ideally no gap in that area.1 point
-
Thanks both. Looking forward to all the future stormtrooper shenanigans [emoji16] Sent from my SM-A715F using Tapatalk1 point
-
Good Luck Trooper1 point
-
Hope all goes well.1 point
-
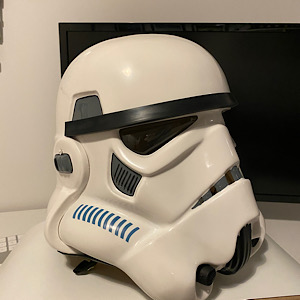
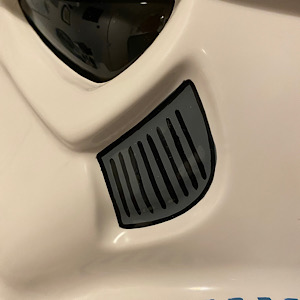
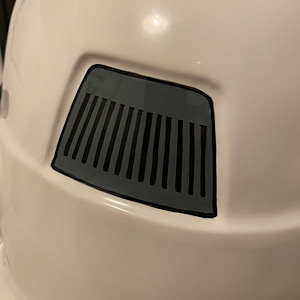
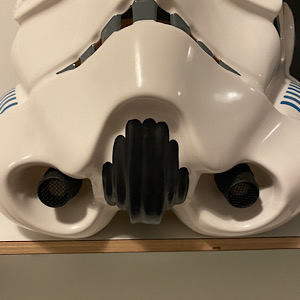
Helmet is nearly done now. Got some clean up and still need to paint the ear screws. Want to do a little tidy up of the ears too - hands were not super steady painting them! Also got all of the decals placed aside from the tube stripes, but I’m a little confused as to why the decal for the left tear is too large for the hole... it’s difficult to make it fit without it creasing or bubbling. Still working on it though. Had anyone else encountered this?1 point
-
Looking great for what it is. If I was in Michigan I would have pulled up to show support young trooper. Keep up the good work.1 point
-
Congratulations trooper and welcome to the ranks, looking forward to seeing your EIB application.1 point
-
No they are not a requirement for higher levels, some do add them as they are more accurate. RS have them on their kits as they do use the bracket strapping system.1 point
-
Congratulations Trooper, Welcome to the Legion !! Enjoy being a "Bad Guy Doing Good" hope to see your Higher levels application soon, you have a great set of armor !!1 point
-
TK-46116 reporting [emoji16] All cleared at basic, and just waiting for an induction troop (hopefully not long). Thanks to everyone for their help and input. Couldn't have done it without you. Big shout out to CableGuy (Dan), my UK Garrison armourer. He has the patience of a saint!! Will start getting my pics together for EIB [emoji106] Sent from my SM-A715F using Tapatalk1 point
-
I know the F1 racking use a film over their lenses which they can remove. I have a few scratches on my lenses over the years but if you are careful cleaning you should be ok.1 point
-
You can add either some velcro or elastic and snaps behind the boots/shins to keep them straight and stop them pulling up when bending.1 point
-
Well that depends on what armor you have, there is quite a big difference in color from one maker to another depending on their local supply of ABS, comparing them together can look as different as stark white to cream. Personally I eye color match the paint, I have an air brush so mix my own paint for touch ups.1 point
-
If you have a pair of tin-snips, I have a spare piece (2.5 x 8) of brand new green lens material (still has the protective plastic on both sides) that you can have for free... I'll even pay postage. All you have to do is cut it to shape. PM me if interested!1 point
-
You did a great job hollowing that folding stock. For the rattling of the tube, you can of course glue it in place. I would just consider to postpone this step after you have done the paintwork. Otherwise it could get hard to reach the inside of that folding stock.1 point
-
Hello and welcome to FISD. I think Japanese Garrison;s CO can help you, Brian Hall @Bulldog44 also Attache here1 point
-
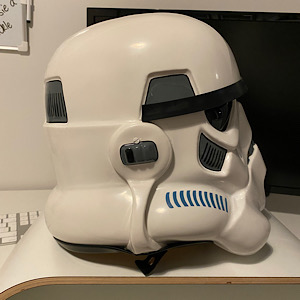
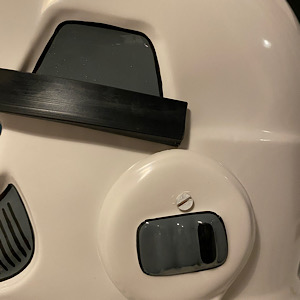
I was able to trim back the excess on the existing right ear leaving a bit more of a gap around the tube, but comparing it to an original made me feel a little bit better about it...1 point