Leaderboard


Popular Content
Showing content with the highest reputation on 05/17/2021 in Posts
-
Thanks Joseph. Really appreciate all the compliments. Once approved for basic you'll definitely be seeing my advanced submissions! [emoji4] Sent from my SM-A715F using Tapatalk2 points
-
I doubled over the mesh, one piece didn't seem enough to me. I taped in place and added a few dabs of black silicon in places to hold it, hasn't come loose as yet2 points
-
I'm 5 11" and found I'm just in the comfort zone for gaps, anything over things get harder. If possible can you pull the ab and butt plates up or is it snug around your frank and beans (pillar and stones) , if you do any any room there to come up it would help.2 points
-
Thanks to anyone who takes a look at my build thread. This is my first time armor build. Name: Matt Certain Height - 6 foot 2 inches tall Weight - 220 lbs Being a little bigger and taller this should be an interesting build. I purchased my armor from ATA at the start of 2020 and have been working on it since. I am a little late starting my thread, but better late than never. Below is from the BBB day, I will post pictures of where I am now in the process.1 point
-
Off to a great start.1 point
-
Hahahahaha!! exactly!!1 point
-
Oh happy days, that excited feeling, then the panic sets in, "Where do I start", looking forward to seeing your build, good luck1 point
-
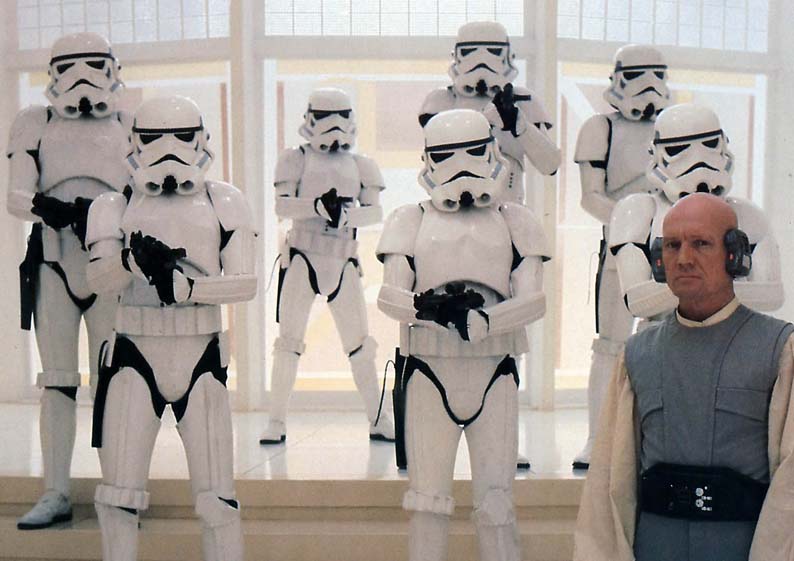
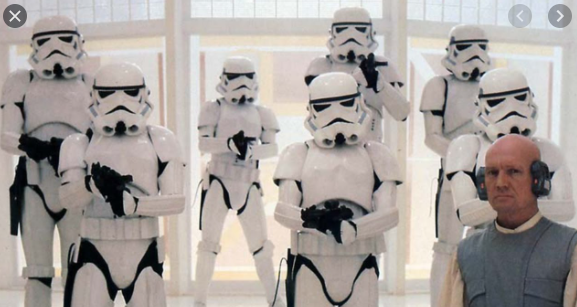
The photo shared is from either deleted scenes or promotional materials and never actually seen on screen in Rogue One. That being said, the majority if not all of the belts I have seen (including ones seen on set in person) were even across the top and bottom, not stepped on the bottom like in the shared promo photo. I think either way should be allowed by the CRL though, personally. I'd be surprised to see any with the boxes hanging past the edge of the belt, so definitely post some official reference if it's out there.1 point
-
I am using the older style elastic with the brackets - I might swap these out for either stronger elastic or nylon straps with snaps. That way they will stay in position and the shoulder or lower elastic will stretch instead...1 point
-
As Glen mentioned your height is going to be a factor, Besides buying larger armor you can try installing a harness that extends over your shoulders and connects to the Ab and Kidney. With it you can pull up the lower sections so that all the upper sections aren't as strained trying to support everything. Note this may cause the lower Ab (cod) and posterior to ride higher in your crotch and butt but at least you won't have the visible gaps at eye level. Worth a shot Other than that the armor is looking great.1 point
-
Coming along nicely1 point
-
Looking SHARP. Richard... outstanding work on this armor, sir! Once you are 501st approved, I hope we will be seeing your submission for Expert Infantry (and then Centurion)!1 point
-
You can size them down as much as you need to, Matt, but it would help to see how they are actually fitting. If you have your under suit, it would give us a better idea if you could post a photo of you you wearing it. You don't want them too loose or too tight. Once you get the circumference where you need it you can trim off those points in the front and back. Another thing to consider when sizing is the return edge on the inside. Some troopers leave this and have no issue, but others (like myself) find that these can cause chafing. "Question: Is the top of the back supposed to sit right under your butt and the bottom of the front just above the knee? I was trying to look at some pics but with the black undersuit it makes it a little difficult" Leave some room for mobility..1 point
-
Compare these two images and you will see the biceps sit a lot lower in ESB Some cool info here on some of the other differences
 1 point
 -
Thanks! It's only been a year since starting, but with Celebration looming May of 22, I now have a hard deadline!1 point
-
Also when it comes to adding your shoulder straps, screen suits on the front are spaced 1 large tab and 4 to 5 smaller tabs on the chest plate, (some makers of armor won't allow for this though). On the rear they didn't actually have a large tab, (although you can leave the large tab for all levels of approval), it's just more screen accurate. Some cut the rear large tab in half or cut the whole tab off, many just leave it there as is.1 point
-
Looking great Trooper !1 point
-
Good stuff. While the front seems just good, you're right. I think it can go up higher under the shoulder bridges when I attach it. I was most worried that there would be a gap between the kidney's and back when I did that. But again, the strapping will probably help a lot there too.1 point
-
You may be able to come up a bit on the back plate as it is overlapping in this image, you also have a big gap between the neck and backplate, a lot of the time it comes down to tweaking the strapping1 point
-
ESB do have slightly lower biceps than ANH, if you think your strapping is tight enough you can leave were they are, I only mention as they can get jammed together if they come out and overlap.
 1 point
 -
One problem I am running into is my height- Once I have everything on, I have a gap between my chest and torso. Same on the back. If I push the chest down some, it does not fit as well in the chest . You can see here, the shoulder bells do not fit very tight. I might need to do a warm water bath to make them a little wider to fit my shoulders. The back piece does not fit directly on my back, you can see through the gap. Another piece I might need to do a warm water bend on the top of the back to flatten it out some.1 point
-
Still gotta trim the thigh tops and kidney notches, attach back of boots to shins and just waiting for the final sniper knee. Otherwise, I 'think' finished. More pics tomorrow to see if there's stuff I've missed. Sent from my SM-A715F using Tapatalk1 point
-
Coming together nicely. Sent from my sorrosuub C1 comm link device using Tapatalk1 point
-
Here are some alternatives. Marketed as the first colour correct paints to vintage ILM used paints. Enamel versions below. They also have acrylics. Grey: https://archivexpaint.com/products/ex-009-1975-reefer-grey-lt-30ml-paint Black: https://archivexpaint.com/products/ex-008-1975-engine-black-30ml-paint Blue: https://archivexpaint.com/products/ex-042-1975-light-blue-30ml-enamel-paint Not cheap for our purposes but worth mentioning.1 point
-
All right moving along I finished the ammo belt and pouches. Started off with a new belt from Rob Kittel. Marked punched and installed the snaps for the armor. Next mounted the ammo belt with the rivets. Next glued on the rivet cover. Next I modified the magazine pouches. Blackened out all the white stitching. Removed the slanted straps. Installed some new webbing glued together and riveted on. Next made some fake foam magazines to fill out the pouches.1 point
-
Resources : As we always recommend here in the FISD to new the armor builders , there are some useful resources and info to take into account besides the CRL . In my case for this very first FOTK build , they're as follow: 1 - First Order Stormtrooper The Force Awakens TK CRL 2- FISD FOTK Reference Images Gallery section 3 - Other's TFA Build Threads . I have found and study the following : Ukswrath's FOTK build thread Ruthar's First Order Stormtrooper Build Revvek’s FOTK build [KB 2020] Merkava74's TFA FOTK Build Thread (Anovos) TheSwede`s FOTK build [KB] 4- Fellow Troopers here in FISD. One of the most important asset to achieve this personal goal is the help, encouragement and support that can be found here from the very best. All the fellow FISD members.1 point
-
So... while sheltering in place, I really wanted to work on some stuff. Unfortunately the hardware vendor still is sitting on some weld nuts I placed back in Februrary... It's imported from Asia, so I'm guessing there's probably some delay due to COVID19. I wanted to glue the weld nuts in place before painting... I got impatient, so plastidipping I went. Masking made the TK face look a bit halloween-ish, good idea for a jackolantern? 3 Coats I wanted to cut my ear holes for Tony's SHA hearing system - I have some grommets to stabilize and hold the left/right ear mics. Used a 1/2 inch spade drill bit - Running it clockwise would crack and not make a perfect hole, so the trick is to drill in and reverse the bit as soon as the spade blade touches the surface, press down and the circular motion will mill out the hole. Then I painted the missing corners of the frown, the one on the right gave me a ton of trouble - got sick of modifying the stroke, wiped it all off and repainted it. Goof off surface spray works good as a thinner/modification tool Oh yea, then I made an armor stand.1 point
-
Great question, the shades of white will undoubtedly differ between manufacturers so buying 2-3 cans of over the counter should result in something close. The other option would be to take a section of armor to a local automotive autobody supply retailer and have it matched. They should be able to tell what make, model & manufacturer of vehicle it closely resembles. After that go to Autozone.com or similar and buy "Perfect Match" by Dupli-color. https://www.autozone.com/searchresult?searchText=perfect%20match&vehicleSetFromSearch=false&keywords=perfect%20match1 point
-
I've been asked by more than one Imperial Cadet recently if I would make a post that details the steps involved in becoming a Stormtrooper. Here it is, and here are the steps: 1. Find the First Imperial Stormtrooper Detachment website/forums at www.whitearmor.net. You are reading this so, CONGRATULATIONS! You are well on your way! 2. Begin researching the available armor kits in the Getting Started section so that you can make an informed purchase, research is your best friend throughout this process: http://www.whitearmor.net/forum/forum/38-getting-started-read-this-first/ 3. Contact your chosen armor vendor and begin waiting patiently for Big Brown Box Day. 4. While you're waiting, begin collecting your accessories for the build, and additionally required items like an E-11, boots, canvas belt, tools, snaps, etc. There is plenty more, but remember step #2. 5. Big Brown Box Day! (take pictures, this will be a day long remembered!) 6. Start your build thread at FISD here: http://www.whitearmor.net/forum/forum/31-costuming-and-builds-501st/. Take pictures, take a deep breath, measure twice, cut once, ask questions before you do something you'll be unhappy about later, all mistakes (within reason) are fixable. 7. Complete the build of your High Quality Imperial Stormtrooper costume, and rejoice. It's about to get technical. 8. Ensure that you are 18 years old, and visit the 501st Legion website's Join Us page: http://www.501st.com/members/join_how.php 9. You will need to make a decision about what you'd like your TKID to be. You'll have to list five choices in your order of preference. Available numbers can be found here: http://www.501st.com/members/search_avail_ids.php 10. Fill out and submit the application found here: http://www.501st.com/members/join_form.php 11. Take your submission pictures and submit them to your Garrison Membership Liaison (GML). A list of the Garrisons can be found here: http://www.501st.com/members/displayUnits.phpIf you don't know who your GML is/or how to contact him or her, this list will assist you with that process. Photo's required: Full length, Front, Side, Back, Side, Action and Helmet off. 12. After you submit your pictures to the GML, he or she will contact you (be patient) to let you know if your costume is accepted, if you need to make alterations, or whether you need to re-take any photos. 13. If you need to make alterations or re-take pictures, submit them in the same manner in which you submitted the first ones. 14. When your costume is accepted by the GML, he or she will forward your pictures to the Legion Membership Office for approval and assignment of your TKID. When your costume is accepted, all you can do is wait for an email from the 501st Legion to arrive, confirming your TKID assignment. Congratulations, and welcome to the 501st Legion, and again, be patient. 15. When you have received your assigned TKID, you have one more important step to complete, and that is to request Legion Access here at the FISD. You do that using this thread: http://www.whitearmor.net/forum/topic/16-501st-trooper-status-requests-include-link-to-your-501st-profile-in-your-request/In your request post, include your newly assigned TKID, and a link to your Legion profile page.1 point
.thumb.jpg.60eadc36840e0919235e0eba43f57161.jpg)