Leaderboard


Popular Content
Showing content with the highest reputation on 08/09/2020 in all areas
-
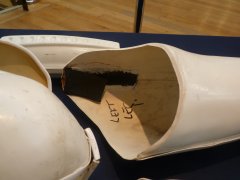
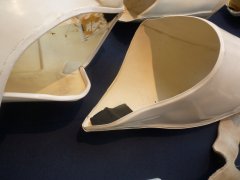
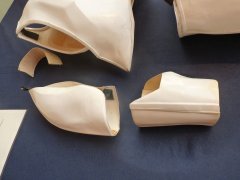
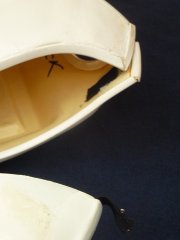
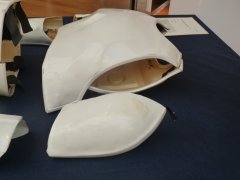
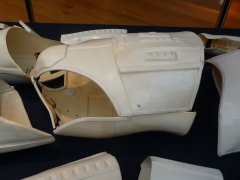
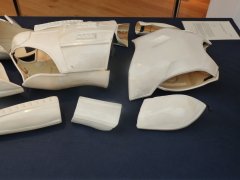
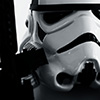
I find matt is too chalky and grey so I use satin on most areas Brow is SATIN Nose/mesh/teeth and traps GLOSS Other lower areas SATIN Here are some nice photos from the Propstore of a screen used helmet (notice the last image on the lower line it is just peeling in the corner so must be a sticker) Also notice the gap at the end of the greebles, unlike TFA2 points
-
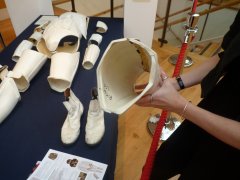
This is my 3D printed helmet. I decided to lead with this, because there's going to be a lot of boring 3D print talk before I get into the fun stuff. I guess throwing the helmet up there gives you an idea of what we're building up to. SPOILER ALERT... I had to repaint my helmet after I took this picture; we'll discuss that another day. Also, I was originally going to post this in the 3D Parts and Technical forum, but ultimately, regardless of the method, this is a ROTK build, so here it lies. Throw my name in with the other ROTK threads, but let's do this with a 3D printer, and finish the project. This should be fun. About two months ago I started searching the forums for complete 3D Print builds. This started somewhat out of curiosity, but honestly I think it really started because my wife asked if it could be done. Right off the bat, I found a few threads that looked promising, including Andrewhitc's 2017 thread where he was designing some pretty awesome ROTK models, and most notably, Cricket's Kid-sized FOTK build. After reading through miles of forum posts, I decided that I was going to 3D Print a full ROTK set and see if I could get it approved. Not to sound too cheesy, but this is my journey. I'll try to update this as much as possible and use this forum as motivation to complete everything by Halloween. I started by researching full armor builds on YouTube. Of course I ran into some interesting videos, but noticed that everybody seemed to be printing the same file from Thingiverse (https://www.thingiverse.com/thing:391664) While a fun prop, it just doesn't look very accurate and all the results I keep seeing seem somewhat fake, if that makes sense. They looked 3D printed. In my searches, I came upon the Galactic Armory videos, which I thought were great. Though The Big Baby sticks to clones (which I'll build next) his Coruscant Guard build was pretty impressive and was ultimately what led to his 501st approval. Additionally, in one of his videos, he mentioned NerdForgeDesigns which brought me to this: Not bad for an $8 STL file. If you're interested look here https://www.etsy.com/listing/808047010/ro-style-stormtroop-helmet?ref=shop_home_active_4&crt=1 The designer was very helpful and worked with me when I ran into a few issues. I highly recommend them. After dropping the 8 bucks, I fired up Meshmixer, Simplify3D, and the CR-10S and got to work. For this print, I'm using Inland PLA+ and ABS in 1.75 from Microcenter. Here's a look at my settings: These are basic nozzle/ layer height settings. I've fiddled around with everything up to a 1mm nozzle @ .5 layer height, but haven't been pleased with the results. Until I'm done with this armor, I'm sticking with the .4 @ .2. I like to slow down the first layer height in order to assure proper adhesion. I typically "babysit" the printer for the first few layers. I experimented with rafts and immediately threw away my prints. Building a brim seems like a great approach. This teamed up with the helper discs I'll show later almost guarantee proper bed adhesion. Standard infill settings Supports are tricky. In the Max Overhang Angle, I currently have this set to 70, but I'm almost always generating my own supports. I'll explain this later. Temp is where this starts getting fun. I'm pushing my filament out at 225 which is the max advertised for Inland PLA+. Check your filament specs, but I've found that if I'm pushing out higher temps on both the extruder and bed, adhesion isn't an issue. Another approach is to run the first layer higher and then settle down a little lower for the remainder of the print. I tried this and had some good results, but if the filament can handle higher temps, do it. Of course, this all needs to be monitored. If I start running into misprints or shifted lines, this and speed are typically where I make adjustments. Cooling is pretty much standard. No G-Code changes Standard Script settings. SPEED, SPEED, SPEED. Nicco Industries did a great video on speed settings. Check it out here https://youtu.be/UJF7vnJ1rNg Essentially, he found little difference between 60mm/sec prints and 180mm/sec. Basically, with the amount of filling, sanding and painting you're doing post-print, the quality differences are negligible. Ok. Now that the boring stuff is out of the way, let's start making some armor. I'll start dropping pics like they're hot soon. SECOND SPOILER ALERT... I'm currently printing out the last two pieces of the entire armor set and ordered most of my soft parts. Additionally, I've already reached out to the community with general questions and others regarding sizing; everyone's been super helpful and incredibly friendly. The reason I'm saying all this is because with the entire armor set completely printed, the only reason I won't finish by my self-imposed deadline is if I lack motivation. I know that 3D printing isn't for everyone, but I haven't seen many threads where someone actually completes one of these projects. Additionally, If I can contribute to the community in some way, I'll be happy. I'll add more later.1 point
-
Thankyou1 point
-
Those notches came out a tread, well done1 point
-
I think you could be right, that is looking much better1 point
-
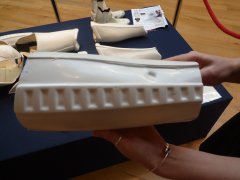
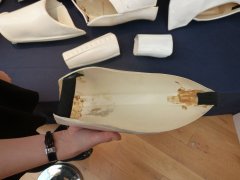
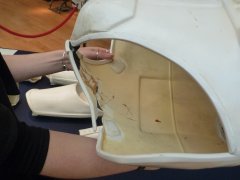
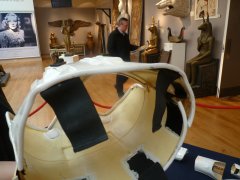
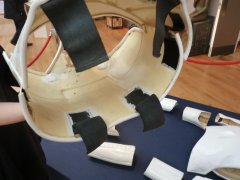
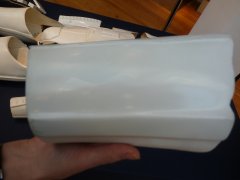
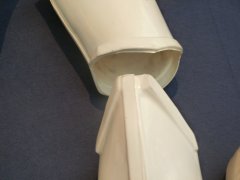
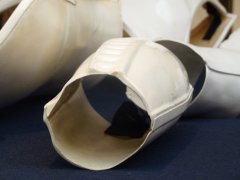
Used a sanding drum attachment and my flat file to round out the notches. I think they turned out great!! Then I built up the courage to cut off the top of my barrel, along with another inch from each end... No issues there! I rounded out the top too and it looks great! I'll fit it with the chest/sides/back again to see if it's trimmed enough. I clipped on the belt front and back (and set the gap as big as I'm expecting). The notches look and fit perfect! The CRL clarifies that the halves join "directly in the middle of the wearer's side waist. The rear half overlaps the front half's ends." I marked where I was thinking of trimming the back, and marked the front to still leave an overlap of 2.5", but then I looked at some pics and realized I need to figure out ammo box placement first! I might need to trim more off the back half to fit the boxes, which would reduce the overlap if I cut it now... Overall, looks good for now!1 point
-
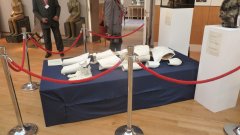
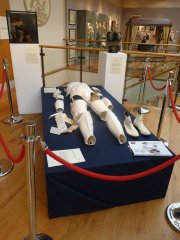
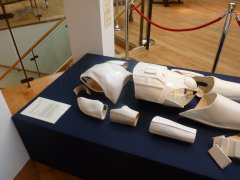
ROTJ armor auction, was offered by Christie’s in December 2011. The price? US$319,5741 point
-
-
Nice work.1 point
-
Martyn Scully 17210 EIB A4 TKSpartan http://www.whitearmor.net/eib/certificates/17210-eib.png 2981 point
-
Trying to make some progress on my kit. Belt Boxes: As previously noted, the boxes that ship with the kit are mostly incorrect. The large pouch and front boxes are passable but the other 2 smaller ones are simply unacceptable. I printed these black boxes from files obtained from 3D Empire. As I do not like PLA as a prop material, I will be molding and casting these masters using a semi-rigid resin. Possibly heavier but will be much more durable. During prep, I added some hardware that will make attaching to the belt easier I think.1 point
-
The empire is very busy in my area. Even if there are some well known rebels in action, it doesn´t last long for our troops to react. Lord Vader shows up1 point
-
I think if you had the symbol inverse (blue on white) it'd look quite cool at the corner of a shoulder or something? It'd be fairly easy to paint or print out a stencil and use that perhaps?1 point
-
Yes exact deaf symbol from Tray posted above. I've seen it all the time. Nothing for me of color rank with pauldron from seen link above. I will ask my local for pauldron wait see. I could put deaf symbol on upper left of front chest or somewhere in part of armor. I want better different design of same symbol like imperial. Who have good designer or I can do? How to apply symbol on the chest? Paint or sticker or know other idea?1 point