Leaderboard


Popular Content
Showing content with the highest reputation on 07/15/2020 in Posts
-
Stormtroopers have never had such good aim as they do right now. The countdown is well and truly on and I for one am getting pretty darn excited at the prospect of hitting the 1000 Bullseye in the next few months. Great work to all that have already submitted and to those building like crazy to get into the first 1000 group. DO team, you are all doing a wonderful job appraising and approving troopers, thank you for your efforts. I will reveal another piece of the merch item when we hit 20 which I suspect will be by next week at this rate.3 points
-
Thanks for the feedback everyone! Here are the additional pictures requested. If I'm still missing anything else, please let me know! 1. Closeup of helmet teeth 2. Photo of helmet "S" trim 3. Closeup of forearm wrists (with return edge removed) 4. I went ahead and trimmed off the cover strip on the back of my shins so that it stopped where you indicated.3 points
-
I will be double snapping shoulders with white elastic for sure.2 points
-
Oops! https://www.501st.com/members/displaymemberdetails.php?userID=280102 points
-
And looking more critically, the cod shape isn't exactly the same as in TLJ. I think Chris @themaninthesuitcase mentioned something about it as well. I see the issue now that everything is coming together. The TLJ cod is narrower and more of a "French cut" style than what I currently have. I won't be cutting the cod on this suit to make it more narrow, nor will I be reprinting one. I think I'll be able to simply bring the cod up a bit more (there is still room to move it up), which will make it look a little more narrow overall.2 points
-
I didn't like how the paint ended up on the black circle on the back plate. Even though it's semi-gloss, it's too shiny for me. And I could see a massive amount of brush strokes in my work. Ugh. I bought a roll of matte black vinyl and cut myself a circle in the exact size (or at least as close as I could do with the circle stencils I have). Then just stuck it over my paint mess. It's not perfectly flat (I guess I could have sanded down some of the excess paint before applying the vinyl, but I am not up for it now), but it looks much better than before. Next, I added little white ABS tabs to the shoulder bridge tabs. Making a template with paper, I cut out the tab shape. Stuck it on with E6000 and taped it on to cure. Test fitting the upper half of the armor today! Woo! First we verified the ab, cod, and butt pieces all fit. Then I velcroed the chest plate to the back plate. This had me a little nervous, because placing the velcro bits is not an exact science. And I kept having to pull things apart to adjust- I was concerned that I would hear a "CRACK", but it never happened. Thankfully, the ABS plastic has some flex to it. The 2K Gloss also adds some flexibility to the parts, too. I added the thermal detonator in there as well. I'm still working on the belt, so that will not be making an appearance today. Then we took things over to a room with a full-length mirror so Cameron could see himself easily. This was the first time he's tried on so much of the armor, and he was really excited about it. I added the arms as well... and discovered that I still need to make fitting adjustments to the gaskets and strapping tweaks for the arms. But still, not a bad effort for the first big fitting, methinks! My little trooper!!!! <3 Taking the pose holding his air-blaster. Any feedback on fitting adjustments would be appreciated. Cameron reports that he feels comfortable in the suit at this stage, so for movement is good so far. I don't know this suit as well as the OTTK, but I'm guessing I'm on the right track? Now, it's time for me to get back to taking care of detail work and strapping those legs.2 points
-
Sent from my iPhone using Tapatalk2 points
-
Working on the red lights. Made boxes out of scrap plastic, lined the inside with aluminum foil. The led is red and the foil helps diffuse the light. Had to buy a sheet of red plastic (12 X 12) as that was the smallest size. The counter box This is just a test fit, the led is too far in the center in this shot Next up is the trigger.2 points
-
WOW! I find it fantastic to know that we are down to the last 23 before reaching the 1000 mark for Expert Infantry level! To those who have submitted and been approved for EI, know that on behalf of the entire Staff we salute each and every one of you for taking your armor to the next level of screen accuracy. BUT... time is running out, Troopers. At this rate we will be reaching our goal soon, and in order to be a part of the "Original 1000" (and get in on that sweet swag we promised) we encourage you to submit your armor as soon as you think it is ready. If you have ANY questions or concerns about this, please feel free to ask any member of the D.O Staff** and we will be more than happy to help! D.O. Staff contacts: (Just click on the name to PM) justjoseph63 Sha Sha Mario2 points
-
Now updated to match current CRL requirement. Note: This checklist has been updated on 1/18/2024. wingnut65 Visual guides updated by TK-50297 Wingnut65 Printable PDF at bottom TK50297 wingnut65 latest addition NEW Helmet exploded view fine detail visual guides suits Level 2 and Level 3. Note: This checklist has been updated on 1/18/2024. wingnut65 Printable PDF below 04 FISD ANH Stunt L3 Centurion - Ver 03 1-2024.pdf 30 ANH Stunt Helmet - Ver 02 1-2024.pdf1 point
-
As I've mentioned previously in a couple of other threads, my son and I are beginning our journey to 501st approval. I think we're going to be following the 80/20 rule. I'll end up doing 80% of the work, or more...lol. We ordered the AM kits from Dave at Dave's Darkside Depot and should be receiving them very soon, along with our boots from IB. I would like to give Dave a shout out. He's very responsive to questions and seems like a super great guy. I've also ordered my E11 from Quest Design. Only thing left for me to purchase will be neck seals, holsters, belts, and my son's E11. I may take on the belt project myself, although its been a while since I've had my hands on a sewing machine. The holster project looks doable as well, but I have to weigh the cost of material and time versus purchasing them completed. Another thing that I am torn between is building these simultaneously or focusing on mine first as an attempt to get into the first 1k EIB and then using that expertise to build his. I'm not sure what I'm going to do yet, but I imagine I will start with both and let my rate of progress be the deciding factor. That being said, in preparation for BBB, I got a start on some snap plates. I put together 20 for each kit per UKWrath's AM 1.0 TK build. I started out using a punch for the holes in the 1" nylon, but quickly learned that using the soldering iron was not only faster, but also gave me a nice cauterization around the hole. This is also the E11 I ordered from Quest. I have read that they make a good product. Does anyone know what, if any modifications I will need to do to it to be lvl3 compliant? E-11 Product Listing1 point
-
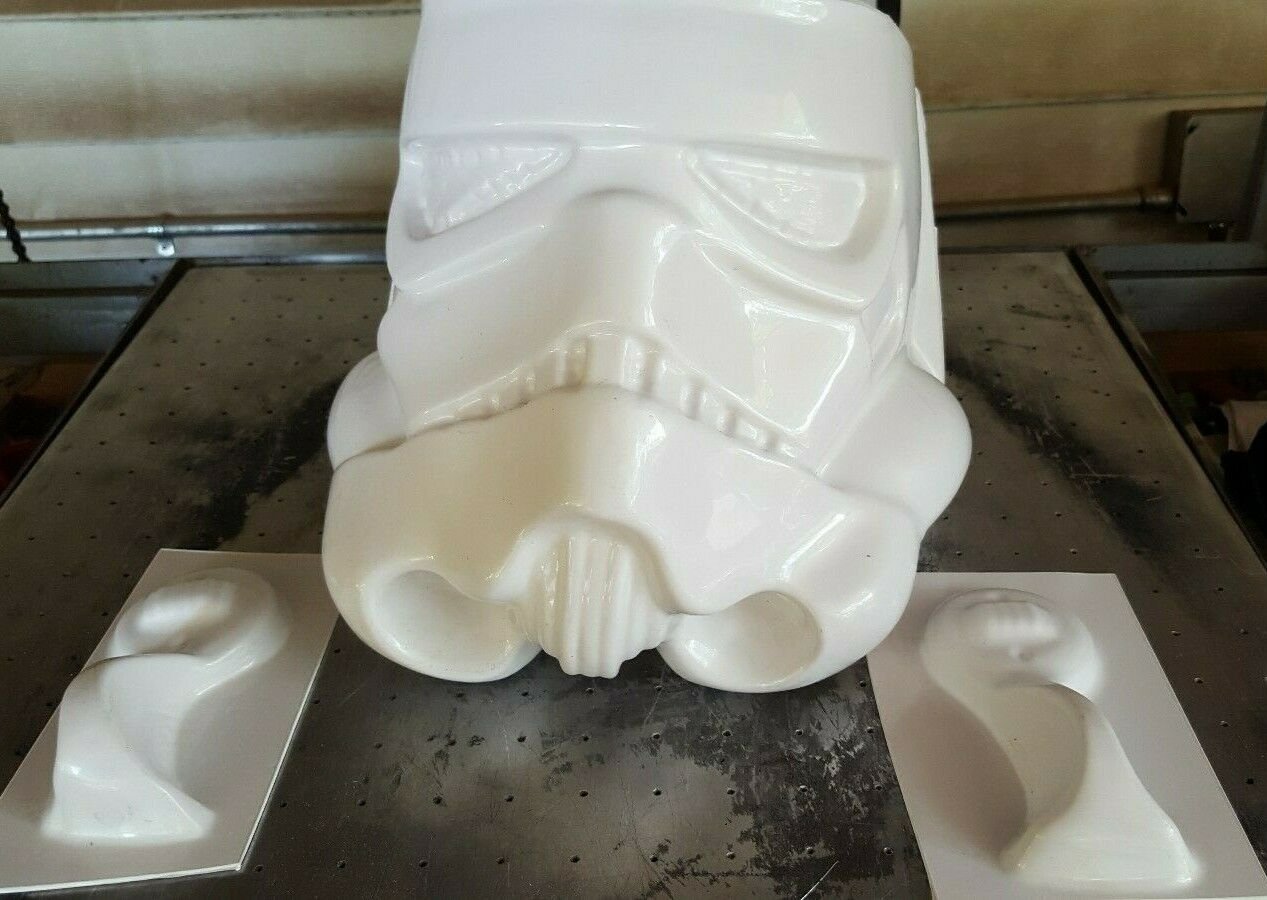
Hello everyone, I have wanted to build a stormtrooper helmet for years (I've also been a member of this forum for years and never posted) but life always got in the way. Last night I decided to just do it. I figured since it's my first go at it I'd just look for a cheap kit off ebay and I actually found a half decent looking one. I have no idea what maker it is and I realize it may be a recast (that did not occur to me when I bought it). It's just the vac formed parts so I'll need to source the rest. It looks like an ANH stunt to me but I also think it may be an ESB? I like the ANH stunts better so I'm going with ANH for now. I know it's definitely not the best available but I figured before I shell out the cash for an RS props kit I'd use this as a trial run. I imagine I'll have a lot of questions for you all and if anyone has any advice for a guy new to trooper armour I'll gladly take it Here are the photos from the ebay listing, I will post more when it gets here in around 10 days from now Thanks everyone
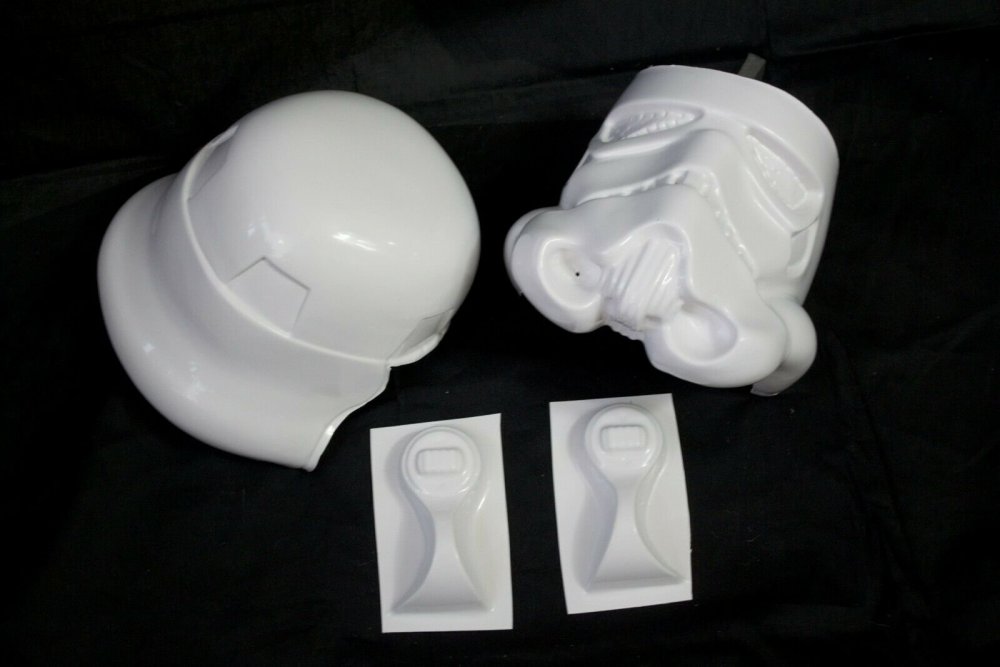

.thumb.jpg.9d16be783008aa3a5ccdaf065b0cea82.jpg)
.thumb.jpg.c979e0390b680d835c6e78d8038bd8fd.jpg)
.thumb.jpg.2af3a81559864f46a1dd7bcb2d3be492.jpg) 1 point
1 point -
Hello, all. I am Gaz. I am from the Midland, UK. I am in my early 30s with broad shoulders and 6'3 (thought i should mention my build somewhere). I may have jumped the gun yesterday and posted in the armoury forum before dropping in here, so sorry about that. I mentioned some of this in my first post so sorry to repeat some of this info. I'll start at the beginning. My now fiance helped me on the road to this enormously. Not to mention putting up with midnight showings and The European Celebration weekend. She pushed my to do this which has been a life ambition of mine - all very mushy but I thought it was an important part of the story. So, after doing a lot research I landed with RS Propmasters and first of all we purchased ANH stunt bucket which was fully commissioned. This looks the hardest part so I cheated and brought it outright. Later we brought the rest of the kit to assemble with a E-11 blaster which i purchased at a discounted cost at the RS open day. The only things I have left to buy are some boots and the black under garments. Fast forward two years later and I have finished all the DIY around the house whilst shielding and I am ready to get cracking with this. Thank you to the guys who have already offered their assistance and well-wishes in the armoury forum. I spend a lot of last night stalking other member's forums and they have been a big help.1 point
-
I will be working with my 19 yo son, who should be joining the boards soon, as I have discussed him being very proactive in the build process. I can imagine that I will be doing a sizable amount of work on his build. Given the circumstances of the times in relation to social distancing and the lack of armor parties, can any my work on his build be counted toward Master Armorer?1 point
-
I rearranged the pads, and moved the lens up. It all fits a bit better now. After a LOT of trial and error, I figured out a method for mounting the iComm and amp. There's no flat surface for good velcro grip, so I wrapped them in hard velcro and put a strip along the bottom, then made a soft velcro strap to hold them onto the helmet. I hooked everything up, and then used some black electrical tape to hold the wires close to the helmet. It took some bending and arranging with the mic, but I got it into a good spot! Performed a sound check! I don't know if this video works or has sound, but assume that it's good lol! This kids loved it! My son kept saying it's "crackly" haha, I explained that's how Stormtroopers sound! I didn't get anything done on my armor, but here's a pic of what's ahead. The barrel ends overlap about 2 inches, so I think I need to cut off 4-6 to leave a gap. Then I'll snap 2 strips of elastic across to hold it tight. For vertical placement, I was thinking the bottom of the barrel should be high enough that I can sit and it rests on my legs, then I'll cut down the top to where the chest still overlaps. Is that a good height placement? I figured that I shouldn't cut from the bottom, right?1 point
-
Nice try but not quite, love the photo1 point
-
On with the work. I do like to double snap in some places that take some strain, like the shoulders, just in case you have a snap fail it still allows you to troop1 point
-
Good luck with your build! I’m also awaiting my kit from Dave, and agree with you...he’s very good to work with, and responsive to messages.1 point
-
That "weathering" was some leftover from troop #3. didnt notice that before the meetup where i took the pics. had no cleaning supplies at hand there. Mud drops are removed now though (removed em when i took the 3 detail pics you requested at tuesday)1 point
-
It’s taken a while, I guess the devil is in the details, but happy with this now it’s complete. Sent from my iPhone using Tapatalk1 point
-
Nothing better after a morning run than a hot cup of coffee on the bridge of a Star Destroyer! Do you guys think I'm ready for GML approval lol!1 point
-
Welcome to the FISD Gaz Sent from my SM-G981B using Tapatalk1 point
-
After further consideration and reading the July newsletter, I think I will just try to go for Centurion level from the start. It will take longer than it would if I was just going for the basic approval level, and will involve a lot more work/supplies/stuff in general, but it’s going to be a long time before I’ll have the time to finish anyway, with me going back to school in about a month. So why not? I want it to be the best looking that it can be, so reach for the stars! On another note, I already have some of the supplies I need (ex: Dremel tool), but they’re at my dad’s house. The first thing I want to get to work on is the helmet, bc when I come home for Christmas break I want to be reminded of why I started this journey in the first place. So, I’ll be taking a trip up to his place this weekend. In the meantime I’m going to go get another tarp and some Scotchbrite pads tomorrow, bc turns out I didn’t have any here.1 point
-
Howdy, I'm quite new here. I bought some stormtrooper armor from someone in my garrison. Our dimensions are about the same, but I weigh a little less. However, upon trying on the armor, it is quite clear that the person who assembled it is not the same size as me. The ab plate has a lot of extra room and the thighs are way too big. The chestplate touches my arms when I stand up straight with my hands to my sides, the biceps and forearms are quite large and the shoulder bells are too far away from the chestplate assembly. Needless to say, I have my work cut out for me on downsizing this armor. Are there any tips for a newbie on downsizing a pre-assembled kit? I think I have a general idea of how to do it but any help is welcome! I will upload pictures if I have specific questions or if anyone asks! I have no idea who the maker of the armor is, not even the previous owner knows. He thinks its an AM kit or an NE kit from troopergear. Thanks for the help in advance!1 point
-
Looks great Jonathan, in my opinion leave it as it, actually it is not noticeable and it would be covered by the holster. i would wait till the final test with all the armor.1 point
-
Nice progress, can't go wrong with IB boots1 point
-
23 to go1 point
-
You need to post a link to your 501st profile https://www.501st.com/members/displaymemberdetails.php?userID=326621 point
-
1 point
-
Fingers crossed that Dave’s Darkside Depot ships my armor in near Centurion status if I can just wear it right! (if I gotta cut, paste, fold, or spindle it - “mutilate” will be the operative word. I got no skills)1 point


.jpg.865759647d084c13856b4226fb13a0f0.jpg)
.jpg.6aad94b7da18b1459816c3428a96c6fc.jpg)
.jpg.79370509084176af6bcb2f607cab85e6.jpg)