
Leaderboard


Popular Content
Showing content with the highest reputation on 03/08/2020 in Posts
-
OK Troopers, it's time for our annual design contest for Celebration! For those of you who have a creative mind and mad design skills, it's time to step up to the plate and possibly have your original artwork used as the official logo by the FISD to commemorate the biggest SW convention in the world in Anaheim, CA. this year! We are starting this contest early (in case there are delays in shipping) as we want to get these in your hands in time for the big weekend in August! The winning entry will be made into a patch, which will be worn and traded by hundreds (and seen by thousands) at this event. It will also be available as a T-shirt to show off your FISD pride! So how do you enter? Glad you asked! Here is the low-down: 1. The contest will be open to all members. If you can see this post, you can enter! 2. The competition will begin on March 9th and will run until April 9th. After that, a poll will be opened so that everyone can vote on the design they like best. 3. The number of designs you can enter is only limited by your imagination. 4. You are welcome to use any FISD logos in your artwork. 5. Shapes can be round, chevron, or custom. 6. Design MUST include full Detachment name (1st Imperial Stormtrooper Detachment), 501st Legion, date (Aug. 2020), Anaheim and LFL. Exact dates (27-30) are optional. 7. All entries become property of the FISD/501st Legion. The winner will be announced in the April newsletter and will receive two free patches and other cool swag (to be announced) as well as some serious bragging rights! The finished products will have their own sales thread(s) once the designs are approved and ready to order.4 points
-
Big weekend for progress on the kit - took several steps forward (and a few back), but it's coming along! The big step was finally adding additional resin to the backsides of all the armor. This kit is my first time working with fiberglass or resin, so it was a learning experience forsure. After prepping the inside of the panels by scuffing with 100grit sandpaper, as previously mentioned, I went with FibreGlast 1110 vinylester resin, which is catalyzed by a mix of 1.25% MEKP. I bought a quart of the stuff along with their basic mixing kit that included several gloves, measuring and mixing cups, and stir sticks, and I ordered several extra cheap chip brushes. I did a test run to ensure that the resin would bond to the existing fiberglass matting/resin and would remain flexible, while adding strength (it did, though I must not have added enough MEKP or mixed properly, as it took a looooong time to fully harden). For the first full batch, I used a syringe I had laying around (for refilling fountain pens, not anything nefarious haha) to precisely measure out the proper amount of MEKP and mixed it into 300ml of resin, then stirred (trying not to mix in bubbles), and transferred to another cup to work out of. It turns from a light pink to a light brown when properly mixed, I learned. You can also use what resin is left in your cup as a gauge for how cured the rest of the resin is. Using the chip brushes, I applied a thin layer of resin to all of the inside armor surfaces (except the arms... I'll do a final 100ml batch for those and any other pieces later). I definitely mixed up too much the first time - 200ml is all I could probably use before it started setting up and became the consistency of like Jell-O instead of maple syrup like it was. I ended up tossing about 100ml of hardened resin in the cup, but live and learn. I mixed up another 100ml and used that to do a second coat on higher-stress areas like the shoulder tabs, chest armor neck line, and posterior armor. If it isn't obvious already, wear gloves, cheap clothes you don't mind ruining, and for god's sake, PPE in the form of a ventilator. I already have lymphoma, I don't need lung cancer too. While I was at it, I did a little repair on one of the belt boxes - it had a super thin spot in the wall that had already cracked, so I mixed up more of that flexible bumper filler and added some in to ensure it was strong, then a little more resin. The whole adding resin adventure turned out supersuper well over all and I would definitely recommend what I did to others. It helped add strength to all of the panels as well as "sealing" the open fibers that were super itchy and rough, but maintained a firm flex. You can see the smoother, glossier finish on the below shot. Next up, I sprayed all the insides of the panels with a flat white for good measure. (Ended up waiting on the thighs, as I wanted to split them and add a little more resin before painting the inside. Also, I just so happened to run out of the rattle can I was using after spraying everything else). I split the back of the thighs later in the day using my Dremel cut off wheel, then a 60grit sanding block to smooth my cut lines out. I'm a slimmer guy, so it'll be nice to overlap these and size em down a bit. I'll add a little extra resin where I chopped them when I coat the arms. After cleaning up any stray resin droplets (what I get for not masking anything) on the front sides of the armor, I sprayed several panels with flat white primer as well. I also sprayed the helmet after giving it a quick wet sand with 400grit and allowing it to dry fully. I'm going to have my pro paint guy paint it for me, but I figured it wouldn't hurt - and it came out surprisingly smooth. Aaaaaand here's several of the main panels, with both sides successfully in flat white 2X primer. I'm pretty darn pleased with how things are going so far, but there's lots more work to be done! Next up is more wet sanding, then a couple final coats of high gloss white! Doing my final chemotherapy infusion this Friday the 13th, so likely no progress until the weekend after, but we'll see how I'm feeling!4 points
-
When the wife is working the husband tries on different outfits4 points
-
Updated with latest approval in the center2 points
-
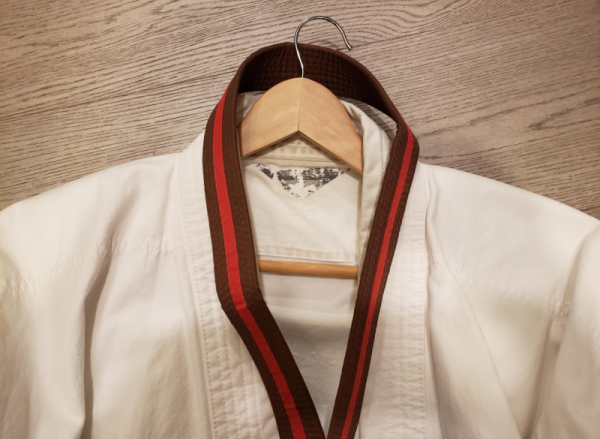
2.5 year ago I got tired of watching my kids do karate and stepped out on the dojo floor for the first time. I had just lost my step-father to heart disease and realized how short life could be. Last night my wife and I achieved the rank of ichi qu - meaning one degree below black belt and the highest belt rank we can achieve before that milestone. I am 52 years old. Making the jump from 3rd degree brown belt to black belt is a very big step. We are now expected to practice daily at home for the next 4 months in addition to class time, and that's just to be able to interview for the prep course (10% of people who do not take prep course earn their black belt, 80% of people who do, earn it). The prep course is a 2 hour weekly class from 7am-9am where you don't learn anything new, but they critique you to polish what you know to black belt level, and is 10 weeks long. We will have to refresh and perfect 4 katas we learned along the way and master one new kata (seems easy, right. Ha!). Plus we have to master 8 standard bunkai, develop our own 4 new bunkai, plus 26 partner techniques both as attacker and defender, for 52 total partner items. All of this has to be able to be performed perfectly, on demand, from memory. Students thus put in usually 4 hours a week of class time minimum, plus usually another hour a day especially as things get closer to test time. I have no idea if my wife & I will be able to achieve this level of performance in 6 months, or 12 months, or even 2 years. But one thing is for sure I will keep plugging away until I get there! I say this to help encourage those who tell themselves "I'm too old" or "I'm too out of shape" that these don't have to be excuses, or stories we tell ourselves that just aren't true. Never give up on a dream, not ever, and don't let negative self-talk get in the way. There are many days I really don't want to go to the dojo and would rather stay at home in front of the TV with a beer. It is also true that I never once regretted getting my ass out to the dojo and taking a class. Does anyone else have a story like this? It would be great if we could share them and help motivate each other.
 2 points
 -
Thank you everyone for the help! I can't wait to get out there and Troop. My first troop will be a local Con in two week. My ID is my Father's birthday. He passed away 6 years ago. He was always my hero and my inspiration. He took me to all the Star Wars movies, starting with A New Hope when I was only about 4 years old. I don't remember it, but I do Empire and ROTJ. I took him to see all the prequels. And now I've been passing on my love for Star Wars to my son, who I'm helping build his TK as well (learning from my mistakes). If Only You Knew: Cutting the ABS would hurt my hand so bad. trim/sand slowing ears are hard Ask for help, there is lots of it out there. you will make mistakes, the armor is somewhat forgiving, and most mistakes can be fixed with E6000 and scraps Save your scraps Oops!: Life happens The build done right takes time Cost just starts with the kit, it adds up with the tools, and extras ASK FOR HELP! don't be so gun ho to think you can do it alone. Watch the videos, go to armor parties, take pictures. A funny thing happened on my way to the Death Star: I could not have done this without the help I received from the other members in Garrison Tyranus. I was terrified to cut my armor and they gave me the confidence to get the work done. E6000 doesn't cure well in the cold Always have a spare propane tank for your propane heater. Measure 600 times, cut once (very carefully, and a little at a time). Shout Outs: I could not have done this without the help of the former Garrison Tyranus CO, Stoagie Schwank TK-4863! He helped me from BBB day to Approval. many weekends in his garage, including several Armor parties. Also Reese Ensign (29992) and Tim Allen (10930) for helping guide me through the approval process.1 point
-
So hey, I'm Art. I'm addicted to all things Star Wars. I've been building costumes and props for a while (I actually have a degree in it, but I do it for fun now) and am just getting started with the 501st. Looking to order a kit from Mark at AP. I am looking forward to assembling this with my daughter. Long story short, she developed cancer and we ran into a those trooping at a Cancer benefit from the Carolina Garrison and I was hooked! She's on her last chemo run and we are excited to get started!1 point
-
if she is over 18, she joins, as a handler or in a costume, and you troop, or if she is already a member, you join her :-) if she is not, that is up to your local garrison. some events are not kid friendly / safe / appropriate. e.g. younglings can join the Galactic Academy, and they have rules about trooping, mainly, accompanied / supervised by parent / guardian at all times. I haven't looked at specifics in a while, but adults used to be limited to not in costume so they were obviously a eagle-eyed parent watching over kids. given the special circumstances, I am sure your local garrison will be happy to make trooping with her possible. also, nothing stops you from escorting her around on Halloween, or her birthdays, etc.1 point
-
THIGHS Moving on to the thighs, I tackled the side with the holster first. I had Dan's metal holster, and it is a beauty. I wouldn't even save the kit holster as a paperweight. First thing I did was to drill a hole somewhere in the middle so I could embed a bolt through it, which, combined later with the top and bottom screws of the holster, will go through the resin riser, ABS riser, and the thigh piece, holding everything securely together since this part is going to hold the weight of my blaster in the future. This is how everything should look like once done, with 3 screws going through the entire set up. Here you can also see the rectangular hole that I cut out, so that the indent where the clasp greeblie will sit later can sit flush. I glued the holster together, even though it would be secured by 9 screws in the end, simply because I am going to send it for painting WITHOUT the screws. The screws will go in at the end, so they will retain the silver colour and not be painted white if I had sent it in with the screws. This is the completed set up, with the edges of the resin riser sanded flush with the metal holster. Next, I glued the ABS riser to the thigh, and used 3 temporary bolts to hold them together while it dried. Then, slather with epoxy putty because, again, CRL says seamless... After sanding, priming, sanding, I was happy with the riser looking seamless, and glued the holster to it. Again, I used temporary screws to hold it all in place. This is after it has dried and I had removed the screws. Finally, the 2 halves of the thigh was glued together. Pretty straightforward using clamps, magnets and clips. I glued both sides down as the thighs allowed my legs to go through without any problems. The clasp greeblie was then heated, curved to shape, and glued onto the thigh. After priming, sanding, and wet sanding using 1500 grit, it is done. The other side was simply glueing the 2 halves together, and adding the clasp greeblie. Here the 2 thighs are done and ready for painting.1 point
-
Grey today! Will probably go back for the corners again with black. Two steps forward, one step back. See you tomorrow!1 point
-
Looks fantastic, Robert! You definitely have an artist's touch with the painting skills, brother... keep up the great work!1 point
-
Moving forward with some suggestions, touched up my paint on bucket and added a layer of gloss to make it shine a bit more. Clean up the teeth a bit more and added gloss.1 point
-
Thank you! Enjoying the build!1 point
-
Nice kit, looks like easy fix dressing issues, best off getting some spandex or compression gear as the RS gear tends to bunch up. As soon as I ditched the RS under gear everything sat nicely. Good job and you will be serving the empire soon enough.1 point
-
Awesome looking kit you will make the emperor proud, go serve with pride!1 point
-
FOREARMS So after completing the re-work of the recess at the front of the forearms, it was time to assemble it together. I did not want to use the shim method, as I realised that if I used the shim down the whole length of the forearm, the pieces would open "outwards". I needed the pieces to fold "inwards" in a rounded fashion. As such, I decided to use little styrene rectangles, heated and bent inwards and lined them along the insides. This is how it looks like completed. The 2 sides do take on a nice inward curving shape. As for the top plate, since I am going for Centurion, the CRL states that the "Forearm top plate is not attached at front of wrists". So I glued 2/3 of the top plate, leaving the front end flexible. Next, the arduous task of filling the seams and sanding them down to a smooth finish. Once that was done, I glued the 2 clasp greeblies and the ridged rail, and tackled the wrist boxes. Again, the CRL states that "Forearm wrist box should be separate pieces, affixed to forearms". So I decided to use 2 nylon bolts and nuts, drill 2 holes on the forearm, and attach the wrist box to the forearm this way. It shows a clear separation. From the inside, this is how it looks: The completed forearm, ready for priming and sanding down one final time. After priming, sanding, priming again, and finally wet sanding with 1500 grit, left to dry. And the completed forearms, ready to send for auto paint.1 point
-
Lokking good, but what about the armor pinching?1 point
-
Thanks for the reply Dracotrooper, I'm getting all the required pieces now. I'll update this post once I figure this all out.1 point
-
Well, it only took me two years to circle back to this build. I ordered a Hero helmet kit and grappling box kit from Troopermaster during the holidays, which will be here very soon. Until then, work resumes on the other stuff! Got Joseph’s all-new Hero hand guards, in matte white (which is a closer match to the film ones): I used plenty of E6000 to get them glued to rubber gloves (stunt gloves for reference):1 point
-
Former LMO, SpecOps DL, Garrison Titan member, holder of the most FISD EIB Awards and all-around nice guy Todd Maxfield-Matsumoto & other R2 builders in my garrison & the Pacific Northwest made it to the cover of the SeattleTimes today. https://www.seattletimes.com/entertainment/movies/how-building-r2-d2-and-star-wars-droids-creates-joy-and-wonder/ Talk about dreaming a dream and a lesson that persistence pays off - way to go!1 point
-
Image can be seen1 point


