Leaderboard


Popular Content
Showing content with the highest reputation on 04/17/2019 in Posts
-
I've got everyone's names & that's in the works.... ssshhhh3 points
-
The best thing from this is how nice everyone was from the bottom to the top. Jon Favreau hit the nail on the head at the Mandalorian panel when he said he didn't know we knew nothing about why we were there and that we worked so hard. The first morning they jumped immediately into filming and most of us had no clue what to do and the crew seemed a little surprised. I think that it was Dave Filoni that told everyone we were 501st not extras then the crew realized we needed a little more direction than normal. From that point on I think our group nailed it and that we knew how to hold a blaster and move like a stormtrooper should as Jon said. The union extras kept having to be told by the crew to hold their blasters like the 501st. Towards the end of the first day we were doing some pretty involved work and one of the production assistants started to get a little frustrated with us since we were not catching her cues. Myself and a few other 501st said, "we have fans running and we can't hear you". She was surprised and asked, "what fans?", so we explained we had bucket fans so we can see. So from there she used hand signals for us and away we went. In the end I think we were in armor for well over 12 hours at a time, to the union extras it was just another paying job and no big deal to us it was a once in a lifetime experience. And yes, some of us now know how to use the restroom in full armor without making a mess.3 points
-
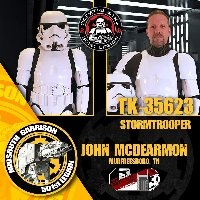
Hi everybody! First/last name: Brendan May Future Garrison/Squad: Canadian Garrison, Vindicator Squad Armour maker: Authentic Props Helmet maker: Authentic Props Cloth belt maker: Authentic Props Neck seal maker: Geeky Pink Gaskets Boot maker: Imperial Boots Blaster maker: Quest Design Canada Electronics: Ukswrath's Hearing Assist and Hovi-Tip Mics, Aker amp w/iComm, Henry's Helmet Fans Height: 5'10" Weight: 195lbs TK type: ANH Stunt Troopers who significantly helped with my build: Bud Spaklur, gmrhodes13, justjoseph63, wook1138, CableGuy, ABS80, Frank75139, TheSwede, Scimitar, and Dan (TK2759), my IRL TK consultant! Thanks also to everyone who chimed in for support and encouragement along the way. :-D Front view: Back view: Left side: Right side: Ab plate close-up: Helmet close-up: Helmet interior: Interior strapping: Thermal detonator: Latex handguards: Action shot: Bucket-less shot: Thanks for your time, everyone!!1 point
-
I used a drill and files, I find that is a lot more control than the Dremel1 point
-
Congratulations once again. First request higher access here Then have a read through the EIB section (you must be approved as an EI before you can request Centurion) https://www.whitearmor.net/forum/forum/95-expert-infantryman-program/1 point
-
I was there as well with the GGG, and I am wondering if there is a final count/list of names of people who were there. I think it would be fun to do a commemorative patch or something like that.1 point
-
If you're comfortable using a Dremel, that's the easiest/fastest way to get it done. Otherwise, cutting and filing by hand is the other way to go about it. This is my AP faceplate after I got done trimming the teeth and eyes with a Dremel, I did use a small file (from the inside) to clean up the corners of the teeth :1 point
-
That would help but in an emergency isn’t necessary, LOL. It helps to be thin and flexible though.1 point
-
Coming along nicely1 point
-
Yes I did. They were too tall for me. At some point I’m going to heat and roll them in.1 point
-
Hi Chris, Looking really good from the front! Great job! :-) Regarding the side view, you’re right that the alignment could be a little better. This is likely based on your internal strapping. As below, the ab plate and kidney should line up top and bottom; The butt should sit up against the lower part of the kidney, although they are prone to ride up if the strapping is not quite right. Do you have any pictures of your internal strapping, please? Best wishes Dan1 point
-
The union workers were really cool. It turns out that the group that were troopers were military vets. They were pretty surprised how lite our armor was, we had fans in our buckets and couldn’t sit down.1 point
-
Thank you. I do try to find answers before I ask, but i feel like I read and look up so much that I confuse myself. Sometimes I just have to ask the question. Lol Sent from my SM-G955U using Tapatalk1 point
-
Absolutely looks great!!!!! It doesn't have to be exact, just pretty close to pencil width. You are doing great and please continue to ask questions before making a move. This will help you with building self confidence and assurance!!! Sent from my SM-G965U using Tapatalk1 point
-
time to start assembling the armor!!1 point
-
Hello people, just popping in. Been really busy with work. I hope all is well with everyone1 point
-
WOW! I agree with Cricket 100%, Fabio! Outstanding job on those updates, brother.. One thing that you will be asked to do for level 3 is to remove the weathering from the T-tracks on your blaster. Since the ones used in the films were made of plastic, they would not have any metallic looking finish to them. A few dabs of black paint and you will be good to go, sir! Reference image Vedo presto un distintivo di Fanteria Esperto sotto il tuo nome!1 point
-
Hi Christine, thanks for the suggestions! (I've saw that you modified the post, however I did anyways the modification of the Ab plate more accurate ) REMOVED HOVI MIC (and I painted them inside) MODIFIED (Changed the mash) REPLACED ON THE HELMET REMOVED AB PLATE TRIMMED REPLACED Thanks for your time! Fabio1 point
-
As an approved The Force Unleashed Incinerator trooper, I must do this version as well! I can not wait to figure out all the details for this kit!!!
 1 point
 -
Holy cow, are we mid-way through April already?! Progress on this kit has been slower than I'd like it to be. I take full responsibility for it, though! I have a serious case of "Ooh-look-a-project-itis" lately. I'm still not done with my Hero TK build (although it's coming along, I haven't documented it, though!), and my T-21 foam build is still mid-way through, and I still have to convert my stunt TK to a TD (and build the backpack for it), and then there's this TK I'm working on... and most recently I got the itch to start looking into 3D printing a shoretrooper. Oh boy. Since my last post, I was able to acquire some TK Boots for my hubby (thanks to @Commander Gree!). And today I finally made some flippin' progress on this kit, which has me thrilled! I present to you... LEGS! Trimming for width is always the most challenging part for me. Not only do you have to trim to make the parts fit properly, but you have to make sure that the front and back seams line up. Which is no easy task with the RS shins! One half of the shins (the left halves, the RS kit comes with two identical shins) has a lot less material at the bottom of it than the other. This isn't an issue if you plan on shrinking the shins down a lot (as I've had to do to my own shins in the past). However, I hardly have to trim anything off the backs of the RS shins on my hubby, so I don't have much room to adjust for wonkiness. In the pic below, you can see how the shins line up in the back. There is barely 1cm of material overlapping at the top, and nothing at the bottom. (This was taken before I finished trimming right thigh for size, so please ignore that!) The shins fit my husband perfectly as taped, so I'm going to have to do some serious coverstrip magic to straighten things out. *For the record ALL RS shins are made like this; it isn't some lame overtrimming from the studio.* I will be assembling his shins with magnetic closures (like I've done with my other 3 sets of shins), and all the hardware for that part of the project has already been created and acquired (I really am not a fan of making magnetic buttons out of ABS. I had the foresight to create those last October- yay!). The other bit of progress made has been with the torso (no pics for this part). I've reinforced all the returns and installed the brackets for strapping the torso parts together. I've also been successful with installing the split rivets and strapping on the right side kidney/ab, and installing the Han snap. These are all little things that seem to take a lot of time to get done for me. But when it's done- WHEW! I'm off to get stuff glued now.1 point
-
Oh yep, you’re quite right. A strip of aluminium from a DIY store And screws to attach. Oh, and a bracket to attach the Hengstler1 point
-
Doesn’t he also need the scope rail? That’s the only piece that doesn’t come with the kit.1 point
-
The complete resin kit does, yes. As long as everything is in the right place and the right way round1 point
-
If we thought this area was a high stress point before it's going to be worse now with a full inner chest plate attached. The shoulder assembly will need to be looked at very carefully to prevent cracking. Good thing it's here on the FISD. With a collection of some of the best builders in the legion, I'm sure we can figure it out.1 point
-
It won't matter what they ship TFA or TLJ. What is clear is areas like the shoulders for example will need to be assembled correctly to gain 501st approval, unless CRLs are down graded which I don;t see happening. That said I encourage new (FOTK) costume owners not to fret. The FISD and it's members have been down this path before with success and we'll make sure you get there also1 point
-
Sadly to pass basic quite a few the assembly instruction areas will need to be ditched for something more accurate. Hurtle #2 the Ab and Kidney seam. The entry seams are not on the side as per the instructions, it's one seam and it's in the back under the TD. Abdomen Section · The abdomen section must wrap around the wearer's body without a visible seam.1 point
-
Be sure to use large washers! The screen used resin boxes kept popping off during filming and the washers got larger and larger. Those resin boxes were heavy too. Anovos’ design mimics the screen used boxes and has them hollow at the back to help compensate for weight. And great to see Anovos finally advisory the correct resin backs for the centre belt boxes. They changed the design a little but principal is the same. Sent from my iPhone using Tapatalk Pro1 point
-
Only by eating them. [emoji23] Sent from my HTC U11 using Tapatalk1 point
-
No Way I can get my stuff on by myself. I blame my flexibility. lol1 point
-
I think Glen has had more practice than most of us, lol! It takes me a good 15-20 minutes (with a handler) or so when I go HWT because of all the accessories. Speaking of mobility, I am constantly dropping bits when getting kitted up, and since I can't bend down after putting on my calves/thighs without looking like a contortionist I bought a "grabber" device. On my next troop the first thing I dropped was yep... the grabber.1 point
-
While reading though a build thread may be helpful to most, I thought it might be equally helpful to share a little illustration I made showing approximately where I cut my kit to fit my 5'4", 110lb. frame. The red lines are roughly where I made the trims. These lines show reductions in the kit size for height, not necessarily width (I made many cuts for width as well, but those cuts were typical for fitting a TK of any height). Cutting in these areas will still keep your TK within Centurion guidelines. Remember to always trim less than you think you'll need to, and try the pieces on frequently as you go to ensure a good fit.1 point