Leaderboard


Popular Content
Showing content with the highest reputation on 11/02/2018 in Posts
-
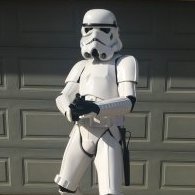
Hello Troopers, Oops - I appear to have missed this introduction way back at the beginning of summer when my amor passed basic approval. So I thought I’d wait to post until I was approved for Centurion! I’m very pleased to be part of this community. If Only You knew: Build to Centurion L3 straight out of the box. Each of our bodies is unique, the armour fits everybody differently. Be patient with yourself. Don’t set yourself an unrealistic deadline. This will cause you to make panic mistakes. You will hopefully have this armour for life. Build it right the first time! If you don’t feel 100% comfortable making that cut today, then wait a day. It will be so much easier tomorrow. There are no shortcuts! They will come back to bite you hard. Trust that it will all come together perfectly in the end. Strapping will be the most satisfying part of the process. OCD will be your biggest enemy! Nobody will notice that small blemish or sight imperfection. All they see is a very cool Stormtrooper Oops! A small crack appeared in the bottom return edge of one of my shoulder bells. The plastic bucked very easily here even when merely picking the bells up! I read in the forums about various fixes but decided to go it alone! BIG MISTAKE, Big Mistake! Coincidentally, I had just made up some ABS Paste to test out the process and look at the results. So smartypants here thought it would be a great idea to reinforce the inside return edges of the shoulder bells with ABS Paste. They would then have firm support and not crack again! Well… after applying the paste a little at a time over about 15 mins I packed up for the night. In the morning TO MY HORROR I found that the outside walls of the bells had buckled and were no longer a flat smooth surface! Devastation, my jaw dropped! New bells!! Or… I then begin the tedious process of using my freshly made ABS paste to very slowly build up the outside shape of the shoulder bells one small application at a time. Once I had "over-built" the shape of the bells I proceeded to sand back the shape and blend into the existing armour surface! OMG what a process. I CANNOT recommend this. But the result was awesome and hardly noticeable as the colour and texture matched nearly perfectly once sanded smooth with 800 grit and polished. Shout outs: Tony’s build threads are amazing. Always trust that it will work out if you follow what he’s done - even if you don’t really understand them : ) I can’t thank Tony (Ukswrath) enough. His Anovos build thread was my bible! I literally printed it out and followed every single page carefully. Slightly adapting as I built, to match what I was seeing right in front of me with my armour. My wife has the patience of an angel and knows nearly as much as me when it comes to dressing and adjusting armour. She’s one awesome photographer and handler. A big thank you to Greg (Wook1138). After acting as his handler on May 4th and seeing Stormtrooper armour in person for the first time it gave me a huge boost of confidence. My build after that point went much more smoothly! Thanks for reading — See you all out there!2 points
-
The list is growing but I guess it’s room for more2 points
-
I'm thrilled to say that I have finally finished my build and already trooped twice since last week! It was so much fun!!! I just sent off my email to my GML(s) for approval so I'm hoping to hear back (but it seems they take a while to get to emails).2 points
-
So many would love to be in your shoes and be Vader2 points
-
Glad I could help, Giles. Not that you really needed much. Great work and a good summary.1 point
-
Welcome and congratulations!1 point
-
Thanks guys! Wow, great points! I love the explanation on the tube stripes! I have some work to do and will continue to strive for accuracy. Again, thank you!1 point
-
Congrats! You did an amazing job on this build, and so quickly too.1 point
-
RS is a great choice as it’s cast from an original suit. TM @troopermaster also does commision builds and is also a great choice. Mark (AP authentic props) @ABS80 is another great choice that does commission builds. You can look at the Centurion applications to help you decide as they all state what maker their kit has https://www.whitearmor.net/forum/forum/72-request-centurion-status/1 point
-
You're not too short for a vader! I'm 5'8" and finished up a Vader a few months ago. In costume I'm 6'2". Will I go do big cons or troops? No. But some smaller library ones, sure why not?? Back to the original question...You could always mix and match different sets if need be. Maybe the shades may be a tad off but if it means fulfilling a dream? Then do whatever it is you need to do! Make a mix of AM and RT (if you can get your hands on it). Troopermaster has XL shins. You can always extend the ab and kidney plates with shims if you need to. Thats not too big of a deal. You will just have to worry about the length of your thighs and the length of your chest and back plates.1 point
-
AWESOME job on that blaster, Sven! Could you post up some pics of the other side, as well as a detail photo of the end cap showing the D-ring? A top view pic of the magazine and magazine well would be nice as well. Thanks!1 point
-
Wise decision by deciding to get two belts, Chris. As you know, the HWT belt cannot have drop boxes or a holster, which can be a pain to remove and add back on. It also needs to have some "scuffing" similar to the armor, and for level 2 it cannot have holes from removing the holster. For the ABS belt, you may want to contact ATA, as I know they make replacement parts. For the canvas belt, be sure that the Imperial Issue belt is the right shade of white, as some of theirs can be way too beige colored and have a lot of excess fraying on the edges. Another option is to go with one of Rob's canvas belts, made to order in your exact size. I own 3 and could not be happier: https://www.whitearmor.net/forum/topic/19803-fs-white-canvas-belts/ If I can be of any help with specifics on your HWT build just let me know via PM.1 point
-
Very nice work, Sven. I hope the aluminum foil can stand the friction from sliding through the receiver tube. Will you paint that rail black? Looking forward to your next update...1 point
-
Not to worry, Rob. When painting them, be sure that the paint stays inside the raised button area, preferably with a small gap around the bottom as seen below. A small, round tipped "filbert" style brush works well for doing this. Reference image1 point
-
Congratulations! How does it feel/wear compared to your ANH?1 point
-
Congrats! Looking superb! Sent from my iPhone using Tapatalk1 point
-
So I went and bought a new bottle of the Testors thinner and it worked great. Wiped right off. I decided to pick up a new bottle because I had been calling local hobby stores today trying to find the Humbrol thinner and I ended up talking to an employee who clued me in asking how long I'd had my thinner, saying sometimes if it sits on a shelf for a long time it could lose its potency but I told him it worked great just 6 weeks before. He said the stripping chemical (diluted acetone maybe?) that's in the thinner can evaporate over time in a sealed jar, but not in 6 weeks. So I'm thinking I must have left the jar open overnight or didn't tighten the lid or something because apparently my original bottle has lost its potency. Thanks for your input Brien and Chris, I really appreciate it!!1 point
-
Wow, I completely missed my approval post here, sorry! I saw Joe's first set of feedback and promised myself I would fix up the armour when I got the chance, but never actually revisited the thread until now. I agree with your suggested changes to my fitting; I definitely need to redo some of the strapping that has worn out since building the costume, and tidy up the paintwork here and there. Expect to see my Centurion pictures before the end of the year. Thanks guys!1 point
-
Well after a couple of troops the new elastic in the shoulder bell to bicep connection continues to work flawlessly, I'm very happy with this setup now. The bad news is after 6 troops, one work event, and Halloween, both of my shins have developed small cracks at the tops from the stress of opening them to get them on and off. But not to worry, a little reinforcement and ABS paste and they'll be back up to par in no time. I currently have no events this month so my plan is to fix those and finally take pictures for EIB/Centurion.1 point
-
If you have used E6000 then they will come apart with a little bit of gentle force, then you can clean the glue by rubbing with your thumb or some rags.1 point
-
Woo! Congrats!!1 point
-
Very nice work! As others have said, this should be an easy pass for basic approval. You'll find by wearing it that the build is an evolution. You'll tinker with it a lot after your first few troops as you find ways to make it work better for you.1 point
-
Halloween candy hand out was a success. A lot of happy kids and adults. And a lot of lessons learned. I have a newfound respect for all those that troop. After 2.5 hours of standing, I was in pain, lol. Much respect indeed. Granted my armor is still not optimal for movement until I can adjust it after basic approval. Key takeaways... Wow, it’s hard to see. And my left lens was continually fogged. Not fun. My thighs still need work. My rigging system won’t adequately hold them up. Part of the problem is the rear cut in to my butt cheeks. I guess the option is to trim the back top shorter? I put foam behind the knee plate but alas, dropping thighs didn’t help. Not much movement in the arms. Need to figure out how to gain more mobility. Shins and my fat calves still worry me. I plan on using the hook method. This is the last item I need to do. I just don’t know if it will work well. This next armor party I might ask for more expert opinion. My Velcro system throughout the armor held up surprisingly well. Might add some snaps once final fitting is squared away. Overall I can almost taste approval! Last night was a blast. I’m paying for it in my shoulders today though... Sent from my iPhone using Tapatalk1 point
-
Approved1 point
-
Awesome, I will thank you sir.1 point
-
Submission has been sent! Some minor dressing issues but overall I´m happy with how it turned out1 point
-
Even if all belts were trimmed and sized the same (which they're not) don't get hung up on measurements made in millimeters. Just put the rivet covers where you think they look good based on the reference photos and go on with your life. No one will ever get a ruler out to measure how far off your corners or rivet covers are. -Eric1 point