Leaderboard


Popular Content
Showing content with the highest reputation on 10/28/2018 in all areas
-
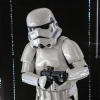
Submission has been sent! Some minor dressing issues but overall I´m happy with how it turned out4 points
-
One of the last outstanding items is done... Sent from my iPhone using Tapatalk2 points
-
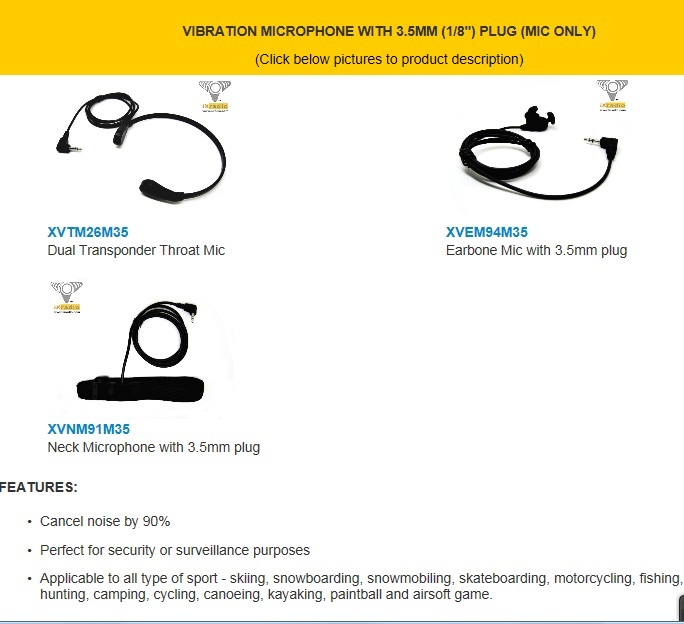
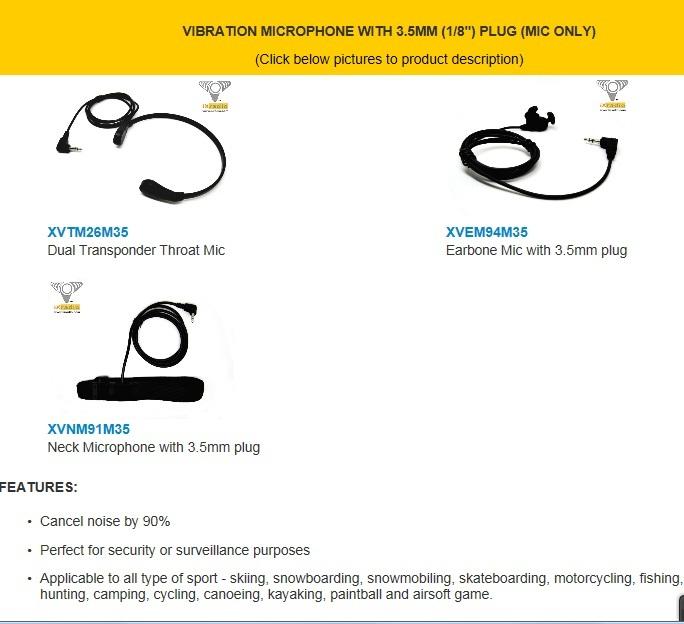
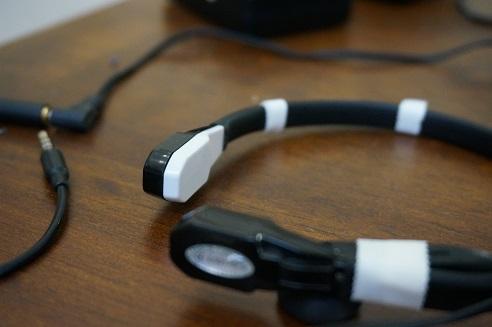
Everyone, There appears to be some interest in finding alternative microphones for use with our armor amp systems. The few users who stated they have used a throat mic did not give too much feedback as to their success, impressions of said microphones or what did they do to make it work. There is a thread on how to rewire a throat mic so it would work with a personal amplifier like an Acker. (thank you for that) I too was one of these people looking for another solution as fitting the unidirectional headset mic that comes the Acker amp worked great for me if the following conditions are met: 1) it actually fits the user's head shape AND inside the helmet comfortably. (I had to rebend the right side of my headset metal holder because the Acker one is TOO big and when I put on my helmet it pushes the mic forward off my ears.) 2) the directional mic doesn't move around or is of the correct proximity to one's mouth. (I used a bandaid to hold the mic to my cheek) 3) when using an iComm, the sound effect level is not user adjustable so if the mic signal to noise ratio is low or inconsistent the squelch noise can be quite a bit louder than the user's voice. Solution? I had a few throat mics that I used with FRS walkie talkies when I used to play airsoft and thought why not try to make them work. Problem was they were all 2.5mm 3 conductor male pin type. Digging through my box of miscellaneous electronics junk and I found a female 2.5mm to 3.5mm adapter I used to use for a wired cell headset back in the day before speakerphones or Bluetooth. I plugged in my 2.5mm pin throat mic into this adapter and then into the Acker and I was in business! I didn't need to wire in a 1.5v power source as mentioned in the other post but that could be beause the Acker supplies power through the mic input port. Of course in this application the ear piece of the throat mic was useless but at least the mic worked. I thought why doesn't someone make a throat mic without the earphone? There would be plenty of other applications for a mic only use right? Since I still had the packaging of the maker of my throat mic, there was the URL of their company and punched up the web browser. Check out the different ones that they offer here at http://www.ixradio.com/shop/computer-accessory/ This vendor seems to change their website every so often. If the above link goes dead just go to their home page http://www.ixradio.com/ and look for the mic only tab. Since it is the same company that makes the one I have and I emailed them about Aker compatibility, they responded shouldn't be any problems. I think we have a viable solution for those looking for an alternative to using an acustic mic. With these no adapters are required since they are 3.5mm male pin. Note that they also carry a few personal amplifiers (albeit pricy) as well, but I could not tell you if they are iComm compatible since the iComm draws some of its power from the Acker. My observations: Using the throat mic with the Acker directly was great. There wasn't any background noise (not that there were any previously using the headset) But the sound level was consistent and I can take off and put on my helmet without any interference or visible wires coming down from my head. The sound quality was a tiny bit hollow sounding so this added some electronic muffled effect to my speech. Not bad and I was pleased. But I'm a Stormtrooper and there should be a squelch click at the beginning and end of my transmission right? Since I also owned the iComm, I plugged it in and gave it another try. Again, I had to experiment a little with the optimum volume level where the squelch effect kind of matched my spoken voice. Here the solution was placement of the mic on my throat as that greatly affected my voice volume. Once I found the sweet spot, I knew I was in business. Now everyone's mileage will vary but for me, I think I found my microphone solution and will try it this weekend at two local Golden Gate Garrison troops and provide additional information. Thanks for your interest.
 1 point
 -
Great work! One of the nicest KB FO's i've seen1 point
-
Super - thanks, Stuart. :-) Have a great troop. [emoji1]1 point
-
Sent from my iPhone using Tapatalk1 point
-
Cool. So... what next? No way you're done.1 point
-
Great work! Good luck1 point
-
Normally the large tab and between 3 to 5 of the smaller tabs, ideal being @ 4 1/21 point
-
Nice work, I don't see any hold ups, good luck with approval1 point
-
Hi! To answer your question, no, the inside of my mic tips are not white. But I will most certainly be looking into making them white. Thanks!1 point
-
Thanks for the feedback!!1 point
-
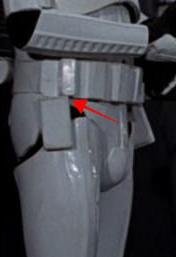
Looking Thight trooper ! The only thing I could see for the moment are your drop boxes , make sure they are vertically lined up with the end of the plastic Belt with minimal gap between belt and drop box ref pic the staff will review your application further goodluck brother !!!
 1 point
 -
https://www.whitearmor.net/forum/topic/42866-how-to-make-abs-paste/1 point
-
You should be totally fine removing the return edge on the thigh armor (in fact a lot of people do, so that it is more comfortable and doesn't pinch). Also, cutting the back of the thighs and calves on the back should be fine as well for approval. Though, since I am not in charge, you should check with your local GML and see what he would think on the matter. If you need the thighs to be bigger, you can remove the back cover strips on them (depends on what they are glued with) and glue on wider ones. But if you do that, it would be best to do that to the backs of the calves as well so that it looks uniform. But, what you suggested should be A-OK for approval. What really effects approval is how the armor fits you, so make it look good and comfortable. (Now I will let the experts cover anything I missed)1 point
-
haha so true. Pretty sure I had a panic attack or two on my first build1 point
-
I'm trooping this Sunday (first TK troop) so I will get some pics done in kit and post them1 point
-
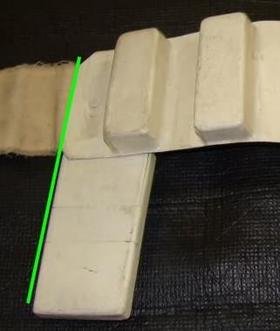
Maybe this helps:1 point
-
Depends on the kit, as Glen mentioned. If there are ridges only on one side, the advice to remove from the back may be valid. But also as Glen warned, don't size these down too much. The size needs to look right along with the rest of the costume (particularly the biceps and shoulder bells)1 point
-
At the upper part of the forearms there is not much space to take of, since there are raised areas for the cover strip, you should better remove on the underside of the forearm if it is needed. I am not sure how much I trimmed of mine on the underside, but I left the upper part as it was, with the appropriate amount left on the upper part 7,5mm on each side for the 15mm cover strip. If one of the more experienced builders wants to chime in, am I right here?1 point
-
Just a tip don't go too small, make sure the sizing of your forearms matches the sizing of the rest of the armor or they could look out of place. My ATA kit has ridges so a there is a minimum size and I have a lot of room in there for my tiny Trex hands, even had to add a little foam inside so they don't roll around1 point