Leaderboard


Popular Content
Showing content with the highest reputation on 04/15/2018 in Posts
-
I wanna play. I'm Steve and I am from the Empire City Garrison. I've been a member of the 501st since 2014. I have always wanted to be a stormtrooper since I was a kid. Finally I started to get serious around 2011 and found the FISD. I did some research and realized how expensive this hobby was so I decided to step away after a few months. I finally made my way back in 2013 and decided it was time. Like many of you it was a very exciting time but also very stressful. I was always wondering if I had what it takes to build a set of armor. I powered through it and haven't looked back. I now have 5 costumes built and am currently working on an ESB vader. Here are a few of my favorite pictures from my time as a member: 1ST TROOP: CELEBRATION ORLAND ECG: CELEBRATION FISD STAFF PHOTO: I'll also leave this link here. This is a little "about me" story that is posted on the ECG blog: https://501ecg.wordpress.com/2017/06/14/why-we-troop-tk-10466/ Steve Sheades TK-104664 points
-
After a few weeks of grinding out loads of inner plastic I did the first fitting test today. 1. The chest piece fits perfect. 2. Arm pieces are okay if a little big but will look fine when attached to chest piece 3. Shin pieces are fine. I accidentally cut the knee pieces off so I can either attach existing ones with velcro or make some out of foam. 4. Helmet is fine if a little big just needs padding out inside (mouth piece will be fitted after painting) 5. Bum and codpiece are okay but need to be attached to chest piece. 6. Big problem with thigh pieces they are way too big so I toyed with cutting them down but they were such a PITA to do I`m going to make some out of foam. 7. All the holes were filled with Polymorph Moldable Plastic Pellets (stuff you melt in water) all sanded down. 8. Gun still needs electrics fitting. 9. Then to paint. 10. Deadline is 4th May for the Blackpool Comicon. The saying is not "Aren't you a little bit small to be a Stormtrooper" its more like "you are the smallest Stormtrooper I've ever seen".2 points
-
I’ve got the knee plate trimmed and test fitted. I think it’s ready for some glue. Sent from my iPad using Tapatalk2 points
-
I gotta' say that being a Stormtrooper has given me experiences that will last a lifetime.... being on stage with "Weird" Al Yancovic, trooping at Disney on many occasions, meeting Brian Muir (the guy who designed the original OT armor) and meeting hundreds of Troopers at Celebration Orlando last year. I started this whole thing a bit late in life, but I'm definitely making up for lost time, lol. That's me standing behind the banner (center) along with a few friends.2 points
-
Starting this thread to document my progress. Also to help others that are thinking about making armor. Hopefully pick up some advice from those who have gone before me.1 point
-
I will start a build thread since I feel I will have more questions. Thanks!1 point
-
Also, your chest bottom return edge looks a little thick, I’d recommend taking a mm or 2 off. Mine’s about 8mm.1 point
-
It looks like the Rogue One E-11 will also appear in the upcoming ‘SOLO’ movie. This is no big surprise as they have hired the exact same prop master again ‘Jamie Wilkinson’ to work on this film. Same costume designer too, this is the exact same Stormtrooper armor from Rogue One and I’ve already seen multiple references with the TK Crystal Patrol Duty pack that we replicated last year.
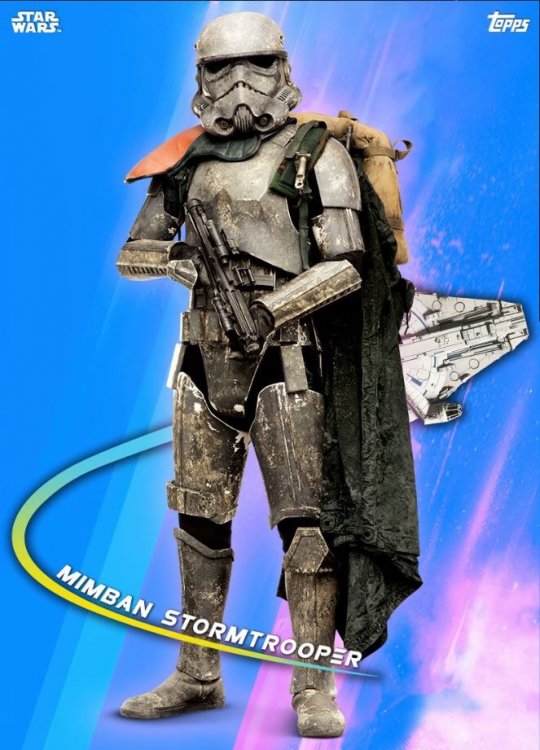
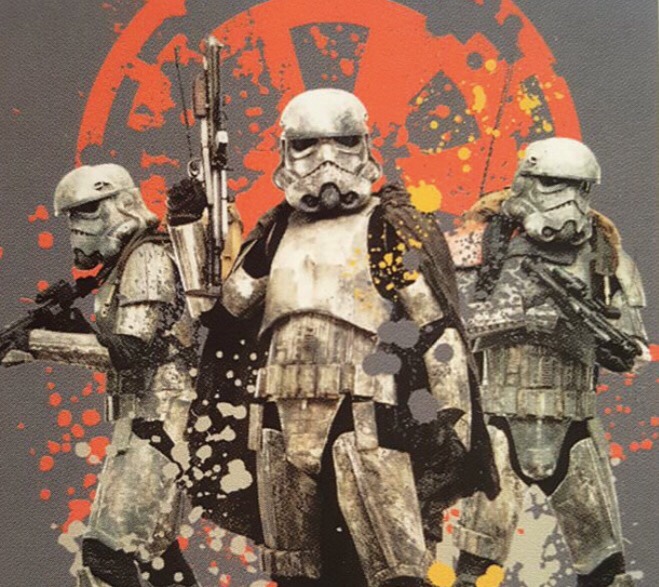
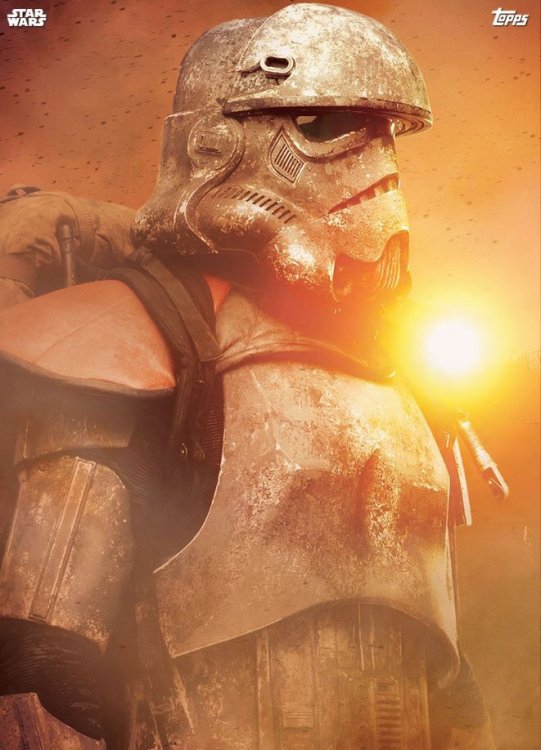
 1 point
 -
Perfect mate, thank you, with you in a moment.1 point
-
I just got a kit from Jimmi this week amd it has it. I asked him about it and he said to fill it in.1 point
-
OK thanks for all the help guys! Here’s the shoulder tabs on the back. I guess it does look like I need to trim to those lines. Yeah I think I’m going to remove all of the return edge on the neckline of the chest. I’ll try the next test fit with the neck seal on also. I’ll make sure to wear my full undersuit on the next test fit. I adjusted the taller brackets on the chest. They were pointing towards the back of the armor (because of the angle of the return edge) and I ended up bending them until they were pointed up (up against the inside of the chest). It made a big difference in lowering the chest down to the ab. Time for a test fit and I think this will help bring the neckline on the back piece up higher. Sent from my iPad using Tapatalk1 point
-
First off I want to echo Jeff's comment Ab to Kidney it's best if you use nylon webbing on the left side, right side make the ab snap functional using elastic or nylon webbing then let the waist belt hold everything in. As for the belt if you have to overlap it that much it sounds like it's too long. That said if you're handy with a sewing machine it relatively easy to fix.1 point
-
I was thinking of getting one of the Pink gaskets as a backup on the warmer days, I'll have to see just how toasty the rubber ones get. The same with the cloak, I had been planning a lighter weight cloak that isn't rubberized canvas to swap out. For chroming, I've decided that I'm going to have a local company vacuum metallize it, the results look really nice from what I've seen. I might have to get a smaller chroming kit for the blaster, since I don't entirely thing they'd be able to work with those intricate details, but I will inquire once some pieces start to arrive.1 point
-
If I had a galatic credit everytime I made an odd mistake I could get another kit Your doing the right thing keep asking questions, we will point you in the right direction1 point
-
Good question Rat, and one that I pondered when I was doing my strapping. The community can correct me if I am wrong, but I believe we are well into the area that is variable so as to accommodate troopers of different heights. This zone is adjusted to comfort so that the chest plate and ab/cod can span the height of the trooper. I do not think there are any set rules....as long as your chest plate still overlaps the ab plate and that the armor is comfortable to wear in the torso. my 2 cents1 point
-
D'Angelo, Without your undersuit on it's really hard to tell if your torso is actually high enough, it looks like it might be too low in the back. The back plate neckline looks really low. I had the same issue with the chest riding too high. I was caused by the brackets and elastics. I ended up swapping out for some straps with adjustable buckles. This will allow you to lower the chest.1 point
-
If it works for you then I would leave it as is, the neck seal will help with some discomfort as well, otherwise you have 2 options: 1# cutting the neckline 2# lowering the chest. As long as you can fit the shoulders in the right location it`s only a plus to have shorter elastics making them less likely to get pulled out by shoulder bells. I´d say trim from the kidney only and there`s no need for a notch unless you really want one. However you don`t have to trim, looks pretty good as is but I agree it would look even better on you with a tighter fit. Keep up the good work1 point
-
1. I keep throwing that back and forth as well for the same reasons. 2. Yes that line on the shoulder you're wondering about is most likely a cut line, but a picture would be helpful. 3. I would leave it. You don't want to have to start making new return edges. Sent from my VK815 using Tapatalk1 point
-
If you want that extra width to make you look bigger, and you already have all the foam in there you can stand, you might want to consider adding a kidney tab to stabilize things on the right side. The tab helps to 'lock' the alignment of the kidney and ab. Here's what I did on mine (there are many ways to accomplish this, go with what works for you!): https://www.whitearmor.net/forum/topic/41502-crickets-wtf-hero-build-even-more-tk-for-the-vertically-challenged/?do=findComment&comment=601645 It also looks like your strapping on the inside of the the kidney rivets might be too long, which is allowing the ab and kidney to move around a lot more than it should on the left side. If you shorten them up a little, that might help with some of the overlap issues. If things aren't fitting together as they are now, a hot water bath can do the trick to get the pieces into better form for your frame. The front and back halves of the armor should meet together nicely without any assistance from the belt to pull things together.1 point
-
I actually found the eyeshadow in my package before I read this and thought you might have left it in there on accident! Thanks Joseph, you're the best. I've had a great response to my question on the HWT facebook group, so I figured I'd share here for future troopers. Seems like dollar-store eyeshadow and charcoal powder are the leading contenders. I'll probably do a nice mix of the two. A great method that was mentioned on FB was to coat a tennis ball in charcoal powder and have someone throw it at you in your armor. Should make a nice impact mark for blaster scoring.1 point
-
I removed my brackets so I could countersink the screws, so I figured it would be a good time to attach the ab section to the kidney since everything was already taken apart. There's only one thing I dislike more than removing and reattaching bracket screws and nuts. Wanna know what it is? Attaching the kidney/ab split rivets! Just a reminder for you Vertically Challenged Troopers: if you're going for Centurion, be sure to line up the tops of the kidney and ab when you get to this phase of the build. How things are lined up at the bottoms of the kidney/ab won't matter because they're hidden by the belt. Now, with that out of the way, here's how I've lined my ab and kidney up! There's a little flaring going on at the top of the kidney in that photo, and I may still reshape it with some hot water. But everything else is fitting together as it should. Want to see how I've got this so nicely lined up securely like that? Well, first thing is that the split rivets were installed on the opposite side. Duh. I've got the areas around the holes reinforced with an extra strip of ABS for strength on the AB and kidney. Each strip is about 30mm wide and cut to fit the kidney and ab. This area takes a lot of stress and can be prone to cracking, so I want it to be strong from the start. Some people like to use nylon webbing for this connection, but I use elastic. The armor wants to stretch and move around when you wear it. If I use nylon strapping, then the holes take most of the stress and can result in cracks where the split rivets are installed. With elastic, the armor has a little 'give' to it, thus reducing the strain on the holes. I use 1" elastic, and it's doubled up- that is, I use two layers of elastic at these connections. I have never had a connection like this fail on my other set of armor. It's strong and flexible and has worked for me, so that's what I use. Now to the other side... Split rivets installed. I covered the rivets with tape on the outside when I hammered the legs down to prevent excess scratching to the rivet heads. Taping them down also helps keep the rivets in place when setting them. And you want to see how I keep the ab/kidney all nice and stable without a belt? Taaa-daaa! A tab! I can't remember who suggested this to me on my first build (I think it was Jorge?), but it helps keep the armor from shifting around on the right side connection and kind of 'locks' the ab/kidney together. Now I know we all have the Han snap and can use that, but why use that puny connection all by itself? I use both. I made two 1"x1" ABS squares and glued them to the ab: one was glued just below the Han snap, and the other was glued to the ridge above where the cod begins on the ab. Then I made a measurement of the length between the outer ends of both the squares, cut a 1" piece of ABS in that length, and glued it to the squares. That creates a slot for the tab. For the tab itself, I cut a piece of thin black styrene (black because I want it to blend in with my undersuit!) in a rectangle shape. I used .04 thick black styrene for this. I measured the width of the space within the slot and cut it to that size. You want enough length on it for it to have lots of surface to glue it to the kidney, and a few inches extra to go into the slot on the ab. Important! Use e6000 when gluing the tab to the kidney! I can't tell you how many times I've need to make adjustments once things were glued in there- which required removal and reattachment of that tab. You've been warned! And that's it for now. Next, time to channel my inner Thor, get out the hammer, and make some snap plates!1 point
.thumb.JPG.b8aa9887d8f9810ffdcb856cc2c71847.JPG)


.thumb.jpg.8eadc48331a3df147c8d5e71dd9b8a00.jpg)