Leaderboard


Popular Content
Showing content with the highest reputation on 03/19/2018 in Posts
-
I got the two small screws that hold the front cover on finally4 points
-
Brackets are all completed! I did not add the extra ABS as a support on the portions where I created the return edge yet, but will be soon.3 points
-
Frank start with hand guards to get used to trimming armour with lexan scissors if that's what you will be using to cut the armour sections. Then probably look at arms and go from there. If in doubt ask for help. No question is a stupid question believe me it's more than likely been asked many times before [emoji6] Sent from my SM-G920F using Tapatalk2 points
-
And for my 10,000 post (Andrew is going to love this one) PLEASE, PLEASE, PLEASE Shoulder Armor CRL update Let's add a L2 section - "There should be minimal gap between the Shoulder armor and the Chest and Back plates" Hopefully this will inspire people to reduce and help alleviate the dreaded shoulder bell gap issue.2 points
-
Waist ammo belt CRL update. Currently the CRL states "The corners of the plastic ammo belt shall be trimmed at a 45 degree angle." I would like to see it say "The corners of the plastic ammo belt shall be trimmed at a 45 degree angle that meets the outer edge of the cloth belt." Can't tell you how many applicant's I've had to suggest make the correction.2 points
-
Cheers mate will give it a go Excited .. cant wait for tk number Sent from my GT-I9505 using Tapatalk2 points
-
Just created my pre approval post. Thanks everyone! Sent from my iPhone using Tapatalk2 points
-
Well what can i say Im cleared How do i edit title lol Still awaiting tk number but cleared all the same Thanks for all the help and advice along the way . Its been a great journey and looking forward to trooping with you all soon Sent from my GT-I9505 using Tapatalk2 points
-
GREAT job on that return, Jeff! Really nice work. You can't even tell it's a DIY return there. Outstanding!!!2 points
-
Thank you Tony and to Cricket as well! I followed your Anovos PDF build for the measurements Tony, and Cricket thank you blazing the path on creating the return edge on Walts kit, and helping me feel much more comfortable with that process.2 points
-
Name: Luc Nakashoji ID: TK-28401 Forum Name: lucnak Garrison: Capital City Garrison Armour Maker: ATA Hemet Maker: ATA Blaster Type: Hyperfirm Height: 5'10"Weight: 170lbsAge: 31Canvas Belt: Local MakerHolster: Local MakerNeck seal: DarmanHand Plates: Justjoseph63 Photos: Front Back Left Right Ab Details Action Shot Cod and Butt Plate Attachment Interior Strapping Helmet Front Back Left Right Mic tip detail Lens colour Blaster Left Blaster Right D-Ring Neck Seal Thermal Detonator Holster Attachment (Belt) Gloves Hand plates1 point
-
Andrew Barton New England Garrison RS Propmasters Helmet: RS Belt: RS Neck seal: RS Boots: RS Height: 5’8 Weight: 160 ANH Stunt Ukswrath, TheSwede, lucnak via FISD thread Sent from my iPhone using Tapatalk1 point
-
This is another good call, thanks Brien. To be crystal clear so there's no mistake as to which belt we're referring to I was state ... L3 - "The top of the ammo belt should sit at or just below the bottom of the central and vertical abdomen button panels"1 point
-
I agree on the shoulder bell gap, if we are quantifying DO asks then what about the belt/ab button height? Something like: The top of the belt should sit just below the bottom button of the central abdomen button panel ? I'd say make it L2 as really how hard is it to make the belt sit higher/lower if you are building your kit... but of course it is up to you guys if it should be L3.1 point
-
Bloody hell you guys, just caught up. On the Hand guards, Centurion is our most accurate level, so lets not dull it down. If you want it, you will do what it takes. Glued as per the movie is my stance. Rivets for the knee ammo pack: cap rivets single or double and split rivets, as long as they look correct on the outside, but my preference will be the Cap. Both Joseph and Trooper bay sells them, so not hard to get but i dont want to see pop rivets with the hole filed in under any circumstance. Tony's comment on the shoulder bells lol, this is my pet hate and we really need to add it to the CRL.1 point
-
Lol I didn’t know what to say when I saw it. I appreciate the help. Wasn’t sure if that post took 5 months to go through with bad WiFi. It’s actually a good tip. Sent from my iPhone using Tapatalk1 point
-
I prefer silicone, I'm all for idealized screen accuracy. If Lucas had access to white Chelsea boots and silicone hand plates he'd have likely gone with those.1 point
-
Congratulations and a great post indeed1 point
-
Unless anyone objects - L2 The rivets used shall be single cap, double cap or split rivets. No pop rivets allowed. L3 (Remove the rivet wordage all together) IMHO I say glue at L3, it's about accuracy and there's not a photo on the planet I'm aware of that shows velcroed hand guards.1 point
-
I think that they should be glued as L3 is meant for higher screen accuracy (unless I´m mistaking?) and the ones in the movie were glued.1 point
-
We really can't do that. We can describe it in words, and if you want a photo we need to have it correctly photoshopped and then i can add it in. So...both? Either way I must have the right text, and then just shoot me the image.1 point
-
Congrats, trooper Dave. If you want to update your title on a PC, just hover over the title and you should get an option to amend it. If you're on Tapatalk, I believe you can go to the first post and you should see "edit post" or "edit title"1 point
-
Whoops - fixed.1 point
-
I have a question: Is this correct or is that last line on L3 supposed to be on L1? Shoulder Straps For 501st approval: These shall be securely mounted in front and may free float in back. They may be affixed with rivets, Velcro, or adhesive. For level two certification (if applicable): No visible rivets are allowed. For level three certification (if applicable): These shall free float in back. These shall be glued in front. The plastic shoulder straps need to be held down in the back via a white elastic band to the white fabric that connects/bridges the chest and back piece. The rear tab of the shoulder strap is optional and may or may not be present.1 point
-
If I may offer an opinion, I would permit elastic straps to hold hand guards on for level 3. Here is my reasoning: If someone spends the extra money to order flexible hand guards and glues them onto the rubber gloves just to reach Centurion, that's great! But as we all know, most Troopers (myself included) end up going with Nomex gloves for comfort. Then, they feel forced to buy another set of guards for the Nomex ones, and relegate the rubber ones to the bottom of the armor bin. Yes, I sell the guards, but if I can save someone the cost of buying a second set that is fine and dandy with me. Also, the part about "painted white" no longer seems to be the case. Many Centurions have used my solid white silicone guards to reach level 3. (Silicone can not be painted). How about: Hand guards shall be of the flexible type, (latex or latex like), solid or painted white, and attached to the rubber gloves via glue or black elastic bands.1 point
-
Thanks mate and thank you for all your advice and help along the way Sent from my GT-I9505 using Tapatalk1 point
-
Congratulations Dave and welcome Trooper1 point
-
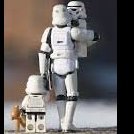
I love these little kits,,,, nothing replaces the real thing but still a lot of fun1 point
-
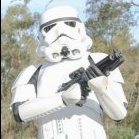
I think your armor looks great. Good luck Luc!1 point
-
Here's hoping your thigh fix goes well! Looks like you're on the right track.1 point
-
Thanks for the feedback, Greg! Yeah, I haven't seen a hard direction regarding the frown, but that's definitely an adjustment I could make. I do think I could take some more return edge off my shoulder bells...may do that for next time! I find that the tension tends to pull the elastic shoulder straps (chest to back) out from under the bridges, but I'm not sure if that will really help. Might as well give it a shot, eh. Now if only I could finish my current build... Hah.1 point
-
Update...here's the latest pics of this build so far. I'm still aiming for Supanova in April to debut this one. Here is everything so far mocked up, I've just stuffed it with batting to fill it out. I completely rebuilt new chest and shoulder armour, and shin guards as Ash is growing out of what I'd done already! Top undersuit is done. Cape is still to be finished; the inner lining, hemming and neck collar still all to be finished, I've only started with the inner lining on one side. The chain is garden cable tie just like the OT screen used suits. The reveal mask, I completely stripped that back and rebuilt more to ROTJ style as well, here it is mocked up on Ash...I've still got to finish the vocoder part and microphones, they are started but not yet ready to be installed...I've just recreated the parts as best I could from found parts or closest match from car shops etc... The suit so far... This has been much harder than building a TK suit, as I can't find anything I can follow for this build. The chest plate, shoulder armour and shin guards are my templates. The undersuit was done from scratch, using existing clothing as templates that I created custom ones from, that's why the legs aren't done yet; I'll start working on those patterns this week. There is a full vader helmet and mask, but that's been completely rebuilt too; the mask anyway, the first one I dropped and damaged too much to try to repair. Lesson learnt, but the second one is better built.1 point
-
Check out the updated CRL! Language now clarifies that this is acceptable as L11 point
-
You're definitely on the good way, keep it up!1 point
-
Beautiful! nice work Jeff1 point
-
Looking very nice, Luc!! The only thing I noticed was the frown paint - it could be brought down a bit more (past the missing tooth). But this is not consistent on all buckets anyways. Also, if you trimmed a bit of return edge from your shoulder bells, they may sit a little closet to you body - eliminating some of the black between your chest and bells. Both of these things are pretty minor and will not affect acceptance. Easy pass, man.1 point
-
Good job. My e6000 wasn’t runny at all. Sent from my iPhone using Tapatalk1 point
-
Hi Chris, any updates to this piece of art?1 point
-
You should be fine with those, Thor. Nice job on the repairs!!1 point
-
Way to go! Never used E6000 so can`t answer that one though, I´m sure someone else will1 point
-
Good luck Luc!1 point
-
Picked up some ca glue and started the repair work on the thigh. Have some abs paste started and hopefully will get them done this coming week/weekend. Sent from my VK815 using Tapatalk1 point
-
True but a GML must follow the CRL - not make their own standard and cover strip sizes are not regulated per the CRL. @willeywonka Keep it close to canon size and you`re good. No harm in contacting your GML though.1 point
-
Hi guys - thanks for your patience. FYI that I've updated the ANH-S, ANH-H, and ESB CRLs to comply with all requests. In addition I have taken all three plus the ROTJ and templatized the common parts. Now, if we want to update a common part like the shins I only need to modify one template file, not touch 3 or 4 different places. Whew! Unless you edit CRLs, this is not a big deal. For those of us that do, it makes maintaining them much, much simpler.1 point
-
Discuss your plan with your GMLs. At the end of the day it is them who will approve, not anyone here.1 point
-
So I am wrapping up gluing my biceps today and am testing out my new magnets that finally arrived yesterday In the mean time, I have started working on fixing the back of my thighs. Here is my progress so far. Here is how they currently look. Try not to vomit... First, I cut down a slightly curved piece of scrap ABS that fit the shape of the thigh to glue on the inside. After this cures, I found other pieces of scrap with a nice flare on the end that will pretty closely match up with the ridge that I cut too far above. I marked off with a pencil where to cut them to size and will glue them to the piece on the inside pictured above. Once in place they should look something like this (but more flush with the trimmed edges because it will be glued on top of the inside scrap piece): ' After that's done I'll make my ABS paste, fill in the seams, sand, and hope it turns out well!1 point
-
Thanks D'Angelo, I'm rooting for centurion and hopefully I make that though bra hooks and brackets aren't required for it. Just challenging myself to do it. Sent from my VK815 using Tapatalk1 point
-
Jaime, It works like a champ. I went with a throat mic personally but a few of our other members have it wirelessly mounted to their bucket.1 point
-
That looks great!1 point
-
Any way you can update your pictures using Flikr or other? I can't see your pics cause of the photo bucket crap... Thank You1 point