
Leaderboard


Popular Content
Showing content with the highest reputation on 12/24/2017 in Posts
-
Minor update: Loosely assembled the helmet, mostly to get tape lines for PlastiDip spraying... Got everything taped off, had a brainstorm about KISS styled helmets, discovered someone thought of it long ago... Sprayed two coats of white... That's it for now, will attempt to get the Dremel going sometime this weeekend.3 points
-
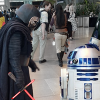
That was some of my Fellow NEG members and rebels from Alderaan Base. It was great to see so many give to make sure this fan got to see the latest SW movie.3 points
-
Best wishes from me and my family, to all of you friends of FISD, Merry Christmas and Happy New Year Tony Inviato dal mio iPhone utilizzando Tapatalk2 points
-
In an earlier post, I mentioned that I was 3D printing pads to reinforce the bracket mounting areas of the torso armor. I took a slightly different approach with this step by choosing to print the pieces, but ultimately it's inspired by others here and I wanted to print them for several reasons: 1. I wanted to have consistent parts that could easily be adjusted by changing the design and waiting 30 minutes for a whole new batch to print 2. I wanted to do other things while bracket pads were magically made for me (got robots) 3. I could do it so why not Here's a look at the two different versions I designed to go with the bracket set (for the long and short brackets): I printed them in white ABS on my Prusa i3. I have a few other printers but this one is my current favorite. Below is a shot of the printer laying out the first layer of some initial test prints (I ended up changing the hole diameters to make it easier to pass screws through). And here's an example of one of the final short pads (15 of these were needed overall and 3 long ones for the chest): And here's a picture of how they fit between the armor return edge and the metal brackets with the hardware roughly in place (not tightened down or glued at this point) With all of that work done, my plan is to heat some of the brackets so that they better follow some of the armor contours using the hot water method since this is ABS! That shouldn't take long, then I'll glue them all in with E6000 and use magnets/mini-clamps/bracket hardware as clamps in order to secure them all. Hope this makes sense and gives some other people ideas, -Dana2 points
-
Well everything worked out guys, thanks for all the advice. Got new shoulders, body and thighs sent to me. Everything fit for most part and wore it at work at my movie theater. All the kids loved it. Shoulders in pic are old shoulders. Working on replacing them with new ones soon. Sent from my iPhone using Tapatalk2 points
-
Sent from my iPhone using Tapatalk2 points
-
Got some painting done, side closure, cod eleastic and that`s it for today - Merry Christmas2 points
-
Just a quick picture of the torso and arms. https://imgur.com/DhlQdgC It's coming together!2 points
-
NOTE! This interest list is for Garrison Titan members only, e.g. to track a potentially large garrison order. This thread is to keep track of what everyone is ordering and who needs to be paid for what items. We'll start with armor kits, and follow up with accessories later. Currently, we are looking at BSP First Order Stormtroopers. We are aiming to place our order in mid-January. ARMOR 1. Kay - [PAID] 2. Aidan - [PAID] 3. Sean - [PAID] 4. Wendy - [PAID] 5. JT - [PAID] 6. Frederik - [PAID] 7. Kevin - [PAID] 8. Susan - [PAID] 9. Neil - [PAID] 10. Trina - [PAID] 11. Ash - [PAID] 12. Thomas - [PAID] 13. Joe - [PAID] 14. Ryan - [PAID] 15. Krystle - [PAID] 16. Olivia - [PAID] 17. Rob - [PAID] HELMET 1. Kay - ANOVOS [PAID] 2. Aidan - ANOVOS [PAID] 3. Sean - ANOVOS [PAID] 4. Wendy - ANOVOS [PAID] 5. JT - ANOVOS [PAID] 6. Frederik - ANOVOS [PAID] / FRENCH GARRISON [PAID] 7. Kevin - ??? 8. Susan - ??? 9. Neil - ??? 10. Trina - ??? 11. Ash - ANOVOS [PAID] 12. Thomas - ANOVOS [PAID] 13. Joe - ANOVOS [PAID] 14. Ryan - ??? 15. Krystle - ??? 16. Olivia - ANOVOS [PAID] 17. Rob - ANOVOS [PAID] GLOVES 1. Kay - ImperialBoots (Secondhand) [PAID] 2. Aidan - Endorfinders [PAID] 3. Sean - Endorfinders [UNPAID] 4. Wendy - Endorfinders [PAID] 5. JT - Endorfinders [UNPAID] 6. Kevin - Endorfinders [UNPIAD] 7. Susan - Endorfinders [UNPAID] 9. Neil - Endorfinders [UNPAID] 10. Trina - Endorfinders [UNPAID] 11. Ash - Endorfinders [UNPAID] 12. Thomas - Endorfinders [UNPAID] 13. Joe -??? 14. Ryan - Endorfinders [UNPAID] 15. Krystle/Kai - Endorfinders [UNPAID] 16. Olivia - Endorfinders [PAID] 17. Rob - ???1 point
-
Between 15 & 20 garrison members are looking to build FOTK suits. This will be the place-holder where they will chart their progress. Stay tuned1 point
-
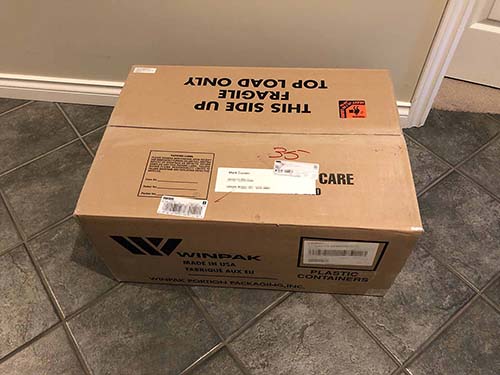
Ok, so it's Friday, three days before Christmas, and I'm jumping up and down like a school girl yelling: OMG, OMG, OMG, OMG!!!!! Santa came a few days early this year!!! Now I'm going to summon up ALL of my strength....I will NOT open the box. I'm wrapping it and putting it under the Christmas Tree. My daughter (age 6) will just have to deal with the fact that Daddy's Present from Santa is bigger than hers. Mark
 1 point
 -
Merry Christmas, troopers.1 point
-
Amazing what semi-gloss black and flat black and careful masking can do for a lowly Hasbro toy.1 point
-
You're probably right. I've been tweaking my armor after every troop (fitment issues, things breaking, etc.) and this is after EI/Centurion. Plus, I keep finding things to put on the to-do list like painting the helmet interior black, electronics, a second blaster... It never ends.1 point
-
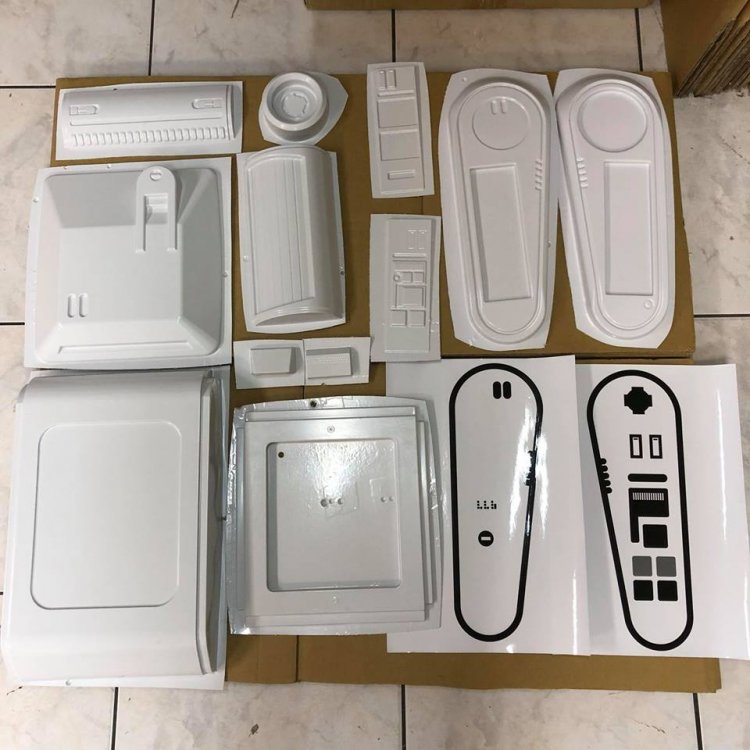
I'm (very slowly) working on a FO TS build. I got my backpack kit from Backstage Props earlier this week but haven't started building yet. The quality is very good and comes with a decal sheet.
 1 point
 -
I'm pretty sure now that my armour will be an ever evolving thing. I have lock nuts ordered for my strapping brackets. When they are in I will countersink the screw heads, install re-enforcing strips and replace the normal nuts with the new ones. I need to install something in the chest to hold my Aker amp and iPhone with TrooperTalk with an external battery for my phone. I learned from TK-2759, Dan, that a plastic bag for one's phone is a good idea to prevent it from getting wet from sweat. New, shorter straps for my kidney to ab connection will be needed and I will need to loose my Christmas weight. I know now that I could have left an extra 1/4" on my kidney plate for my girth. Frankly, it will be easier to loose the weight than to add a shim. This won't be hard with my job starting up again at the end of January. Very physical. No need for a gym membership when I'm working. The elastic strapping from my right chest to back will need to be redone and the ribbed cover strap will need to be curved a little more to sit nice and flush on my shoulder. I have another troop booked before the end of the year and another one for January 21. I'm so looking forward to meeting more people in my garrison and being able to contribute to the community. Merry Christmas & Happy Holidays everyone! Sean TK-191651 point
-
Merry Christmas to you! And I hope you had a fabulous year.1 point
-
Hey David, welcome and thank you for your EIB application. Let's have a look at our final applicant of 2017. CRL and EIB Application Requirements: All submission photos have been posted and we have great news, your armor displays all the necessary elements to qualify for Expert Infantry. Congratulations! Other-Armor Fit/Assembly: In this section we review observations made by your fellow troopers and ourselves. Some observations may lead to suggestions to improve the overall look of your armor. We have a couple minor suggestions to mention here. Areas to work on to enhance the overall accuracy and look of your armor. Starting at the top and working our way down the right side tear stripes could be a little thicker, especially when compared to the left. Little extra paint should do the trick. Left side looks ok Reference photo While in the area it looks like a single tube stripe is trying to escape the fold. We're suggesting get this critter back in line with the rest. Reference photo Next up it looks like your back plate is overlapping your Kidney, it should rest on top of it. A simple strapping adjustment should do the trick. Reference photo Nice work on the Ab button details, we only have one suggestion here and that is there's to be no return edge on the Ab plates, specifically the vertical button plate. The edges should trimmed similar to the reference photo provided. Reference photo Next up the Thermal Detonator looks a bit long. Total overall length should be roughly 7-1/4"-1/2". We've provided a reference photo with the TD component specifications to help guide you. Reference photo Not related to the armor but worth mentioning is the scope details on your blaster. There should be less brass showing. Were suggesting you darken the circled area to match the blaster body. Reference photo Centurion Suggestions: Because Centurion photos show much more detail than EIB, items pertaining to Centurion might be seen there and not here. We try to point out all we can from what is seen but the final accuracy is the responsibility of the trooper. From what we can see, the only item that stands out is your drop box positioning. They should be aligned with the outer most edge of the ammo belt and just below it with little to no gap. Gluing the drop box strap to the cloth belt should help keep them in place. For level three certification (if applicable): Drop boxes are vertically aligned with the end of the ammo belt with minimal gap between belt and box. Reference photo That's it David, congratulations on a great build . We hope to see you next year at Centurion.1 point
-
Merry Christmas, Tony. :-) Sent from my iPhone using Tapatalk1 point
-
Merry Christmas to you all as well! [emoji869][emoji38] Sent from my iPhone using Tapatalk Pro1 point
-
Merry Christmas to you, Tony!1 point
-
For you perhaps. Mr. "I'm taking a break from armour to exercise" I think my straps have stretched a little because of a few too many holiday treats. Maybe.1 point
-
Merry Christmas from from myself and the Troopacoola family! Sent from my SM-G920F using Tapatalk1 point
-
Ok, so I did all of the countersinking yesterday and it was much easier than I thought, I was more worried about how careful I would need to be but this Anovos kit plastic drills so nicely. I haven't had any bit walking, or anything (granted I use good bits in new-ish condition). I used my cordless drill and a 1/4" countersink bit: I went slow so that I could see about how much material needed to be removed from the first hole as I frequently checked the fit of the screw until it sat pretty close to flush. It really wasn't much work and it looks SO much better to me! Below you can see a finished countersunk hole on the left and what the screws looks like installed on the right: -Dana1 point
-
Elastics works just fine1 point
-
Thanks for the tip, I have actually watched them but that was before I got the kit, and think I skipped over the belt part thinking that it was going to be assembled. I will have to revisit those videos at some point.1 point
-
If you haven't already check out tk-1636 on YouTube he does a great video series on an ANOVOS build. So glad they stopped prebuilding the belt. I heard they also fixed the bucket screws. Sent from my VK815 using Tapatalk1 point
-
Yeah I was kind of surprised when I opened it earlier today. Was expecting what others had gotten in the first version from posts or unboxings I saw. But at first glance it seems like the helmet and the belt are the only 2 major differences I've noticed. Will have to look over it in more detail when I get into the build.1 point
-
The belt is unassembled - sorry, forgot you had asked about that.1 point
-
Here's the inside of the new anovos helmet. Trying to get the right placement with the included padding, might not need to use the chin strap after all.1 point
-
Hey Tom looking good and great work so far.1 point
-
Merry Imperial Christmas, Daniel!1 point
-
Step 16: Adding mesh behind the teeth (hot glue gun) Cut out a piece of screen material (found at the local hardware store). I used the type for heavy-duty pet protection, as it is a coated nylon and has a rubbery feel to it. I will typically cut out a wide rectangle, and then cut areas to better match the frown shape. Using hot glue, I put a vertical stripe directly in the middle of the center tooth, making sure to keep the glue away from the edge of the tooth. At this point, I push the mesh into the glue, holding tight at the top and bottom until it sets. I continue to glue one side, then the other, starting at the top of the frown area, and finishing the bottom, being sure to wrap it to the curves of the helmet as much as possible. Ideally your mesh should be in line with the teeth, with the square openings parallel to the teeth, rather than at an angle. Step 17: Adding the lenses (pencil, paper, tape, sharp scissors, hot glue gun) There are a ton of different tutorials out there for adding lenses. If you like any of those, awesome. This method is easy and does the trick. It is, however, a more permanent method of attachment but I haven't found the need to remove lenses from any other bucket as of yet. Using a pencil, create a rubbing on paper to get each lens opening cut this out, and tape it to your welding screen cut 1/4"-1/2" around the outside of your rubbing line test fit glue it in place with hot glue, making sure to keep the glue away from the opening edges as much as possible use lots of pressure while the glue hardens, 2 minutes or so We're getting really close!!1 point
-
I know this won't happen until the new year but my EIB request is in. This has been such a great experience. I can't believe the top two items on my bucket list have happened. Stormtrooper armour and I'm in the 501st.1 point
-
The wife has imposed a build-ban until after Christmas. Something about spending attentive and quality time with family or whatever - I really wasn't listening that carefully as I just downloaded TrooperTalk and was trying to figure it out. Anyway, Merry Christmas and Happy Holidays everyone!1 point
-
For those interested, this print hanging at my workbench is from Tony at Run Riot Media: Sent from my XT1254 using Tapatalk1 point
-
Hey mate. Great thread so far. You’re ahead of me but I thought I might be able to provide some (admittedly noob) advice. With your thighs, they look quite long to my eye. They seem to sit quite high up in your groin and possibly even cover your knees a bit? Almost as if they are resting on the top of your shins. It is hard to tell from the photos but I wonder if you may benefit from removing some material from the tops of your thigh pieces but maintain the current shape. Do you have a garter system to hold them in place? The teeth issue confuses me, I’m not sure if I’ve painted mine correctly either. Sorry! Now this one is hard because I can’t quite tell in your photos, but it seems to me that your cod is either sitting a bit low or your kidney plate too high. These two pieces should marry together nicely, with the six split rivets aligning. Depending on the level of accuracy you are going for they don’t need to be touching but, I believe, should align horizontally. There are no end of pics on this throughout these forums. If I wasn’t on my iPad I would try to link a pic for you. But try this thread: So much useful information here. I’ve been using this a lot myself. There are some handy diagrams for attaching holders there too! Hope some of that helps.1 point
-
Okay, so that's at least one set of cover strips I'll need to redo. Thanks.1 point
-
Decided to start with the tube stripes before cleaning up the pin stripes to make the helmet look some what finished...some touching-up and they will do1 point


.thumb.webp.27f7939d37871f319ff836257d4a3668.webp)

