Leaderboard


Popular Content
Showing content with the highest reputation on 10/12/2017 in Posts
-
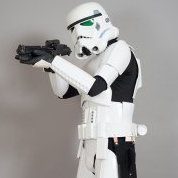
Sneaking in here with somewhat of a strange first post, but I think I've passed through the site quietly more than a few times picking up bits and pieces of information working on a project, but thought it was time I just and say hello. I'm a design engineer / materials physicist by profession with a specialty in developing theories into application. Most of my time is spent integrating things together with an absurd amount of constraints, but I love what I do, which is why it's also something I do in my personal time. That being said, I've been really attracted to this idea for a while: to make something that doesn't just look like it's real but also works like it's real; to smudge up that line that goes between science fiction and science fact. Which leads me here... What I'm Proposing: I would like to see about designing and possibly prototyping a system which could either be built into a new helmet or possibly retrofitted into existing helmets. Developing that system to address different shortcomings of current helmets. And do it in an economical way that could be put together into a simple kit. Or.... I want to make the helmets work closer to the way they should work if they were military issued. Plus, you shouldn't try to make a better hammer, without talking to a carpenter. So in effort to do that, I'd really like to get some input from anyone willing to share. I've got a few questions I'm hoping to answer, but also see if I'm missing some things that should be included. What kind of field of view would you really want to have? Full 175 degree horizontal and 135 degree vertical FOV isn't exactly an impossible thing to accomplish using a flexible OLED, nor is it that expensive as the screen component would cost about $9 - $10; however, this would be more prone to fish eye curvature, and would probably through off depth perception. Sacrificing some of that down to say 120 degrees / 90 degrees would be able to give a more 3D effect to establish depth and minimal distortion. What about incoming sound? I've heard / read numerous times that it's really hard to hear what's going on around you. Bringing external sounds in wouldn't be much trouble to do at all, but thanks to this wonderful modern day we live in, it would also be possible to filter out crowd noise or would it be better to try and just hear things around you as if you weren't wearing the helmet? Cooling is the other one I see as being a huge complaint... Before we even talk about adding in these kind of extra electronics. Personal opinion, I don't like fans... Spinning blades in tight quarters near your face... That being said, weight is going to be the issue with alternative methods, and power... There are passive methods of basically hiding a heat exchanger in between everything but it may not help enough during a Florida summer. There are active ways of cooling that essentially would be putting a tiny air conditioner in the helmet that could handle a Death Valley noon day picnic, but then power would become the problem maybe ending up with 2-3 hours or so before needing a recharge. And what about heating, would there ever be a need to actually warm things up in there? These are just some basic questions from my end, but I'm also really open to hear about what other things people might want. Things like switchable from electronic display to normal in case of power failures or just because are things I do consider, but I'm totally open to even crazy ideas like, could a respirator be added. Because if it's wanted / needed / etc. then why not. Plus, right now I'm at the drawing board so it's easier to put it in and figure out how to make it work. As this process goes on, I'll start to focus on addressing how to many it fit for different sizes and things like that, but again, right now it's "what's on your wish list"2 points
-
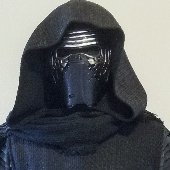
I've been able to make good use of the good weather and some occasional free time to move this project along. I had also been waiting on the arrival of some paints from interstate so the stars aligned this week! First job was to give the yoke and bells a good sand and wash. A relatively quick and easy job. I should note that the spares I received from Jim are v5 and are so much lighter and smoother than my v4 kit. He and his team have worked miracles! Next up I was able to lay down a primer/filler layer... And after a good dry I was able to tackle some of the pinholes with 3M Glaze and Spot Putty. I LOVE this stuff! So good to work with... A day passed and I was able to give a wet sand... Before hitting with another layer of primer/filler the next day... One more round of bondo that night... And after a further wet sand I was ready to lay down the matte black on the bells. I decided to use the Rust-oleum Universal Flat Black for no other reason than I used the same brand/type in White Gloss for my kit. The paint went down well... ...and after two coats and half-an-hour of waiting I was left with deeply satisfying black matte bells... It has been five days since I started but really a matter of an hours work in total. I'm loving this mod! Decals of the First Order insignia have been ordered from an eBay vendor I have been dealing with for a while. Have ordered both 2.5" and 2.75" as I'm still not convinced which is right for the Jim bells. In a week or so I'll know! Latest news on the new helm is that, all going well, it is just weeks away. That will be a more complicated paint exercise but having already successfully resprayed an Anovos standard bucket I feel prepared for what is to come. And then there's the matter of the Laser Ax. Obviously not required for approval but a necessary part to complete this build. After an update today I believe it will be heading my way this weekend2 points
-
Greetings everybody! Probably it is my first topic on FISD, despite that I approve my stormtrooper in 2013 +)) But after conversation with Daniel during our trooping in Moscow. He asked to give a look on 3D model of stormtrooper armor that I currently work under in my workshop. So there is our current progress with 3d modeling of helmet and armor. After "approved" parts I will do first 3d prints of it and then will think cast of vac forming it. So there is a links on: Helmet ------------------- Armor ------------------ Armor in piece------------------ We use my photos from celebration London, photos from Visual Guide, Hot Toys figure & Anovos manual for @part sepereation@ to create this pieces. Probably we miss something or don't see. And I know that many people don't like look of new armor, but for me it is really like HD version of OT armor. But I will be very grateful for help, view and critique notes Best regards, Andrew TK-250071 point
-
Well after a lot of reading and research both on here and the UKG I finally took the plunge, well read that as I've dipped my toe in the water, what I mean is I've ordered and now received an ABS ANH lid from RS propmasters <br><br> It's in kit form so I need to cut our the eyes and teeth, fit the ears and the thing that's worrying me most, paint the tubes, well that will come later. <br><br> I'm thinking if I can do the lid then hopefully, and that's a big hopefully for a small guy, I may be able to trim and put together the armour. Crickets build in here has been an inspiration, thanks <br><br> I'm so pleased that I went with RS, they are a northern business in Manchester which is only 20 miles from me, so it's good to support local businesses. I must admit I was blown away, in a good way when I opened the box on Christmas Day, yes the lid is wonky , yes it's bumpy and yes it's awsome , I am well chuffed with it and can't wait to get the armour, but first things first, I need to build my lid <br><br> This is the pic I took after opening the box, hopefully it will work<br><br> The next pics I have pencilled in where I think I should cut the teeth out and the eyes, the second pic has two lines on it at the top, I'm not too sure whether to cut the top or bottom line, your thoughts are appreciated <br><br><br> I intend to drill some small hole some in the teeth and eyes with a hand drill and then cut them out with an x-acto knife, I will post some WIP pics . The guys on the UKG have been kind enough to tell me what colour humbrol paint to get for the lid, so that will be my next purchase.<br><br> I would like to say thank you to all members on here, especially those who have taken the time to pull together how to threads, WIP threads and instructional videos plus the do's and don'ts when it comes to purchasing your TK armour, you have all helped a complete novice to take the first step toward success becoming a member (hopefully) of the 501st, thank you all1 point
-
Basic Information Name: Alberto Oscarelli FISD forum name: Albaz 501st Member Page: http://www.501st.com/members/displaymemberdetails.php?userID=24123 501st ID: TK-20055 Garrison: Empire City Garrison (NYC-US) Mandatory Information Armor Maker = AP Helmet Maker = AP Blaster Type = Hyperfirm E-11 EIB application/approval: Optional Information Height = 6'1" Weight = 173 pounds Boots Maker = TK Boots Canvas belt = AP Hand Plates Type = TrooperBay Electronics = iComm + AKER Neck Seal Type = DarmanProps Holster Maker = TrooperBay Corrections (belt, lens, drop box, and forearm) - Added a second layer of acetate lens, moved belt 1/2 up, and glued straps of drop boxes to belt to maintain alignment. I tried to move the forearm down as much as I can. Unfortunately I have long arms and this is the best I can do. also...I had to take the pics on my own, so every time I would get in position they would slide up a little since I had to bend my arms to reset the armor ;-P1 point
-
The drop box alignment is correct in the second photo - aligned to the ends of the belt. I don't think there's a required way to fix the elastic to the belt - I did an elastic loop but also used E6000 to keep it aligned to the belt ends. As for not being able to reach your shoulder bells - have you considered cutting the first notch off of your forearms? It is totally approveable up to Centurion (see @Cricket's Centurion approval) and makes bending your arms much easier. The yellow trim line for your thighs looks fine to start - you might need to refine further depending on if it overlaps the butt plate. Finally, your chest looks a bit on the wide side - maybe heat bend/boiling water to shape it?1 point
-
Hehe. Cheers pal. :-) Sent from my iPhone using Tapatalk1 point
-
Good luck with approval1 point
-
I did all the straps and connections before painting. I just masked them off to protect from any stray paint [emoji106] Sent from my iPhone using Tapatalk Pro1 point
-
lol, I guess it's built in that I have you to benefit from but, um, have you seen how much 'green stuff' I have on my build! - 'hands like a surgeon' (Brian) hands like a surgeon Dan, you got this!1 point
-
Yeah, the benefits of stretching out my build is to learn from others - another reason to stay connected! Yeah, I'm turning to the reference and to Tino for accuracy myself.1 point
-
Yup me too. had a large laundry basin installed so can wet sand inside the house. hehe. The Bathtub was pretty funny Matt. ahaha!1 point
-
Fantastic progress and color achieved from that Rustoleum Universal. So much that ill be switching to use that on my kit now. Great work thus far1 point
-
I have some suggestions to put forward for the Under Suit. Under Suit L1 - Black non-textured material, either one-piece or two-piece construction with no visible zippers or logos/designs. L2 - Black rib-knit fabric, either one-piece or two-piece construction with no visible zippers or logos/designs. - At minimum there is rib-knit fabric present in all exposed areas between armor pieces. L3 - Stitching shall be present between the ribs on the rib-knit fabric.1 point
-
they just got back to me: the bucket is slush cast resin, shipping is $30 (to Chicago), 2-3 days1 point
-
Excellent thank you Paul1 point
-
just found his post on his page...they look great! I'd think I could get it cheaper/quicker all together vs Jim's...since this is in the US already...1 point
-
Congrats trooper! Welcome to Centurion.1 point
-
I'll post a few photos a bit later today.1 point
-
Congratulations Alberto! Looking sharp Trooper!1 point
-
Ah yes... I think my eagerness to get some bits together early on meant that I failed to check and just followed the pre-drilled pilot holes. Your scope rail is probably the same, Jesse, so you can learn from my mistakes. lol I've looked at some other builds and some are slightly different, for example with the end of the scope itself in line with the stock bolt, rather than the scope foot; however, the more accurate reference pictures go with Tino's positioning. No surprise there. ;-) I'll have another look when I get home. Any tips for filling a hole in metal? Still greenstuff? Thanks guys. I've booked a half day tomorrow so can hopefully make some solid progress. :-)1 point
-
Congratulations on all your work on achieving level 3 Centurion! Well done and well deserved.1 point
-
Looking good! That is the same paint have been planning on using so I'm glad to see the results! You got this! Can't wait to see more.1 point
-
If you are looking for maximum movie accuracy go for RS. Shepperton is ok but RS is way more accurate.1 point
-
OK, time to resurrect this since someone is working on approval at the Legion level. I've basically ignored this since there hasn't been an applicant, but will be reviewing it in detail now that we'll need a CRL in. I've read through what has come before and will start working on a CRL wiki entry this weekend, just like we did for the TLJ, TLJ-E, and R1.1 point
-
Henry - thanks for breaking this down and shepherding the changes. CRL is updated based on the latest iteration. https://origin-wiki.501st.com/databank/Costuming:TK_rogue_one1 point
-
I've wet sanded pieces in my sink before, was too cold to go outside and I don't have a bath ;). Well done1 point
-
From motels to bathtubs...you are a true innovator! Great work1 point
-
Good luck with the approval, Kris!1 point
-
L1 -Based on a real or replica Sterling Airsoft Gun, Sterling Sub-Machine Gun, scratch-built, or a modified commercial toy Stormtrooper blaster. -A small flashlight shall be mounted on the right side of the blaster centered over the T-Tracks. L2 -Blaster shall be based on a real or replica S&T Sterling L2A1 AEG Airsoft Gun. (Folding Stock does not need to function) -D-Ring shall be present on the rear end cap. -Scope shall be a real or replica M.H.R. (Minneapolis Honeywell Regulator Co.) M38 Telescope. 1943 model is preferred. -Counter shall be a real or replica Hengstler 400 Series counter. Eagle logo is preferred. -Power Cylinders shall be mounted on top of the magazine well. R1 style power cylinders are preferred over ANH style. -6 rows of T-Tracks cover the Sterling receiver holes except for the lower left row with the bayonet lug. -Flashlight shall be a real or replica Element M300A Mini Scout Light. L3 -Scope shall be a real or replica 1943 M.H.R. Co. M38 Telescope, 1942 is not allowed. -Counter shall be a real or replica Hengstler 400 Series counter with Small eagle logo. Large eagle logo is not allowed. -Power Cylinders shall be R1 style, ANH style is not allowed.1 point
-
Whew [emoji28] Sent from my iPad using Tapatalk1 point
-
No you're right it doesn't I was just trying to be thorough. 1943 has a wide front foot, 1942 has narrow front foot. L1 -Based on a real or replica Sterling Airsoft Gun, Sterling Sub-Machine Gun, scratch-built, or a modified commercial toy Stormtrooper blaster. -A small flashlight shall be mounted on the right side of the blaster centered over the T-Tracks. L2 -Blaster shall be based on a real or replica S&T Sterling L2A1 AEG Airsoft Gun. (Folding Stock does not need to function) -D-Ring shall be present on the rear end cap. -Scope shall be a real or replica M.H.R. (Minneapolis Honeywell Regulator Co.) M38 Telescope. 1943 model is preferred. -Counter shall be a real or replica Hengstler 400 Series counter. Small eagle logo is preferred. -Power Cylinders shall be mounted on top of the magazine well. R1 style power cylinders are preferred over ANH style. -6 rows of T-Tracks cover the Sterling receiver holes except for the lower left row with the bayonet lug. -Flashlight shall be a real or replica Element M300A Mini Scout Light. L3 -Scope shall be a real or replica 1943 M.H.R. Co. M38 Telescope, 1942 is not allowed. -Counter shall be a real or replica Hengstler 400 Series counter with Small eagle logo. Medium or Large eagle logo is not allowed. -Power Cylinders shall be R1 style, ANH style is not allowed.1 point
-
Thanks so much for sharing your piece! It is a big help. Thanks also for the compliments; I have to say, I've gleaned much from those who have gone before me, appreciate it lots1 point
-
Here's a photo of that piece if it helps.1 point
-
I might be able to have a cobbler shave them down.1 point
-
-------- you can kinda see how the whole lower area is assembled in this picture.1 point
-
Congratulations and welcome to the ranks trooper1 point
-
No problem. Yes you can purchase individual pieces. Just give Mike some time to respond. He always does but can take a few days.1 point
-
Congratulations trooper and welcome to the EIB ranks1 point
-
Kick A.ss Matt!!! another Executioner to watch and congrats on the BBB!. For filling the gap in the rear, i would suggest using ABS opposed to PVC. only reason why i say that is that ABS will flex a bit, where PVC when flexed will snap and shatter. Andy1 point
-
Hello! 1. Alberto Oscarelli 2. Centurion #352 3. TK-20055 4. letter size 5. Tony http://www.whitearmor.net/eib/certificates/20055-centurion.png1 point
-
Thank you for your kind words, I’m glad you have enjoyed my thread and the odd diversion I’ve been on.... Not this year. But we went here last year... thought you might like From the other side And saw this Just a little diversion..... back to imperial duties now Sent from my iPhone using Tapatalk1 point
-
I do allot of R&D at work; it's required for the job and like part of my DNA now. Glad to share my E-11 research for you and others to benefit. Thanks for the photo Tennant; I'll add it to my archives1 point
-
Yeah Tino, I agree - awesome seeing Dan trail blaze that mod with the t-tracks1 point
-
This is so amazing. I've got a DA Props stunt on the way. I'm going shopping this weekend to get it all together for when my kit arrives! Thanks to everyone who contributed and especially to Joseph. This thread saved me hours of research and headache.1 point
-
The first thing I noticed was your belt doesn't look like it is RS. And the holster is to far back and is set up Hero style? Besides that it fits you well.1 point
-
Looks like a solid start, Kris. :-) Sent from my iPhone using Tapatalk1 point
-
https://www.dropbox.com/s/gx4bo0qi43doawa/IMG_7227.jpg?dl=0 ok this isn't approved...but still fun.1 point
-
When it comes to Christmas parades, all bets are off! We did these for the Clermont (FL.) parade last year, and this year we are doing elves. Always nice to change things up a bit for the holidays.1 point
-
Here is my finished version 2 armor of jims Sent from my SM-G930V using Tapatalk1 point