

msouza
-
Posts
761 -
Joined
-
Last visited
Content Type
Profiles
Forums
Gallery
Articles
Everything posted by msouza
-
 Hey Josh, Can you upload a close up of the crown on your helmet, the one thing I can’t tell from the photos is if the gray on the frown extends to the lip or if it’s just a shadow? (Anovos is notorious for this) but no worries nothing a little mineral spirits and a toothpick can’t fix . Take a look at the attached and you’ll see what we’re aiming for. Sent from my iPhone using Tapatalk
 -
Thanks for the quick response & I’ll be with you shortly.
-
Josh, Thanks again for your application for EIB & like gmrhodes says "just a couple of things you could improve on to really shine:" Before we get into details I would like to see a couple more photos. 1) The right side of the helmet, specifically the ear and showing all three screws 2) Thermal Detonator with a tape measure or ruler showing the lenght 3) Close up of the Ab buttons
-
Hey Josh, Thank you for your EIB application, I will be going over it and to make sure all the required photos have beed submitted and then we'll proceed from there.
-
The best way would be to isolate the mic from the speaker, you'll run into your biggest problems when your mic is able to pick up what's coming out of your speaker.
-
Welcome to the ranks Trooper!!
-
Digz Graavz ANH Stunt - AP Pre-Approval Request
msouza replied to Digz Graavz's topic in Request TK Pre-Approval
Like gmrodes has stated, the belt box alignment is off a bit and that could just be an adjustment after suiting up and some foam to keep the sniper knee from going under your thigh. and Adjust your strapping on your thighs to make them as close in height as you can. -
Cool model, I like the bearded look! Some well placed supports will give him a nice clean shave!
-
I like how you kept the same feel & style as the 501st merch as well!
-
Same setup as gmrhodes, Icomm running through a 1505. Two years and still going strong.
-
Welcome Basti! The files look great so far. Be sure to check out our 3D resources that Dan listed above. I have 3 CR-10's but I will tell you that unless you plan on molding and vacuum forming kits for sale I'll be much quicker and more cost effective to go with an approved vendor. Don't forget to factor in your time post printing for sanding and sanding and then wet sanding some more before you begin sanding lol, best of luck with your journey! The files really do look amazing!
-
Coming Along nicely! Any questions ask away..
-
Im also having this issue. Thanks
-
Shoot me a pm on what your looking to do Joseph, i'll see if I can help you out.
-
No worries Martin, Like most have said you need to trim your biceps a bit. No worries about trimming or cutting your armor we've all had that exact anxiety but a couple deep breaths and some measuring and you'll be fine. Trust us we become the largest detachment for a reason. On your Biceps the two raised piece that butt up against each other should measure 5/8 of an in or just shy of 16mm if my conversion is correct. Look at the amount I have to trim on the bicep here See how much I measured out to trim off here. Everything on the left gets trimmed off! This is whats left after trimming! Any other questions don't hesitate to ask, honestly its why we're here!
-
Thats because I follow your threads like an assembly manual lol! Also forgot to tell you I changed the mic out on my IComm system and that seems to have been the culprit!.
-
Thanks!
-
I decided to work from the top down on this build so it was shoulders, biceps and forearms along with the chest & ab plate. Shoulders are pretty straight forward as all the makers seem to have a cut line well defined. Just cut a clean line and your on to biceps. Use the same score and snap method to trim them out. I like to run 220 grit over all the edges to get rid of any bite points or any place that’ll snag your under-suit. Measuring for the bicep cover strips. The outside strip will be 5/8” wide and I’ll adjust the strip on the inside if needed so your own arm will help conceal the difference. I also use a strip on the inside as well! Thanks to Ukswrath for this idea. On a side note for the newer members going through a build if you haven’t read through Tony’s builds like they’re the gospels what are you waiting for????? He is an absolute architect when it comes to building these kits that’s for sure! Bicep is done. Just repeat the steps on the other side. You’ll also notice I had my under armor shirt on while fitting up, you’ll be absolutely shocked on how much of a difference it’ll make. Same process goes for the fore arms. Covers trips on both inside and out . The only difference is I use the flashing material for the inside strip and the thicker material for the strip that’ll show. Trimmed out the chest plate then abs and attached the button plates and also made sure I spent some extra time sanding the edges. But for the most part it was the same score and snap method. You can see how much of a good job this de-burring tool does. Really makes easy work of it! That wraps up the front upper torso on this. I also have the back rough trimmed so it should go quick! Until next time! Sent from my iPhone using Tapatalk
-
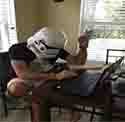
I’ll just post a picture of his work! Sent from my iPhone using Tapatalk
-
Hey Everyone I ran into an amazing tattoo artist at Megacon Orlando and after talking with him about our love for the Empire and how both He and his client getting tattooed has always wanted to join the 501st but wasn't sure what steps to take I also discovered that he's had a set of ATA just sitting in his shop collecting dust. He was just hoping to get it propped up on display in his shop and when I told him he'll be able to display it after he's worn it his face lit up like all of ours did, like a kid in a candy store and besides who doesn't want to be a Stormtrooper? I'm pretty excited about this build and will update it sections and when they get finished so it might be a bit slow going. Swung buy the studio and heres the obligatory BBB photo once I got it home. Started with the Helmet. Marked up the face plate and cleaned the eyes and teeth then joined the two halves. Trimmed the ears, repeat and attach with 3 flat head brass screws. I will say that this tool is a huge timesaver when it comes to fine tuning the trim of the armor and I highly recommend it to anyone. You can pick them up at mcmaster carr or even harbor freight tools With all but plastic dipping the inside i'm considering the bucket finished. No it won't be Mr No Stripes but I will leave the exterior painting to him, I feel its a right of passage and it's what makes your bucket yours, whether you paint it or use stickers. Just my opinion. Next update will be for the shoulders, biceps, forearms and hand plates.
-
I can 3D print you one if you’d like? Sent from my iPhone using Tapatalk
-
Welcome to the FISD!! Like Justjoseph has said I would start by reading this section here! You’ll find just about everything you think of when it comes to getting started and your armor needs! Speaking of armor needs our fellow Trooper and Deployment Office justjoseph63 has put together a great and very useful checklist of what you’ll need other then that amazing white shiny stuff. I found that personally it came in extremely helpful for my build. Once that has been all decided upon then I would dive into our EIB / Centurion sections and find out which a little extra effort you can get on screen accuracy. Hope that helps point you in the right direction, I know its a ton of information and a good size financial commitment so if any other questions come up feel free to ask. Its why we’re here “ Troopers helping Troopers” Best of luck in your journey.
-
TK-41123 reporting for duty !
msouza replied to hollowbodies's topic in Newly Approved Members - Sound Off!
Congrats & Welcome to the Legion trooper! -
TK-82214 Ready for deployment
msouza replied to DEVOLVER's topic in Newly Approved Members - Sound Off!
Look forward to seeing you in the EIB ranks and beyond! -
TK-52417 reporting to Parjai Squad
msouza replied to Asystole's topic in Newly Approved Members - Sound Off!
Welcome to the ranks Trooper & See you out on the front lines!
