

msouza
-
Posts
761 -
Joined
-
Last visited
Content Type
Profiles
Forums
Gallery
Articles
Everything posted by msouza
-
A couple of these almost had coffee coming out of my nose lol!! <br> Best of luck to all!
-
Just hold my blaster and watch this!!
-
Wait a second are you sure this was in the read this first section!!
-
Your getting close, I went through the same thing with Celebration. Create a punch list and cross them off as you go along I found that it helped me not feel so overwhelmed with a deadline coming up fast.
-
Second this, But at a minimum I carry a roll of white duct tape,super glue & two different lengths (3"/4") pre made elastic snaps
-
 Welcome to FISD Start with http://www.whitearmor.net/forum/forum/38-getting-started-read-this-first/ You should find a ton of research material and give you an idea of what direction to go.
 -
Listings like this should be posted in the newbie section on what not to buy!
-
EFX New Hope Stormtrooper Helmet adjustment
msouza replied to petetoria's topic in Assembly, Mods, and Painting
I actually just got contacts for this very reason! Sent from my iPhone using Tapatalk -
Most of our first reaction is to stay away from ebay at all cost!! It has a two piece cap & back which can be a pain in the rear to line up! Go through http://www.whitearmor.net/forum/topic/11538-the-various-types-of-armor-and-where-to-find-them/ and you should be able to find a reputable vetted seller to get what you need!
-
Welcome to the FISD Alex, I would start by reading http://www.whitearmor.net/forum/forum/38-getting-started-read-this-first/ And make sure you sign up on the Florida forums as well. http://www.fl501st.com
-
Anyone know if we have a staging/changing area for blast a trooper?
-
March 2017 Newsletter - the April/SWCO Edition!
msouza replied to Dark CMF's topic in The Newsletter Archive
What a jammed packed edition this month and next month look like its should be the same with Celebration recaps! As for the March for 1000 I know I'm hoping to join the ranks and just printed out the requirements & checklist to begin the process. -
Mike Souza SHA hearing aids with speaker (9v operated) 16
-
Signed up for Blast a Trooper on Saturday 10 - Noon stop by & say hi! And how cool is it that my first 501st event/troop will be blast a trooper @ celebration!!!!!!
-
This will be cool to watch in person as well and will give me a idea of what i'll be up against, i believe i'm close but don't think I can get it all together in time.
-
Mark, Join the WTF facebook group and shoot Rocky or Walt a PM, They're pretty quick on getting back to people.
-
Doopy's is horrific with communication but i've never had a problem with them delivering. It just takes what seems like a lifetime lol
-
Requesting 501st access with updated link, first one didn't seem to work. Thanks https://www.501st.com/members/displaymember.php?userID=24129&costumeID=124
-
you weren't kidding on the speed build part now were you!!lol great job!
-
TK 11463 Requesting Access https://www.501st.com/members/searchresults.php
-
Getting close thoughts & opinions please.
msouza replied to msouza's topic in Build Threads Requireing Maintenance
Thanks troopers I appreciate it! More bucket pics! Making adjustments to the thigh & shoulder straps, post more Picts when I'm done! Sent from my iPhone using Tapatalk -
Your off to a great start Ben! Funny I think we all get that exact look on our face BBB Day!! Like the others above have stated pick up a set of needle files from harbor freight/home depot for control. You'll find a great reference for the teeth/frown here http://www.whitearmor.net/forum/gallery/album/36-helmet-frown-a-new-hope-stunt/
-
Getting close thoughts & opinions please.
msouza replied to msouza's topic in Build Threads Requireing Maintenance
Thanks! -
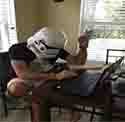
Getting close to finishing, neck seal/ holster should be in today but I couldn't pass up the chance to walk around the neighborhood! Sent from my iPhone using Tapatalk
-
Just waiting on my neckseal to submit my photos but don't know if I'll have enough time to be approved & volunteer. Will be there Thursday thru Sunday if I can get approved I'll gladly help out!
