


gmrhodes13
-
Posts
31,219 -
Joined
-
Last visited
-
Days Won
1,070
Content Type
Profiles
Forums
Gallery
Articles
Everything posted by gmrhodes13
-

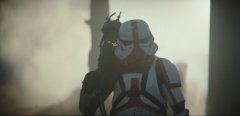
From the album: Mandalorian Incinerator Trooper
-
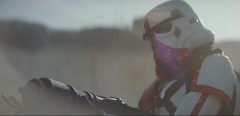
From the album: Mandalorian Incinerator Trooper
-
From the album: Mandalorian Incinerator Trooper
-
Even for basic your GML may require the adjustment
-
May want to have a look at the drop boxes too, they should align with the end of the plastic belt section and just a few mm's gap between them and the belt
-
Have a look here
-
A little foam can make a lot of difference, good luck with approval
-

TK-11672 Requesting ANH Stunt EIB Status (SDS) [952]
gmrhodes13 replied to Sidius's topic in Request Expert Infantry Status
Nice work trooper, a couple of other pics the DO's like are: * Front and both sides of the knee sniper plate * Thigh ammo strip rivets outside and inside * TD showing front panel * D ring on rear of blaster * Close up of ab rivets A few things you may want to address while waiting for the DO's: With your teeth area you could remove some paint from the gums: Frown is painted gray and does not leave the teeth area. You could also straighten the brow trim, it appears higher in the centre Appears your left shin is closing inside over outside so the opening can be seen from the outside, they should close outside over inside You may want to lengthen the drop box straps, they appear tight and push outwards. Also thigh coverstrips should stop above the bottom thigh ridge Belt could come down a little too as it's covering the lower button A few tweaks and I'm sure you'll do fine, good luck -
StarTrooper's TFA/TROS FOTK Build Thread (KB Props)
gmrhodes13 replied to StarTrooper's topic in TFA Build Threads
Happy days -
Hello and welcome aboard, here is a nice comparison sheet between the versions https://drive.google.com/file/d/10tEVteIreh6AHMogW010cuH_Bf8TBfU6/view
-
Hello and welcome aboard, you will find base requirements in the CRL (costume reference library) https://databank.501st.com/databank/Costuming:TK_rogue_one Under Suit Black non-textured material, either one-piece or two-piece construction with no visible zippers or logos/designs.
-
Hello and welcome aboard, looking forward to seeing the progress
-
Hello and welcome aboard
-
Sharkbait's TFA Captain Phasma Build
gmrhodes13 replied to sharkbait's topic in Captain Phasma Build Threads
Looking good -
Good luck, remember it is the festive season and contact may take a little time
-
ANOVOS (DENUO NOVO) FOTK Armor Delivery Possibility
gmrhodes13 replied to JonnieBear's topic in TFA Stormtrooper
Amazing they can have Mandalorian helmets ready for the painting process but can not fill 4 year old orders, shameful -
Exciting times, can't wait to see the BBB photos
-
Beautiful story, my Dad snuck me out of the house in 1977 to a drive in theatre to see A New Hope, didn't want my brother knowing as he was too young to understand the movie, to this day this was the only thing my Dad and I did together without any other family member. I've not had the opportunity to be a Dad myself but I do get a kick out of the smiles I see on younglings faces when I'm in costume and hearing stories from others, much like yours. All the best to you and yours for 2020 and hope you have an amazing year. Cheers TK85421
-
Lord_Potato's Walt's Trooper Factory ANH TK Build (COMPLETE)
gmrhodes13 replied to Lord_Potato's topic in ANH Build Threads
If you are afraid that you may damage under the cover strip just slip a knife blade under the corner Rounded off or angle cut are both acceptable -
Hello and welcome aboard, good luck with the research
-
Great work trooper, looking good
-
Looking forward to the progress, good luck
-
Episode 9 Stormtrooper research (Caution Spoilers Ahead)
gmrhodes13 replied to Alay's topic in TROS Stormtrooper
Interesting the armor next to that one still has the belt and TD tightly attached, skeleton must have turned to ash and blew away -
Episode 9 Stormtrooper research (Caution Spoilers Ahead)
gmrhodes13 replied to Alay's topic in TROS Stormtrooper
-
Not too many dramas with the grey on TD as long as it's not too dark. I use grey primer and coat with clear as I have that handy
