gmrhodes13
-
Posts
31,219 -
Joined
-
Last visited
-
Days Won
1,070
Content Type
Profiles
Forums
Gallery
Articles
Everything posted by gmrhodes13
-

What about this armor can’t be approved?
gmrhodes13 replied to TK7892's topic in TK Pre-Approval Questions & Discussion
That is an old way of doing them, it is better to glue the shim to the kidney plate, then add a filler piece so it meets with the outer section then add ABS paste, sand and polish. You can get basic approval and L2 approval with a seam showing but has to be filled for L3 -
ESB TK WIP - UKG - first build - hoping for centurian
gmrhodes13 replied to CallMeMrTibbles's topic in ESB Build Threads
No actual measurements but here are some references

-
EVA foam stormtrooper armor build
gmrhodes13 replied to Cheeseballs's topic in Other Non-Approved Star Wars Costumes
Great work and very impressive building skills. If I was to pick I would suggest sizing down the chest plate a little, it is a tad on the large size -
I use a few different sizes, those you mention will work, max width I have is 1", depending on width and thickness can change how much pressure/pulling power the magnets have. Quite cheap on eBay and Aliexpress, as most that comes from overseas shipping does take some time though.
-
Great work trooper and a nice clean application, a couple of suggestions if I may to really take you to the next level. Your right drop box elastic is a little longer on the right side than left You have quite a lot of shoulder strap showing on the rear, you could adjust the front straps to 1 large tab and 4 to 5 smaller tabs. Also note the elastic in the reference image goes around the backplate, not just the elastic. Shoulder elastic is being pulled outwards, doubling the elastic can help this Bottom ear screw head is on a slant, not flush to ear Right side bottom ear screw is very low and you have a large gap between the ear and rubber trim Paint on the sides of your vocoder are slanting inwards and the top curve is a little thin. Just for esthetic's you could also have the hovi's facing out at the same angle, using a small wedge of rubber tube behind can help adjust the angle of the hovi tips. There is quite a bit of wire on your blaster which could be reduced Once again great work, these are just suggestions and not requirements, I'm sure the DO's will be along soon.
-
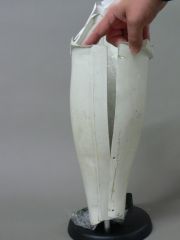
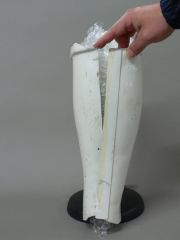
Nice work, if you use a block of wood with some sandpaper wrapped around you can sand the pieces straight so they meet a little better, at the moment they are a little jagged.
-
RS Propmasters ESB TK slow and steady build in Portland, OR
gmrhodes13 replied to Infern0's topic in ESB Build Threads
Sorry to hear you have been unwell, I can definitely relate to that and becoming discouraged, just try small bits at a time, they all add up in the end. -
Tat2trooper TX Anovos build thread
gmrhodes13 replied to tat2trooper's topic in Other 501st Costumes
Just watch your gaps between the end caps and control panel, looks a little wide.jpg.357f4cfd98f42f2f6fadc3ad481782d3.jpg)
-
I think you will find your cod needs to come up more, you shouldn't have to trim the thighs at this stage. Also run an elastic strap between the cod and butt plate, will help stop the butt plate flaring backwards.
-
Most just had the black appearance on the rim, but during filming some black was rubbed of as you seen in different scenes. The inside of the hovi's should be black with a white nipple. Black inner walls clearly evident below. From Joseph our DL I have no issue if the interior sides are not painted white, but the rear "nipple" should be white, as should the rim (at least a little). I also see no problem with the screen being painted black.
-
There where quite a few differences with the Mandalorian bikerscout hence the need for a new CRL. A good question for you @Sly11
-
Looks like you may have overdone the trimming of your larger ab plate, should be ok for basic but will be picked for higher levels. Two work arounds is either get a new one from the supplier, or glue a piece of ABS behind and fill the join seam with ABS paste. The velcro on the shims won't stay completely flat and you will end up with a gap because of the thickness of the velcro.
-
Added mesh definitely helps keep you a little cooler, I have an intergraded set for my Sithtrooper and find it easy to wear compared to a separate undersuit and gaskets on armor with my FOTK
-
Yes I have that on one of my helmets, just depends on the rubber, the shape of the lip and also how tight the rubber is (length, having too much pressure)
-
EVA foam stormtrooper armor build
gmrhodes13 replied to Cheeseballs's topic in Other Non-Approved Star Wars Costumes
Hard to believe it's made from foam, nice work, applaud your patience and skills -
Hello and welcome aboard, good to see you've been doing some research, looking forward to seeing a build from you soon
-
Helmet looks good, looking forward to seeing your armor in hand.
-
Tat2trooper TX Anovos build thread
gmrhodes13 replied to tat2trooper's topic in Other 501st Costumes
How much easier it is on your second build Coming along nicely -
ESB TK WIP - UKG - first build - hoping for centurian
gmrhodes13 replied to CallMeMrTibbles's topic in ESB Build Threads
I always sand both pieces before applying E6000, can take longer than 24 hours to dry fully too, I normally leave for 48 hours before applying any pressure to glued areas. -
Where, What and Whom To Avoid When Buying
gmrhodes13 replied to RogueTrooper's topic in Getting Started - Read this First!
Anovos are no longer supplying Star Wars costumes due to the license being taken away by Disney. Non supply of orders from over 4 years ago. You will find that many of the black series helmets will not meet 501st legion costume approval, check out the CRL's for costume requirements https://databank.501st.com/databank/Costuming:FISD_CRL You can find the vetted sellers list here -
Have a read of the Getting Started section, there is some research required with this hobby. Legion has a base requirement for costume approval (CRL's), for Stormtroopers you can find them here Also some more information on becoming a member is here. Good luck and hope to see a build thread from you soon.
- 1 reply
-
- 1
-

-
TK-91882 Requesting ANH Stunt EIB Status (1021)
gmrhodes13 replied to semperfi108's topic in Request Expert Infantry Status
Nice work trooper, just a couple of suggestions before the DO's review: Watch the gaps match on both sides, you can see one arm the forearm is touching the handplate the other has a gap. Also different gaps between the thighs and cod. You also have quite a bit of black showing between your shoulder bells and chest, the original shoulder bells had a curve to them, you could also bring the bells in closer at the top, they appear to have a gap under them to the top of the shoulders as well. You may want to bring your thighs down a little or try move the whole back armor upwards to give you some clearance at the top of the thighs. Detonator not quite centered on the rear. Your ab and kindney plates are not quite lining up. Also your drop boxes need to be in line with the end of the plastic belt. Ideally the large tab is removed (or trimmed to match to the other tabs) Some paint missing from the top front ab rivet Thigh ammo strip rivets are very close to the corners. Could you also supply image of the inside rivets connectors. Also rivet heads are quite big. Plastic belt corners should meet with the width of the fabric belt, also the button covers should not be placed on the end of the belt. Detonator clips should be closer to the detonator panel A few tweaks would really make this application stand our. Good luck with approval. -
Trying to complete my FO need some direction
gmrhodes13 replied to Order-66's topic in TFA Stormtrooper
Soft goods try Geeky Pink (SoulArt) Vendors list is here Ammo vest I'm not aware anyone is making them at the moment. Weapons vendors Shorts need a shine to them, Unfortunately Lycra won't do, it's more of a coating, plastic look, I found a pair on ebay but it was quite some time ago so I don't have a link. -
Geeky Pink (SoulArt) Vendors list is here
-
CableGuy renovates RS Prop Masters ANH Stunt
gmrhodes13 replied to CableGuy's topic in ANH Build Threads
That was some sanding, nice work