Leaderboard


Popular Content
Showing content with the highest reputation on 07/21/2025 in all areas
-
Trying to colormatch the printed parts and I think I have reached a close enough stage. Shins are read to be mapped for the gold and put the helmet together, no details are glued yet.4 points
-
Sure, is this better? Also here, just in case: https://drive.google.com/file/d/17dh1paCUZwmg6lr-SDl55DDqqJ_tNa0_/view?usp=sharing3 points
-
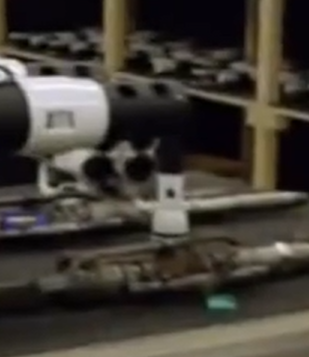
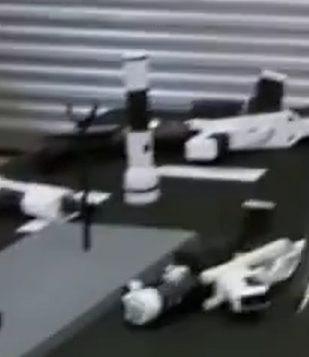
Production Made SE-44C for TFA: Had these a while and meant to post them. Think they came from : https://www.instagram.com/steve.madethis/2 points
-
TFA Leg Torch 7:50 https://drive.google.com/file/d/1fx4_9zZ_stU9_KK4aGXmlpKl_Qy761W2/view?usp=sharing
 1 point
 -
That looks a lot like a 2 cell maglite.1 point
-
unfortunately still not made a major amount of headway, the armour (barring the jetpack and chest) are in the smoothing stages, im hoping the maker will have them smoothed out for an august armour party my squads thinking about and i can get everything painted1 point
-
I've done @Sly11's mod on mine with this battery: https://www.aliexpress.com/item/1005007173333563.html?spm=a2g0o.order_list.order_list_main.11.57a81802P6vyNk Worked a treat for me, icomm was going strong at the end of my troop this last weekend.1 point
-
Hey Will! I put my answers based on my experience and opinion in blue above and hope it helps!1 point
-
To answer your questions: - I see that it's 3d scanned from an original. Does this version eliminate the warts on the helmet? Only RS armor has those nifty bumps. - Are the straps and mounts that are included helpful or do I need to replace them? The strapping they include is all Velcro. I REALLY don't advise using it. Trust me. - Are the included instructions helpful? The pieces are numbered (VERY helpful) and you have US to help you after that! - I think I was told the belt will need upgrading? The belt they include is very flimsy, will sag and is not acceptable at Centurion level. I highly suggest an upgrade. We can help with that too! - Besides under armor suit, shoes (purchased), neck piece, electronics (fans, voice changer, hearing assistance) blaster and potentially belt... are there any additional pieces/expenses I should expect with this kit? (flexible hand armor). - Be aware that some members have experience a blue/black color bleeding onto their armor from the under suit that is included, at least on the older kits. You can get a nice set on Amazon for pretty cheap. Examples: Shirt (link here) Pants (link here). Note the lack of logos/markings (important). It helps a LOT to have your under suit on hand while fitting. The flexible hand guards are an option, but are required for Centurion level. There are a few options out there, but I sell them here. Keep the questions coming!1 point
-
Hey all! Just some updates from last time..... removed the sharpie from all the pieces. The R and L are now in expo marker. Also went ahead and fully removed the return edges on all the arm pieces. Pics below of that... Also my Tandy 24 rivets arrived today! Along with other supplies. Yes, I did get 2 tubes of E6000. Just didn't want to put both lol. Also it seems I chose the wrong width when ordering the white elastic strap (meant for the belt boxes). I wanted to get 0.75" but ordered the 1-1/4" instead. That shouldn't be a problem right? And the black elastic is for the bicep loop to go around my arm and also for the straps that attach arms together. Next, I got a little bit ahead of myself. Just wanted to tape the main body armor parts and see how they fit on me. Haven't done any sort of cutting on these yet. Wanted to get some thoughts on fitment. I prioritized the back section and keeping as minimum of a gap between butt, kidney, and backplate as possible. Also for reference, I am 5'6" and I couldn't find the black underarmor style pants so disney shorts it was. My Current TO-DO List just from putting this on.. I'll have to trim the Chest and Backplate shoulder sections to the appropriate length. Lose weight!! LOL but seriously seeing the gap between the kidney plate and the codpiece the way it was really motivates me to step it up some at the gym. Trim out the kidney plate and butt to align with this diagram since I am on the plus sized range. Also add to trimming, but to angle the codpiece cut near the leg so it angles up more. Right now its just kind of straight. I need to buy some wider nylon strapping for connecting these. I have 1" nylon which will work great for some areas, but I need to pick up the 2" for the beefier connections. Just a short list off the top of my head..... But I'm hoping tomorrow to start fitting forearms and properly trimming them to correct fitment and also adding the elastic straps to shoulder bells. Thanks again for reading and the help!!1 point
-
Would have been nice to see a photo showing the serial number on the magazine housing. Many details in the pictures remind me heavily on the old DoopyDoo's kits...1 point
-
Was going back and forth on what type of strapping to use, snaps, magnets, quick release buckles and what not…ended up using velcro and webbing. Easy and adjustable. I needed some more velcro- surface under the back and chest so glued in some plastic tabs before adding the velcro. left a little room to pull the flexible shoulderstraps through. I’ll glue the straps in permanently in the back but just slide them in the chest tabs so no gap here. velcro added. Lower velcro is for the black chest/back connection. Cut down the pipe on the TD, much better. lower right is new size. Decided to give ”beefing up” the side walls on the shoulders a go. It was alot more work than I thought and not sure it will make a difference when worn…well..atleast I know it’s done1 point
-
still not showing for me :(0 points