
Leaderboard


Popular Content
Showing content with the highest reputation on 02/02/2023 in all areas
-
I get the exact same measurements on the Abs as mentioned by TKSpartan in the last picture:2 points
-
 I think the rear sight should be fine until we look at these again in the near future and determine what variations and options can be added to the CRL. I believe the DO's are only mentioning it and it is not a requirement currently. I will also point out that it looks like we have another shared template across the TFA and TLJ CRL's as the end cap information was correct and is now reflecting the TLJ which is different. Also to note the Centurion requirement for the working light on the SE-44C side arm has disappeared. Shared templates served their purpose when the CRL's were first created but because we are improve them, now they have become problematic. This is something I need to amend by creating a separate template in both CRL's so it can never happen again on any future amendments to either of those CRL's. We only discovered this one yesterday so I will get it remedied as soon as possible. Apologies if this has caused any confusion to both the DO's and members alike.2 points
 -
2 points
-
Wait, I'm at 195 this month... I can do this. Also hit this milestone Yay, I did it! But now the important question: should this be celebrated or should someone start an intervention? Shout-out to @MaskedVengeance, who started the January meme chaos, @gmrhodes13 who was a driving force behind many of these late night meme sessions, and @TKSpartan who gave me the idea of trying to reach 100 Memes in one month. As evidenced, I went a bit beyond that goal, but it was super fun! Now, I probably will dial back the amount of memes shared on here, because 200 Memes in one month was pure insanity and I've got absolutely no idea how I did it All Memes counted together, this meme marks the FISD hitting exactly 500 Memes this month. Wow. Thank you so much to everyone who has participated during this, whether it was one meme or 202 memes. This is truly incredible. Over 150 Memes by Glen, 66 by Caleb, @revlimiter with a strong 45, @jsilvius with 12 memes... and many others chiming in as well Oh, and @Nairy? I gotta agree -- it's a wonder the Imgur Database hasn't crashed yet in light of these numbers2 points
-
Per the suggestion of Mario, I've added Andrew's iComm battery mod thread to this compilation. As always, if anybody finds particularly helpful resources that should be added to this list, please don't hesitate to reach out!1 point
-
It’s not printed lines it’s rhe way it was but not print lines. I believe in the actual file but I’ll fix that for sure and no problem on rhe f-11 photos as well1 point
-
@Chemi Please let me know if this works, wife wasn't home so I couldn't get it on to get the picture. If you need it on let me know and I'll upload one later tonight or tomorrow, but it was as easy as bending those and completely see how it changes the look. Thanks!1 point
-
Hey all! I've been diving into this project and already learned a LOT, but I'm still running into learning curves and potential issues. A whole slew of them lol I see this thread hasn't been visited since 2022, and Andras hasn't been active for a little over a month now, so I'm concerned I'm not looking in the right place anymore and this might not be the place to start asking for help. Is there a more recent or more active place for me to be connecting with fellow FX-BlasterOS builders? Thanks!1 point
-
Added the fabric and gaffers tape to the chest and gaffers tape to the biceps and shins pill holes: Next I decided to Frankenstein my v1 R2Dan functional metal holster onto the base of the Denuo Novo non-functional resin holster. I started by cutting the “metal” part of the resin off of the base, which turned out better than I expected: Think this is going to work pretty good: Then I added filler to correct issues with the cutting process. I also had to shorten the base by about 1/2” since the v1 metal is a bit shorter: And added white paint: The white really brought out the imperfections, so the base is going to take more filling and sanding. More to come on this later.1 point
-
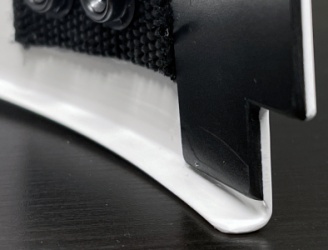
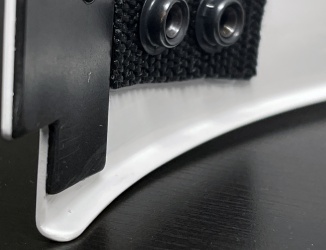
I don't know if I'd say "wizardry," Jim, but thanks for the sentiment! So this is something that will be documented in my build thread once I complete it, but since you asked, below you'll find a quick write-up of that eventual ab-kidney reinforcement and hardware section. I was very pleased to receive compliments on the reinforcements from @justjoseph63, but I'm not sure if you're asking about that or the rivet hardware and caps. First, I knew that I wanted to reinforce the edges of the the ab and kidney pieces so I began by cutting some spare black ABS. I used black to minimize visibility through the ab-kidney seam. I used this same plastic for my v-tabs between the kidney and posterior armor pieces. I then positioned the reinforcement strips how I wanted them, and added tape guides. This would help my rough sand the ab and kidney pieces appropriately, as well as placement when gluing the strips down. Here we have the edge reinforcements after several days of letting the E-6000 cure. An additional benefit of adding these plates was that it mostly straightened out the ab and kidney pieces, which initially had some misaligned curvatures. At this point I then glued down the strapping kit that I received from Justin (Rascal). I don't have photos of this process, but essentially I taped the ab and kidney pieces together to keep them static and then glued one side of the ab-kidney connection. Once the glue had cured, I glued the other side. In case it's not obvious in my other photos, I used the non-stretching nylon strapping on my right side, and the elastic on my left side with the rivets. Here we have some close-up photos of the actual hardware I used. Taking a page out of AJ Hamler's book, I sourced some screw caps (will add purchase links later), but unlike AJ, decided to also use the snapping base. However, doing so required that I find smaller diameter washers that still had an appropriately-sized inner hold opening, since they needed to fit inside of the cap base. After spending perhaps hours at multiple Ace Hardware stores, I finally find the right size (brass washer shown on the left). The result after using a small chisel as a rivet wedge: Moving onto the alignment tabs, which I actually haven't completed yet (have one finished one of the two). I wanted a system that would foster flush alignment of the ab and kidney pieces while also accommodating some flexibility. I thus landed on a triangle tab, which would enable some verticle movement the further away the ab and kidney pieces moved from each other. The triple photo below illustrates this, with the center photo being the default "ab-and-kidney-touching" resting position. If the kidney were to pull away from the ab, it could shift up or down as shown in the first and third photos. At the end of the day I had to implement a miniaturized version of what I had initially envisioned, due to strapping placement. For a full-sized version I could have build this into the actual reinforcement plates, with a single triangle tab sized nearly as tall as the kidney piece. Detailed progression photos of the two ab-kidney retention systems. On my left rivet side I would use the triangle tabs, and on the right side just some basic tabs to keep the ab and kidney from bulging out (but no protection against vertical misalignment). And here we have the final results. Hopefully this helps you out with your build and submission, Jim! Please don't hesitate to reach out if you have any additional questions! Go get that EIB!1 point
-
1 point
-
And yeah my 1,000th forum post is a meme.1 point
-
 Congratulations Ardeshir! Well done brother!1 point
 -
1 point
-
1 point
-
I probably need to add more memes before posting!1 point
-
@Morgi Now to my narrative from the past several days. @justjoseph63 Sunday morning before I later tested positive. But the next night I got 7 hours of sleep, so... I started my ESB conversion! And had great conversation with @revlimiter and Luca about merch stuff. Feels good to be back on the boards with you fine folks!1 point
-
1 point
-
Congrats FISD memes!1 point
-
BRILLIANT!!!1 point
-
1 point
-
1 point
-
GET. THE. CENTURION 500. PIN. DESIGN. AND. MODIFY.1 point
-
I mean, February is shorter. There's no way it can also hold 500 of the things. We need a 500 memes pin.1 point
-
1 point
-
1 point
-
1 point
-
 Thank you guys so so so much1 point
 -
Clearly a sitting tutorial is needed. I can add my own pix to it also @Morgi1 point
-
Welcome my friend! Also, believe it or not, we do create bad memes Should I create a tutorial? I feel like I should create a tutorial. There's been way too much disbelief lately1 point
-
Hi Caleb, and thank you for your submission for ANH Stunt Centurion! CRL and CENTURION Application Requirements: All required photos have been submitted, and on behalf of the entire D.O. staff we are pleased to welcome you to the rank of CENTURION. Congratulations! Other-Armor Fit/Assembly; In this area we review observations made by your fellow troopers and the DO team. Some observations may lead to suggestions to improve the overall look of your armor, and please keep in mind that we consider both text (CRL) and pictures (screen caps/reference images) when reviewing submissions. Welcome to the ranks, brother, and thanks for one of the best submissions we've seen in a long time. You have not only stepped up to the plate, you have knocked it out of the park! We appreciate you taking care of the notches in such a timely fashion, and VERY smart idea of adding the reinforcements. I'm not a big fan of return edges in many areas, but in ones like this it's better to have that extra protection to prevent any potential splitting. Nice job, sir. Nice job indeed. All that being said, I would like to be the first to congratulate you on this milestone in your TK journey, and we are looking forward to seeing your HWT!
 1 point
 -
Just had to post this from the FISD Meme Thread:1 point
-
I've been carrying trading cards in a white leather binder pouch from Darman's Props on Etsy (who most in the US use for neck seals). It wasn't cheap at around $50, but it has an automatic magnet closure and doesn't stand out at all. I can juuust reach it in armor. The opening is just slightly above the magnetic button in the center, so it's nice and low for easy card reaching. It blends into the belt really nice. Hard to even notice it unless it's pointed out. And as Luca mentioned, it's not a canon/allowed piece of the armor. I don't wear it at canon troops. It's just for the laid back ones, which are about 75% in my local garrison.1 point
-
Very nice. As noted previously It does depend on which version the member is making, standard pauldron (Game/ROTJ Style) has no stitching on the colored area while the (RO Style does have stitching Comparisons for anyone interested Game/ROTJ Style RO (The Mandalorian version) 3 panels1 point
-
https://imgur.com/a/a0OYY0D so yup its not right but I had fun anyways. Sent from my SM-G781V using Tapatalk1 point
-
Thanks, Caleb, I appreciate the shout-out. Glad you like the meme! (And as if there was any way I was gonna skip over this thread when making memes about the FISD.)1 point
-
So at first I wasn't sure how to carry my armor, couldn't find any boxes big enough then asking at my local garrison I found a lot of troopers use a suit case. Luckily enough I had one laying around, which most people do, so here is how I packed all of my armor in. So I tried a few combinations but this seemed the easiest for me. First I put the shins inside the thighs. Next I keep all of the arm sections together and fit them insde the shins Next I open up the torso and fit both thighs inside Next close up the torso and fit in the suit case I then pack the shoes and smaller parts around the outside of the torso, helps to stop it moving around. You may notice in the bottom left corner there are a few tools, a container with snaps and elastic and also some duct tape, thought this would be good for an emergency fix kit. Next I have a towel to have a wipe down after trooping, perfect to wrap your blaster in and slip down the side of the torso I try to keep the softer things on top, one to protect the torso and two as I will be putting them on first. I have a seperate bag for the helmet, fits in nicely Then all closed up and ready for transport A quite cheap but effective way to get your armor to and from places1 point
-
OK Daniel, I think I know what went wrong. This issue really piqued my interest, so I actually spoke to a chemist at Eclectic products as well as the person who is in charge of packaging design there and got some really interesting information. The product you show in the photo is legitimate, but as Chris mentioned there is an export issue. Unlike Asia, Australia and most other countries, the EU does not allow solvent based products such as regular E-6000 to be imported, so they came up with E-6000 Plus. It is actually is a completely different technology/formulation and is solvent free, but I was told it should work fine on ABS with no issues if used correctly. BUT, with it's unique properties it does not cure at the same rate as regular E-6000. To use it effectively, you will need to look at the technical data (2 pages, a quick read) from Eclectic products located here. Side note: All the people I spoke to at Eclectic products are well aware that we love their product!1 point
-
Almost forgot to add this item for my first troop, knew there was a reason I made my TD end caps removeable LOL1 point


