Leaderboard


Popular Content
Showing content with the highest reputation on 01/27/2023 in all areas
-
omg the batting average one I had a long health care meeting this morning. When it got to be too much, I'd glance at this thread and feel better. I also thought about memes. But mostly I lacked concentration.4 points
-
Now that I'm approved I have spare time to meme, but should probably go home and rethink my life. Multiple EIB Award Recipients4 points
-
At what point does it classify as an addiction? ... asking for a friend or two And our daily To-Do List: On the other side it says "read every single post on the FISD" and "troop!!!"3 points
-
3 points
-
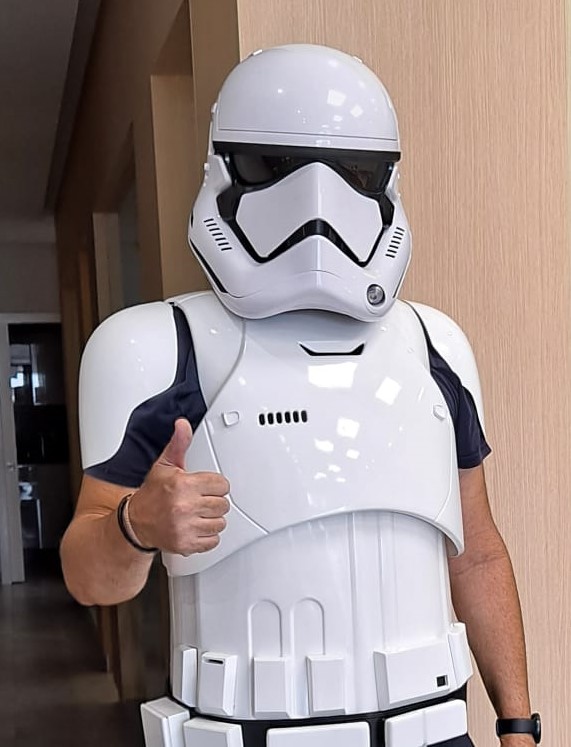
Hello, I have always been a fan of Star Wars, I was 6 years old when I saw the first one and since then I have wanted to have a Stromtrooper armor and I have already achieved it and finished it. I greet all this community that to some extent has helped me a lot along the way, thank you all and I hope to learn a lot and enjoy this world that I have discovered late, but here I am.
 2 points
 -
Mine was my roster number from basic training (Infantry) so fitting here. Then it was 335, so my TK number is 33555.2 points
-
Haven't had any troubles since. A drop or two of glue and you'll never again have a problem with them2 points
-
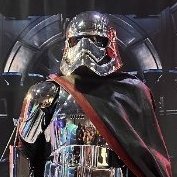
Hello! I'm a current 501st member (Clone Wars Ventress) but wanted to add an armored costume. I'm in-process to buy a fully-built already-once-approved TFA Phasma and very excited! Will be posting some questions in the Phasma threads for fitting the kit to me and maintaining the chrome.1 point
-
Soft pouches can definitely help protect the armor from getting scratched in transport.1 point
-
It might be obvious, but in-bin protection is a must. Would pillowcases be enough for Phasma-chrome? Or would custom made wrap pieces be needed? I know many FOTKs already wrap their armor carefully in padded sleeves each time they suit up and down to keep paint damage at bay. I use travel pillowcases for my OTTK armor. They're much smaller than standard pillowcases and can be had by the dozen on amazon. I don't protect as much now as I did when I started trooping, but a thin pillowcase around each armor piece helps. I tend to use them now more to keep the bin clean from my HWT weathering than for keeping scratches from happening. Scratches are easy to buff out of ABS... As far as protection for the chrome finish itself, it can be waxed like any car paint. Often it IS paint on the armor and not actual chrome plating. Try a synthetic wax that isn't just carnauba. I'm a big fan of Ammo NYC products. Reflex wax + Skin top coat protects for most of a year on my car's paint. Easy to apply and it smells good too. I hope that's at least a little help.1 point
-
Hi Vanessa we don't always get a lot of interaction by Phasma's here, there is a Facebook group which may help https://www.facebook.com/groups/16544723614742541 point
-
Yes they are indeed still taped. Just took a quick photo. thank you but I will make some better pics soon and then will post them in the suggest topic for sure1 point
-
Looking good Alan, If I may , prior to submit for 501st approval with your GML, a great source of feedback on your Armor build is to post in the bellow Section. There are always some details that once fixed can make you to look your best.1 point
-
Yeah, looking good, Alan!!!1 point
-
Always fun to see the transition of -> Looking good! I'm sure you're very excited, and you'll be approved in no time! Hard for me to tell exactly what it is, but there's something odd going on with your shoulder bridges. Do you just have them taped down for the photo? There appears to be a lot of excess soft material poking out on the sides.1 point
-
Sneak peek1 point
-
Welcome to FISD. Good luck and looking forward for your Build thread1 point
-
Welcome aboard trooper!1 point
-
Hello Vanessa and welcome to the FISD! I can't wait to see your Captain Phasma build. The ECG could certainly use our first ever Phasma!1 point
-
Welcome, Vanessa! You're certainly in the right place for armor, and it'll be great to see another Phasma!1 point
-
Thanks for pointing that out, i didnt have a good rear photo to check that out. Designed it centered with the over lap. will need to adjust model again.1 point
-
It's close, but I feel off with the eyes still and can't figure it out. The brow is still a little low I know, the construction leaves a gap in the top that doesn't hold the trim as tight as the stunt I've noticed? Sent from my SM-G991B using Tapatalk1 point
-
True enough. I've personally never had much trouble removing superglue, so it wasn't a problem for me. Still, E6000 is definitely a better solution and wayyyy more satisfying to remove1 point
-
Not sure if I would use super glue. The reason being is that depending on how often you troop, the elastic can/will wear out and lose it's flexibility over time. It takes longer to cure, but I use a dab of E-6000 which is a lot easier to remove. Super glue is forever, lol. I have had to replace the elastic on my HWT armor about 3 times, and peeling the E-6000 of is pretty easy.1 point
-
Yeah I figured the cap is a little low. There's defos a 4th tooth on the right but mine is still too noticeable so I will have to tone it down a bit more so. The width of the teeth might be due to me using 2mm plastic. Thanks for the overlay though. I'll probably finish this one off and do another comparison. Sent from my SM-G991B using Tapatalk1 point
-
Updated. I'll replace the link in the first post with revlimiter's suggestion since I think they've taken down the old search function.1 point
-
coming along nicely !1 point
-
Nice work1 point
-
Great initiative!! Count me in We definitely need to go for a group picture at SW Celebration in April. Cant wait to see all of you fierce women irl!1 point
-
Did some very rough sanding on the ABS paste. Results look good on the ab side seams: I think those are good to go for finish sanding and polishing. The shoulder seams are going to need more work due to the overlap: So more rough sanding and then probably another coat of ABS paste1 point
-
Caleb Mask 73692 EIB letter size Joseph Here you are, sir. Display it proudly! https://www.whitearmor.net/eib/certificates/73692-eib.png1 point
-
Mine is a combo of the years my kids were born 1996 2000 2004 hence 960041 point
-
Not as yet, @NoVATie looks after this section, he should be along soon1 point
-
Painted the arm and leg greeblies: Then attached the clips to the forearms: And the biceps: I think I trimmed too much return edge from the inner chest shoulder: Since I was worried about having enough space for the shoulder plate support tabs and strapping slots, I glued some little bits to both sides to fill the gap. Then trimmed and sanded: Then I sanded the lip caused by the overlap on the shoulders, to prep for ABS paste: Decided to tackle the ab seams first, so I taped off the area to prevent any spread and applied to the left side: I used a toothpick, which I thought would help get it into the seam, but turned out to make a messier application: So on the right side I used a popsicle stick, which was much easier to work with: Next, I applied the ABS paste to both shoulders: I’ll let this dry overnight and then try some sanding tomorrow.1 point
-
That's your 501st forum profile, you need this one https://www.501st.com/members/displaymemberdetails.php?userID=358341 point
-
^ I had the same problem and thought it was just me. https://www.501st.com/members/searchresults.php?searchfield=12345&criteria=tkid If you copy this URL and edit the searchfield number of the URL itself (12345 in my string) to the one you want to use, you can still search someone's TKID. Not sure if that makes sense. You have to basically change the URL manually to search that way.1 point
-
Hello, TK-33555 requesting access. https://www.501st.com/members/displaymember.php?userID=35587&costumeID=125 https://www.501st.com/members/searchresults.php?searchfield=33555&criteria=tkid Also, from the first post, it says to click on this link: https://www.501st.com/members/searchform.php to get your page. However, when I do that, I got a 404 error. To find my page, I had to go here: https://www.501st.com/members/members.php then search through costumes to find my TK number. Not sure if the search link needs to be updated, but wanted you all to know, it did not work for me. Thanks.1 point
-
Thanks everyone for the welcome back and for the resources. I've started looking through the build threads and watching the videos by Captain's Drydock on YouTube. I'll be starting my own build thread soon!1 point
-
I decided to work out a complete, comprehensive list for those about to start an OT TK armor build (ANH Stunt, Hero, etc,) to help get everything in place for when "Big Brown Box" day arrives! This list does not include soft parts, (neck seal, boots, etc.) but focuses on the hardware and supplies for building the armor itself. However, a list of soft parts can be found HERE I believe I have covered most items, but would appreciate additional suggestions/corrections to add, and will keep it updated as such. Yes, it looks a bit daunting, but some of the items you will already have, and the rest can be purchased at major home improvement stores, online, or borrowed from a TK friend! Plus, it gives you something to do while you "hurry up and wait" for your kit! This list is includes items used for the EIB and Centurion programs, (marked with double red asterisks)**. These items are not required for initial TK approval, but I encourage everyone to consider them as an option. Hope this helps, and best of luck on your build! PLEASE NOTE: Some kits come with all the hardware you will need to build to Centurion level, i.e. split rivets, ear screws, TD screws, etc., however, not all armorers supply the correct ones. If you are (hopefully) planning on aiming for level 3, please check with your armorer to see if they provide these. You can also reference the photos below to see if they are accurate. These supplies are based on using the snap method for connecting the armor. Example photos are shown at the bottom for many of the items, but not all. (Everyone knows what a hammer looks like). Items with photos have a notation. 1. E-6000 glue- Great for almost everything, and removable if necessary. Highly recommended. (Pick up some wooden tongue depressors as well, makes spreading it easier)! (Photo 1) (Please see updated information on E-6000 below, after #50 before purchasing). 2. Binder or notebook- To keep notes on your research. 3. Dremel or rotary tool- A "must have". (Photo 2). Be sure to get the sanding drum attachment and extra sanding drums (Photo 3). I suggest the 180 grit type. 4. Small plastic containers- Keeps everything organized. 5. Lexan scissors- Curved and straight, for cutting ABS. (Photo 4) 6. Small spring clamps- For holding things in place while gluing. You can't have too many! (Photo 5) 7. Line 24 snaps- For strapping. You will need at least 30, and do NOT "cheap-out" on these, but purchase quality ones. (Steer clear of Wal-Mart snaps). Tandy is recommended. Tutorial located here: https://www.whitearmor.net/forum/topic/44617-snap-setting-101/ (Photo 6) 8. Snap setting tools- There are 2 types to choose from- One is a two piece set (requires a hammer) (Photo 7) and the other is the pliers style (Photo 8) 9. Hammer- For setting snaps if you use the 2 piece style of snap setter. 10. Pliers/vise grips- 11. Screwdriver- Slotted head. 12. Rivets-** 5/16 (8mm). (Photo 9) Round head bifurcated/split rivets with washers. You will need 9. (3 for the kidney, 3 for the ab, one for the cod piece, 2 for the thigh ammo pack). You will also need 3 speed (Chicago") rivets to attach your ABS belt to your canvas one. These are attached by hand and not to be confused with the aluminum ones listed below (#19). Some like to use the screen accurate single cap rivets (Photo 10) to attach the ammo thigh pack but these are not a requirement. 13. Elastic- 1 inch wide black for shoulder bells, etc. (4 ft.) 2 inch wide white for ab/back plate shoulder connection (1 ft.), 1 inch wide white for drop boxes, (1 ft.) 1/4 inch wide white** (1 ft.) for shoulder straps. 14. Nylon strapping- 1 inch wide black, at least 6 to 8 ft. long. 2 inch wide black (48 inches) for high tension areas if you are using the double snap method. (NP) 15. Exacto knife/extra blades- For cutting, trimming, cutting nylon strapping. (Photo 11) 16. Heavy duty razor knife/extra blades- For cutting cover strips and scoring around pieces that will be removed. (Photo 12) 17. Heavy duty scissors/tin snips- For (carefully) cutting large sections of ABS. (Photo 13) 18. Metal ruler or straight edge- (At least 18 inches long). For use as a cutting guide, especially cover strips. 19. Hand Rivet gun/aluminum open end blind rivets- For putting your helmet together. Available for about $10-$12.00, EASY to use! (Photo 14) 20. Metric Ruler- 21. 2 x 2 or larger piece of carpet- Protects work surface, keeps dust down, and stops small parts from rolling away. 22. Rags/paper towels- And plenty of them. 23. Blue painter's tape- 1 inch and 2 inch widths. For keeping glued parts in place and dry-fitting your armor. 24. China marker/pencil- For marking cut lines. 25. Sandpaper- I highly recommend Sandblaster Pro Flexible silicone sanding sheets from 3M, 220 grit. You will never use anything else, I promise. They last forever! 26. Sanding block- The sponge type, 120 grit. 27. Band Aids- You will need these. Might as well keep them handy. 28. Rare earth magnets- (10 minimum) SUPER strong! I use the 20 mm x 3 mm round ones. Cover them in blue tape to prevent scratching your armor. You cannot have too many!!! Tutorial located here: https://www.whitearmor.net/forum/topic/44619-magnets-101/ (Photo 15) 29. Butane Lighter- For sealing the ends of nylon strapping. (see # 44 below for a better option) 30. Large "half-round" file- For smoothing out edges before sanding. I used this a LOT, especially in the curved areas. (Photo 16) 31. Small "Needle file" set- Very inexpensive, comes in 6 different shapes, and is perfect for the teeth and eye openings on your helmet. (Photo 17) 32. Foam padding- 1 inch thick. Great for helmet and armor padding. Available at craft or fabric stores. 33. Velcro- 2 inch wide black (various uses) and 1 inch wide white, for calf closures (about 36 inches). Go for the "Industrial Strength" kind. 34. PAINT: Satin Black: Humbrol # 85 or Testors # 1747 for vocoder, trap/ tear drop/ear bar outlines/stripe(s), ROTJ and ESB frown, TD screw heads. Gray: Humbrol # 5 or Testors # 1138 for trap/tear drop/ear bar background, ANH frown and ab-buttons. French Blue: Humbrol # 14 or Testors # 2715 ForTube stripes/ab buttons. Mediterranean Blue Humbrol (Tube stripes alternative color) Testors: No exact match Gloss white for all rivet heads (excluding cod rivet). Mineral spirits for brush cleaning 35. Goo Gone- Citrus based solvent that will remove latex and enamel paint and NOT harm your armor. (Photo 18). 36. Small paint brushes- Assorted sizes. Try to buy quality ones.. Cheap brushes =cheap looking results. I suggest picking up a "filbert" (Photo 19) style brush (photo 5) as well, as it's rounded tip works great for painting the ab plate buttons and vocoder. Another GREAT way to get clean, crisp lines on the ab buttons is to use Testors Micro-Sponge brushes (Photo 20). 37. Wire or fiberglass mesh- (Window screen). For inside the "frown" of your helmet. A piece 3 x 8 inches will work fine, and you can trim it as needed. 38. Safety Glasses- It never hurts to be too careful, especially when using a Dremel type tool. For your Thermal Detonator, (TD) clips: (Note: There are some GREAT pre-made TD clips you can buy on this site, and some kits include them, but you can use the following 5 items to make your own. 39. Aluminum strip- 1 inch wide 40. Screws- Size #6 pan-head slotted screws **, 1/2 inch long, You will need 4. (Photo 21). NOTE: The CRLs have been updated and round head screws are permitted, but they must be the slotted (not philips) style. 41. Hacksaw- For cutting the aluminum strip. 42. Drill- Electric or battery operated, with various size bits. 43. Vise grip OPTIONAL ITEMS: 44. Heat sealing iron- For making return edges. Not normally needed, but there are some great tutorials on this here on FISD. Try it on a scrap first, though! 45. Soldering Iron- For making holes in nylon strapping and sealing the ends. Pretty inexpensive, and worth the cost! (Photo 22) 46. Plasti-Dip- A black rubberized coating you can spray inside your helmet, (also available in a brush-on). Or, you can use spray paint. Just remember to sand and prime first! 47. Heat gun- Not normally needed. For shaping ABS. Use this CAREFULLY, and practice on scraps first until you get the hang of it. These things can reach 1500 degrees and melt your armor. 48. CA (super) glue- Not recommended for first time builders, as it is PERMANENT, and you can't fix mistakes. Also, if it drips on your armor it is nearly impossible to remove. It can also become brittle over time, causing connections to fail. 49. Acetone- For use ONLY in making ABS paste for filling small gaps, (see tutorials). Do NOT put this directly on your armor, as it will melt it. 50. SUGRU- This is an easy way to attach the lenses in your helmet. Tutorial located here: https://www.whitearmor.net/forum/topic/44593-how-to-attach-lenses-using-sugru/ 51. Respirator- An informative post was made by Clint, (cm325i) concerning the effects of E-6000 glue on some individuals. Definitely worth a read: http://www.whitearmor.net/forum/topic/33347-e6000-warnings-read-them-and-wear-a-respirator/ 52. Cut resistant gloves- Especially helpful if you are prone to cutting yourself. Available online for about $12.00 (Photo 23) E-6000 update: Please note that there are certain online retailers (including those in Europe) that are selling FAKE E-6000 or "knock-offs" like these: The genuine product is clearly marked Made in the USA, and has a batch number on each tube. They do not sell to distributors in Asia, so if you try to save a few bucks by ordering from a seller there it is not the real stuff. If you have any doubts, you can contact the manufacturer at www.eclecticproducts.com, and they will let you know where to get it. The fake stuff is garbage and will not hold up. 1. 2. 3. 4. 5. 6. 7. 8. 9. 10. 11. 12. 13. 14. 15. 16. 17. 18. 19. 20. 21. 22. 23. IMPORTANT UPDATE! To make life easier, Ray (Dieltski) made this into an awesome Google spreadsheet, which you can download to keep track and add notes! Just click here. Thanks, Ray! .1 point
-
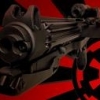
Table Of Contents: (Just click a line to jump straight to that chapter) #01 - Getting Started #02 - Resin Repairs #03 - Tools For Resin #04 - Receiver Tube #05 - Grip #06 - Trigger And Guard #07 - Selector Switch #08 - Muzzle And Screws #09 - Front Sight #10 - Flash Guard #11 - Bayonet Lug #12 - T-Tracks #13 - Folding Stock #14 - Magazine #15 - Magazine Well #16 - Ejection Port And Guard #17 - Inner Bolt With Clearing Strip, Plunger, Extractor And Serial Number #18 - Charging Handle And Rear End Of Inner Bolt #19 - Recoil Spring #20 - Rear Sight #21 - End Cap With Lock And Ring #22 - End Cap Clip #23 - The Scope #24 - Scope Rail And Counter Arm #25 - Hengstler Counter #26 - Power Cylinders #27 - Assembling #28 - Painting #29 - Weathering #30 - Blueprints #31 - Measurements #32 - Downloads #33 - Gallery #34 - Greeblies1 point


.thumb.png.69856e02550a2e6d07e44a2b1bda020c.png)