Leaderboard


Popular Content
Showing content with the highest reputation on 01/23/2023 in all areas
-
I do love my shoulder snaps. 0 time. The shoulders and biceps stay connected in my bin.4 points
-
This is pure Gold, Caleb Your own ear collection is just as impressive! I'm a bit scared of Adam's snaps though... How long does it take to put the armor together?4 points
-
@revlimiter & @Morgi4 points
-
If Glen retires...4 points
-
4 points
-
Seems you're as obsessed with ears as I am about TDs. Also: True story.4 points
-
When I help troopers assemble their armors, I ask for their second pair of ears, usually. Don't ask me why, I don't know either, but I got a nice bag of ears by now. If anyone has theirs and no use for them, feel free to let me know Look, the R1TKs, FOTKs, and Blasters are all super fascinating, but I honestly got no clue what you're talking about. I'll keep on reading and learning4 points
-
My time to shine This is the madness going on inside my shoulders. EIGHTEEN snaps per shoulder if you count each individually. 18. A garrison buddy called it a snap fetish. Starting at the bottom, the bell-bicep straps are all elastic. You could arguably do this same thing with just the front and back elastic and leave the side piece out, but it just helps pull things back to straight after waiving my arms around. I do that kind of a lot. But the double snaps keep everything in place, the TON of straps keep everything aligned, and if one pops off, there's still two to hold things up. For some reason, my HTW pack makes one of these lower straps pop off once in a while. Nothing bad happens since there's still two in action. Up top, the shoulder-to-bridge connection was a huge pain. It was originally a straight strap with double snaps on both ends, but I kept unsnapping the shoulder bell side while trying to get changed into the armor. Apparently my shoulders are really flexible. Building a new strap with four snaps on the shoulder bell side has solved it completely. Even after 5 hours, I only had one of the three snaps come undone and had no idea until I was suiting down. Overkill means you don't have to worry about things breaking whilst out in public, and that's worth it IMHO. Thank you for coming to my TED talk.3 points
-
OP (MV) Post #54: Helmet Completion You read that right. This post will cover the remaining steps in the assembly of my very first helmet. Note that internal padding and electronics will be covered in a later post. Supplies Resources CRL Helmet Alignment and Attachment Brow Trim Adjustment Extra Interior Paint Neck Opening and Attachment Trimming Ear Trimming and Painting Tube Stripes Neck S-Trim Final Helmet Exterior Questions Upcoming Pencil Masking tape Magnets Ruler Lexan scissors Xacto (hobby) blade Mounting hardware of your choice Mini trangular craft swabs (NEW, see photo below) Below are some resources links that I've previously posted when I first began my helmet work and are now particularly applicable with there I am in assembly. I've divided them into five categories: brow alignment, ears, example builds, tube stripe painting, extra build threads, plus a link to the FISD OT Gallery at the bottom. BROW ALIGNMENT Choose Your Brow Height by CableGuy (Print PDF) Helmet Alignment by CableGuy (Print PDF) EARS Helmet Ear Tutorial by gazmosis (Print PDF) Draw No Gap Ear Line by bpoodoo (Print PDF) Ear Placement by justjoseph63 (see particular posts) (Print PDF) EXAMPLE BUILDS pandatrooper's ATA Brow & Ear Section (Print entire thread PDF) Ales ATA Ear Section by Ales (Print entire thread PDF) ANH TE2 Helmet Build by TK-4510 TUBE STRIPE PAINTING Template Painting 101 by justjoseph63 (Print PDF) Tube Stripes by CableGuy (Print PDF) EXTRA BUILDS A.J.'s Helmet Work LTM's Helmet Work Cricket's Sponge Template Painting and Lid Work (several posts) zv288bot's Helmet Assembly, Scimitar's Excellent Helmet (Pages 1-3) wook1138 Helmet Progress Ensi's Helmet Work dereferenced's Photo-Heavy Posts plus Flickr album TheLorelei's Helmet Posts (across many pages) FISD OT Gallery (screen references and props used) Click image to enlarge, or navigate directly to the CRL. Helmet Alignment and Attachment To continue where I left off back in [insert month and link], while tackling my faceplate and cap alignment I had two goals: Set my brow-height at the lower end of the Stunt acceptable range; certainly not as low as Luke's Hero. Align the pieces in which away that enabled me to line up the ear screws with the rear edge of the side traps, as shown in the photo below. Though that latter goal may seem more ear-related rather than general helmet alignment related, it is relevant as I wanted to ensure I properly trimmed the cap edges so that its overlap seam with the faceplate would fall under and be obscured by the ears at the angle I wanted them to be set at. I also wanted to be sure position the screws for the face and cap in a way that would not hinder placement of the ear screws. Thus, before drilling holes for attaching the face and cap, I drew a light pencil line down from the trap rear edge to mark the lateral placement of the ear screws (knowing, of course, that the end result wouldn't be exact since I'd be somewhat at the mercy of pre-formed screw-hole dimples on the ear pieces). I also removed the ears from a WTF helmet to measure roughly where the ear screws would be placed vertically along my drawn line. If the ears are positioned as far up (high) as possible, touching the brow trim, then then top ear screw will be about 0.5 - 0.75 inches (1.27 - 1.91 cm) from the brow trim, and the second ear screw would be 1.75 - 2.00 inches (4.45 - 5.08 cm) from the brow trim. Once again, I realize this is only approximate, and the only reason I wanted to mark this on my helmet was to drill my face and cap attachment hole sufficiently away from the future ear screws areas. I then split the 1-inch (2.54 cm) difference between the ear screws area and drilled my face and cap attachment hold 0.5 inches (1.27 cm) forward from my pencil line. With the eventual addition of the two top ear holes, the three holes will essentially form a triangle. And here we have my bucket with face plate and cap attached and with magnet sachets removed for the first time. I used some extra screws, washers, and locking nuts from my lens installation, rather than rivets, to give me ease of disassembly in the future. Eventually all the internal hardware will be painted black to match the rest of the helmet interior. While I had the WTF ears off the other bucket I laid them over the top of my ATA helmet sizes to gauge what the form of the ears would cover on my cap piece so I could determine how much more plastic to trim. I had previously trimmed the flashing of my pieces very conservatively, so after taking the photos shown above I disassembled the helmet pieces and trimmed a little more ABS around the cap ear areas and the neck opening on both helmet pieces. Note that I placed blue tape over my painted traps to project against any nicks from my scissor tips. Here is where I landed after this next round of trimming. I figured I could still open up the neck area even more, but before doing so I wanted to get a basic form of my ATA ears in place, so I left things as is. Brow Trim Adjustment Through the many hours of my helmet assembly I had no doubt observed the tiny details of the sculpt and assembly details. One tiny insignificant detail that I wanted to address was one that I’d never before seen any other builder do, but once I had the idea in my head, I couldn’t rid myself of it. And what was this, you may ask? The flushness of the end of the brown trim with the helmet at the rear edge of the side traps. OCD me wanted that little tiny gap to disappear, so I set out to create a spacer on the inside of the helmet to pull the rubber brow trim right up against the cap piece. I trimmed some ABS scraps that already had a curve in them and E-6000ed them to the cap. Viola! Very clean looking if you ask me. Note that I was aware of the impact that adding a thin spacer on the inside of the cap would be. The faceplate would no longer be able to sit as flush up against the cap with the spacer in place, but I figured that added span would be easily masked with the ear pieces in place. Easily curable with a slight deeper cutout step at the top of the ear pieces. Extra Interior Paint While I had the face and cap pieces disassembled I added a little extra pint to the interior of the helmet. After finally attaching the two halves of the helmet an unpainted section was left exposed. My original can of truck bed liner spray was on fumes, but it got the job done. Neck Opening and Attachment Trimming Before moving onto the actual ears I needed to get the faceplate and cap to fit more harmoniously with each other, so first I widened the neck opening a bit, mainly on the cap piece. I added a second screw on the right side to encourage a better fitment then proceeded to evaluate the next trimming steps. Below are some before-after photos of additional trimming for both sides of the helmet. I always marked my intended trim lines with pencil to prevent accidental over trimming. Without pencil markings a reference, it can be easy to get carried away and shave off too much—something worth remembering for your entire build. At this point I had some rough-trimmed ears to use to help guide my trimming, and I used my heat gun for forming purposes for the first time. I needed a bottom section on the right-side cap to curve inwards a bit more, so I “insulated” the surrounding area with popsicle sticks (not sure if it was effective). Still not entirely happy with the form on both sides, I used an xacto blade to actually thin the plastic to create more of a flush surface at the seams. More on this again in the next EARS section! Ear Trimming and Painting Undoubtedly the ears had been a mental barrier for me for the past year, but the time had finally come, so I reviewed the helmet and ear resources I had saved (some of which are listed at the top of this post) and set to work. ATA ears have very minimal, and in some areas practically non-existent, ear trim lines fabricated into the pieces which isn’t necessarily a bad thing. My goal has been to line up the ear screws with the rear edge of the side traps, but that’s not how all builders assemble their kits, so there truly can’t be any one-size-fits-all ear trim lines. In this case of not having distinct guide lines I actually had fewer limitations on cutting locations. The trickiness of ear completion is rooted in the three-dimensional nature of the form, thus requiring trimming on the x, y, and z axes. And, because of the diversity in cap and faceplate tolerances and installation placement, there’s really no template or guide to use when trimming ears. It really simply comes down to trial and error. The perfectionist and “engineering” side of me went to work. Rather than utilize methods such as using a compass or aluminum foil, I decided to employ an elementary (literally) technique—paper mache. Essentially I would create a paper mold atop a “good enough” rough trimmed ear, and then use that mold to trim the final ear. I decided that it may be helpful to have several spare ears on hand to help perfect the technique, so I reached out to recent ATA builders to ask if they had any they could spare. (INSERT TAGGED users) @Cheeseballs, @Cali_Nole, @PajamaTrooper, answered the call, and @Cricket even sent me an old pair of RS ears. In the end I acquired five individual ATA ears, all pulled (vac-formed) from within a year of my own armor and thus all a color-match. Iza @Cheeseballs even sent me the awesome cartoon below: (And no, @Morgi, you cannot have my ears.) The first thing I did was to pencil-mark the very faint trim lines on one of my original pairs of ATA ears (ATA kits ship with two pairs), which I had already painted black on for practice. I then proceed with trimming to the lines using lexan scissors and an xacto blade. No dremmel at this point. After attaining a rough profile that was acceptable, though most definitely not the ear gaps I was after, I aligned the ears with the traps and drilled the mounting holes. I recalled seeing a technique involving drilling the holes in the ear pieces and installing tall screw posts in the cap in order to maintain proper and consistent ear placement when sanding and test fitting, shown in the photo below. With the “guide post” screws inserted from the inside of the cap I proceeded with some further trimming, and the following images reflect where I landed. Notice the ear gaps are quite pronounced due to first-time-builder over-trimming, but they would be rendered moot by the forthcoming paper molds. Happy with the semi-final profile and placement of the ears, I then moved into the paper mache phase. But first a brief explanation on why I opted for a paper medium. I had considered using molding silicone but thought it might be too messy, and the ear gaps would have posed leakage problems. I also desired to stay away from any recasting appropriateness discussions, and hence fell back on paper, and more specifically, toilet paper / bath tissue. Haha. I prepped my helmet in a wash bin, poured some water in a small container, and raided a bathroom closet for some low quality toilet paper leftover from the beginning of the pandemic. I then set alternating layers or wet and dry toilet paper atop the ears and the surrounding helmet area. The goal of this was to capture a true form of the seam between the helmet and ears, so I paid special attention to the borders of the ears where they rested on the helmet. Here is a three-stage photo sequence showing layering in progress, the completed wet mold, and the final dried product. Note that I poked hold in the wet mold so that I would later being able to discern proper seating upon the ear. As shown below, the edges of the hold did pull up from the helmet surface, due to shrinkage while drying, but the edge form capture remained most uncompromised. Here is what the inside of the paper molds looked like. Notice that even the screw head forms were captured by the mold. If I recall correctly, complete drying took between 24-48 hours, and once that was done I laid the molds over another set of fresh ears and traced the form line over via pencil. For redundancy to check my work, I then also formed two layers of aluminum foil over the helmet and ears and compared the resulting form lines to those from the toilet paper molds. As shown in the last photo ABOVE, there were some slight discrepancies between the paper and foil lines, so when I proceeded with actual ear plastic trimming I stayed conservative and followed the more shallow lines. Note that in the photo above, the ear pieces are actually a color match; there was simply some white-balance issues while photographing. With the molds complete, I was also able to determine that one of the spare ears that I had acquired was already over-trimmed for my purposes, as shown below. I then proceeding with trimming out new ear forms, which I actually planned on being a second draft of sorts. I estimated that there may be some inaccuracies with my rudimentary molds, and that I may also simply make errors due it being my first real attempt at close form fitting. (Recall that with the first set of ears I cut for molding purposes, I paid virtually no attention to the helmet-ear gaps). Here are some photos AFTER trimming with an xacto blade but BEFORE fine-tuning sanding; honestly, already passable as-is, if you ask me. Before moving on to trimming and sanding my final set of ears for actual use, I had initially decided to paper mold all my remaining new ears simply to double check that their profiles were all identical to begin with. Finding that they were, and behind quite happy with the results of my second draft ear sanding with negligible gaps, a new thought dawned on me. Rather than reusing my original paper mold for my final ears, or even remolding the helmet with my second draft ears, and could simply remove my second draft ears from the helmet, place them inside the new molds, and trace the ear edge/trim line onto the inside of the paper mold. I could then cut the paper molds along the lines and then place those molds atop brand new ears and trace the outline back onto the ears. I suspect that sounds really complex in writing, and as of now, I have not actually executed that process (other than molding the ears as shown below). To this point, the ears shown attached to the helmet above (with red background) were intended to be intermediate ears that we then be replaced by final ears. However, they turned out so well that, coupled with working on a tight deadline over the past two weeks (January 2023), I elected to keep them. There is a stray hobby blade slice that is visible upon close inspection, that that imperfection may push me to eventually redo the ears, but for now I can live with it. At one point in my build I wanted to be able to done my helmet so I actually painted up these intermediate ears, minus the rank bars. I had recently discovered little craft swabs, which looked line minimalistic and dangerously pointy q-tips, and worked GREAT for paint edge cleanup. Just dip them in a little mineral spirits and crisp straight lines are achieved in no time! Some of you may recall me having previously painted ears as documented in this post, and those were to be the FINAL ears, which remain unused at this time until I get motivated back into action. You'll notice in the ears above that there were not yet mounting holes at the bottoms of the ears so I went back and drilled them at the pre-molded areas, starting first with a small drill bit then working up in size. I think used a countersinking tool (TURNING BY HAND) to properly cradle the screws (required for higher levels of approval). To restate, DO NOT countersink using a drill or you will likely bore all the way through the soft plastic. To finish off ear installation, I spray painted the six screws with white glossy white paint and a clear enamel. I'll dive more deep into this paint process when I touch on painting the rivets for my ab and kidney armor pieces. Tube Stripes For the past several years I had intended to hand-paint my tube stripes, but when I realized that there were actually ANH-style decals that individual stripe pieces instead of one large piece of vinyl (like ESB), I changed course. There's no way I'd be able to paint, even with a template, as clean as a decal, so I purchased a set from Trooperbay (link to be added later). In preparation for application, I cleaned off the helmet tube surface with isopropyl and let it air dry for a few minutes. * Note, I've since redone my frown teeth paint job, so disregard the teeth paint. * Two of the critical factors in tube stripe application are 1) Orientation of the stripes, and 2) distance from the top of the tube/edge of the fact. First, orientation. As shown in the image below and documented by Dan "CableGuy" in this thread, the stripes should tilt or fall forward towards the front of the helmet, as opposed to appearing to be leaning backwards. Once proper orientation of the left and right sets are determined, proper placement must then be judged. The edge of the stripes are to be roughly one pencil's width from the edge of the face of the helmet, and so for my build to trimmed my decal paper to match that space. See the first photo below showing the pencil, and note that that particular decal is for the wearer's right side of the helmet. I then ran a pencil eraser over the top of each stripe to ensure maximum adhesion with the top layer of "contact paper." Convenient to have a pencil so handy. Next was to peel off the topper, and hopefully the stripes would peel off the backing paper with it. I peeled up at an angle, say perhaps 45-degrees, instead of straight parallel with the length of the decal. A few times the stripes didn't immedialy pull up, but in those cases I simply lowered the top sheet back down and and tried pulling from the other edge (essentially just changing from 45 degrees on one side to 45 degrees on the other side). In the end each stripe pulled up very well. After trimming the top rear corner of the decal paper to gain clearance from the ear (next photo below), I carefully placed the decal down onto the helmet. Screen-used helmets had varying numbers of stripes on the sides, and I opted to use all 16 stripes on Trooperbay's left-side decal, and 15 stripes on the right side. I then got my handy eraser back out and scrubbed it over the decals again to maximize their adhesion to the helmet surface (see photo below). This would hopefully combat them from peeling up with the top contact paper. Here is the final result on one side of the helmet, and I was equally satisfied with the other side as well. Neck S-Trim The final component of my helmet build was to install the S-shaped trim around the opening of the neck. Note that some armor makers provide trim that has a U-profile rather than S, but the S-profile trim (shown in the first photo below) is required for higher levels of approval. Another point of nuance is that some builders place the seam of the trim at the back of the helmet, but it's actually most hidden when set in the front at the Vocoder paint. This area of the helmet is so recessed that it's impossible for onlookers to see, while a seam in the back would, in fact, be visible. When fitting the trim it's important to try to pack it as tight as possible in order to maximize tension and thus retention. Start with one end at the Vocoder area (close-up shown below), and squeeze it onto the the helmet, trying to get as deep a fitment as possible. Once you've wrapped it all around, before cutting it to length, go back and try to squeeze more tension by working around the whole length again. You may be surprised to find that you were able to compress an addition 1cm to 1-inch onto the helmet the second time. Once you've done this you may now cut the excess trim, and I would recommend adding in an extra 1cm in length just in case. You can then try to compress it again, and if absolutely necessary, cut it shorter if it simply won't fit. Better to have to cut again then cut too short the first time. On the wide shot above you'll see that the inside of the trim may "bubble" away from the rest, which is due to the curvature of the inside edge, which is technically shorter than the outside edge. If this is really bothersome to you, you could consider gluing those areas down with E-6000. Final Helmet Exterior The big reveal. Moment of truth. Final product. Here is my first ever build helmet! This next set of images more closely reflect what my helmet now looks like after receiving feedback for my Expert Infantry (Level 2) submission. I was asked to remove some paint from the bottoms of the teeth, as it appeared to extend onto the gums. I also took the opportunity to "re-form" the end tips of the frown. First Attempt: Second/Final Update: Helmet interior ATA vs WTF Comparison Forearm pieces Printable/downloadable PDF of my entire build thread to this point contained in [THIS SHARED FOLDER]. The PDF will typically be updated after each new post and will note sequential version numbers and revision dates.3 points
-
Yup. Again.3 points
-
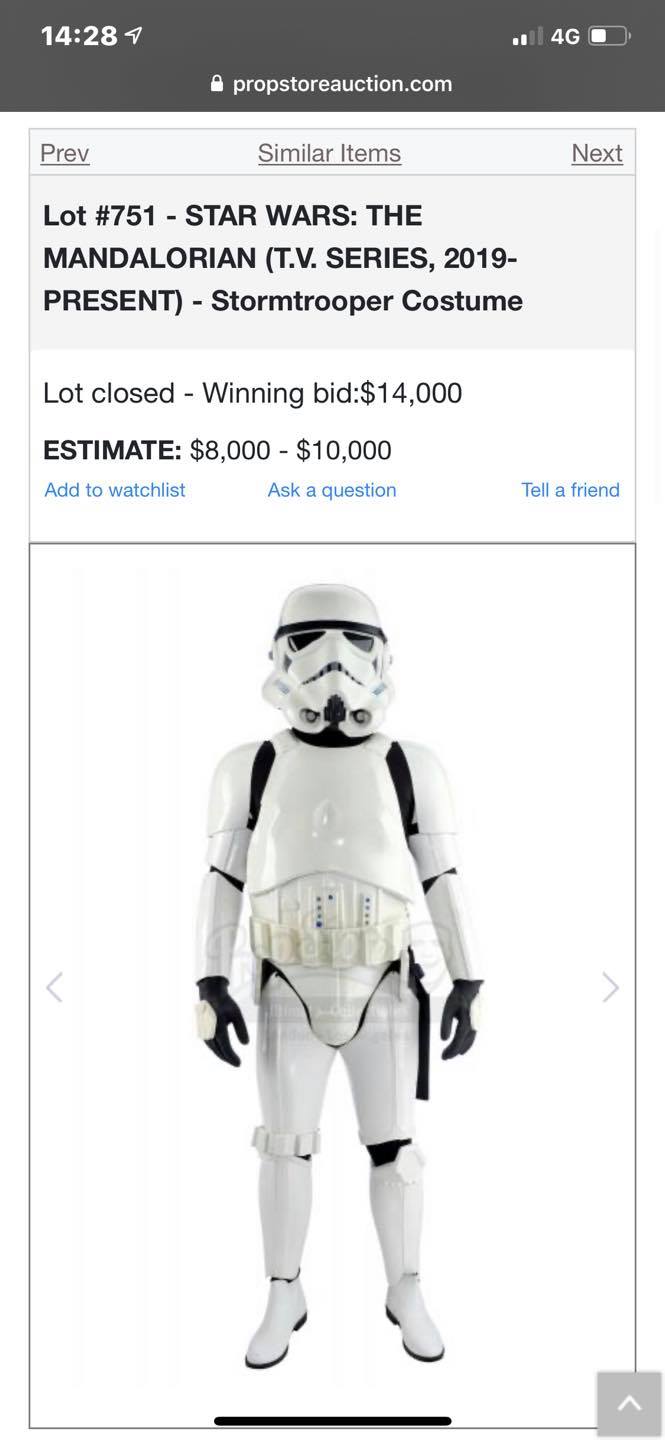
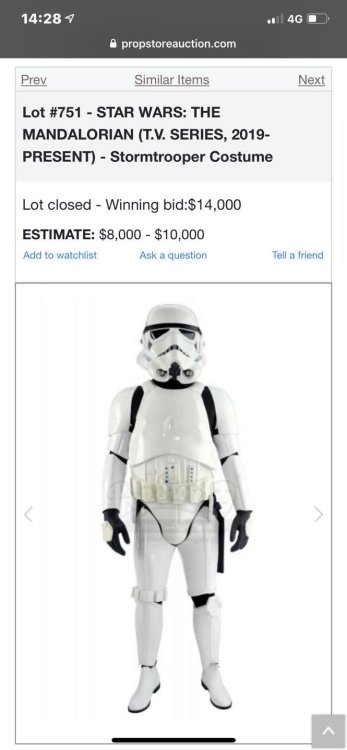
Sure enough. I was aware some of the screen used member costumes went for auction but I didn't know one of them wound up at Planet Hollywood. Funny I just happened to stumble upon it by chance. Thanks for sharing the additional photos and the article. They did not do that armor any justice with the way they have it displayed. Here's mine on a PVC and duct tape mannequin that didn't cost $14,000.00 to have on display in my living room.2 points
-
2 points
-
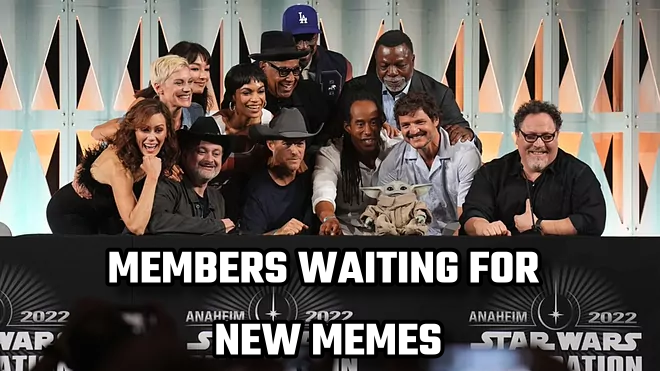
I discovered this on our garrison calendar after yesterday's troop. It called for a high effort meme.2 points
-
2 points
-
2 points
-
2 points
-
Love the photos Ardeshir, no bad path here, only the fact that we asked for your patience sir. There is a lot going on in the background for election preparation which currently is a priority over CRL work. We have a process that allows our members to participate in the shaping of our CRL's, why should that be circumvented?, how is it a bad path for our members to be involved?1 point
-
A few other images of the display A write up on the costume https://www.orlandoattractions.com/this-is-the-way-to-planet-hollywood/1 point
-
Appears to be the same one and it's from RS Props From a Facebook RS Props post The Prop Store auction late last night (UK time) was really interesting. Some items escaped our grasp, but not all. We did secure a new play thing, more about that to come. However, let’s talk about this Stormtrooper. Built by us a few years ago it found it’s way onto the set of the Mandalorian season one. If the price tag is making your eyes water check out our website, they are much more affordable direct from us and not pre owned. Seriously, congratulations to the buyer and the seller. We are proud to see one of our creations being sold by such a prestigious organisation.
 1 point
 -
I think this armor is the one in the first Propstore link posted: https://usm.propstoreauction.com/lot-details/index/catalog/267/lot/62859?url=%2Fauctions%2Fcatalog%2Fid%2F267%2F%3Fpage%3D30%26view%3Dlist There is a chip in the vocoder in the Propstore TK that can be seen in the same location for the Planet Hollywood TK. There is a visible crack in the cod piece that can be seen in both. Also, the top edge/gap of the right thigh piece looks to be the same. Interesting this ended up in a restaurant on Disney property.1 point
-
Thank you Jonatan. I could never see that button. I use a tablet and when it is in portrait mode, the button does not show up. When I switched to landscape, it is there1 point
-
Yeah I think eventually I'm going to pull out all my helmet content into it's own thread someday, but perhaps even the ear technique would be worth it. Just be aware that the brow spacer impacts the cap-face gap, so you may need to adjust the notches in your ear pieces.1 point
-
How very timely... :-)1 point
-
Yeah Adam (Rev) definitely went CRAZY with his bell-bicep strapping. I'm sure he'll be eager to post photos, @elscorcho42.1 point
-
@justjoseph63 and @Deployment Officer Team - I've now updated first post in this submission with new frown paint images as requested. Thank you for your review! EDIT: The updates with full image set are shown at the very bottom of the first post, but here is a preview.1 point
-
Updated to something even cooler! @TikiTechie1 point
-
 Hi Ardeshir, In order to finish this EIB app we still need you to make the two updates requested: 1- Update the Helmet showing the correct from teeth number . 2- Since your request of allowing the Black D-ring is in an initial phase and this can take some time, following the right process , the update your F11-D Blaster with the correct D-Ring following the CRL as it at this time would be necessary . As Andrew @Sly11 responded before in this post "You presented a case, and it is being worked on, your case is not ignored, it is being handles with the same level of action ans seriousness that all CRL potential updates are given. In fact it is also being expanded upon, but like all balanced and fair systems the process takes time. You know this first hand as the TLJ thread has been running for over 2 years, we had no correct images so we couldn't update until we did. Patience is the key here, this needs to be done in the correct fashion and that is the fair and balanced way to do it for everyone concerned including our current and future members. I have offered up more possibilities in that thread because you are correct, this isn't about a D ring colour, it is about multiple variations and different parts, and if we consider one, we need to consider more, and it deserves the due process of discussion, and outcomes to be put to membership polls. I think its pretty clear that we are invested in continuing to update our CRL's, so your patience and understanding are appreciated." IMHO, you could update this submission as the current CRL requirements and move on or we can let it on hold till the CRL updating process finish later on. Thank you for your patience brother.1 point
 -
No I’ll probably use Velcro. I chatted with equuspolo (Ardeshir) and he recommended overlapping for extra support. Time to bite the bullet and glue the inner chest and back: Started cuttings for a batch of ABS paste:1 point
-
 Hey brother just wanted to check in. Am I just moving away from this submission? Not really sure what is going on? Same with the TFA?1 point
 -
5 teeth done. 4 to go. I expect to complete it tonight and will submit photos of the updated helmet paint job.1 point
-
In other news, I attended an armor party recently and... Appreciation Because without the DO's, Attachés and other active members it would be way more difficult to build high quality armor.1 point
-
1 point
-
1 point
-
I wasn't sure if I should post in this thread, or Glen's post, so I opted with the more recent of the two. And here is a link to my post on the story behind my nickname (MV). Three years after creating my account and starting my 501st journey, and I finally have my very own shiny new TK number. 73692. When I first started my build (actually before I had even purchased my armor) I started brainstorming what TK number I might want, and began by compiling all the spoken numbers from the Star Wars films. The most known were 1138 and 421, but I desired something a bit more nuanced. My birthdate and zip code were also available on the 501st ID list, and for a time I got hung up on variations of 3263827 (Death Star trash compactor). I also considered 501+ my age, which was available, but elapsed time has now rendered my current age unavailable. A number corresponding to a scripture verse referencing helping others, due to the abounding assistance I've received from other troopers, was also on the table, as was the Lego set number (75276) of the mini Stormtrooper helmet. (Seriously, somebody needs to jump on that Lego TK number, and you heard it here first lol). However, I eventually decided on a string of individual numbers spoken in sequence in A New Hope. 10 - 7 - 3 - 6 - 9 - 2 - 11 - 5 Anybody recognize the sequence and corresponding film scene? I'll give you a hint below, as part of a more in-universe explanation, though this is not a full character backstory as others have written in this thread. Back to real life now. In fact, back in 2019 or 2020 I wrote that aforementioned numerical sequence on a small sticky note and stuck it in my wallet for safekeeping, and for the past three years it has remained in the exact same spot, prominently placed atop my driver's license. Much like my TK character's mini story, this was to serve as a reminder to press on with the continuation of my armor build. And now I can finally remove the note and regain easier access to my real life ID. Haha. For those of you who still haven't sorted out my TK ID: TK-73692 standing by.1 point
-
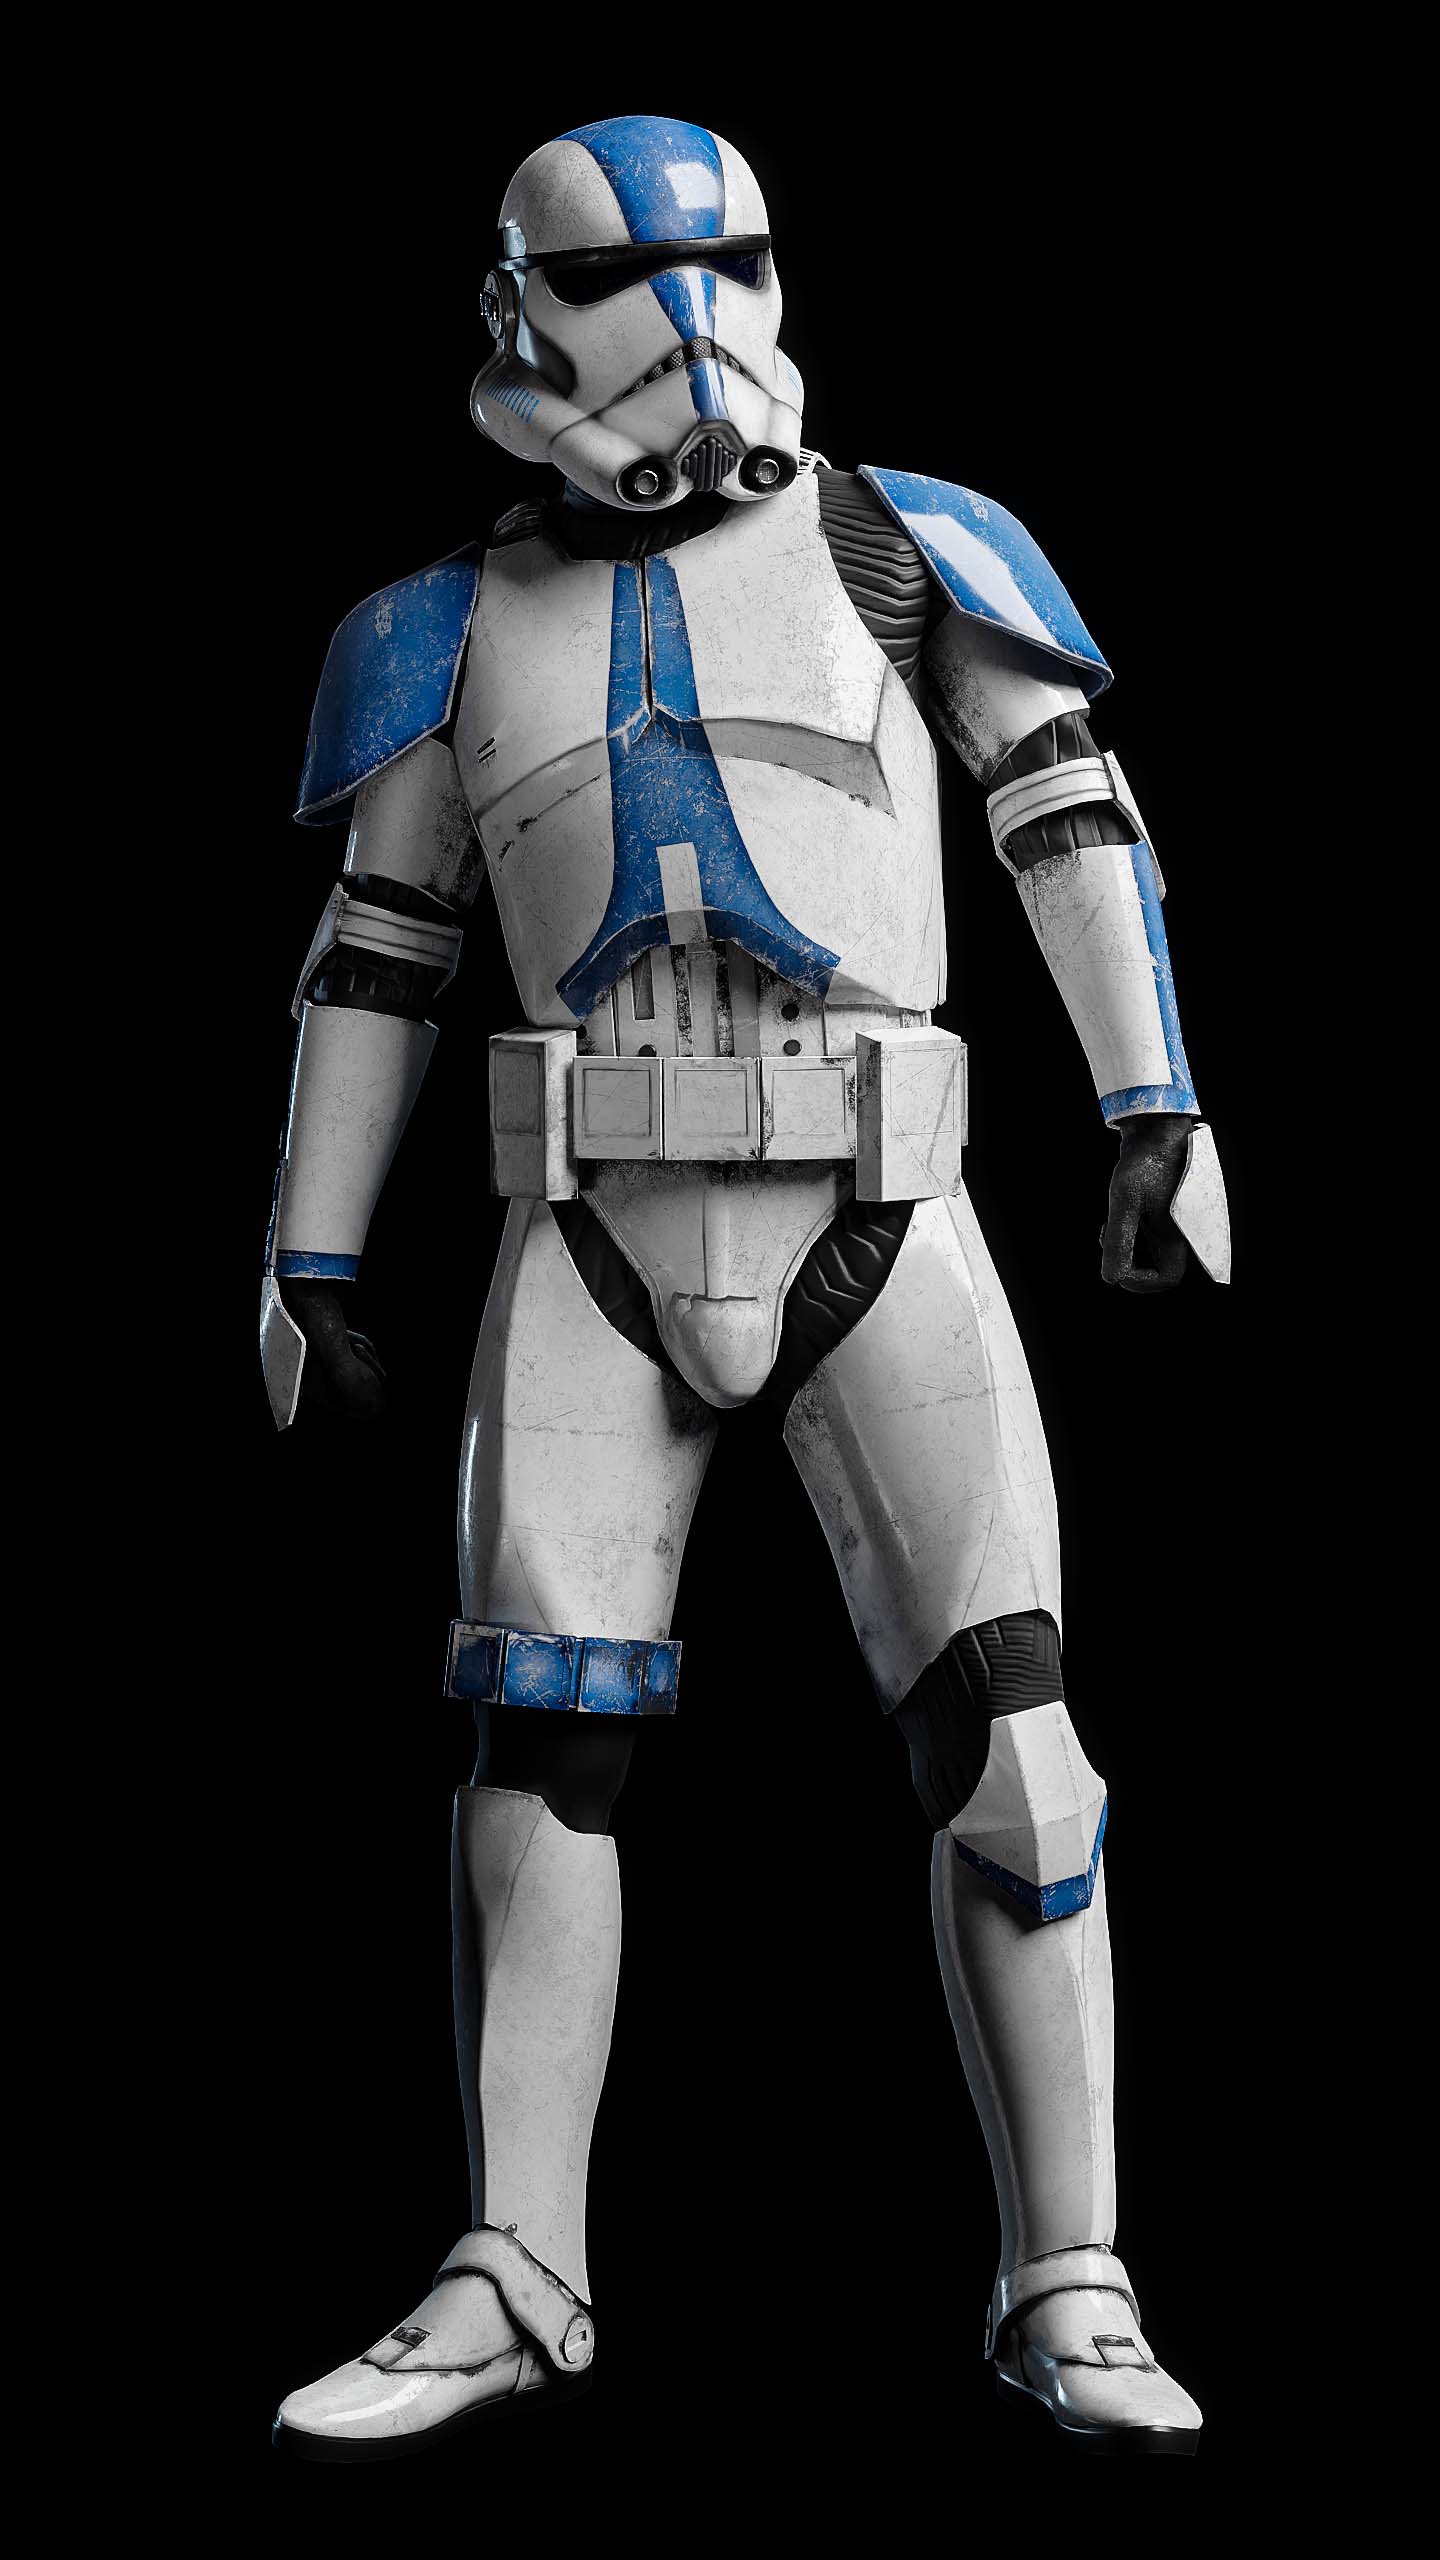
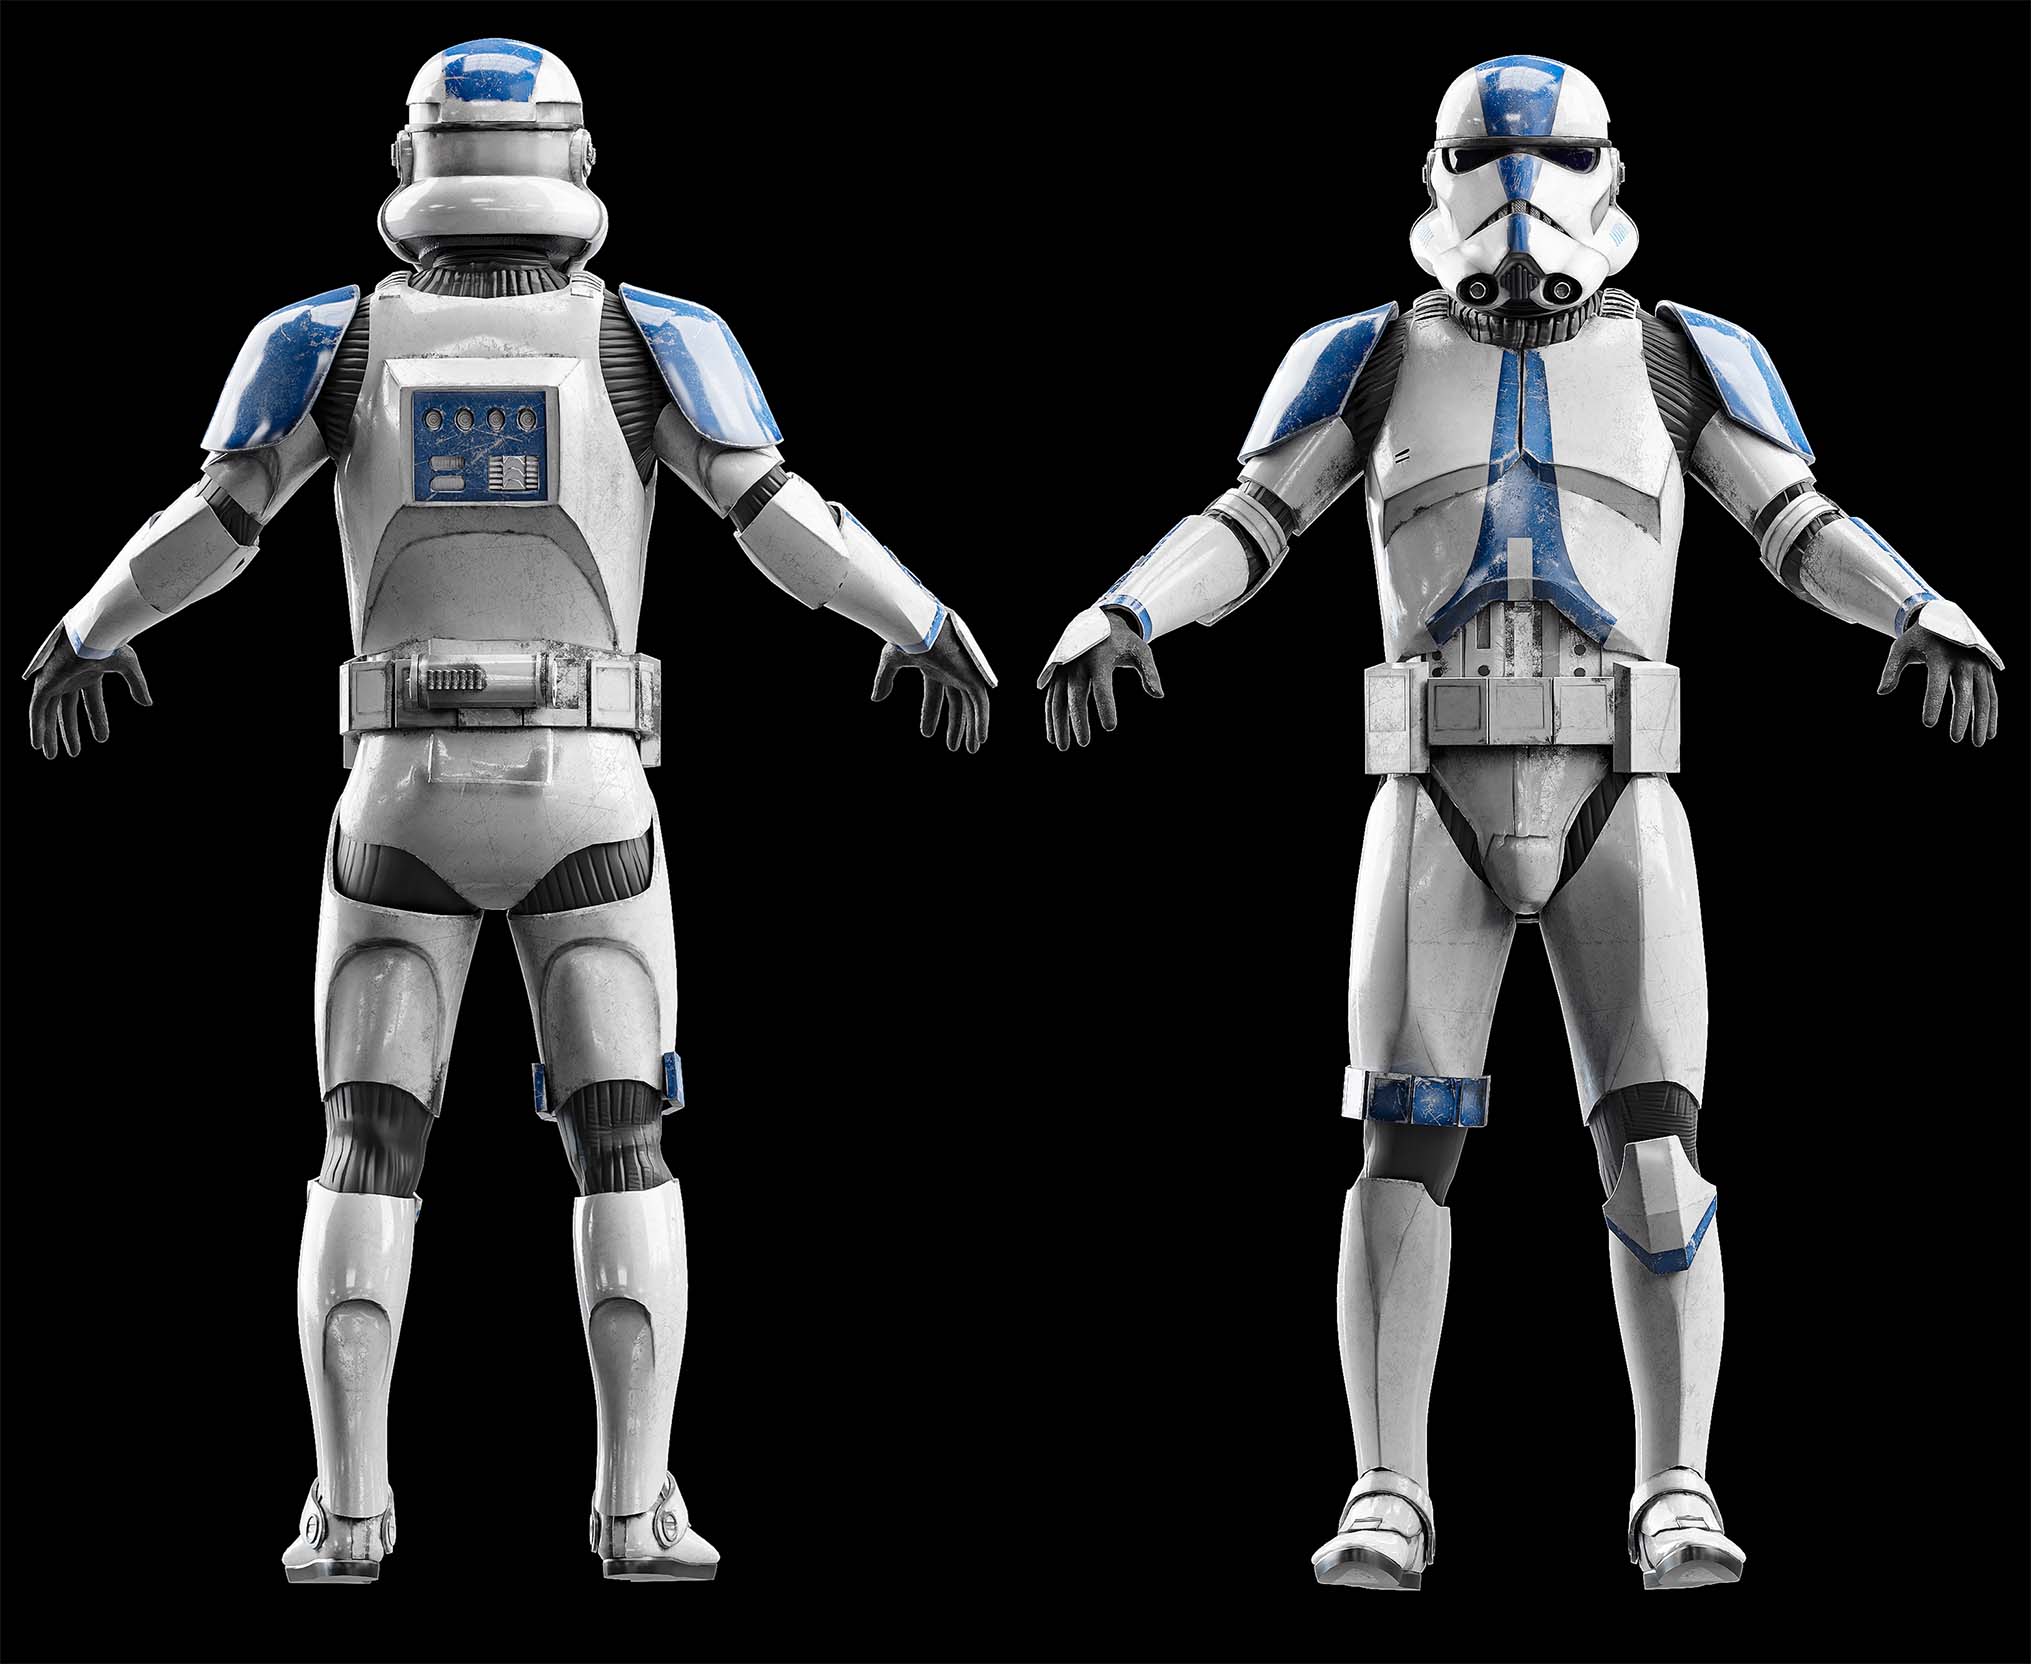
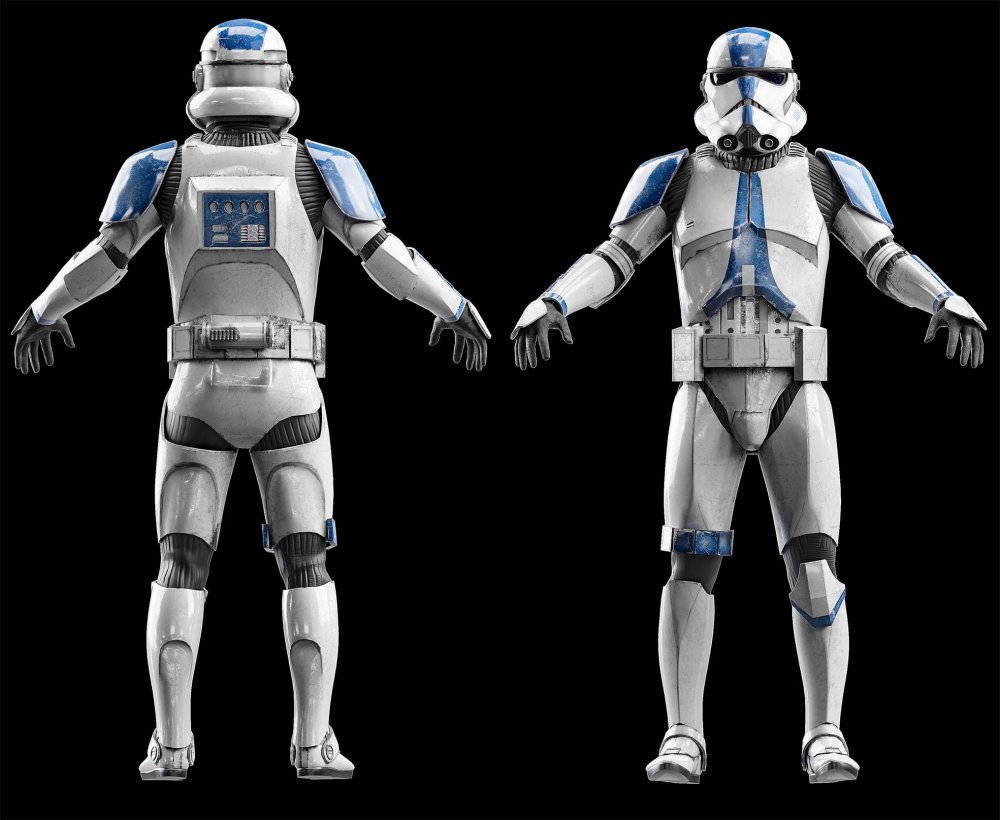
Another good reference. Very nice renders. Personally I would make those upper leg gap adjustments from the live action suits so you could actually sit if wearing this armor. I also should be starting my build by February if all goes to plan. This is indeed a website about building armor. 2023 is the year Triton gets cosplayed. Anyone know if a live action Clone CRL is out?1 point
-
I saw Cameron_Kiesser sharing his version of the phase 3 clone stormtrooper with the meshes from Delta Reynolds and Jaztermareal so I thought I'd share my own version with the same meshes

 1 point
 -
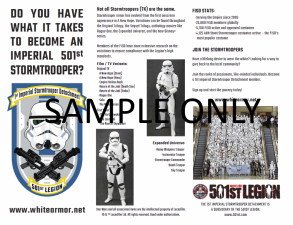
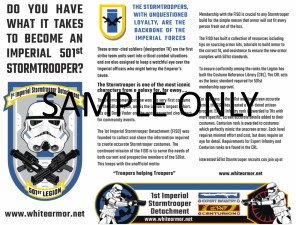
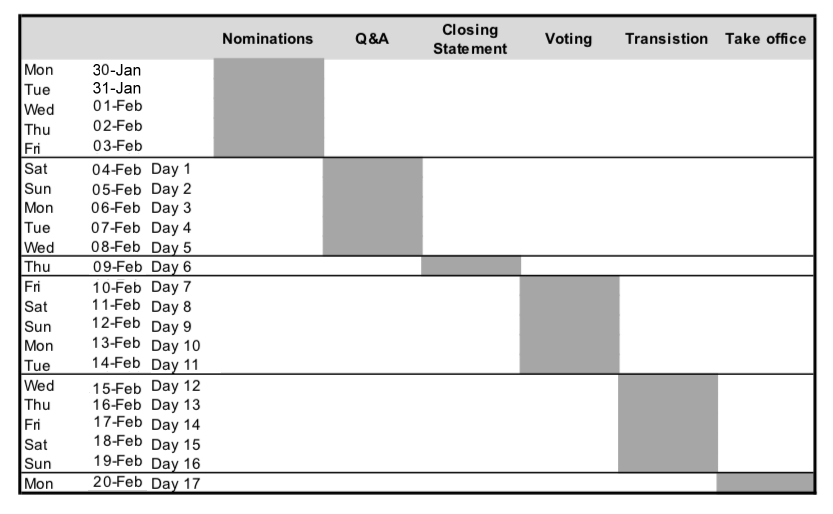
NEW Detachment Leader Merchandise & Officer Detachment Affiliation Elections Just For Laughs FISD Meme's Update Your Build Threads Around the Detachment Photo Editing / Signatures INFORMATION & AWARD PROGRAMS Common FISD Acronyms and TK Glossary Pre Approval Forum 3D Section Field Exercise Award Imperial Attaché Program Master Armorer Award Fire Teams EIB & Centurion: What do these terms mean? Need Help Ask the Deployment Officers Advanced Tactics Awards Public Relations Staff List 2020 Follow FISD Welcome everyone to the final FISD Newsletter for the 2022-23 term! I would like to kick this off with a HUGE THANKYOU to all our members for participating in some way shape or form and contributing to this wonderful Detachment. Lets celebrate the year that was 2022: We saw a raft of new members come into the forums, plenty of build threads and finally our First Order ranks are again growing due to an up-step in supply of armour which is truly awesome. As always, we also had plenty of new members join and follow their life long dreams of becoming original trilogy TK's The forums remained a calm and happy place for all with quite a few newer members going over and above in true troopers helping troopers form which we absolutely love to see. Morgi TK 66744 kicked his FISD Memes thread into overdrive, and there is some seriously good memes there, so thank you to all those who joined suit and contribute to that thread, it brings a smile to my face. If you haven't seen it you can find it HERE Nairy TK 23592, not a moment after he was approved, jumped into action providing assistance where he could to his fellow members. Nairy set up a thread offering to create signature banners for anyone who wanted one. I haven't asked him yet, but mine could probably do with an update Nairy style!! MaskedVengance not 501st approved yet, but I gotta say, Caleb has been one of the busiest yet to be approved members we have seen for a while. He continued his supportive trend from last year and has been ever present on our forums helping where he can. A while back he created a fantastic all in one resource called ANH Stunt resource Compilation. basically a conglomerate of many threads and resources all linked under a single post, and it has proven it's worth on countless occasions. These are only a few examples of the exceptional level members go to as part of this community, and the Detachment is truly thankful for your input. We had another year of amazing merch and sensational designs, again showcasing the talent we are so privileged to have in our membership. Our last run, the FISD sweats and hoodies proved to be very popular, as was our Anniversary shirts and Celebration Anaheim patch. Don't forget the interest thread will be closing very shortly for the Celebration London patch, so jump on board. We finally put the icing on the TLJ/TroS CRL, 2 years of conversations with plenty of, "should we, shouldn't we" on some aspects was well worth the time spent bringing it up to a standard that reflects better accuracy to truly have members look like they just stepped off the movie set. There were other minor CRL tweaks as well, but next year will bring a Legion wide CRL upgrade to a newer platform. This will indeed be a large undertaking increasing the work load for LMO's and DL's alike. 2022 was also a year for the return of little things, like trooping and seeing fantastic photos appearing on our Facebook platform and across the forums. Lots of happy TK's out there doing what we do best, making smiles and raising money for charity. For many it is their happy place. So whether you spent a little or a lot of time on one of our platforms, thank you for making 2022 as good as it could be for FISD and our entire community. With Unquestioned Loyalty Andrew Franke TK-11469 "Sly11" Detachment Leader Greetings Fellow Troopers! Please help me congratulate Omar (TK-56072) @RoninTK72 for his winning design for our Celebration 2023 Europe patch contest! I have an interest thread running here, so please click the link, check out the winning design and give us an idea how many you might like. I would like to get the run thread up and running ASAP! The staff is working hard with me to finalize a few other merch items that we'd like to try and get out before the term end, or have ready for the beginning of the next term. I'd like to take a minute to thank @Sly11 for allowing me to be your DMBO this term. I want to thank everyone that assisted me with getting the work done, and I hope that the items we did get done where exciting and wanted. I have some other ideas for next term if I am lucky enough to be invited back to the staff in this position for 2023. I hope everyone had (or is still having) a wonderful Holiday Season! With Unquestioned Loyalty James Silvius TK-12953 "jsilvius" Merchandise & Branding Officer With elections starting at the beginning of February it's time to check your detachment affiliation. OK so you look at your Legion profile and it shows that your detachment affiliation to FISD is pending, or otherwise incorrect. Why does this happen, and what is detachment affiliation anyway, and what will FISD do about it? The answer is that detachment affiliation is only ever used once a year, and for one purpose. The only time the Legion ever uses it for anything is to determine who can run for DL and who can vote in detachment elections. That's it. Otherwise it is pretty much ignored and not used for anything. The process of validating detachment membership is cumbersome and time consuming because people use different email information between their Legion and detachment logins, and that there is no way to bulk update the rosters. For a small detachment it is not a big deal to do this manually, but for a detachment the size of FISD with hundreds and soon thousands of 501st members, it's impossible. Fortunately we have technical folk both on FISD and in the Legion web team. Once a year they take a feed from FISD's database and do a bulk update on the Legion database. This occurs right before the election cycle starts and is done once per year. Pro tips: 1) Ensure the email address you use on the Legion & FISD boards are the exact same. 2) Ensure that your FISD profile has the correct TKID. 3) IMPORTANT! You MUST be in the right security group. It should be "501st Stormtrooper" in order for the automated system to pull you over. This thread is where you get your detachment access updated. 4) If after the bulk update is complete and your profile is still not updated, and you are 100% sure your info is in sync between the two boards, then ask for to the Legion web team. They should get feedback on why this isn't working. 5) If all else fails, ping the FISD staff. Which basically means that we'll simply tell the 501st web team to bulk approve everyone 6) If still you have no luck you can contact the legion web team directly via email: [email protected] To check detachment affiliation go to the 501st holocron here, login using your 501st forum username and password, click on YOUR PROFILE DATA, then look down the lower part of the page for YOUR UNIT AFFILIATION, then under DETACHMENT AFFILIATION. If you do not see FISD listed reach out to your GML (garrison membership liaison) as they can add it if you are an approved Stormtrooper. If FISD shows as PENDING contact our DL @Sly11 and request a manual update. 2023 Legion Election Timeline It's coming up to that time of the year again, legion elections are just around the corner. Nominations Open: 30th January 12.01am Nominations Close: 3rd February 11.59pm If only one person was nominated for a particular position then it was filled and the election process is ended. If more than one person was nominated Q &A Starts Q & A's for Garrison, Squad, Legion Commanding Officer and other Detachments has begun Starts: 4th February @ 12.01am GMT Ends: 8th February @ 11.59pm GMT Closing Statements: Starts: 9th February @ 12.01am GMT Ends: 9th February @ 11.59pm GMT Voting: Starts: 10th February @ 12.01am GMT Ends: 14th February @ 11.59pm GMT Transition Period: 15th February @ 12.01am GMT to 20th February @ 11.59pm GMT Take Office: 20th February @ 12.01am GMT Election Issues/Access You may reach the Legion Election Moderators by emailing [email protected] Cast your vote here Link to legion election forum here Costume Approval Information New Members - Legion Elections 2023 With the Legion election period underway the membership database will be in lock down, during this time new member applications through your local garrison/outpost/squad can not be finalized, you may however still submit them but they won't be processed until the end of this cycle. This does not affect the addition of any new costumes to an active members roster/profile, however it does affect any membership status changes ie: active / reserve / retired and any personal information updates. The period of membership database lockdown for 2023 starts Feb 4th and ends Feb 20th "FISD Memes" Some of you may have noticed some extra activity in the meme thread of late, whether it's because of the weather, the festive season, having more time on our hands or just because we can does not matter, anyone is welcome to post in the thread so don't be shy. Thank you to Luca "Morgi" TK-66744 for starting a FISD specific meme thread, hope to see more of these in the future not only by you but by others as well. You can find the thread here. WE NEED YOU TO UPDATE YOUR BUILD THREADS As most would be aware we are diligently working through the forums updating watermarked images, missing images and broken links, this has taken over a year so far and has been a monumental task but there is still a lot of work ahead of us. Members build threads are one of the biggest areas of watermarked/missing images and we are asking you the membership to help and update your build threads yourselves as this is just too big a task for staff. Build threads requiring updates are being moved over to this area https://www.whitearmor.net/forum/forum/241-build-threads-requireing-maintenance/ Thank you in advance for your cooperation. New FISD Tri-Fold Brochure It's been quite a long time since we actually had these available and since then many things have changed leading us to updating some of the text to include new costumes, and have more relevant information. Originally these were done in a limited run by the member who created them, but nowadays, we have moved this to a print your own service making them accessible to all countries around the globe. Files are available to all full 501st members on request, and are completed in a very high resolution to ensure quality in a finished product. The thread can be found here for more information and how to access the files. Ever wanted your action image edited on a cool background, an awesome signature banner or profile picture made, well Jonatan "Nairy" TK23592 has offered to edit photos for our membership. For more info head to his thread here INFORMATION & AWARD PROGRAMS For a full list of FISD awards head here. Are you new to the FISD and wondering what the heck all those abbreviations and strange sounding terms mean? To help you @justjoseph63 has started a list of the most commonly used ones that will give you some insight. If you have ANY questions about a particular term that is not listed or suggestions for new ones please contact Joseph. You can find the list here. Pre Approval Forum allows future Troopers the opportunity to submit photos of their completed build to be reviewed by the Staff, Imperial Attaches and others in preparation for forwarding it to their GML for approval. Any and all advice/suggestions given will be specific, constructive, helpful and respectful. Please note that this program will NOT take the place of your local GML, as Detachments are not chartered for costume approval and can not override a GMLs decision, but is instead a peer review program designed to help you look your best and offer guidance and positive feedback. For more information on this program, please visit the link here. Don't forget to visit our 3D section when next surfing the FISD forums, there is plenty of useful information to potentially help you on your next TK adventure. You might be feeling may generous and share with our community a new TK related 3D file and maybe win yourself a 3D contributors award so check out the details below and be part of the in house 3D community. Here is a link to the FISD 3D Contributor program. Don't forget to create a troop log here on FISD and get awarded for your adventures The list of accomplished troopers keeps growing, so get on board and register your troops today Simply start (or update!) your troop log, keep the running total in the title, and post (at least!) a date and name for the official 501st event where you wore your TK! Once you've hit a milestone count, go over to the "Field Exercise Awards -- Post your milestones here" thread to request your profile be updated! Simple, right? Award Recipients December - January TK-26590 "Escrich Trooper" Nora - - - - - TK-20177 "Cybergrunt" Bill - - - - - Are you an approved TK that spends more time on the boards than the average Trooper? Do you enjoy using your knowledge to help out future and existing Troopers? If so, we would like to invite you to join the Imperial Attaché program! Members of the I.A. team are chosen to help out not only those here on the boards, but on a local level as well. Our aim is to have at least one in each and every Garrison, Squad and Outpost in the entire legion to be the eyes and ears of the FISD on a local level. For a complete list of Imperial Attaches, go here. Some of the benefits: Access to exclusive Attaché merch., including patches, IA patch , IA Rocker You may also be in the running for an Imperial Attaché Award Imperial Attaché Award for those attaché's who have gone above and beyond [minimum 1 year of service]. You can find a list of prior recipients here. The FISD Master Armorer program is an optional, detachment only incentive award to recognize individuals who have directly helped another 501st stormtrooper to achieve Expert Infantry status. Some people spend countless hours helping others, and want to reward their results as well as incentivizing new people to help as well. To register a “win” in the program, the assistance must have provided hands-on help trimming, building, and/or fitting of said armor for the person who was awarded Expert Infantry status. More information can be found here Want to setup a "Fire Team? the Fire Team program is completely optional, and is intended to help form a common identity and spirit of camaraderie among 501st Legion Stormtroopers in the same geographic area/garrison that troop together. Fire Teams are not officially recognized by the 501st Legion nor the FISD, although they will be able to access a Fire Team sub-forum on the detachment website. You can find more information here. With Unquestioned Loyalty Mark Ryner TK-4584 "captsafe66" Fire Team Relations So what exactly are and levels? These programs were designed for those who choose to take their armor above and beyond the minimum requirements for basic 501st Legion approval. It gives you the chance to show a level of dedication and pride that takes your armor closer to being as "screen accurate" as possible, without as much extra work as you may realize! You can find more information on the programs here. For those unaware it is possible to achieve extra awards at Expert Infantry for each additional version costume you have approved, additional awards are not issued with another Expert Infantry number (you are only issued 1 Expert Infantry number) but you will see a star above the award on your profile and the thread title will show [APPROVED] 2nd, [APPROVED] 3rd, [APPROVED] 4th and so on. Multiple EIB award recipients and info here NOTE If you are approved with a "2nd Version" of a particular costume that you are already approved with you do not receive an additional award, there is only 1 award issued for each costume version ie: only 1 x Hero, 1 x Stunt, 1 x HWT, 1 x ESB, 1 x TFA and so on. If you have a second/additional version costume approved you will see "2nd Version" and [APPROVED] added to the thread title, no additional profile stars (more info on profile awards here) ASK THE D.O.s For those of you who have a particular issue (or issues) before or after submitting for Expert Infantry / Centurion level approval, in order to get you an answer faster you can now privately contact the entire Deployment Officer team at one time! Questions about fitting, repairs, CRL standards/requirements or anything pertaining to reaching Levels 2 and 3 are not only welcomed, but encouraged. Keep in mind that no question is too small, and that your queries will only be seen by the D.O. Staff. We are here to help in any way we can, so please feel free to send us a message by clicking on this link: @Deployment Officer Team and we will get back to you A.S.A.P.! This area lists all those who have gone above and beyond basic approval toward screen accuracy and obtained EIB or Centurion or both. FOR December - January the 1st Imperial Stormtrooper Detachment would like to congratulate the following. Expert Infantry Badge Award: Ardeshir "equuspolo" TK42128 EIB APPROVED - TLJ-E - Second Version (no additional award) GREAT job on your approval, now on to Level 3! Request your free EIB certificate here. You can find a list of multiple award recipients here. Multiple EIB award info here --------------------------------------------------------------- Centurion Badge Award: Luca "Morgi" TK66744 Centurion 521 Outstanding job on reaching Centurion, Troopers! Request your free Centurion certificate here. You can find a list of multiple award recipients here. If you see any of these Troopers around your Garrison or Squad, be sure to congratulate them! Newsletter Editor Well this could be my last newsletter as this term is coming to a close, legion elections are looming and nominations start 30th January - end 3rd February so depending on the outcome there may be a change in editor. It's been a great ride, thank you who have reached out with praise, most of what is included in the newsletter is from you the members, without you there wouldn't be one. For anyone interested in having a look through any of the older newsletter they have now been moved to a new archive sub forum which you can find here. With Unquestioned Loyalty Glen "Q" Rhodes TK-85421 "gmrhodes13" PRO, Newsletter Social Media Greetings fellow troopers, As we close out this term, I just want to thank all of our active members for their participation in these forums and for engaging with our various social media platforms throughout the year. Anywhere we can come together as a TK family, whether it be to post build progress photos, share troop logs, or ask and answer questions, has had incredible value to me and I hope to this Detachment as well. It has been a year of great triumphs, and of challenges (if I have to delete one more bogus scam merch post, so help me...), but I hope we continue to come together in the spirit of "Troopers Helping Troopers". Thank you all and have a wonderful new year ahead! With Unquestioned Loyalty Justin Reed TK-61490 "TheRascalKing" PRO, Social Media Staff List 2022 -2023 Detachment Leader (DL): Andrew Franke (Sly11) TK-11469 Executive Officer (DXO): Steven Sheades (starsaber25) TK-10466 Chief Deployment Officer (DCA): Joseph Pedigo (justjoseph63) TK-10963 Deployment Officer: (DCA): Mario E RT (TKSpartan) TK-48117 Deployment Officer: (DCA): Jose Maria Sanchez (Chemi) TK-30173 Provost Marshal (DCOG): Dan Branton (CableGuy) TK-42911 Provost Marshal (DCOG): Tim Waychoff (Dark CMF) TK-51878 Provost Marshal (DCOG): Chris Pearson (themaninthesuitcase) TK-10911 Merchandise and Branding (DMBO) James Silvius (jsilvius) TK-12953 Personnel Officer (DPER): AC (Novatie) TK-5597 Fire Team Relations (DPRO): Mark Ryner (Captsafe66) TK-4584 Content Editor At Large (DPRO): Christoph (Danny) Lauber (Ripper_L) TK-55550 Content Editor Support (DPRO): Tony Jobe (ukswrath) TK-10116 Content Editor Awards (DPRO): Handled by the XO Newsletter Publisher (DPRO): Glen Rhodes (gmrhodes13) TK-85421 HOF Director (DPRO): Aaron (Bronx) Gibson (Pyrates) TK-99725 Attaché Ambassador (DPRO) Frank Peranteau (Frank75139) TK-75139 Social Media Relations (DPRO): Teresa Nuthall (Soulart) TK-41307 Social Media Relations (DPRO): Justin Reed (TheRascalKing) TK-61490 Systems Administrator (DWM): Eric Brager (Darth Aloha) TK-9674 Systems Administrator (DWM): Mathias (Locitus) TK-2959 Detachment Founder (DF): Paul (Daetrin) TK-8020 Trading Cards Content Support (IPM): Eric Ho (Hoda) TK-77520 Imperial Propaganda Machine (IPM): Brien Edick (Harbinger) TK-92802 Imperial Propaganda Machine (IPM): Jeff Salt (wingnut) TK-50297 Imperial Propaganda Machine (IPM): Richard Tibbitts (CallMeMrTibbles) TK-46116 Imperial Propaganda Machine (IPM): Adam Wolf (revlimiter) TK-89400 Imperial Propaganda Machine (IPM): Daniel Melin (TheSwede) TK-99665 Facebook: www.facebook.com/whitearmor Facebook Group: 1st Imperial Stormtrooper Detachment (FISD) Official Twitter: www.twitter.com/FISD501st or @FISD501st Instagram: www.instagram.com/fisd501st On behalf of the 1st Imperial Stormtrooper Detachment Command Staff and the Imperial Propaganda Department


 1 point