Leaderboard


Popular Content
Showing content with the highest reputation on 10/04/2022 in Posts
-
Me, two months after getting my first TK5 points
-
I retook the full body back photo and posted the new one after I noticed the tight shoulder bridge was lifted. I heated and adjusted the right shoulder bridge to get it to sit flat on the back. Boiling pot of water for the win. Before After4 points
-
I guess this is why people have so many costumes?4 points
-
Thanks everyone for the feedback! Those were only temporary. I've relocated them to their permanent position. What also wasn't helping was I left too much return edge on the front top of the shin since I figured it would be hidden by the sniper plate. I'll be removing most of that. Using tape to pull it back help a little too.3 points
-
Troopers! I want to help out the community and the people that doesn't have the time or have the necessary tools or skills to create a cool Signature banner or have the background of your Action Photo removed, or even if you have a request for a certain Profile picture! IMPORTANT!! The size of the signature banner will be: 600x200 px, if you want it designed in higher resolution, please include that in your request! Please send me a PM or reply to this topic with: The image that you want to use What kind of background you'd like (Death Star/Space/Tantive IV etc.) What logos you want (501st/Garrison/Squad/Outpost/Detachment/Fireteam) Accolades (EIB/Centurion/Troop awards etc.) Completed banners: 39 @Empiretrooper @jsilvius @jsilvius @techdesco @Nairy @Bobstormy @TikiTechie @Morgi @BAZINGA @Jakebullet @Armor9 @Chemi @Starkiller @TK21698 @Sawanator @dblcross @Lafleur @JBar @KorbenDallas @DocDan @Slouch @Tzag @TheRascalKing @Spadille @Vader2015 @TookBreaker @larryebaum @Tall_Trooper Completed profile pictures: 7 @Bobstormy @Bartman @Sawanator @Lafleur @Slouch @Vader2015 Completed logos: 2 Scary Looking Nerd Herders Fire Team Mantero2 points
-
Tiny update - I modified my rolling bin to allow the pack to strap on. This is a $7 truck bed bungee from Harbor Freight cut way down. I can roll it, I can tip it. I can even open the lid and the pack stays right in place. I'm gonna suit up on Thursday for my first HWT troop. EXCITED!2 points
-
Thank you Jonatan for offering assistance to our members, I think this might go well, so I am going to pin your post so it is easy for everyone to find.2 points
-
Thank you, this is super helpful! Appreciate your help in clarifying.2 points
-
A little wholesome Doofus Rick content for all my fellow trophy hunters out there...2 points
-
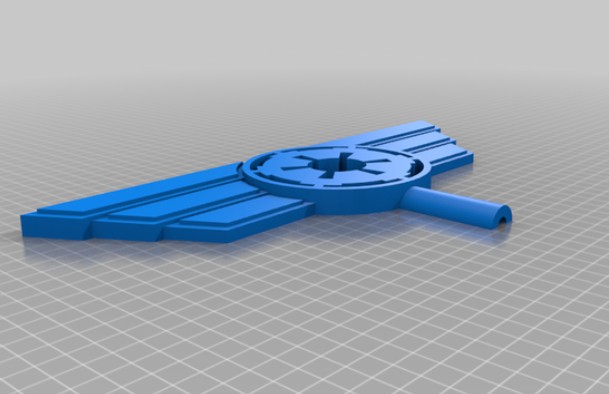
Imperial Flag Pole Topper File-Name: Galactic Empire Flag Pole Topper (Final) Designer: "superpunkduck" LeSage ID: 93086 Last Update: Oct 4 2022 File-URL: https://www.thingiverse.com/thing:5546260 Description: Posted on the legion forums, thought it could be handy for some. Designed to Put on the end of a flag pole for an Imperial Flag... Scale to whatever size you need... You need to print Two and glue them together... Should print flat on the bed... Venting has been provided to alleviate suction on resin printers. Best to mirror on the X axis for the second print because the geometry isnt perfect (im brand new at modeling) Paint however you see fit. Terms of Use: https://creativecommons.org/licenses/by/4.0/ Image: Version 2 IMPERIAL COG FLAG POLE File-Name: IMPERIAL COG FLAG POLE FINIAL Designer: "Zoingo Last Update: July 4 2022 File-URL: https://cults3d.com/en/3d-model/architecture/imperial-cog-flag-pole-finial Description: A simple decorative flag pole topper made to look like an Imperial Cog from Star Wars. The mount is intended to be used with ~.9in ID poles. Quick and easy to print, supports are required. Terms of Use: - Image:
 1 point
 -
Name: Jonatan Östling TK ID: 23592 Garrison: Swedish Garrison Forum name: Nairy Armor maker: RS Prop Masters Helmet maker: RS Prop Masters Blaster: E11 RS Prop Masters Hight: 182cm/5'11.65 Weight: 100kg/220lbs TK type: ANH Hero EIB: 1051 501st armor link: https://www.501st.com/members/displaymember.php?userID=35506&costumeID=125 Body type: Long legs, long arms, shorter torso EIB post: White elastic band Button alignments Shim seam images Frown detail New updated mic tips New and updated belt details Thank you quadrice again for your consideration! TK-23592 out!1 point
-
Very true, Glen! Found it helpful myself as I was trying on some pieces a couple weeks ago! Will add it when I get back to my computer!1 point
-
Kind offer Jonatan, from time to time we do get members reaching out for signature banner help, I've made my fair share in the past. Info on this has been added to the next newsletter.1 point
-
Yes! great to know, you read my mind brother1 point
-
May as well share my bin in this thread too. Almost a year of service and it's one of the best armor additions I've done.1 point
-
Great !! Thank you.1 point
-
It could also possibly eliminate the need of filling in any gap in higher approvals later on! Lower thigh ridge joins (front and rear) shall butt-up flush against each other. Any gaps must be backed with ABS or filled as not to be noticeable.1 point
-
Hi Alex, If I may , adjusting a little more the lower section of your thighs (it looks like you have enough room) would give a better look. Not too square legs. This is easy to accomplish by reducing lower section joint. References1 point
-
These are the images I got from Arvin (he asked if I could post them in this topic for everyone to see)! Wow Arvin, looking sharp!!!1 point
-
Hi everyone sorry about being off the grid for the past week - I got hacked so was in major security protocol lockdown. the good news - got the armour - it is an amazing fit. So I learned the following and I will post photos shortly: 1. Line of sight / visibility is tight so definitely walk around and get a feel for everything. 2. Putting armour on is tricky at first but you can get the hang of it with experience - challenge is are the snaps and trying to do it when you can’t see it. 3. Keeping things straight and perfect - I was not perfect on the first try but you can quickly see where you may need help and extra pair of hands. 4. I want to send photos but I need some time to clean up on the IT side. If someone has an email/text I can send something if you really want to see it…but I need to still do some reconfiguring of my laptop. next steps: second assembly and photos for sending through for comments / approval. I have Halloween and one of my clients is a TV station and we discussed doing the weather report on Halloween (LOL). No pressure! talkto everyone soon.1 point
-
Congratulations trooper, Welcome to the ranks!1 point
-
sizing with the shin sniper and thigh ammo added. I need to tighten the lower eod of both thighs to get a better ergonomic fit, but Im thinking I may be about there, sizing wise? The sniper plate almost touches the thigh, but I think that won't be an issue when the thigh fits more snugly at the knee. Looking at the pics it appears the left thigh is a bit higher than the right- thats just a result from where I stuck it on a temporary velcro garter I made to keep everything up while I sized it. Its sitting more evenly in previous pics. Kidney I need to pull up, especially where it sags on my right. Abdomen I tried pulling up a bit tonight, but there wasnt much to be gained there without discomfort.1 point
-
Awesome Jonatan !! Congratulations Centurion twice !!!1 point
-
Congratulations again. Awesome work.1 point
-
Hi Jonatan, and thank you for your Centurion application! CRL and CENTURION Application Requirements: All required photos have been submitted, and on behalf of the entire D.O. staff we are pleased to welcome you to the rank of CENTURION. Congratulations! Other-Armor Fit/Assembly; In this area we review observations made by your fellow troopers and the DO team. Some observations may lead to suggestions to improve the overall look of your armor. Note that we consider both text (CRL) and pictures (screen caps/reference images) when reviewing submissions. Nothing to add here.. Just remember to check that everything is in place when trooping (although I know you will do it, seeing your interest in details). Congratulations again Jonatan.1 point
-
Congratulations!1 point
-
They have been approved all the way to L3, a couple of recent apps 508 4851 point
-
@gmrhodes13I believe I glued the sniper knee on the wrong leg, by accident. Looks like I’ll be taking it off and switching it.1 point
-
Ari, Thanks for reaching out. I've been away from home for a while, so I didn't see your post initially and apologize for the slow response. I'll continue to update my work and I hope the thread helps you out during your build. I reached out to the designer and asked if he minds me sharing his info, but I haven't heard back yet. If he gives me permission, I'll share their info. However, the files Glen posted have been used by quite a few people and I've worked with the designer previously; he's very helpful. @Cricket put up a great build thread when she used these files for her son. You can find it here: Regardless, I have a few updates I'll be making later this week and will post them here. For now, here's a picture I haven't posted yet. I finally got everything smooth on the main helmet and have since coated it with another layer of filler primer. This pic was from the first time I did a test fit using screws instead of loosely setting the pieces in place. So far so good. What's good to look at though is the differences between the initial primer layer I posted on August 3rd and this one. Plus, it looks even better now. 3D printing is fun option for doing these, but it's a ton of work. Please keep in mind though, that with these type of builds, 3D printing is the hobby not costuming. I've covered it previously in other build threads, but if you're looking for a costume to jump in, there's other options available that'll save you a lot of time, heartache, and in some cases money. I only say that to give you a head's up, not to discourage you, primarily because Halloween is very close. For a 3D TK, you might want to set some extra time aside. Typically, it takes me around 3 months at the quickest to assemble a full 3D costume and that doesn't account for the lead time on soft parts and assembly. Regardless, I will gladly jump in anytime to help you out if you have any questions and now that I'm back in town, I'll start updating my threads again. Thanks for the interest1 point
-
1 point
-
1 point