Leaderboard


Popular Content
Showing content with the highest reputation on 09/29/2021 in all areas
-
Just to expand, you have one ID number which is 33270 BUT the number you have on the legion web link is your joining number, you would be 33,240 person to join the legion. I joined back in 2012 and mine is 15,264, so that's how many who had joined before me even though there was only @ 4,000 active members at that time, many had retired. Incidentally your ID number is with you for life, and in fact death, on your passing your ID is added to the Eternal Legionnaires, nobody can have that number again. Your ID number is also the same for every costume it's only the prefix letters which change, TK33270 for Stormtrooper, if you got approved as a Bikerscout you would be TB33270. Hope that has explained a little more. FYI there are currently 14,679 active members in the legion
 3 points
 -
Thanks Glen! Much appreciated Richard. Thanks Arthur! Thanks Mario. I'm looking forward to stepping up he accuracy of my armor!2 points
-
Hi Tony and welcome aboard. We have another new member also building a WTF FO TK who may also be able to assist you with some questions he has asked. Now he is building the TLJ version but much of the costume assembly is the same and he is on the research trail. Check out his thread here Good luck on your exciting new journey.2 points
-
Many thanks Dennis, I have a wall of suitcases full of costumes, someone will find me under an avalanche of them one day2 points
-
*EDIT: I've since discovered the FA Thermal Detonator has a visable seam between the canister and backplate. I will redo this at some point, but for now this will still look passable. Awkward to join without lots of gaps due to it being a multiple part vac-form. But I got there in the end with endless filler, paint and repeat. VIDEO LINK HERE: https://youtu.be/14oshMvuUNw1 point
-
Yes if I can't restore I am archiving1 point
-
Wow a necro post lol. There are plenty that simply wont use Rustoleum because of bad batches, and the fact there are superior paints available. here in Australia, Rustoleum isn't considered a great paint, and I have seen some crappy spray jobs done using it. Rustoleum has a primer and paint in one as does Krylon paint. this helps with adhesion to your prepared surface. Regardless of which of these two you chose, I can not stress enough that a prepared surface (filled, well sanded and cleaned before paint application) is the one major thing that will give you the best possible outcome for your finish. Rustoleum is also a high gloss and Krylon not as shiny when dry. Bare in mind if you are using Bondo or similar, you will probably need to use a primer or primer filler anyway to make sure your surface will be blemish free for your final coat. refer to my above statement regarding final prep before painting. Generally these paints are not expensive in the grand scheme of things, and experimentation is always something to ensure you are ultimately happy with the finish. No pressure pack spray can is going to give you the perfect result or type of result you can get from an Auto shop paint job, but it is also the cheaper way to go when it comes to painting armour. I hope this helps at least a little1 point
-
Congratulations! What's your next? I wonder :>1 point
-
Ab plate buttons painted and mounted. I used the Humbrol colours from TrooperBay (Admiral Grey 5 and French Blue). Button plates are not WTF but ordered from TrooperBay as I found the WTF ones to be too deep and not flat on the bottom. These are much flatter. (Same with the square buttons on the ABS belt, which I will also use in place of the WTF ones.) I got lucky with the colour. The plastic is a close enough match.1 point
-
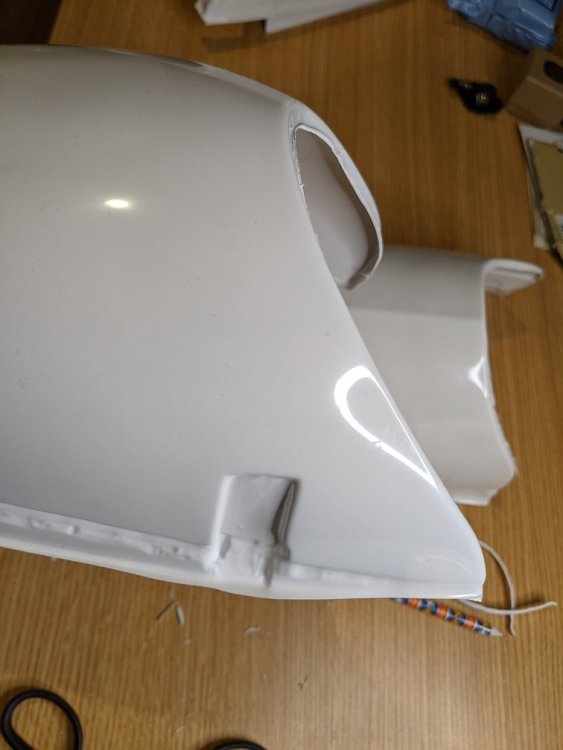
IMO, at this stage you can leave the excess. later when you start assembling you will be more confortable trimming a bit more plastic.1 point
-
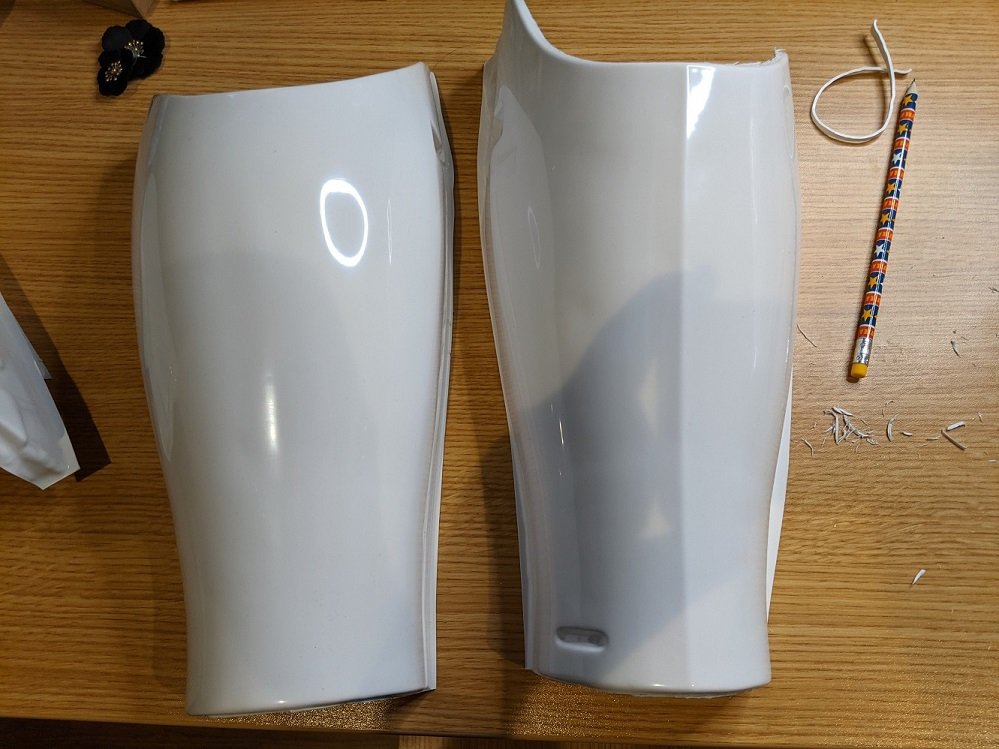
I made some of my first cuts this week! I still have to sand the tops but I'm going to do all the sanding together most likely, so my plan is to cut all the pieces first. Not sure if that's a good idea. Also, should I leave the excess material on the sides of the pieces so that when I go to fit it later I can keep some as needed? I'm talking about this part on the bottom of this picture.
 1 point
 -
Congratulations yet again Glen, well done sir.1 point
-
In your URL the 33230 refers to your 501st ID, separate from your TK ID.1 point
-
Of course. Once purchased, you will have access to the archive and the updates will be applied when they are done. You can download them any time.1 point
-
1 point
-
Please visit and subscribe to our YouTube page: https://www.youtube.com/channel/UCd2-JJt-mQEOFz45Gr38RUw/featured1 point
-
1 point
-
Just make sure you give those eye sockets a light sand so you dont have sharp edges or any lose material. If you put fans in your bucket a a small piece drops in it can get spun out of a fan and into your eye. Not a pleasant sensation at all, and you dont want to have to remover your helmet in public and spoil the illusion for the kids. Build is looking good so far, keep up the great work James.1 point
-
If I'm not too late to the party here, I'd like to add a suggestion that has worked well for my snaps on the elastic: I sandwich a piece of ABS between the elastic and the snap. I cut the ABS to the same width as the elastic, and make it about 2" long. I make a hole in the middle of the ABS piece so the snap fits in easily. It looks like this: snap-elastic-ABS-elastic-snap It removes all strain on the elastic at the snap, and makes removing your snaps a breeze. They simply pop off with the flick of a (rubber gloved) finger! Super easy and quick. I've never had to replace a snap in elastic that has been reinforced like this.1 point
-
I've been asked by more than one Imperial Cadet recently if I would make a post that details the steps involved in becoming a Stormtrooper. Here it is, and here are the steps: 1. Find the First Imperial Stormtrooper Detachment website/forums at www.whitearmor.net. You are reading this so, CONGRATULATIONS! You are well on your way! 2. Begin researching the available armor kits in the Getting Started section so that you can make an informed purchase, research is your best friend throughout this process: http://www.whitearmor.net/forum/forum/38-getting-started-read-this-first/ 3. Contact your chosen armor vendor and begin waiting patiently for Big Brown Box Day. 4. While you're waiting, begin collecting your accessories for the build, and additionally required items like an E-11, boots, canvas belt, tools, snaps, etc. There is plenty more, but remember step #2. 5. Big Brown Box Day! (take pictures, this will be a day long remembered!) 6. Start your build thread at FISD here: http://www.whitearmor.net/forum/forum/31-costuming-and-builds-501st/. Take pictures, take a deep breath, measure twice, cut once, ask questions before you do something you'll be unhappy about later, all mistakes (within reason) are fixable. 7. Complete the build of your High Quality Imperial Stormtrooper costume, and rejoice. It's about to get technical. 8. Ensure that you are 18 years old, and visit the 501st Legion website's Join Us page: http://www.501st.com/members/join_how.php 9. You will need to make a decision about what you'd like your TKID to be. You'll have to list five choices in your order of preference. Available numbers can be found here: http://www.501st.com/members/search_avail_ids.php 10. Fill out and submit the application found here: http://www.501st.com/members/join_form.php 11. Take your submission pictures and submit them to your Garrison Membership Liaison (GML). A list of the Garrisons can be found here: http://www.501st.com/members/displayUnits.phpIf you don't know who your GML is/or how to contact him or her, this list will assist you with that process. Photo's required: Full length, Front, Side, Back, Side, Action and Helmet off. 12. After you submit your pictures to the GML, he or she will contact you (be patient) to let you know if your costume is accepted, if you need to make alterations, or whether you need to re-take any photos. 13. If you need to make alterations or re-take pictures, submit them in the same manner in which you submitted the first ones. 14. When your costume is accepted by the GML, he or she will forward your pictures to the Legion Membership Office for approval and assignment of your TKID. When your costume is accepted, all you can do is wait for an email from the 501st Legion to arrive, confirming your TKID assignment. Congratulations, and welcome to the 501st Legion, and again, be patient. 15. When you have received your assigned TKID, you have one more important step to complete, and that is to request Legion Access here at the FISD. You do that using this thread: http://www.whitearmor.net/forum/topic/16-501st-trooper-status-requests-include-link-to-your-501st-profile-in-your-request/In your request post, include your newly assigned TKID, and a link to your Legion profile page.1 point
-
I'm now at the point of the build where snaps are necessary. Not everyone uses snaps for connections, and that's okay. I like snaps- especially for the arms- because that allows me to fully nest the arm and leg parts inside each other (and all that goes inside the torso shell) when putting everything together in my half bin. I also like to make sure that my snaps are built with an extra layer of ABS in them. Not only does it make the snap strong, but it makes removing the snaps a breeze when dekitting! All you need to do is get the edge of your finger under the corner, and POP! Super easy. I start with some extra ABS pieces cut to the same width as the elastic. Mark the centers. Punch the holes. Make an ABS sandwich with the elastic. Punch your elastic holes so everything is lined up. You can also punch everything at one time if you have the strength to do so. And there ya go. I also melt the edges of the elastic with a lighter to ensure that the elastic doesn't fray. Works great! Another trick that I thought I'd share is marking snap positions. Here you can see I've got a snap plate installed on my chest. I like making a double snap here for extra security. Not everyone does (elastic glued here is canon), so do what works for you! The female halves will be assembled using an ABS plate inside the elastic strap, so the positions must be absolutely perfect because the female snap parts will be rigid. Now, I could spend time measuring, remeasuring, and remeasuring this in order to get the other halves of the snaps in the perfect positions. But instead of spending lots of time measuring it all, I just use a metallic sharpie on the snaps, making sure that there is a lot of ink on the snaps. You just need enough so that it doesn't dry before the next step. I like using the metallic sharpies for this because it takes a longer time for the metallic ink to dry- which gives me a little more time to work. Then I pressed the elastic exactly where I wanted it to go over the male halves. This ends up making a perfect mark for where I need my female snaps to go. Then I make my holes in the elastic and ABS plates. And install the snaps. Here is the snap before putting it together... Yay! Perfect fit!1 point