Leaderboard


Popular Content
Showing content with the highest reputation on 07/31/2021 in all areas
-
Well, this has to be the fastest update so far The thighs are glued and currently drying and I just finished painting. Doesn't seem like a huge difference, but there's definitely some more black paint on there: I also got rid of some of the grey in the frown: Thanks for all the feedback so far!2 points
-
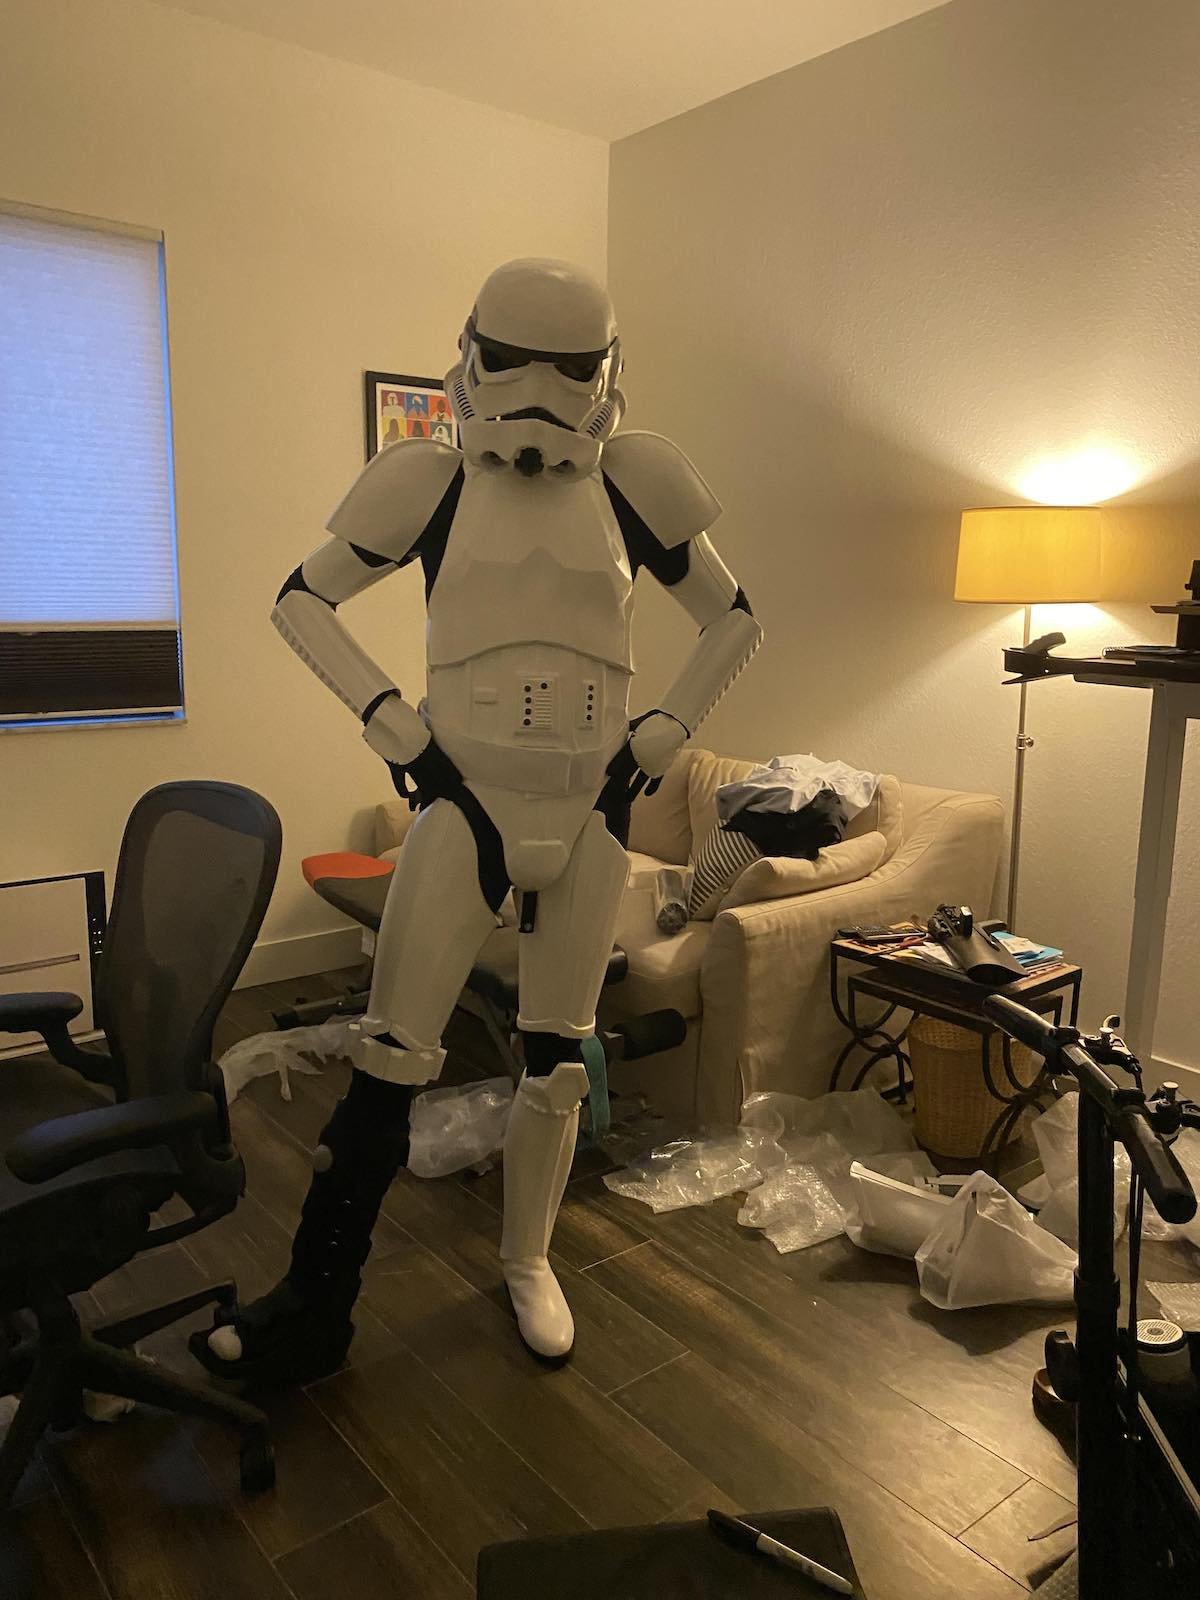
I think it's time to open a thread here about my newly acquired Anovos TK suit. this is a factory assembled ensemble that lived in someone's garage for years. Now it's mine and I WILL be putting it into service soon I hope. still has the plastic on much of it. only a few soft goods missing, and 1 hand plate. Parts: Armor - Anovos pre assembled Ensemble Helmet - Included helmet fans - TroopaCoola Under-suit - black compression skirt and pants off internet... Neckseal - Geeky Pinks or Anovos (have both) Belt - included (plan to replace, but as yet not ordered) Gloves - Joseph Pedigo Hand Plates - Joseph Pedigo Boots - Crowprops Voice Amp - TRamp E-11 Blaster - TroopaCoola JMC Follow that build here Revvek’s E-11 [TroopaCoola JMC] blaster build1 point
-
Super slow [emoji23] Got distracted by another project, then had a printer issue which I haven’t had time to remedy. That said, I’ve printed 2 of the smaller boxes and the cup. Radio box is being printed as 4 parts, of which 2 are done. Sent from my iPhone using Tapatalk1 point
-
Ok so all I had to do was uninstall and reinstall the app now its working. In case this was happening to anyone else.1 point
-
I don't currently have any proper ABS to fill the holes... its Anovos white... I probably will get some if I dismantle and trim some of the other parts for better fit. I'm tempted to go with 1/2" screws honestly.1 point
-
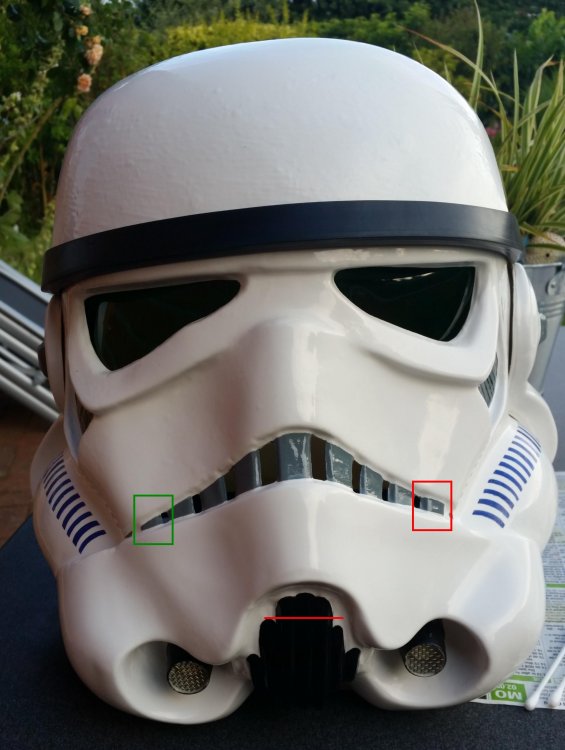
Fantastic work, Luca! From what I can see it looks as if the cover strips are ready to attach, but just make sure that the tops are not too tight. There should be enough room to comfortably insert 4 fingers (or so) in between the tops of the thigh(s) and your leg. If you need a bit more room you can always trim off a little of the return edge (yellow line). "Visibly hand painted, so maybe I'll do a bit of clean-up in the future". Just the way it's supposed to be! CRAZY nice job on the both the painting and placement of those tube stripes. You mentioned you still have a few touch-ups, and I would think about widening the lines in the tears a bit. As Glen mentioned, the vocoder could use a little black paint love. If you have one, I would suggest using a small "Filbert" style (round end) brush for clean/crisp lines. You really are doing a wonderful job on this armor, Luca. If you keep up this rate of excellence, I fully expect to see your submission for Expert Infantry right after Basic approval. Bravo!1 point
-
Looks like I will find out first for the both of us. I have installed the voice amplification system and am halfway thru installing the hearing assist system. I still have to source some type of helmet mounted speakers to go with it, am going to start researching that this week.1 point
-
Nice work, having the belt on will make a lot of difference to the side gaps, may also pull in your cod/butt. I added a few abs tabs behind the side of the ab/kidney to help pull the sides in. On the right side of your helmet the grey on your outter tooth isn't as pointed as your left. Also you could match the sides of black pain on the vocoder.
 1 point
 -
Hi troopers, I received my clearance earlier this month and like many others have spent the time to now under varying forms of Covid lockdown. Prior to this build I was an approved TX, unfortunately with my arthritis I had to sell that early last year and go for a lighter weight hard armour solution, after research went for the RS Props kit. Am extremely happy with their gear and after making a few strapping changes am just about ready for the first troop. Looking forward to getting back into the thick of it. Cheers, Geoff.1 point
-
Congratulations Trooper, Welcome to the ranks.1 point
-
Hi Erick, Any update on the requested fixes ? If there is something we can help you , just let us know. Thank you1 point
-
Way to go, Georgia! If we can be of any help with Centurion level, just let us know.1 point
-
And, its finished! Thank you everyone for the likes and kind comments. It's been a lot of fun, and helped keep me centered. Suggestions for the next one gratefully received [emoji16]1 point
-
Hello there! Great work on those tubes Just printed: 220 dry sand - finish off with a 360 dry sand. First layer of Motip putty and 360 dry sand. If another layer is needed, I will then either use 360 again and then spray, or straight off a 500. I will normally finish with an 800 very slightly wet sand. This process has worked for me since I discovered Motip Spray Putty, I just learnt how to work with it. Maybe somebody else has a better process How is your costume coming along? I will check your updates.1 point
-
Hi to all of you,the day has come to make a dream become true and I just sent my application to the 501st Legion to join this great community. I received a few days ago my commissioned Stormtrooper ESB costume and cannot wait to get started. Waiting for my approval and the TK ID.My passion goes as far as being inpatient despite a leg injury, hence I am one legged being in a boot (was pretty difficult to wear and stand on one leg)!In general, I do look for guidance on tips and tricks for wearing stormtrooper armor as well as what to consider for trooping (how to prepare, best practices for trooping, etc.). Thank you!
 1 point
 -
First up my gloves are a success! Next, I decided to try my hand at making a custom Mesh press tool set. used PLA with High infill. (these will not last as PLA for more than a few times) But it worked! Though, I discovered a minor flaw in my design once I got to this stage. I should have made the top and bottom both square, to facilitate keeping the top and bottom aligned when in the vice. (it was a bit harder to keep the round part centered over the hole) I've made some minor adjustments to the tool model, but this one lasted and worked well enough for this time. I'm going to go with the Left one (they are not the same, but close). Got some input from an expert who agrees with my choice. LEFT: #16 stainless mesh. RIGHT: #14 stainless mesh next up, paint the inside white and figure out how to glue these in without getting it all over everything..1 point