Leaderboard


Popular Content
Showing content with the highest reputation on 03/06/2021 in all areas
-
First of all, thanks for your concern. As I was writing a response, trying to figure out what was happening (since I thought I could see quite well) I realized that since taking those first photos I have added some electronics to the inside of the helmet, which made me change the padding setup. As you can see (sorry for the quick crappy photo lol), it sits much better now. Most of the padding is on the brow and cheeks, which makes for great visibility, or as great as it can be, as well as hanging much lower.4 points
-
I think I may have finished the helmet! (unless someone sees something I need to correct). Here are some pics below. I tried some padding off of Amazon, but none of it worked well. So I ended up making my own which did work. And of course on my head. Next step I think will be to start on the torso. One of the parts I still need to order is the belt. So getting that squared away would allow me to get an accurate measurement for that order. Again, thanks for everyone's input! It is always appreciated!3 points
-
Looking great, and nice job on those fixes, Guillermo! One thing that concerns me is your helmet height. It looks to be sitting far higher than "normal", and I am wondering how well you can actually see out it. In comparing the second 2 photos below, your eyes do not appear to be centered in the eye openings of the helmet, which may affect your ability to navigate safely. Do you have padding in the top? Do you find yourself constantly tilting it forward to see? Removing any padding would help bring it down and greatly increase your field of vision, as well as look a lot more screen accurate. ESB reference images2 points
-
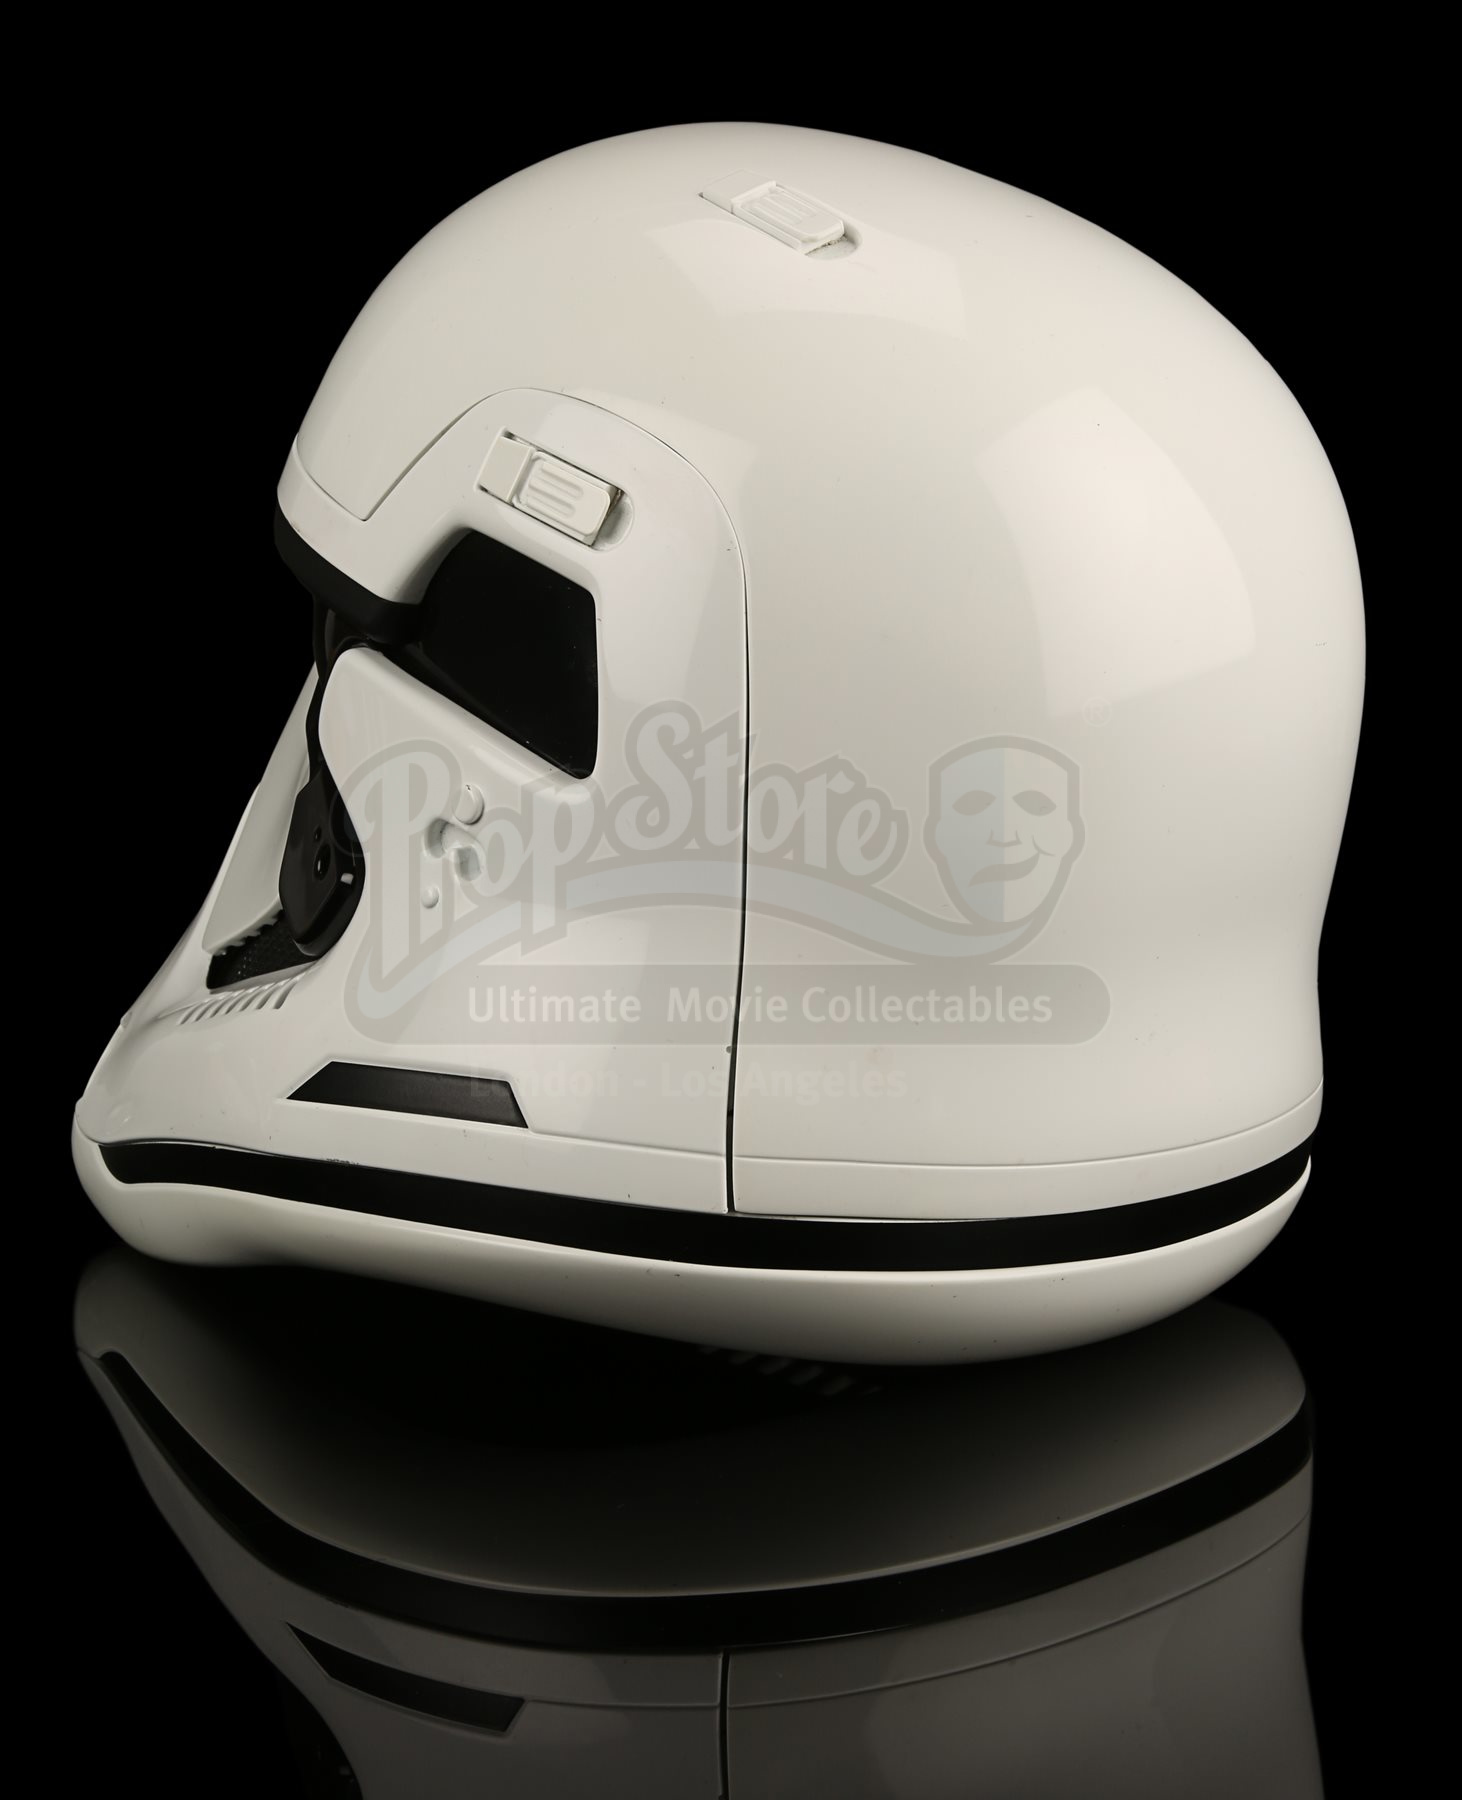
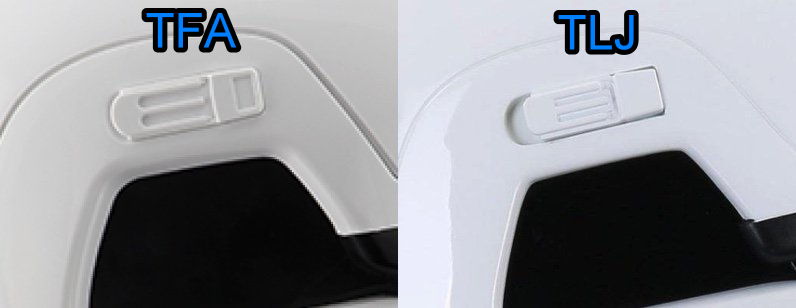
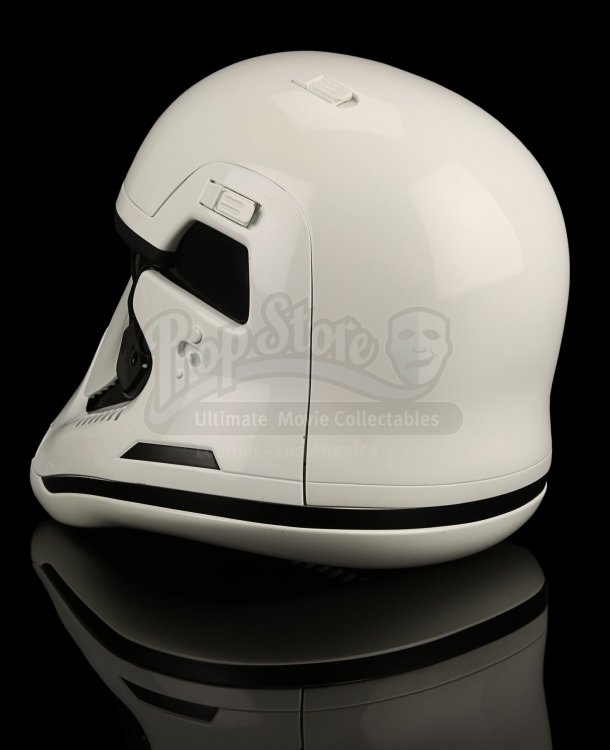
There was someone selling them on ebay at one stage, was also mentioned in the Anovos first order build group, you may be able to find more info in that group Be aware that there are other differences with the helmets, clips are slightly different, hardly any recess on the main piece and no recess in end and there is a recessed area around the clips unlike the TFA helmets, although not in the CRL at this stage (TLJ CRL should be getting an update this term)
 2 points
 -
Ah that's a good point! I'll have to do that before I drill any more holes.1 point
-
Thanks for the feedback. The ears have been bothering me as I felt they could be skinnier. So I will work on that along with the rest of the build.1 point
-
Nice work, you do have a quite a bit of material still there which you could trim if you wanted too.
 1 point
 -
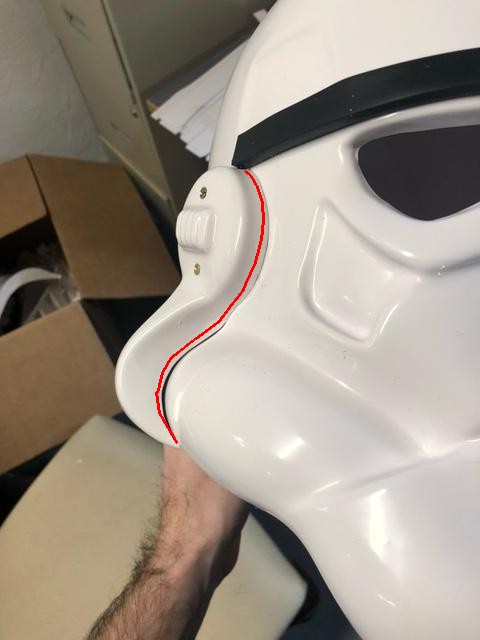
And now the right ears. I cut one of the ears provided, but wasn't satisfied and started over on the backup pair. Got a better fit. I drilled the bottom screw hole at an odd angle. I'm going to use the hole in the underside, and drill outward from there to get a screw hole slightly higher on the ear so it can actually screw tight and bring the ear close to the helmet. Afterwards, I can fill the old hole with ABS paste and it will probably be hidden by the S rubber seal anyways.1 point
-
Much better Guillermo!!!...1 point
-
Thanks brother. I will look in to it.1 point
-
Looks way better trooper1 point
-
Chest plate! I have marked off where I plan to cut back to. I'm pretty sure this is good, but I would like the experts opinion before I start trimming and sanding. Any thoughts before I proceed?1 point
-
Looks MUCH better!1 point
-
Progress is being made. The 3d printer is setup and working. I think my workspace is well stocked for the build and just needs a little more organizing before it's ready. In exciting news, ATA informed me that my armor is being made this weekend. Since most of my prep work is done, and I've gone through what was a miserable time setting up the 3d printer, I haven't done too much build related until this morning. Right now the E6000 is drying on the flexible guards for me gloves. I also started the mannequin stand early in the week and hope to have that finished and painted today.1 point
-
James, You should probably check out the ICAT Trooper Build Group on Facebook. https://www.facebook.com/groups/147936167085649/ They'll definitely get you set up nicely.1 point
-
Not sure why unless you are trying to post in a 501st/ member only section. You could reach out the the command team, you will find their info on this page https://www.501st.com/members/displayUnits.php#detachments1 point
-
received new orders with proper information here https://www.501st.com/members/displaymember.php?userID=31767&costumeID=326 THX1 point
-
Thanks Brother. I am starting on the adjustments tonight.1 point
-
You may want to ask this over at the Armored Cavalry Detachment as they look after the costume https://501starmoredcavalry.com/ CRL: https://databank.501st.com/databank/Costuming:Imperial_Combat_Assault_Transport_Driver You may also want to use an online image host such as "Imgur", once you upload your images you can select the "direct link" and paste your images directly into posts. With any modifications to helmets I use bondo (automotive filler)1 point
-
Truly, I do suggest a good photographer, even freelance. It will cost some $$, but if you get some buddies to be part of the shoot you can decrease the cost. I'm really glad I had them taken when I did. The ones with the book though I didn't pay for. I was the "model" for that photo shoot and they were nice enough to give me copies of the test shots. So I have a bunch of me in different poses, but the one for the advertisement is me simply holding up that huge book, which was so heavy I could only keep it at that angle for a short while.1 point
-
Yup, but for reference these are not TE2 shins which were even worse then the FX. They are RT-Mod that were painted to match the TE2.1 point
-
Esp. in your area. I've been Seattle the whole time and have never had them installed.1 point
-
Hello again! And again, mostl dressing issues... I think I may have been wearing the armour wrong all along; I found that by wearing the body pieces just a bit higher, everything falls into place better, incluiding the infamous ab/kidney gap. The shoulder bells were an easy fix as expected: I simply shortened the straps a bit. And lastly, the gaps in the back of the thighs were filled with repair putty and painted over. I hope this is it1 point